-
ICMag with help from Landrace Warden and The Vault is running a NEW contest in November! You can check it here. Prizes are seeds & forum premium access. Come join in!
You are using an out of date browser. It may not display this or other websites correctly.
You should upgrade or use an alternative browser.
You should upgrade or use an alternative browser.
Seeking Critique on Vert Colosseum SOG concept.
- Thread starter Anti
- Start date
awesome news anti!
good luck with your build!
good luck with your build!
I love it when a plan comes together
Last edited:
Good luck Anti....looking forward to seeing what develops!
geoponics13
Member
wow just showed up!right on time!woohoo.lol
If your design now calls for merely holding the pots and not hanging them, maybe a round hole will work.
It would be much easier.
True. I'll have to kick that idea around for a couple of days. Hmmm....
Thanks for the well-wishes everybody! I'm hoping I can make you all proud.
Finally! An update! With Pics!
Finally! An update! With Pics!
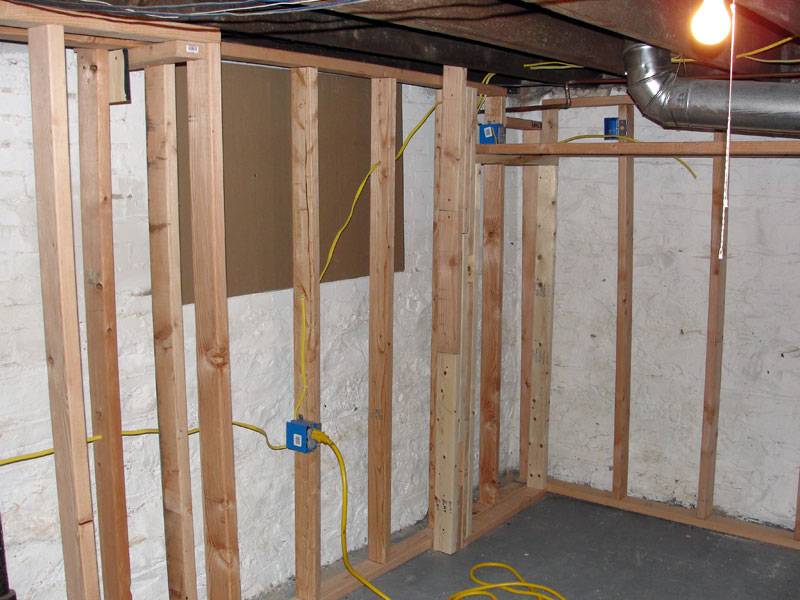
Ok. Above you can see that I have framed out the basement and installed outlets. There are 2 circuits that I have run. One is just for the grow and one is for anything else I might do in the basement. 20 amps on each circuit, gives me a max power rating of 2400w per circuit. Since I'm only running 800w of lights plus a fan and a water pump, the circuit should never have any issues. (Fingers crossed.)
You can also see the spot where I covered the window. I built a frame that fit inside the window ledge and then I attached two layers of green drywall which had been glued together. 2 layers of drywall is a lot better soundproofing than 1 layer. Glue helps keep them from vibrating against one another. This is so that no sounds (like a fan) will be heard by anyone who happens to be standing outside that window. The window itself has a set of closed mini-blinds, so you don't see the frame I've put in. From the outside, it looks like a regular window.
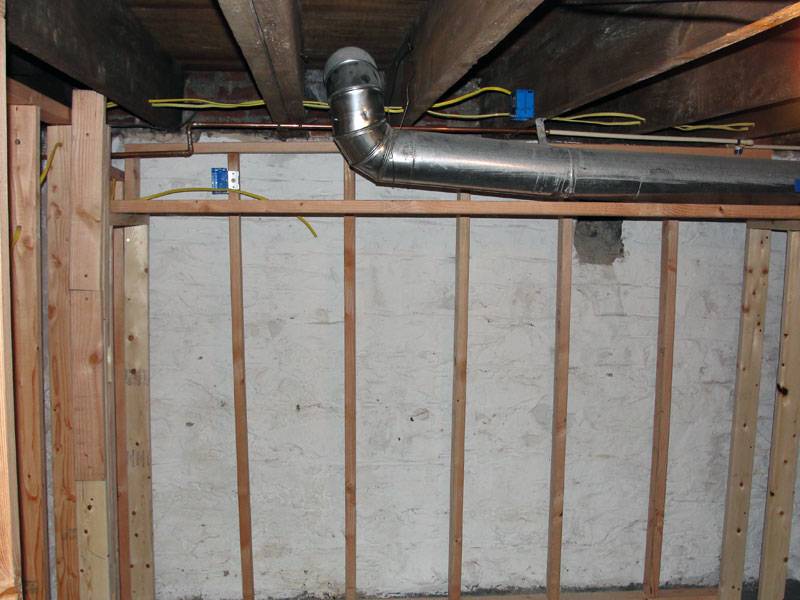
Alright. This second pic (above) is of the area that has been framed out for the actual colosseum. It will fit inside this space. The hole in the wall (to the upper right of the picture) leads up and out and this is where my exhaust will go.
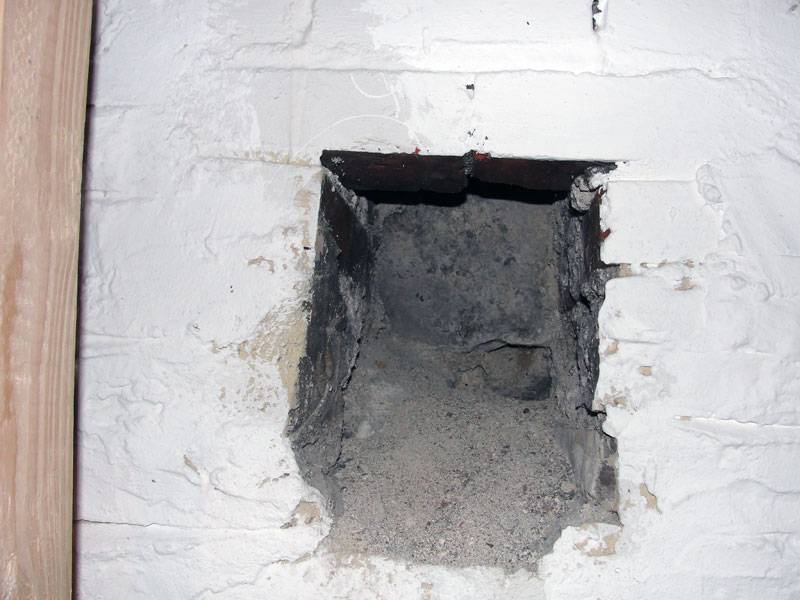
Above: A close-up of the exhaust hole.
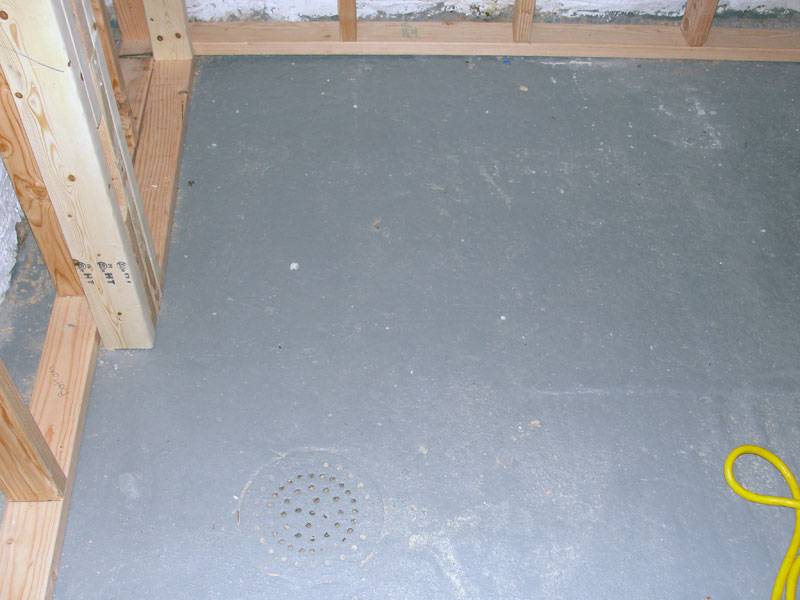
Above: Kinda hard to see, but in the bottom left, you may be able to make out one of the two drains in my basement. This one is within a few feet of where the grow is, so in case of some kind of catastrophic flooding situation, it won't go far.
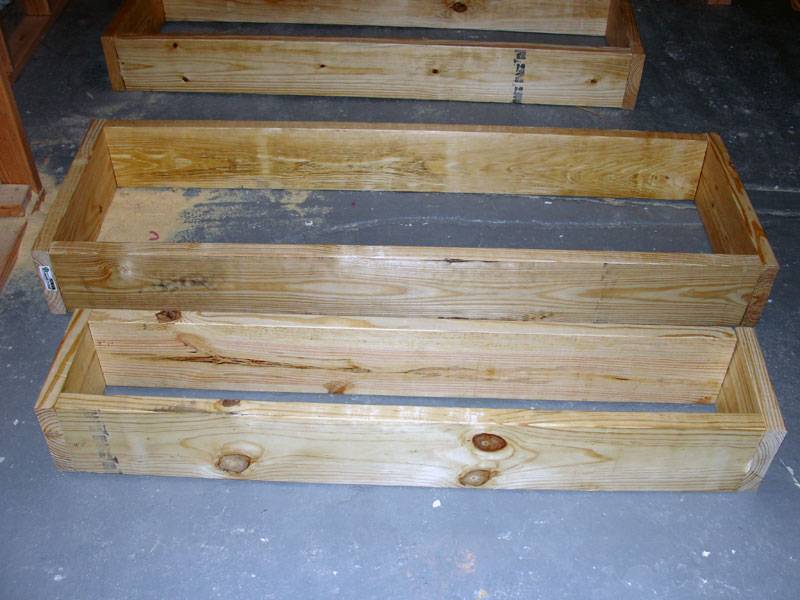
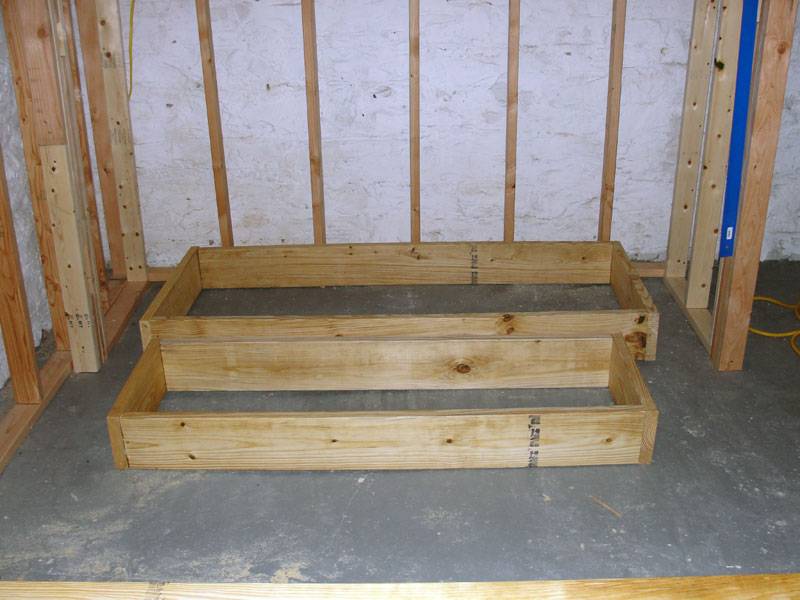
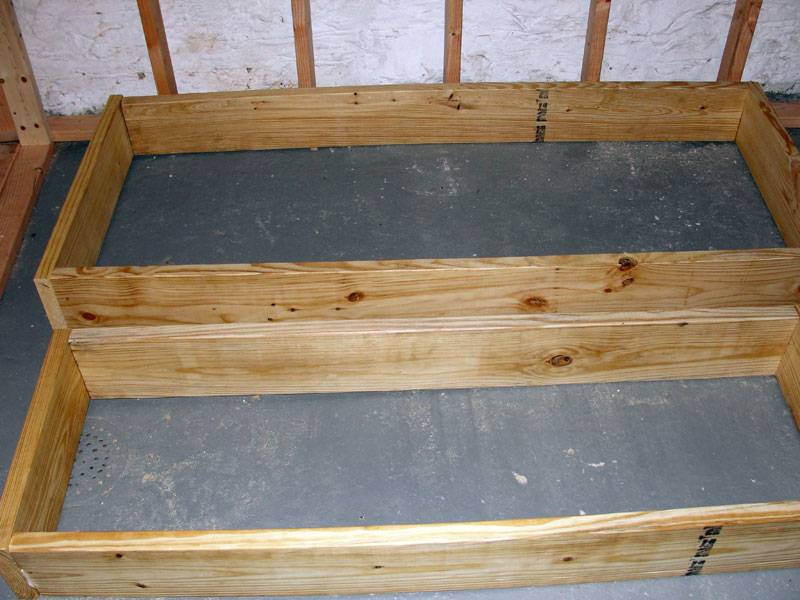
Above: To make the Flood tables, what I did was construct 4 rectangles using 2x8s. I laid them inside the space they've been designed to fit in so that you can start to get an idea of what the finished product will look like.
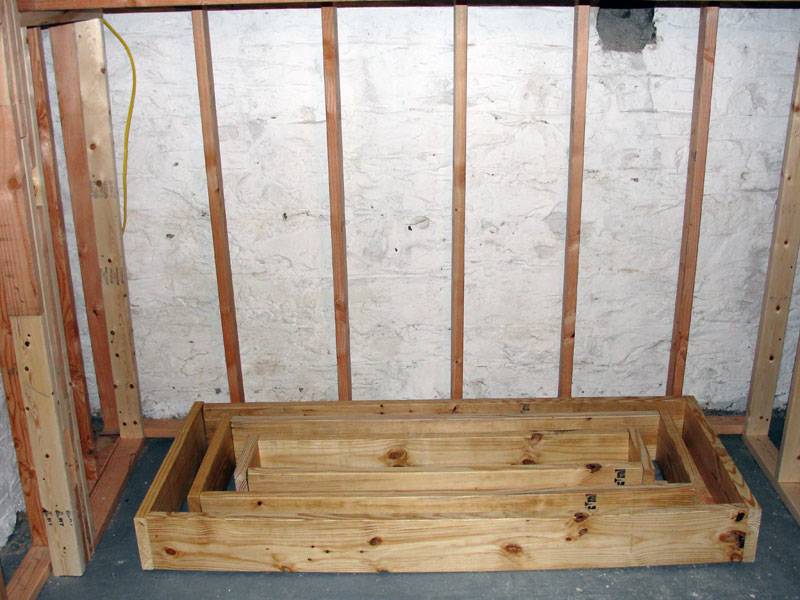
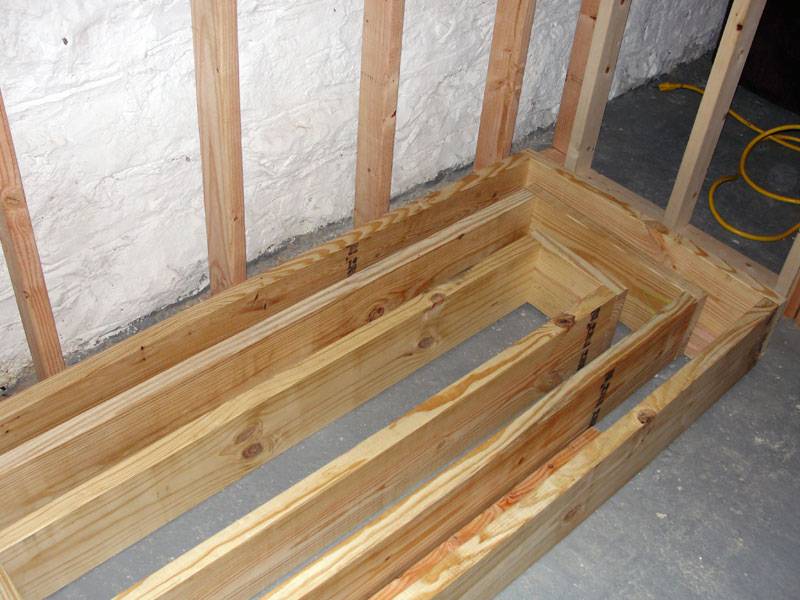
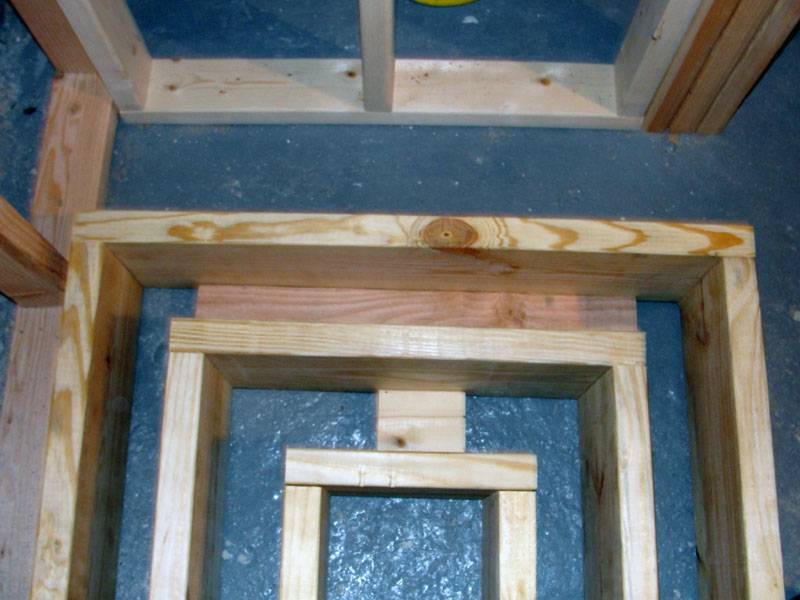
Above: There are three sizes of 2x8 rectangles. You can see how they are designed to fit. 2x4s were then cut to fit the spaces between the inner and outer rectangles, resulting in two separate tiers that plants will be on.
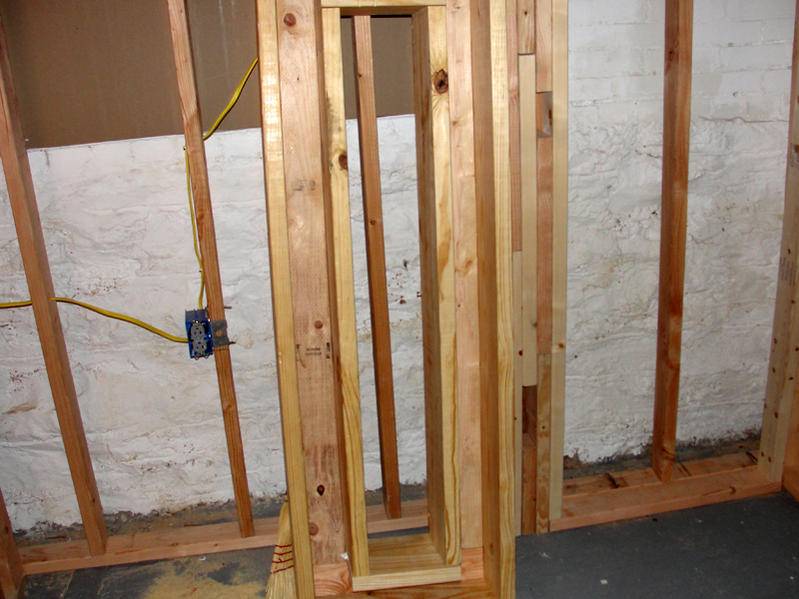
Above: The smaller, inner tier. This one will be about a foot lower than the one that fits outside. This way the inner (lower) tier plants will not block any light from the outer (upper) tier.
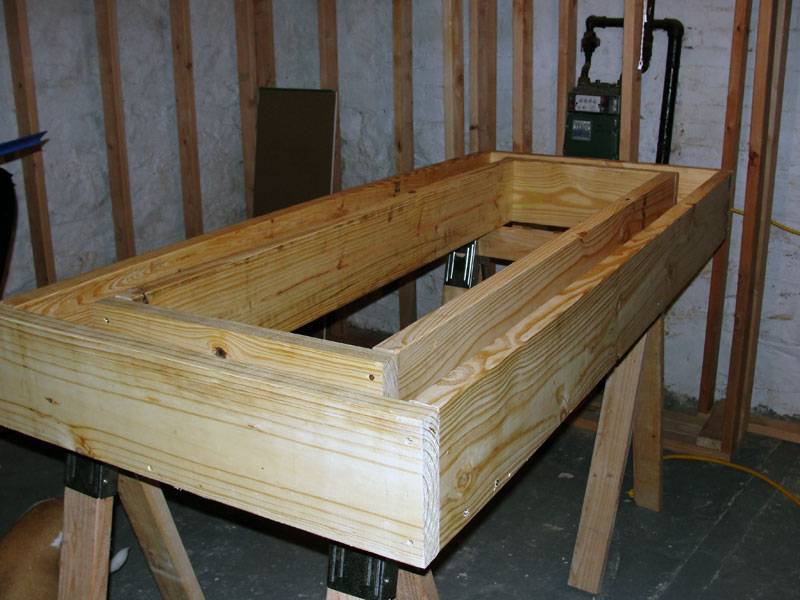
Above: The larger, outer tier. I put it up sawhorses to get a feel for what it'll be like when done.
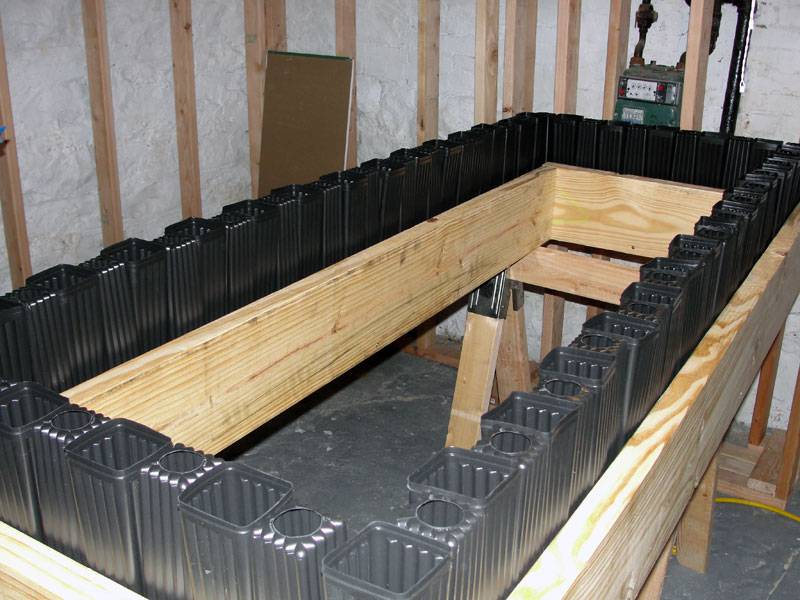
Above: After I put it on the sawhorse, I put my MT2510 (Mini Tree Pots, which I love) in it to get a feel for how many plants it'll hold. I put an upside down treepot in between each right-side-up treepot to keep everybody in place for the picture. Right now the upper tier holds 40 treepots with roughly 2 inches between each one. (So it could hold 70-80 of them if I just crammed all the plants in right next to one another.)
Tomorrow I'm going to build the actual frame that will hold the two tiers in their places and if there's time I'm going to get started with the pond liner.
I went back to wood because I made a major miscalculation when i decided on the rain gutters. Basically, the gutters themselves would've cost about $20 bucks. No sweat. But all the corner pieces would've cost $40 (still no biggie) and then the CONNECTOR pieces to put it all together would've cost $80 (!!!)... so the gutter idea would've cost me $140 just for guttering, and I'd still have had to buy lumber to make the table to hold the gutters. With my improvised wood gutters, my total cost for supplies for the table was closer to $60.
I've taken clones of my AK47 uber-mama and created 6 mini-mamas that I plan to veg under my 800w CMH so that I can get my clones going. This is something i really wish I had started sooner, so that I could start filling this bad-boy up right away, but real-life got in the way.
I'm hoping to have the colosseum totally ready to roll very soon and I'll fill it up with clones as quickly as I can.
More pics will come as I take them. Found my camera and the battery and we're ready to rock it. Can't wait to see this fucker fill up with lovely green ladies!
Thank you for your attention, your advice and your kind words! I hope I can do good things in the name of ICMag and the Vert Posse.
Finally! An update! With Pics!
You can also see the spot where I covered the window. I built a frame that fit inside the window ledge and then I attached two layers of green drywall which had been glued together. 2 layers of drywall is a lot better soundproofing than 1 layer. Glue helps keep them from vibrating against one another. This is so that no sounds (like a fan) will be heard by anyone who happens to be standing outside that window. The window itself has a set of closed mini-blinds, so you don't see the frame I've put in. From the outside, it looks like a regular window.
Alright. This second pic (above) is of the area that has been framed out for the actual colosseum. It will fit inside this space. The hole in the wall (to the upper right of the picture) leads up and out and this is where my exhaust will go.
Above: A close-up of the exhaust hole.
Above: Kinda hard to see, but in the bottom left, you may be able to make out one of the two drains in my basement. This one is within a few feet of where the grow is, so in case of some kind of catastrophic flooding situation, it won't go far.
Above: To make the Flood tables, what I did was construct 4 rectangles using 2x8s. I laid them inside the space they've been designed to fit in so that you can start to get an idea of what the finished product will look like.
Above: There are three sizes of 2x8 rectangles. You can see how they are designed to fit. 2x4s were then cut to fit the spaces between the inner and outer rectangles, resulting in two separate tiers that plants will be on.
Above: The smaller, inner tier. This one will be about a foot lower than the one that fits outside. This way the inner (lower) tier plants will not block any light from the outer (upper) tier.
Above: The larger, outer tier. I put it up sawhorses to get a feel for what it'll be like when done.
Above: After I put it on the sawhorse, I put my MT2510 (Mini Tree Pots, which I love) in it to get a feel for how many plants it'll hold. I put an upside down treepot in between each right-side-up treepot to keep everybody in place for the picture. Right now the upper tier holds 40 treepots with roughly 2 inches between each one. (So it could hold 70-80 of them if I just crammed all the plants in right next to one another.)
Tomorrow I'm going to build the actual frame that will hold the two tiers in their places and if there's time I'm going to get started with the pond liner.
I went back to wood because I made a major miscalculation when i decided on the rain gutters. Basically, the gutters themselves would've cost about $20 bucks. No sweat. But all the corner pieces would've cost $40 (still no biggie) and then the CONNECTOR pieces to put it all together would've cost $80 (!!!)... so the gutter idea would've cost me $140 just for guttering, and I'd still have had to buy lumber to make the table to hold the gutters. With my improvised wood gutters, my total cost for supplies for the table was closer to $60.
I've taken clones of my AK47 uber-mama and created 6 mini-mamas that I plan to veg under my 800w CMH so that I can get my clones going. This is something i really wish I had started sooner, so that I could start filling this bad-boy up right away, but real-life got in the way.
I'm hoping to have the colosseum totally ready to roll very soon and I'll fill it up with clones as quickly as I can.
More pics will come as I take them. Found my camera and the battery and we're ready to rock it. Can't wait to see this fucker fill up with lovely green ladies!
Thank you for your attention, your advice and your kind words! I hope I can do good things in the name of ICMag and the Vert Posse.
Last edited:
P
pine boy
Congratulations on the build out Anti.I wish you many great harvests.

HushemFlupskluk
Member
Hi Anti,
Will the wooden constrution be treated with paints to prevent it from rotting? I thought of toxicities in the paint that might have negative influence on the plants.
If you not treat the wood. It will rot soon enough. Especially when you start humidifying. The rot would spread itself on your plants. Which is not a good prospect.
Not sure if it is as bad as I think. Just hope you thought of it It is just that every peace of wood i've used inside my room has rot on it now or had been rotting or was weakened by water condens.
What do others say about using wood inside a growroom? I am very curious.
GL building the setup dude! The design looks tidy!
Will the wooden constrution be treated with paints to prevent it from rotting? I thought of toxicities in the paint that might have negative influence on the plants.
If you not treat the wood. It will rot soon enough. Especially when you start humidifying. The rot would spread itself on your plants. Which is not a good prospect.
Not sure if it is as bad as I think. Just hope you thought of it
What do others say about using wood inside a growroom? I am very curious.
GL building the setup dude! The design looks tidy!
Hi Anti,
Will the wooden construction be treated with paints to prevent it from rotting? I thought of toxicities in the paint that might have negative influence on the plants.
I was originally planning to do what a guy did in another thread and use a rubber-based pool sealant paint, but it's $60 a gallon + shipping.
I am going to cover the tables with rubber pond liner and seal it all up with aquarium silicone. I do have some flat white paint leftover from when I built my micro-cab so I will probably go ahead and give the exposed wood a coat of that.
The important thing for me is to get this thing up and running smoothly ASAP. Once I've harvested a crop or two I may do a complete rebuild to address any issues that I discover in the setup.
I built it with 2x4 and 2x8 instead of plywood to make it a little more resistant to warping. It's HEAVY.
If you look at my latest sketchup (below for reference) I put a dotted-line bounding box around it, to show the dimensions of the "room" being built to hold the table. I left an extra 6" out of the design so that I could add some heavy-duty castors on the four legs of the table so that I can pull it out and access any part of the table.
Once the money is there to do so, I will cover every surface (walls, ceiling, planter-walls with reflectix, but this might not happen until after the first harvest, depending on funds.
Looking great man!
Latest posts
-
-
-
-
-
ontario early 00's wine gum/hashy smelling commercial regs
- Latest: Creeperpark
Latest posts
-
-
-
-
-
ontario early 00's wine gum/hashy smelling commercial regs
- Latest: Creeperpark


