What's new
  • ICMag with help from Landrace Warden and The Vault is running a NEW contest in November! You can check it here. Prizes are seeds & forum premium access. Come join in!

passive plant killer

delta9nxs

No Jive Productions
Veteran
Those are the totes I am going to be using in a new setup. They are a bit cheaper though from walmart especially if you need 12. They ship site to store free.

D9, would you use 2 tailpieces on those rectangular totes?

Can you clarify your top pulse volume every 90 minutes now? Was that 2.5 gallons per plant pulse fed every 90 minutes?


one is more than enough. and i think you could get away with a single row of holes around the bottom of the grow container.

i'm watering until i get overflow out of the sidewall holes on the slowest container. i have not measured or timed it yet but i will.
 

delta9nxs

No Jive Productions
Veteran
[URL=https://www.icmag.com/ic/picture.php?albumid=35933&pictureid=856509&thumb=1]View Image[/URL] [URL=https://www.icmag.com/ic/picture.php?albumid=35933&pictureid=856510&thumb=1]View Image[/URL] [URL=https://www.icmag.com/ic/picture.php?albumid=35933&pictureid=856511&thumb=1]View Image[/URL] [URL=https://www.icmag.com/ic/picture.php?albumid=35933&pictureid=856512&thumb=1]View Image[/URL]

Here are some pics. The first pic is a messy shot of the room. On the back wall you can see the split ac. The ac guy had to move some stuff around to get in there and work.

The second shot is the black box with out the marine battery box and float valve.

The third shot shows the ballasts mounted on a wall. There will be be 9 next gens i just need to make some more hangers. 3 rows of 3.

The last shot is the 2 ton ac in the other room.

lookin' good! you are about to grow some monsters! thanks for the pics, they really help new people see the process unfold. it increases understanding.
 

delta9nxs

No Jive Productions
Veteran
hey bloyd, i just went out and measured my veg pulse for you. it is almost exactly 1/2 gal delivered in 35 seconds.
 
G

Guest 142956

You hit it right on saying smoke hits people differently! I have many times had to hang out and wait for people trying good smoke for the first time to get back and cool to drive again. Just as I don't drink too much in public I don't stone myself into the ground either tending to be the "designated" driver. But it's all good anyway. Got my deer feeder timer up and running yesterday.
 

Snook

Still Learning
one is more than enough. and i think you could get away with a single row of holes around the bottom of the grow container.

i'm watering until i get overflow out of the sidewall holes on the slowest container. i have not measured or timed it yet but i will.

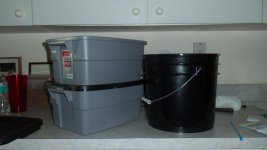
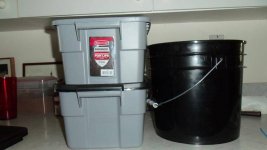
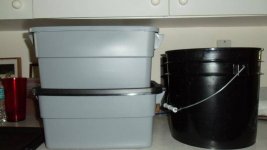
D9. 1 row!?? no more 4" up?? million and 2 drilled holes??!! THIS IS HUGE and I dont needem', no mo. those holes was the only thing stopping me from changing to more shapley (for my grow configuration) containers (like those roughnecks). The rectangular shap might with the wick at one end and the plant at the other, limit rootage in the wickage. and BOYD: you have had no structural problems with the weight of the wet medium and plant in the top roughneck vs the thinner walls of the bottom roughneck that is already holding ??? 75% of maximum capacity of water/nutes and in my past experience already bulging from that nute mix.

and I might have asked you before, maybe, but why is it that we do not run a second wick, but like in your cloners, a short wick of the thermoloam just dangleing an inch or two below the lid, in mid air, above the rez water level. My logic (not always logical), this would reduce the time the perceved perched water tble would be perched, during the pulse process. way back, you said something about limiting evaporation, I think.
 

Snook

Still Learning
I tried to imbed this in my last post 3 times, wouldnt let me.

EDIT: Pics of stacked, 3 gal roughnecks compared to 1, 3.5 gal bucket.. they look small!
 

Attachments

  • roughneck comparison 116.jpg
    roughneck comparison 116.jpg
    25.9 KB · Views: 20
  • roughneck comparison 115.jpg
    roughneck comparison 115.jpg
    29.2 KB · Views: 24
  • roughneck comparison 114.jpg
    roughneck comparison 114.jpg
    23.8 KB · Views: 23

delta9nxs

No Jive Productions
Veteran
hey, the dark blue ones block light better.

i would put the tailpiece dead center in the totes because that's where you will have the maximum sag from weight and it will drain better.

the tailpieces already drain the medium very fast and it's just not necessary to increase the rate any further. the other thing is that the wick hanging down into the air gap will put roots into the reservoir like crazy. in this system it is a bad idea to have a lot of root material in the res. i'm really not sure exactly why but i know that the plants with a lot of roots in the res will show symptoms and the plants that have had the roots torn off at the flip don't

i'm in the middle of building 18 more modules right now and i thought about drilling 60 holes per container. decided to do some math and streamline the process a little bit.

60 7/16" holes have a surface area of approx 9 sq inches. 16 3/4" holes have a surface area of about 7 sq inches. you will still have to use screen anyway with turface.

when i first started drilling these holes i was thinking that root pruning would play a large role in the performance of the device. after de-potting the plant and looking at the roots you do see the root pruning has occurred but it is not much and i believe the o2 is more important here.

dr carl whitcomb is the original root pruning guy and his studies show that the total weight of roots is about the same pruned or un-pruned. other studies back this up.

his focus is on the ornamental plant industry where they are dealing with plants that might not sell for years. the old thinking was to just leave them in the ground and dig them up when needed but this severely damages the big plants.

with root pruning containers they can leave the plant in the same container for a couple of seasons before potting them into larger ones.

when they do sell they can pick up the container with a forklift without disturbing the roots, dig a hole the right size, pop the container off, plant it in a precision hole and the roots take off immediately.

if they don't sell it and it gets too large for the container they can pot them into the next size up.

we don't ever keep a production plant that long and we never pot up adult plants. i don't think that the root pruning is all that important here in this application.

as far as where to drill these holes i'm going to center them at 2.5 inches up from the bottom edge. this should contain the pwt and get plenty of air.

16 holes does not require a template like 12 rows did. it's very simple to just drill a hole and then eyeball the second hole directly opposite, another set halfway between those giving four, another set halfway between those giving eight total and then another set halfway between those giving 16 total.

the diameter of the bottom of a bucket is approx 10.5". this gives a circumference of approx 33" so you will end up with 16 holes centered about 2 and a fraction inches apart.

this will contain the pwt and will minimize the amount of overflow that has to return. i fact you can pulse to overflow and then back it down just a little to stop the overflow.

this would be desirable as then you would not need the holes in the bucket lid anymore. they do create algae and increase evaporation.

speaking of which i don't think you need to be able to check tds and ph in the plant reservoirs anymore either. with this kind of volume it's all running about the same anyway. this means just one 2.5" hole in the lid.

with the holes you have to drill for the tailpiece and the tire valve this is only 19 total holes to drill per module.

a 3/4" hole is best drilled with a spade bit so no multiple step up holes like you would normally do with twist drills to get a clean hole.
 

delta9nxs

No Jive Productions
Veteran
i just drilled the first one and stopped at 8 holes at the 2.5 inch level. it looks to me to be enough. so that would cut the drilling to 11 holes total per module. one for the tailpiece one for the bucket lid, one for the tire valve and 8 for air.

whoops, forgot about the 8 holes for the wire ties.
 
Last edited:

ImaginaryFriend

Fuck Entropy.
Veteran
WRT air pruning:

I've read the same about total mass of roots... but if the roots aren't wringing the pot, then they must be distributed elsewhere... I believe that a more even root distribution (i.e. a more uniform density) through the media may or may not be helpful.

It may or may not be more helpful with regard to different media, and different applications of food and water.

It may or may not be more helpful with regard to O2 uptake.

Regardless, I am on the get it done in ten minutes wagon. 8 holes it is...
 

Snook

Still Learning
hey, the dark blue ones block light better.

i would put the tailpiece dead center in the totes because that's where you will have the maximum sag from weight and it will drain better.

the tailpieces already drain the medium very fast and it's just not necessary to increase the rate any further. the other thing is that the wick hanging down into the air gap will put roots into the reservoir like crazy. in this system it is a bad idea to have a lot of root material in the res. i'm really not sure exactly why but i know that the plants with a lot of roots in the res will show symptoms and the plants that have had the roots torn off at the flip don't

i'm in the middle of building 18 more modules right now and i thought about drilling 60 holes per container. decided to do some math and streamline the process a little bit.

60 7/16" holes have a surface area of approx 9 sq inches. 16 3/4" holes have a surface area of about 7 sq inches. you will still have to use screen anyway with turface.

when i first started drilling these holes i was thinking that root pruning would play a large role in the performance of the device. after de-potting the plant and looking at the roots you do see the root pruning has occurred but it is not much and i believe the o2 is more important here.

dr carl whitcomb is the original root pruning guy and his studies show that the total weight of roots is about the same pruned or un-pruned. other studies back this up.

his focus is on the ornamental plant industry where they are dealing with plants that might not sell for years. the old thinking was to just leave them in the ground and dig them up when needed but this severely damages the big plants.

with root pruning containers they can leave the plant in the same container for a couple of seasons before potting them into larger ones.

when they do sell they can pick up the container with a forklift without disturbing the roots, dig a hole the right size, pop the container off, plant it in a precision hole and the roots take off immediately.

if they don't sell it and it gets too large for the container they can pot them into the next size up.

we don't ever keep a production plant that long and we never pot up adult plants. i don't think that the root pruning is all that important here in this application.

as far as where to drill these holes i'm going to center them at 2.5 inches up from the bottom edge. this should contain the pwt and get plenty of air.

16 holes does not require a template like 12 rows did. it's very simple to just drill a hole and then eyeball the second hole directly opposite, another set halfway between those giving four, another set halfway between those giving eight total and then another set halfway between those giving 16 total.

the diameter of the bottom of a bucket is approx 10.5". this gives a circumference of approx 33" so you will end up with 16 holes centered about 2 and a fraction inches apart.

this will contain the pwt and will minimize the amount of overflow that has to return. i fact you can pulse to overflow and then back it down just a little to stop the overflow.

this would be desirable as then you would not need the holes in the bucket lid anymore. they do create algae and increase evaporation.

speaking of which i don't think you need to be able to check tds and ph in the plant reservoirs anymore either. with this kind of volume it's all running about the same anyway. this means just one 2.5" hole in the lid.

with the holes you have to drill for the tailpiece and the tire valve this is only 19 total holes to drill per module.

a 3/4" hole is best drilled with a spade bit so no multiple step up holes like you would normally do with twist drills to get a clean hole.


I was good til this 3/4" hole business... what's that all about, D9?

I was only going to run 3 plants this run but this roughneck thing has me going.. I may put the 4th plant in in one of these, jacked up to the same height as the 3.5 buckets... pulse may be too much though. WTF, I try it. Get back to you.
 

delta9nxs

No Jive Productions
Veteran
[/B]

I was good til this 3/4" hole business... what's that all about, D9?

I was only going to run 3 plants this run but this roughneck thing has me going.. I may put the 4th plant in in one of these, jacked up to the same height as the 3.5 buckets... pulse may be too much though. WTF, I try it. Get back to you.

hey, snook, sorry, i was referring to the buckets.

if you are using the totes the medium depth should be around 6". you might just run it with no holes and see how it works out first.

i drill the buckets as they will run at 7" + with a mulch layer on top of that and this makes sure that no part of the medium is more than about 5" from an air source.
 

delta9nxs

No Jive Productions
Veteran
i just built one top and loaded it. i ran a pulse through it, approx a half gal, and no water came out of the sidewall holes so it is high enough to trap the pwt plus a little extra.

this means that you could build it without drilling any more holes in the bucket lid than the 2.5" one.

it's no big deal either way but it will help with solution stability. a little. and cut down on algae, debris, and insects.

i have no intentions of changing out my existing buckets, i have too much sweat equity in them.

i'll have a pic later.
 
Last edited:

high life 45

Seen your Member?
Veteran
Got my Jacks in the mail today. My buddy said that clones are ready as well, not sure if its Platinum Kush or Dog Collar. Need to buy some bulbs and a big tank of co2.
 

petemoss

Active member
Converting E&F to wick feed

Converting E&F to wick feed

You guys were making me envious with your trees grown in PPKs! So I decided to convert my perpetual cab SOG from E&F to wick sub-irrigation. Experimented with several types of wicks (cotton sheet strips, nylon/propylene, tiki wicks) until I found a braided nylon/polyester rope that worked. I used wire closet shelves supported with PVC tubes to build a shelf in my flood tray. Flood height is set by the overflow tube and the water remains in the tray after the pump turns off.

Initial air gap of 2" left my small 4 inch pots too wet. I'm trying a 3" gap now with plain top water flush once a week. The first thing I noticed was that the plants seemed to take off in a burst of growth. This I attribute to the removal of standing water. After three years, I was still drowning roots like a newbie! Amazing how quickly this weed grows without moisture stress! Thanks d9 for showing me a better way!


petemoss

Active member
Thanks, high life 45! You'll be glad you made the switch to Jack's Hydroponic. I've been using Jack's for two years now and can tell you that it's really simplified my feeding regimen. Now when I have a problem, I know it's not my nutes. BTW I forgot to mention that my bonsai moms are now wick fed. I'm loving this sub-irrigation!:dance013:


ImaginaryFriend

Fuck Entropy.
Veteran
petemoss,

I've always loved the look of your garden... I'm super happy to hear that sub-irrigation worked.

Just a warning: that was how I started, with just a wick here or there. And then I just followed along...

Just be glad there is less drilling than there was a year or so ago.

picture.php
 

zeke99

Active member
delta9, what's your regimen for seeds in the plastic cloners.

not the turface preparation, but how long do you cover ?
 

Latest posts

Latest posts

Top