
-
ICMag with help from Phlizon, Landrace Warden and The Vault is running a NEW contest for Christmas! You can check it here. Prizes are: full spectrum led light, seeds & forum premium access. Come join in!
You are using an out of date browser. It may not display this or other websites correctly.
You should upgrade or use an alternative browser.
You should upgrade or use an alternative browser.
Off the shelf retail store screw-in LED and CFL bulb comparisons
- Thread starter blynx
- Start date
HuffnPufferfish
Member
18inch, i guess some veggies get to that range when i place some seedlings on the floor, bad results compared to 1.8inch ")
Finally made a graphic for light output on my screw in LEDs using my ghetto swing style light meter. Hopefully this helps my fellow micro growers in setting up their growing spaces with regard to light penetration expectations.
View Image
For reference:
outdoors at noon, full sun in the middle of July is >2000
outdoors at noon, bright shade in the middle of July is 1000
1000w HPS gardens I've visited at canopy register at 1000-1500
600w HPS gardens I've visited at canopy register at 850-1100
I generally try to maintain 800-1200 at the canopy for flower. 300 is what I consider to be minimum for strong veg growth and 600 as a minimum for flower.
So a 16w LED screw in bulb is equal to the blackstar fixture at 18"? That's like a no-brainer then. Just 2 of those bulbs would out-do the blackstar....crazy.
brown_thumb
Active member
So maybe these aren't worthless junk? Actual power consumption is 16 watts per lamp.
http://www.ebay.com/itm/282012234734?_trksid=p2057872.m2749.l2649&ssPageName=STRK%3AMEBIDX%3AIT
http://www.ebay.com/itm/282012234734?_trksid=p2057872.m2749.l2649&ssPageName=STRK%3AMEBIDX%3AIT
I'm really glad everyone likes my rough light output graphic.
According to my $5 ghetto light meter, yes. To be fair though, this isn't a PAR meter, so I'm sure the purists will have a fit there. This is part of the reason I've taken that meter out to various outdoor settings / HPS canopies.
I've found that the LED array I've made can be run much closer to the canopy than a single Blackstar which is hung a bit higher for better light distribution (multiple light sources versus single source). As you'd imagine, my LED array produces better buds because of the brightness at canopy - roughly 1000-1300 versus the blackstar at 750-900.
When you compare a 240w Blackstar at ($300) and a ten light 16w LED setup ($50 for a 10 pack of bulbs and $20 in flush mount sockets) it really is a no-brainer.
Side note, I had six 16w 3000k bulbs lying around which I wasn't using, so I traded out the 8.5w bulbs I had in seedling veg (2x2x2) for 16w units. I lost about 1-2 inches of vertical growing space due to the larger / taller bulbs, but man is it bright - 1500-2000 at the canopy! Going to be interesting to see if theres a difference in veg strength / plant density. Can you bleach plants in veg? If something is worth doing, its worth overdoing...

So a 16w LED screw in bulb is equal to the blackstar fixture at 18"? That's like a no-brainer then. Just 2 of those bulbs would out-do the blackstar....crazy.
According to my $5 ghetto light meter, yes. To be fair though, this isn't a PAR meter, so I'm sure the purists will have a fit there. This is part of the reason I've taken that meter out to various outdoor settings / HPS canopies.
I've found that the LED array I've made can be run much closer to the canopy than a single Blackstar which is hung a bit higher for better light distribution (multiple light sources versus single source). As you'd imagine, my LED array produces better buds because of the brightness at canopy - roughly 1000-1300 versus the blackstar at 750-900.
When you compare a 240w Blackstar at ($300) and a ten light 16w LED setup ($50 for a 10 pack of bulbs and $20 in flush mount sockets) it really is a no-brainer.
Side note, I had six 16w 3000k bulbs lying around which I wasn't using, so I traded out the 8.5w bulbs I had in seedling veg (2x2x2) for 16w units. I lost about 1-2 inches of vertical growing space due to the larger / taller bulbs, but man is it bright - 1500-2000 at the canopy! Going to be interesting to see if theres a difference in veg strength / plant density. Can you bleach plants in veg? If something is worth doing, its worth overdoing...
grouchy
Active member
Side note, I had six 16w 3000k bulbs lying around which I wasn't using, so I traded out the 8.5w bulbs I had in seedling veg (2x2x2) for 16w units. I lost about 1-2 inches of vertical growing space due to the larger / taller bulbs, but man is it bright - 1500-2000 at the canopy! Going to be interesting to see if theres a difference in veg strength / plant density. Can you bleach plants in veg? If something is worth doing, its worth overdoing...
View Image
If you would like some of that vertical space back you can do what I did. Carefully remove the led board and mount it to a heatsink. It's only two wires and adds many benefits. You can cool the led board better on a heatsink which will increase light output. It also allows you to mount the sockets and drivers outside the grow space. I don't even use sockets anymore, I just hard wired it. The headroom alone is worth it imo
Cur
Member
If you would like some of that vertical space back you can do what I did. Carefully remove the led board and mount it to a heatsink. It's only two wires and adds many benefits. You can cool the led board better on a heatsink which will increase light output. It also allows you to mount the sockets and drivers outside the grow space. I don't even use sockets anymore, I just hard wired it. The headroom alone is worth it imo
Have you made a thread about this? If you have, can you post a link. I'm very interested in seeing precisely what you mean by this!
HuffnPufferfish
Member
you pull the light apart, desolder the 2 wires, glue/screw that cob now to a heatsink, solder wires back
a led bulb is just this

a led bulb is just this
Cur
Member
you pull the light apart, desolder the 2 wires, glue/screw that cob now to a heatsink, solder wires back
a led bulb is just this
View Image
But you had mentioned drivers and sockets additionally. Is that different from a diy cob?
grouchy
Active member
But you had mentioned drivers and sockets additionally. Is that different from a diy cob?
The driver is the circuit board in the socket portion of the bulb. You can scavenge parts from cheap led bulbs to make your own diy cob leds. They are not nearly as efficient as cree or vero cobs but you can get them locally and they work well
frostqueen
Active member
Finally made a graphic for light output on my screw in LEDs using my ghetto swing style light meter. Hopefully this helps my fellow micro growers in setting up their growing spaces with regard to light penetration expectations.
View Image
For reference:
outdoors at noon, full sun in the middle of July is >2000
outdoors at noon, bright shade in the middle of July is 1000
1000w HPS gardens I've visited at canopy register at 1000-1500
600w HPS gardens I've visited at canopy register at 850-1100
I generally try to maintain 800-1200 at the canopy for flower. 300 is what I consider to be minimum for strong veg growth and 600 as a minimum for flower.
Fantastic information! Gives a much clearer picture of the light penetration ability of each type. I know this isn't a screw in, but I saw this unit yesterday https://www.amazon.com/gp/product/B01CDX0BAK/ref=ox_sc_act_title_1?ie=UTF8&psc=1&smid=A3S1YS3ZG7NW10
and was wondering how its rated 8000 lux would measure at 24" or 48"... at what distance are various bulbs measured at, exactly?
I will grab one soon and take a few measurements and post back here.
I've had moms stay under these types of COB units and they seem to be really happy. It really surprised me. My last one was a 50w version and it fizzled out after just a year. Maybe they've improved a bit since I got that. They are a lot cheaper than they were 2 years ago.
Not ideal for a mini cabinet, but for a 30"x 30" breeding zone with headroom, I bet these would be great. It might be too hot without venting, tho... if so I'll put it in my garage I guess.
Cur
Member
The driver is the circuit board in the socket portion of the bulb. You can scavenge parts from cheap led bulbs to make your own diy cob leds. They are not nearly as efficient as cree or vero cobs but you can get them locally and they work well
So the driver would stay on the board in your proposal, right? I'm just trying to picture it in my head... I've threatened to finally out my case together (an empty case I've been carrying with me every time I've moved for the past 5 years or so) and this idea really intrigues me. The numbers in this thread have certainly made up my mind from CFL's that I had planned, but if you could show me how to save ~2"-3" of headspace I'd really love to learn!
HuffnPufferfish
Member
you can safely assume its measured at mere inches, or the theoretical max output of the chips x the amount of chips = magical amount of lumenswas wondering how its rated 8000 lux would measure at 24" or 48"... at what distance are various bulbs measured at, exactly?
Cur
Member
use 2,3 inch less shallower pots boom , fixed
Thanks for the opinion, and I'm not trying to be disagreeable, but I have been container gardening for a while. I understand moving to a shallower container will allow me the extra headroom, that much is obvious. From what I've seen over the past several years lurking here and at the old overgrow forums before they got shut down (I've been watching the grow-your-own movement for close to 10 years now) most people are already utilizing as small of pots as they can, and I planned on doing so as well.
But the question was if I can gain *another* 2-3" by working the lights. So, if anyone here can actually show how they have their off-the-shelf LED's pulled apart and then installed I would really like to see that and learn how to do it myself! ����
Specifically, GROUCHY, if you haven't yet made a thread about how you mounted these led boards inside your grow space, I think it would be very beneficial to the forum if you could do so. Or, if that's too much trouble, if you could drop me a pm as to how you did that I can try and replicate it and put that information in my box's build thread when the time comes.
HuffnPufferfish
Member
i dont have any pic but step by step i
1) pulled the dome off
2) unscrewed the 2 little scew on the led plate
3) desolder the 2 wires that connect the led plate to the driver/electronics/ac wire
4) mount the disc on metal
5) pull the electronics out of the hull (what u call it, housing?)
6) solder wires back
7) solder power plug wires to other end of the driver
8) on off switch?
9) grow more
Cur
Member
i dont have any pic but step by step i
1) pulled the dome off
2) unscrewed the 2 little scew on the led plate
3) desolder the 2 wires that connect the led plate to the driver/electronics/ac wire
4) mount the disc on metal
5) pull the electronics out of the hull (what u call it, housing?)
6) solder wires back
7) solder power plug wires to other end of the driver
8) on off switch?
9) grow more
Sweet, thanks! I'll have to pull one apart when I get home to put a visual with the electronics/driver thing, but awesome. I appreciate it, man!
Dang good thread Blynx, it took me 2 days to read the whole thing.
Im also flowering indoors but with CFL and LED Bulbs. This plant doesnt look to good but showed what I wanted to see.. I had the LED Bulbs pointed at the bottom-middle of this plant, and the CFLs are right on the sides of the highest points of the plants.
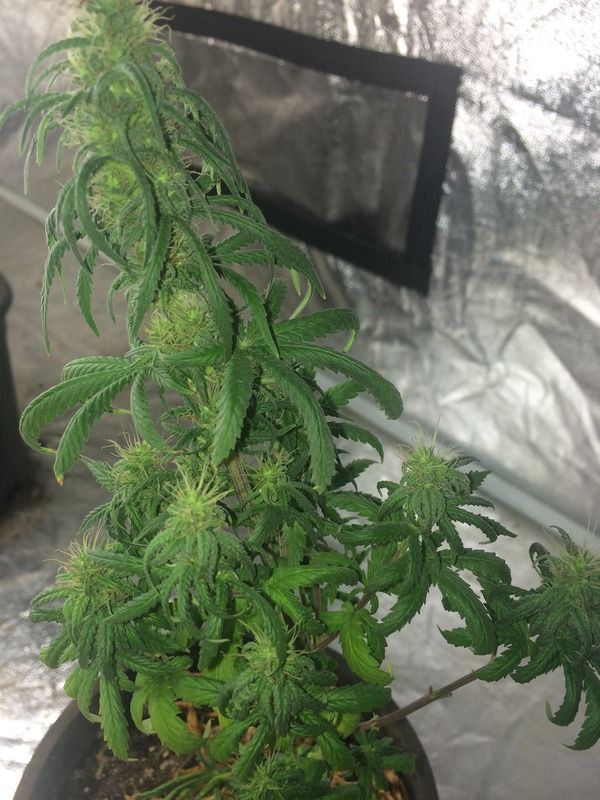
The other plants that didnt have LEDs pointed at the bottom-middle of them have very small undergrowth compared to the ones that did.

I wanna play too! 
I wanna play too!
Great thread Blynx! I've been having a lot of fun seeing every ones screw in LED grows. I spent like 400$ on terrible, cheap, worthless screw in COB LED's from China on eBay like right before these decent ones hit the store shelves they almost seem like fake COB's or something there's a jelly type substance over the LED's which are weak AF, they were supposed to be 12w and the board said 7w and they're only 1/4 the brightness at best of the Eco smart 8.5's I have now and I had to take them apart to pull nasty smelling off gassing yellow tape that was wrapped around the driver, now they're just collecting dust. I paid like 5$ per bulb plus shipping and now the Eco smart ones at home depot or Walmart brand ones are less then 2$ each. Such is life.
I made a thread for my screw in LED Stacking totes, it's still in the build stage.
https://www.icmag.com/ic/showthread.php?t=333472
I hope the link works. I'm a newbie poster as you can see. Infact i accidentally posted my thread in Grow Diaries instead of Micro Grows... I need a Moderator to move it right? I can't move it myself can I?
Here's a lil glimpse of what I'm working on...
Please visit my thread if you'd like to see inside the recessed lighting tote/ballast room. It's lonely over there but I just posted it yesterday. I can't wait until I figure out the right fan/filter combo to keep the temps in check so i can pop some beans and start having some real fun.
I wanna play too!
Great thread Blynx! I've been having a lot of fun seeing every ones screw in LED grows. I spent like 400$ on terrible, cheap, worthless screw in COB LED's from China on eBay like right before these decent ones hit the store shelves
they almost seem like fake COB's or something there's a jelly type substance over the LED's which are weak AF, they were supposed to be 12w and the board said 7w and they're only 1/4 the brightness at best of the Eco smart 8.5's I have now and I had to take them apart to pull nasty smelling off gassing yellow tape that was wrapped around the driver, now they're just collecting dust. I paid like 5$ per bulb plus shipping and now the Eco smart ones at home depot or Walmart brand ones are less then 2$ each. Such is life. I made a thread for my screw in LED Stacking totes, it's still in the build stage.
https://www.icmag.com/ic/showthread.php?t=333472
I hope the link works. I'm a newbie poster as you can see. Infact i accidentally posted my thread in Grow Diaries instead of Micro Grows... I need a Moderator to move it right? I can't move it myself can I?
Here's a lil glimpse of what I'm working on...
Please visit my thread if you'd like to see inside the recessed lighting tote/ballast room. It's lonely over there but I just posted it yesterday. I can't wait until I figure out the right fan/filter combo to keep the temps in check so i can pop some beans and start having some real fun.
grouchy
Active member
Sweet, thanks! I'll have to pull one apart when I get home to put a visual with the electronics/driver thing, but awesome. I appreciate it, man!
It's only a two wire extension if you want to keep it simple. Keeping the driver in the socket housing allows you to use the standard socket still but it takes up so much space. It's only two wires on the power input side to get rid of the bulky housing.
Don't forget to pick up some thermal paste to reattach the led to your heatsink. I use arctic silver 5. Any chunk of aluminum is better than what the socket housing provides and fans help out immensely.

