What's new
  • ICMag with help from Landrace Warden and The Vault is running a NEW contest in November! You can check it here. Prizes are seeds & forum premium access. Come join in!

Building a 4x6 hidden room

budderfly

Active member
While that dried I worked on the bench. I was going to take the studs off the bench, but it was just not happening without destroying it.

So I'm sawing a couple down to mate to the two studs on the wall. It came out sorta close, I don't have a good finished shot, but it's not even close to a perfect line up. It's ok though because it'll be covered by pegboard later. I'm going to have to shim the front too because the floor is sloped different. The bench is a pain but I have to keep it so the room looks close to the same (and its a very useful 8' bench).
picture.php


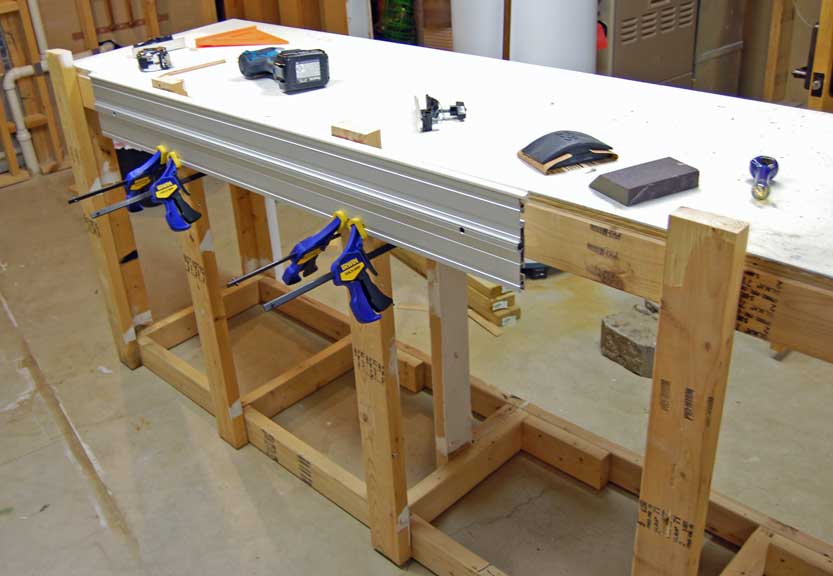
That's a Eurekazone track saw rail. A table saw isn't that practical for me but these rails and a circular saw and I can slice up sheet goods with ease. I also have an attachment for my router which helps do dado's and circles etc.

It's so important to have good tools if you're doing serious DIY. The right tool makes every step safer and smoother. I don't have a SDS hammer drill, just a drill with the "hammer" feature and I'm paying for it trying to drill into the foundation with stripped and bottomed tapcons and burning up bits. It's one of very few tools I lack here thankfully.

picture.php


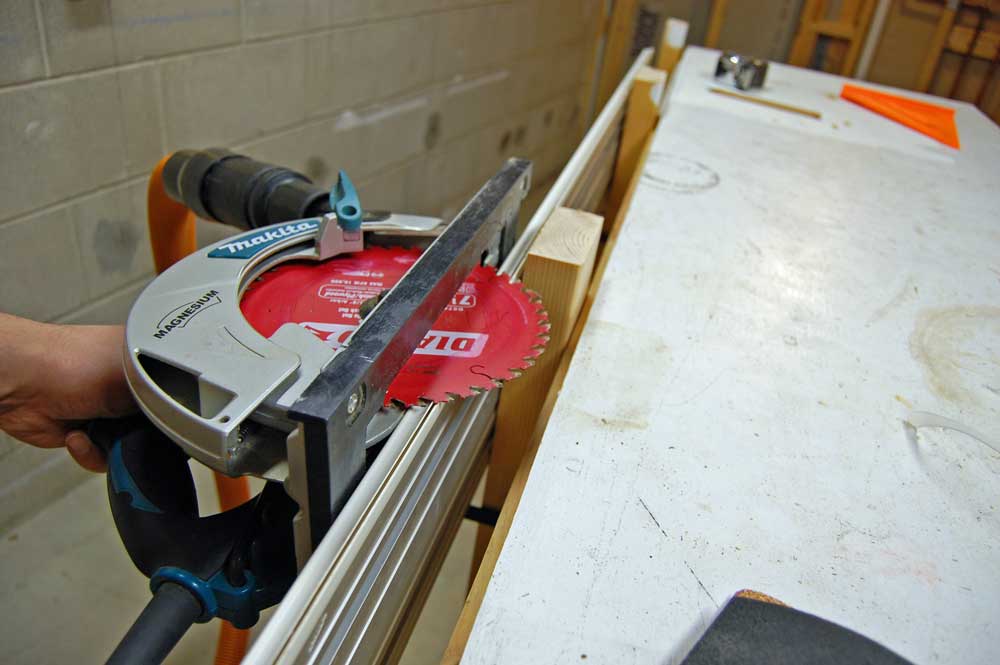
Dust collection is important, too. People live here. It's going well so far, not much stray sawdust.


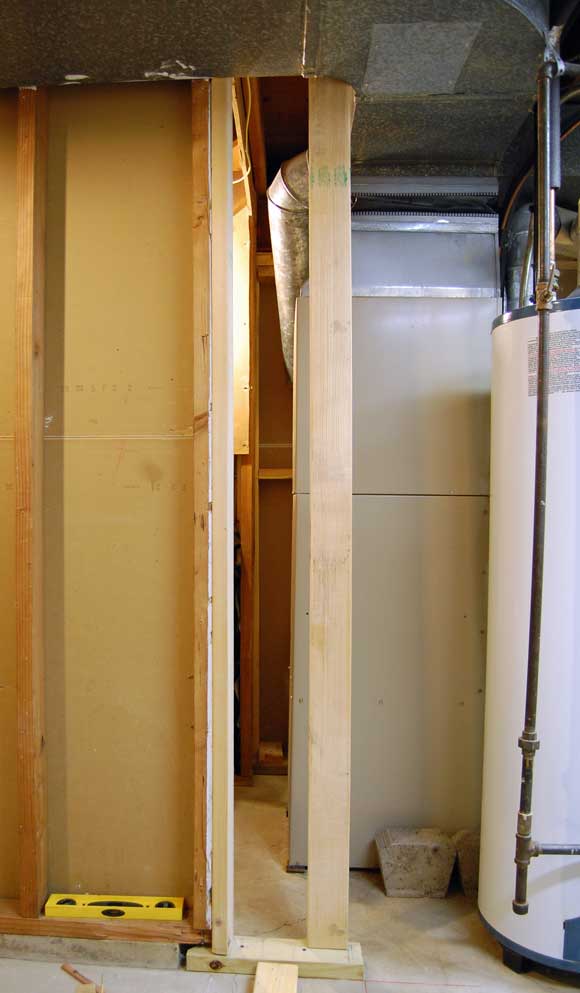
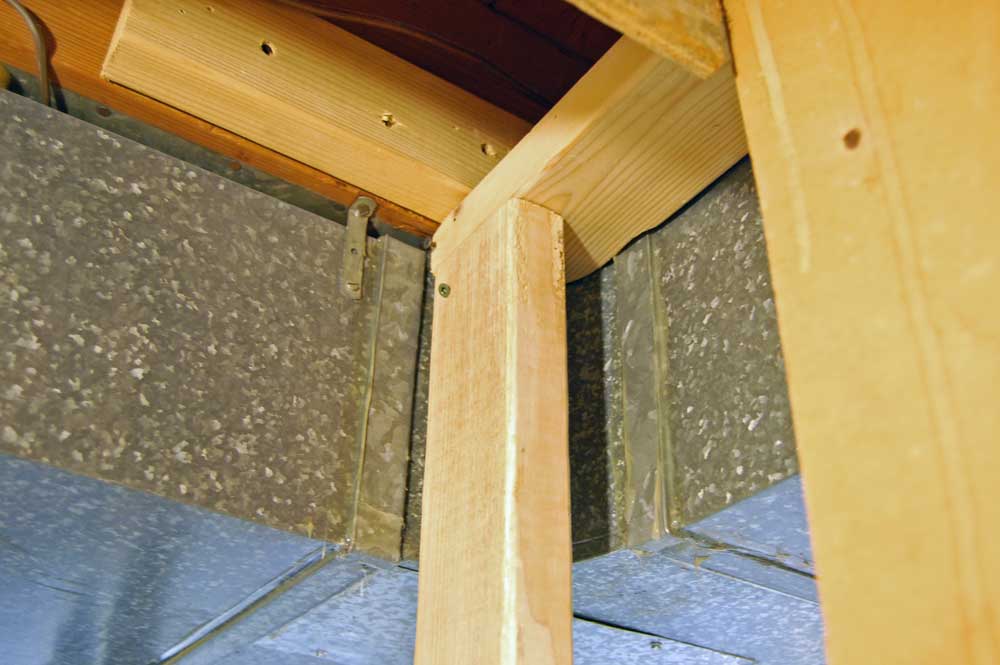
Here's the extension I'm building off the wall under the stairs. This wall is leaning pretty hard. Tried to use a plum to mark down and was off half a foot.
picture.php


It's attached to the joists above.

picture.php


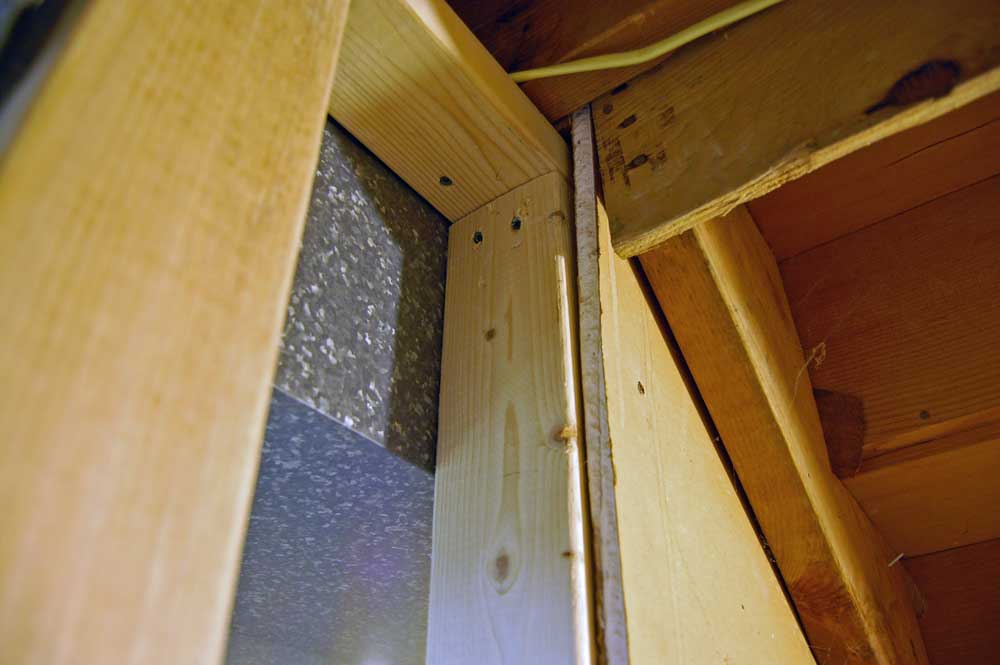
Had to jigsaw a little curve around the duct.
picture.php
 

budderfly

Active member
Next up I covered the block wall with a solid sheet of XPS insulation. If this was a normal finished space I'd use 1.5" or 2" but I'm fighting every inch so I went with 1". My basement if very temperate and dry, great environment to work with.

I kept stepping on the stuff and nicking the tongue and groove. ugh.

picture.php


I just used a T square and a utility knife to score the sheet. Then snap it and it's clean enough.

picture.php


When you glue it you want to create a grid to prevent any air circulation, even in a sub-inch gap behind the insulation. I may have used way too much glue idk, I definitely underestimated and had to make a emergency Depot run.

picture.php
 

budderfly

Active member
Here's a base plate about to go down. I drilled through the stud and floor. Putting the screws through a bit helps line it up to the holes. Generous with the glue, want to make a good seal to seal thermal and acoustic gaps.

picture.php


I drilled a 2" hole in for the fake PVC drain pipe going to the floor. Brand new hole saw. What a disaster! It kept getting gummed up and smoking probably toxic who knows what eeks. Pretty much destroyed the saw in one hole, barely made it through.

picture.php


Here's the plate down and secured. Like I said, I'm having trouble making good holes and the tapcons aren't holding great, but once the glue sets it really doesn't matter I guess.

picture.php


And here's where it sits now. Got some stuff propped against the insulation to keep pressure on while the glue sets. The part of the wall that's framed is where the secret entrance will be.

picture.php


Enjoy that for now; I'm pouring every minute into the room right now and will update after I have a bunch more pics. :)
 

Scottish Research

Senior Member
ICMag Donor
Veteran
Looking great! I'm kind of in the same situation, except my room is a lot bigger. I framed a wall and hung a door. I created an exit door in the back. My problem is that I have not insulated enough. I got some of those pink foam boards that you have, but I had to pre-cut them in the parking lot in order to be more discrete. I'm thinking about removing the entrance door and just using the back one. Gotta get this all done by the end of next week.

Also, getting ready to order a Phresh fan muffler. Where did you here that the Phat ones are better? Just don't want to get the wrong one.

Thanks!

R.Fortune
 

budderfly

Active member
Looking great! I'm kind of in the same situation, except my room is a lot bigger. I framed a wall and hung a door. I created an exit door in the back. My problem is that I have not insulated enough. I got some of those pink foam boards that you have, but I had to pre-cut them in the parking lot in order to be more discrete. I'm thinking about removing the entrance door and just using the back one. Gotta get this all done by the end of next week.

Also, getting ready to order a Phresh fan muffler. Where did you here that the Phat ones are better? Just don't want to get the wrong one.

Thanks!

R.Fortune

Most mufflers, Phresh included, use an acoustic egg crate foam. Even if Phresh uses the best it's still got a limited lifespan (5 year rated).

Phat mufflers use a glass fiber pack with a much higher rated lifespan and a higher sound absorption.

You can buy both egg crate and glass fiber mat from a variety of sites and find mold, moisture, fire, and lifespan ratings. It seemed to me like the Phat's would be better because of that.

I was going to make my own mufflers using egg crate foam and use the extra to line my hvac ducts. But I couldn't find an acoustic sound absorbing foam that looked appropriate for duct use. Fiber mats can be, glass and otherwise. It's cheaper to buy one than make one, too.
 

GetUpStandUp

Active member
You old skool, you take your time, and set your pace, stage it out, good skills, why I cant wait for finished product. keep it up.
 

GetUpStandUp

Active member
plus, using the Makita cordless drill, and other awesome gadgits shows the knowledge, I for one used to use the big beefy homedepot Ryobi dynosour drilld that weight 20 pounds, lol, that drill you have is amazing and worth the 2 bills for it, its small but powerful than any drill I used, same with all their tools, I have a buffer that is used everyday bout hour in half when I buff each car out, and the thing has been workin for years. Tools make a mans work that much better!
 

budderfly

Active member
You old skool, you take your time, and set your pace, stage it out, good skills, why I cant wait for finished product. keep it up.

plus, using the Makita cordless drill, and other awesome gadgits shows the knowledge, I for one used to use the big beefy homedepot Ryobi dynosour drilld that weight 20 pounds, lol, that drill you have is amazing and worth the 2 bills for it, its small but powerful than any drill I used, same with all their tools, I have a buffer that is used everyday bout hour in half when I buff each car out, and the thing has been workin for years. Tools make a mans work that much better!


Thanks, I usually just think I'm a slow bastard. :) But it's often quicker to spend more time thinking about what you're about to do than ripping it up and redoing it because you missed something or did it wrong.

The Makita LXT cordless tools are great. They were quite an investment - I have two drills, an impact driver, an angle grinder, 4 high-capacity batteries, 2 quick chargers, and their portable radio lol. The grinder can chew through batteries as fast as they charge but I've yet to run out of power on any job with the 4 batteries.

That big ass sliding miter saw is basically brand new, too. An old roommate had a dewalt sliding miter so I got away without one for a few years. Once I booted his ass I had to pop for one. Definitely not cheap, but you can hardly frame a room without one.

Any time I take on a project I try and buy the tools that make the job easier, and after several years of that I can finally take on most significant projects and not need any new tools.


Yesterday I nearly finished framing out the fake wall and ran the 10/3 AC cable from the main panel area to where it will enter the room (doing so required shifting a couple other conduits closer together). Also had to shuffle around the overhead lights. Pics aren't ready yet.

Today I should get the cement board and drywall up on the fake wall and start building the door.
 
G

Guest 315072

the only way to go completly stealth from leo .. is to never show ur pictures on the internet of u building it.. and to get that room to not show up on FLIR
 
G

Guest 315072

the only other thing. i can reccommend. is the door.. not to just be able to be open..

maybe have like a hidden switch.. or like the drug cartels do for cars.. u need to like push in the ciggarett lighter.. turn the key .. honk the horn.. and step on the brake.... and the hidden compartment opens... maybe think outside the box.. cause if they cant find it with FLIR.. and cant open it.. ull be good.. and then if ur smart.. ull have a power shut off set up to a cell phone number... so u can call the number from anywere and have the power to the room shut off so theres no noise or heat coming from the room if u think something is going down!!!

seriously if its about keeping urself out of jail and keeping ur family safe .. we need to think out of the box here
 

budderfly

Active member
the only way to go completly stealth from leo .. is to never show ur pictures on the internet of u building it.. and to get that room to not show up on FLIR

A little late for the pics. I've tried to follow good internet security practices though. My goal for the room is not to be visible on a handheld FLIR cam. I hope to be able to access one to test it at some point even.


the only other thing. i can reccommend. is the door.. not to just be able to be open..

maybe have like a hidden switch.. or like the drug cartels do for cars.. u need to like push in the ciggarett lighter.. turn the key .. honk the horn.. and step on the brake.... and the hidden compartment opens... maybe think outside the box.. cause if they cant find it with FLIR.. and cant open it.. ull be good.. and then if ur smart.. ull have a power shut off set up to a cell phone number... so u can call the number from anywere and have the power to the room shut off so theres no noise or heat coming from the room if u think something is going down!!!

seriously if its about keeping urself out of jail and keeping ur family safe .. we need to think out of the box here

I've thought about electronic control.. but if for any reason the electronics don't work you don't get in - unless you have mechanical backup but then why not just use that.. .but how to hide it. It is a tough design problem that I have not yet solved.

The entrance will be obfuscated very well, but security via obscurity is folly.

I do hope to eventually implement a stealth mode which would be only the filtered exhaust fan on low. This mode could be activated by remotes placed throughout the house or by a power outage where the fan is on a UPS.


Anyway, lots of building to do before that. I realize my pace is not blistering, but I really think I'll have a lot of cool ass things to show as I build this out. I hope to stimulate people's minds and show them ways to go uber stealth.

Pics :)

Here's the duct liner I got, it'll go inside the main hvac trunks.

picture.php


Here's the cable I'm running for power. It's 50' 10/3 AC. It says 40 amps, but 10ga should only be 30 I think - which is way more than this little room would ever need. Cable was like $93, 10/3 50' NM was about $80 so I think the AC was a good deal.

picture.php


Running it over the wall into the next room.

picture.php


The panel.

picture.php
 

budderfly

Active member
Made some blocking to attach the wall to.

picture.php


Had to make a cutout for a water line tap, the tap goes to a whole house humidifier but that doesn't work anyway. It will still be accessible anyway.

picture.php


picture.php


Here's the finished frame with the middle stud in the doorway; I'm leaving it out while I build - it'll go in at the end but be easily removable if I need to get something large in or out.

picture.php


And here's the wall with the cement board and drywall up.


picture.php
 

overbudjet

Active member
Veteran
I.M.H.O. for your door stick with your's magnet as backup(powerfailure)and add 2 electro magnet(security mode) control them (unlock door)from any place in your home.Electromagnet is also fail safe all you have to do is cuting power to get in!And if you are very concern about LEO place kill switch for main power up in stairway
 
Last edited:

budderfly

Active member
I.M.H.O. for your door stick with your's magnet as backup(powerfailure)and add 2 electro magnet(security mode) control them (unlock door)from any place in your home.Electromagnet is also fail safe all you have to do is cuting power to get in!And if you are very concern about LEO place kill switch for main power up in stairway
https://www.icmag.com/ic/picture.php?albumid=12297&pictureid=421843View Image


I assume that's an electromagnet in your pic?

Can you link me to a site that sells them? I can google it of course but if you're familiar with a good site I'd be happy to know.

I thought of electromagnets to unlock the latch, but I admit I hadn't considered using them as the lock. Suppose the 24/7 power wouldn't really be much compared to what it's locking up. ;)
 
Top