you could use relays so the switch kills both driver power supply wires. one thing would also be nice is PWM dimming. most cheap microcontrollers can do it if paired with the right transistor depending on the power that is being switched.
btw, if they are used on a timer, they can still be left on (very dimm) or pulsing, cause the timer will only kill one wire, and certain plugs can be put in the timer receptacle either way (like EU plugs), so depending on how the user plugs the panel in the timer and the timer in the main plug.. it can certainly happen.
you need to use at least a switch that has 2 separate circuits and they are both off when switch is in off position, this would be the simplest fix, without using any extra electronic components.

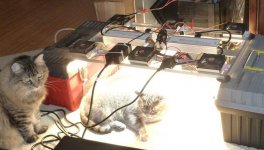
") It'll all get mounted though, actually got some acrylic ordered last night through an online company that can laser cut sizes much better than what I can do. We'll see how this all works but at this point just happy to see things light up.
It'll all get mounted though, actually got some acrylic ordered last night through an online company that can laser cut sizes much better than what I can do. We'll see how this all works but at this point just happy to see things light up.
 . Now to troubleshoot the other driver/COBs.