What's new
  • ICMag with help from Landrace Warden and The Vault is running a NEW contest in November! You can check it here. Prizes are seeds & forum premium access. Come join in!

does anyone here use an auto feeder system

Craven_au

Active member
Unless they've changed designs since mine (my single pot systems are square & black, not round and green) the covers don't hold the valves down, on mine there are vertical tabs on the bases that the valves press down onto.
Setting something on top of the smartvalves is tricky - there's very little room & it's tough to stay out of the way of the upper float and arm. The best thing I came up with was epoxying some heavy bolts standing straight up in the middle and a couple nuts on the other available spots. That worked fine although both bolts eventually fell off - epoxy's problem. I found that for me there's just more that I like about the complete set-up verses any of my different pot & tray trials: Most importantly it's a tight design leaving little room for excess liquid - this means the cycles are quicker than they would be if there was a large tray. Tight also means evaporation is minimized, no light gets to the nute mix, also there's that channel on the tray that ensures a period of no standing liquid on the bottom of the pot each cycle & probably a few other things I'm not thinking of right now. But if someone did want to use the valves in their own tray it's definitely do-able, just a little tricky & there's more to think about than first apears.

sounds like u have copies not the original autopot
can u show a pic of the valve plz.
 

dodo5678

Member
Unless they've changed designs since mine (my single pot systems are square & black, not round and green) the covers don't hold the valves down, on mine there are vertical tabs on the bases that the valves press down onto.
Setting something on top of the smartvalves is tricky - there's very little room & it's tough to stay out of the way of the upper float and arm. The best thing I came up with was epoxying some heavy bolts standing straight up in the middle and a couple nuts on the other available spots. That worked fine although both bolts eventually fell off - epoxy's problem. I found that for me there's just more that I like about the complete set-up verses any of my different pot & tray trials: Most importantly it's a tight design leaving little room for excess liquid - this means the cycles are quicker than they would be if there was a large tray. Tight also means evaporation is minimized, no light gets to the nute mix, also there's that channel on the tray that ensures a period of no standing liquid on the bottom of the pot each cycle & probably a few other things I'm not thinking of right now. But if someone did want to use the valves in their own tray it's definitely do-able, just a little tricky & there's more to think about than first apears.


well i'm not sure if i have a knock off or not. i purchased my set from futuregarden, but on the AU site that has been posted here makes it sound like i got the knock off if i purchased it from futuregarden?

anyhoo, i got my air stone thingie mounted with the hot glue and have to say i'm rather delighted. you can see in the pictures how i have it mounted. the bubble tubes i picked up from the pet store seem to be made out of some sort of fiber material so i was able to cut them to size and have some of the tube left over for the next run. I also included a picture of the autopot cover... maybe someone can tell me if that looks like a knock off? i really wish i supported the real inventor.

anyway, the hot glue seems to work awesome and holds really well. I know 'cause i had to pull one of the filters off. I was also able to pick the glue off the components after it cooled for re-mount. I think this is a better solution to something like epoxy cause you get a better bond since epoxy turns brittle after it cures. the bolts sounded like a good idea, but i may be worried about rust, then again plants need iron right? hehe

Air Stone
picture.php


Cover
picture.php


Cheers,
-dodo :joint:
 
Last edited:

mayorofthdesert

Active member
^^Your pics aren't showing up, I'd love to see them though. I think the difference between our autopots might be due to overseas trade/patent issues. They appear identical in operation, but different looks/shape. My whole units are by a company called "Easy2Grow." But I also have some individual valves purchased elsewhere that appear different but function identical. here's a pic of the undividual valves that I epoxied the nuts & bolts to:
picture.php


Below is the best pic I have handy of one my whole units, although Inmstead of the unit's pot I have several small containers sitting in it. The valves in these units are all black and more square than the above blue one:
picture.php
 

dodo5678

Member
^^Your pics aren't showing up, I'd love to see them though. I think the difference between our autopots might be due to overseas trade/patent issues. They appear identical in operation, but different looks/shape. My whole units are by a company called "Easy2Grow." But I also have some individual valves purchased elsewhere that appear different but function identical. here's a pic of the undividual valves that I epoxied the nuts & bolts to:
picture.php


Below is the best pic I have handy of one my whole units, although Inmstead of the unit's pot I have several small containers sitting in it. The valves in these units are all black and more square than the above blue one:
picture.php

Wow, that's a bummer. Hopefully you can see them now? Yeah- i saw that company when i was looking a replacement reservoirs for my setup. i was actually thinking that you glued the bolts to the tray then fastened the valve to the bolts. silly me, those are some killer bolts!

i still think you can run a bead of hot glue down on the side on a couple corners and that'll keep it in place. i'm actually going to try the hot glue on a valve in a tray in my nursery with a second strain i have going as i'm getting tired of hand watering all the time. Here is another picture that I hope will show up of the girls i just transplanted and the others from the nursery that i will put back when i get the ScROG going for the 4 in the autopots:


-dodo :joint:
 

dodo5678

Member
dodo u don't have knock off u have the same i do from Jim him self.

Very cool. Glad I could support him. I'm gonna try to throw together a watering tray using the smart-valve tonight. If everything goes well i'll post some pictures for you all to see.

Have a good one,
-dodo :joint:
 

Craven_au

Active member
Very cool. Glad I could support him. I'm gonna try to throw together a watering tray using the smart-valve tonight. If everything goes well i'll post some pictures for you all to see.

Have a good one,
-dodo :joint:

Try to fill up as much space as possible in the tray so you get faster wet an dry cycles u can fill any unused space in the tray with aquarium stones.
 

mayorofthdesert

Active member
dodo, do you think you're getting much benefit from airating the water in the tray? My one previous grow was a wick set up & I kept an aistone going in the tray/resevoir. This time around I've been going back & forth trying to decide if I should airate my resevoirs and/or trays. One thing I like about the autopot cycles+coco/perlite mix is that there should have a lot of air available to the roots without actively aerating the solution. Eventually I might do a side by side with two clones unless someone else has done such a thing already or has used the autopot system with & without air enough to make up their mind whether it gives as much benefit as it does with some other watering methods. Also thanks for the hot glue suggestion - I'll use it if I decide to do something with my extra valves again. First time I've had the epoxy stick stuff not hold onto something... I've been using it at work for years.
 

haze_daze

Member
I've grown in Autopots in compost for the last last five years and have tried various nutrients, but the best is easily Flairform's Green Dream.

It's soluble and uses 'slurry technology' so it dissolves instantly into the water. It really is excellent stuff, I cannot praise it enough. No need for air stones to keep the nutes mixed. Also there's no blockages to the pipes/valve or any deposit in the autopot trays, while It's optimised to be used in hydro, coco or soil.

The bloom is especially good with an NPK of 2-2-6.

It also buffers my PH to 6.1 :)

I even mailed the company before I used it for the first time last year and got a reply from one of their chemists within 15 mins, and he stated that it was ideal for Autopot systems, and so it has proved. I'm on my second grow with the nutes and the plants drink every last drop of it

Flairform is an Australian company and apparently the guy who runs it is a chemist who takes great pride in his work.
 

dodo5678

Member
Smart-valve self watering tray

Smart-valve self watering tray

Alright guys, here's the tray i assembled this weekend. I used the hot glue to fasten the smart-valve down as well as the air tubes. i bought two cloning trays, one for the bottom and one i inverted, cut out squares for the pots and put over the top to help keep light out. looks like i can get a total of 8 pots in there, but only have 5 now, so i covered up the holes i was not using. not sure if the uneven bottom of the tray will effect how the smart-valve works, but i guess we'll find out soon enough.

I was going to put a thin sheet of plastic under the valve (and still can) if is stays too wet. while i was examining how the valve sits on a flat surface, i noticed that there is still some gap between the bottom of the valve and the resting surface. so being that it does not appear at first that the valve needs a flat surface, i thought i'd give it a try.


Try to fill up as much space as possible in the tray so you get faster wet an dry cycles u can fill any unused space in the tray with aquarium stones.

Thanks Craven_au- you must have been watching me work! Didn't read your thread until i was done that night, but after i filled the tray the first time i was thinking i may need a way to displace the amount of water . I didn't think of it as a way to increase the frequency of watering though, but i like it- thanks for that. As you can see in the pics, i have some riverbed rocks in there for now. I was thinking maybe i can find some scraps of marble strips or tile to stack in there for when i get'er filled up with more plants.

-dodo :joint:
 

dodo5678

Member
dodo, do you think you're getting much benefit from airating the water in the tray? My one previous grow was a wick set up & I kept an aistone going in the tray/resevoir. This time around I've been going back & forth trying to decide if I should airate my resevoirs and/or trays. One thing I like about the autopot cycles+coco/perlite mix is that there should have a lot of air available to the roots without actively aerating the solution. Eventually I might do a side by side with two clones unless someone else has done such a thing already or has used the autopot system with & without air enough to make up their mind whether it gives as much benefit as it does with some other watering methods. Also thanks for the hot glue suggestion - I'll use it if I decide to do something with my extra valves again. First time I've had the epoxy stick stuff not hold onto something... I've been using it at work for years.

Hey mayorofthdesert- i'm not really sure how much benefit i'm getting from the bubblers. I was inclined to become a member of IC Mag 'cause there's so much information about coco here and this is my second iteration with it. When i first started looking for autopot grows here, i ran across Johnny Chimpo's D-39 SCROG thread. since i have much of his setup in common, i figured i would give it a go. one of the things he mentioned in his thread was using an aquarium powerhead in the reservoir and bubblers in the trays. because i wanted to mirror his grow as closely as possible i opted for both.

while i agree with you that the normal actions of the autopot in conjunction with the coco and perlite should provide airation to the medium, i figured it couldn't hurt... and I already had an air pump. My other logic behind this decision was that i have a black 1/2" tube that feeds the 1/4" tubes to the autopots, since that hose and the trays sit under the lights with water in them while the lights are on, i'm not sure how much oxygen is depleted from the water while the water warms and while the water waits for the plant to ask for that waiting water. given that, i just figured i would try to keep as much air in the water as I could. it would be cool to see a side by side, if you ever get a chance to do one, please let us know how it turns out. maybe i'll give it a try next time, but i'm still working on getting stuff dialed in and may not have time to do it until next time around.

If someone has some other insight on this, please let us know.

P.S. No worries about the glue, you'll have to let me know what you think if you ever get around to trying it out. I've been really pleased with it's application in the autopot air stone and my little self watering tray so far.

-dodo :joint:
 

dodo5678

Member
Nice cutting job dodo what did u use to cut out them squares for the pots.

Nice thread man D-39 scrog


Thanks a bunch Craven_au. I used a Dremel tool with the flex shaft and a "tuf-grind" cutoff wheel attachment. If you do a google search for "tuf-grind" you will see some pictures. I really like the ones that "House of Balsa" makes. Hands down 100x's better than the ones that dremel make. Even their new ones with the quick change attachment that dremel makes kinda suck. Especially if you are cutting metal. I feel the larger discs give me a little more control when cutting straight lines, but if all you have are the small ones or the ones made by dremel then that should work as it's only plastic. Also i found that it's good to move quick when cutting such thin plastic as i did notice that it started to melt pretty quick if i moved slowly. I also made some slits in the corners of the tray in inverted to help it fit better in the bottom tray. I'll try to post some pics of that later when the lights come back on.

Yeah man that D-39 ScrOG was pretty bad ass, i can't believe he almost yielded a pound off of 2 plants, i was almost in disbelief until i started reading more on ScrOG techniques. I just installed my screen and have about a week to go before i switch to flower. I'll try to post some pics as things progress, i'm still trying to get a good feel for my autopots and coco.

-dodo :joint:
 

autopotking

Member
Mod to flush Autopots without moving the pots

Mod to flush Autopots without moving the pots

more pics next as i dont know how to post in order with text
 

Attachments

  • IMG_0353.jpg
    IMG_0353.jpg
    40.4 KB · Views: 25
  • IMG_0356.jpg
    IMG_0356.jpg
    21.1 KB · Views: 37
  • IMG_0355.jpg
    IMG_0355.jpg
    40.9 KB · Views: 25
  • IMG_0357.jpg
    IMG_0357.jpg
    31.5 KB · Views: 26

autopotking

Member
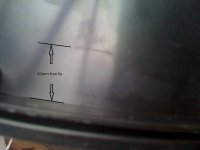
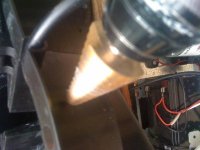
Now you just need to throw some 13mm hose to waste and you can now flush with out moving the pots, plants or tub
 

Attachments

  • IMG_0357.jpg
    IMG_0357.jpg
    31.5 KB · Views: 27
  • IMG_0358.jpg
    IMG_0358.jpg
    40.2 KB · Views: 26
  • IMG_0359.jpg
    IMG_0359.jpg
    50.1 KB · Views: 26

autopotking

Member
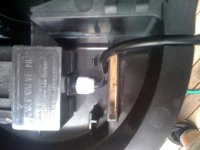
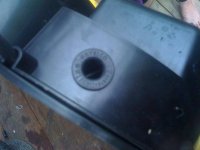
i hope the pics do the job if you need any info just ask BTW you need to silicone up the overflow slots otherwise water all over your grow room.
 

mayorofthdesert

Active member
I was getting overflow everywhere until I realized what was happening - I was removing the pots from the trays in order to tend to the plants. If the water level was anything less than half full, removing the pot would drop the level enough to open the valve. Valve would fill the tray up without the pot in it & when I'd set the pot back it would then raise the water level above my overflows & soak my cabinet.
 

dodo5678

Member
i hope the pics do the job if you need any info just ask BTW you need to silicone up the overflow slots otherwise water all over your grow room.

Very nice autopotking. I never thought of putting in some sort of tube to drain out excess water for flushing. I'll have to check my double pot setup to see if i can install something like that. May need to wait until the next run to lift the trays up a little so i can drain into a bucket since my pots sit close to the ground and i've got my screen installed and ready for the ScrOG.

-dodo :joint:
 

mayorofthdesert

Active member
To drain mine I just do it syphon style, it's easy enough. Even though I haven't had any problem with my resevoirs' grommets and hoses I didn't want to add extra holes below the water line that could be a place for a leak in the future.
 

Latest posts

Latest posts

Top