What's new
  • As of today ICMag has his own Discord server. In this Discord server you can chat, talk with eachother, listen to music, share stories and pictures...and much more. Join now and let's grow together! Join ICMag Discord here! More details in this thread here: here.

DIY Organic Potting Mix's for Grass - Ace Spicoli

acespicoli

Well-known member

Homemade Potting Media​


Many cost conscious home gardeners and do-it-yourselfers are often looking for cheaper ways of growing plants for home and garden use. One way to achieve this may be by making homemade potting media.
Save for later Print
  • Share

Updated:
March 14, 2023

Skip to the end of the images gallery

Skip to the beginning of the images gallery


Many cost-conscious home gardeners and do-it-yourselfers are often looking for cheaper ways of growing plants for home and garden use. One way to achieve this may be by making homemade potting media rather than purchasing pre-made materials at garden centers and home supply stores. Although purchasing the base ingredients and developing your own mix may not result in a cheaper mix, it does offer the opportunity to be creative and to modify mixes for specific goals or plants that you feel would make a media better for your situation. The following information will provide you with a basic understanding of potting media ingredients and steps for making homemade media from scratch.
Potting media, which has a coarser texture than garden soil, is commonly used in container gardens and in trays for sowing seeds. Ingredients recommended for potting media have changed over the years as research conducted by professional horticulturists has identified components that are beneficial for sowing seeds and plant growth. Before the mid-1900s, soil-based potting media was commonly used; however, peat-based soilless mixes have become more popular in recent years. Many ingredients are now available to gardeners who choose to create homemade potting media instead of buying one from a retailer.

Media Ingredients​

Either soil-based or peat-based potting media can be made at home by combining individual ingredients.
Recipes given here are measured in gallons for primary ingredients and in teaspoons and tablespoons or ounces and grams for smaller ingredients. Primary ingredients used for both soil-based and peat-based media are discussed below.
  • Sphagnum peat moss has a coarse texture and contributes to good aeration yet provides the water-holding capacity to prevent soil from drying too quickly. However, adding too much sphagnum peat can restrict soil drainage by holding too much water. Sphagnum peat moss can be difficult to wet and should be moistened prior to mixing in other ingredients. Sphagnum peat moss is a limited resource that can be replaced with compost if so desired.
  • Coarse, sharp, or builder sand, often used in construction, is a primary ingredient in potting media. Like peat moss, sand improves drainage and aeration, but does not improve water-holding capacity. Too much sand will make containers too heavy to move. Sand should not be mixed with a clay-based soil.
  • Perlite can be used in both peat-based and soil-based potting media in place of sand. Perlite is expanded volcanic rock manufactured when heated to 1,800°F. Like sand, perlite provides great drainage, but is lighter in weight and holds more air. Although more expensive than sand, the advantages may outweigh the additional cost. Disadvantages of perlite include: 1) a tendency to float to the top of the medium when watered; 2) an inability to hold or retain water; and 3) a need to be moistened before it is mixed into other ingredients to reduce dust, which is harmful if inhaled.
  • Vermiculite is often used instead of perlite. Vermiculite is clay belonging to the mica family and is naturally found in laminated flakes. It expands when folds of vermiculite can hold water, nutrients, and air, unlike perlite. Only horticultural grades, sold at garden centers, are recommended. Vermiculite can easily compact, which reduces its ability to hold water and air.

Making Soil-based Potting Media​

The following is a basic recipe for soil-based potting media. In this recipe, garden loam soil, coarse construction sand, and sphagnum peat moss are combined together in equal parts by volume:
  1. Start with one gallon of sterilized loam soil, commonly called garden soil and sold at garden centers, and pour it into a clean, empty bushel basket. Sterilized loam soil is worth the cost to avoid disease, insect, and weed problems that may exist in unsterilized soil. Soil taken directly from the garden may be contaminated with these pests, causing possible future problems such as dead, deformed, or stunted seedlings. Weeds in garden soil generally grow vigorously and crowd out desired seedlings by competing for nutrients, water, air, and light.
  2. Add one gallon of moist, coarse sphagnum peat moss, followed by one gallon of coarse sand, perlite, or vermiculite.
  3. Adjust the texture of the medium to create a loose, well-drained mixture. Sand feels gritty and clay feels sticky. If the potting soil feels too sandy, more peat moss should be added. If the potting soil feels too sticky, extra sand and peat moss should be added. Adjust the texture by adding small portions of sand and/or peat moss until you are satisfied with the texture.

Making Soilless or Peat-based Potting Media​

Soilless mixes or peat-based potting media do not contain any soil, but generally consist of peat moss combined with horticultural grades of vermiculite and/ or perlite and added fertilizer. Peat-based media are useful for seed germination because they are relatively sterile, light in texture and weight, and uniform. The light texture enables seeds to readily germinate and emerge, allows tender roots to grow, and makes transplanting seedlings easier.
In general, standard media recipes are created based on the types of plants being grown (ex. bedding plants, potted plants, or for seed germination). A standard recipe for a homemade soilless mix consists of half sphagnum peat moss and half perlite or vermiculite. To mix ½ bushel basket or four gallons of media:
  1. Start by pouring two gallons of peat moss into the bushel basket.
  2. Add two gallons of either perlite or vermiculite and mix thoroughly.
  3. Moisten the mix before using it in pots or flats.

Adding Ground Limestone and Fertilizer to Soil and Soilless Potting Media​

Small amounts of ground limestone and fertilizer will need to be added to the media. These ingredients can be blended together in a separate container and then added to the bushel basket. Fertilizer will supply nutrients; however, the correct media pH must be maintained so these nutrients can be available for plant roots to absorb. The range in which all nutrients are available to most plants is between 6.0 (slightly acidic) and 7.0.
Based on the length of time plants will be held in containers, it may or may not be necessary to add supplemental fertilizers to soil-based media. Clay or mineral content in garden soil provides cation exchange capacity (CEC) for nutrient retention and water-holding capabilities. Therefore, soil-based media generally provides enough fertility compared to soilless media. When making soil-based mixes, the pH will need to be adjusted according to soil test results. Soil test kits are available for purchase from your county extension office or garden center. (Refer to the website to contact your local county extension office.)
Although soil-based potting media may not initially require fertilizer in the mix, additional nutrients are usually helpful for plants that will remain in the same container for several years. A slow-release complete fertilizer (e.g., Osmocote) can be added to both soil-based and soilless potting media at rates recommended on the fertilizer label. Slow-release fertilizers will assure that nutrients are available for your plants through the coming months.
Whether soil-based or peat-based, media often has a pH that is too low (generally below 6.0) and should be adjusted. Adding ground calcitic limestone or agricultural lime raises media pH and contains calcium, which strengthens cell walls. Dolomitic limestone, sometimes used instead of calcitic limestone, also raises media pH and supplies magnesium as well as calcium. Four level tablespoons of limestone (about 2 ounces or 57 grams) can be added to the bushel basket. Soilless or peat-based media often require the pH to be adjusted upward (to between 6.0 and 7.0) and buffering to prevent rapid drops in pH while the plant is growing. One way to do this is to apply an alkaline fertilizer. Two teaspoons (about ½ ounce or 14.2 grams) of potassium nitrate (15-0-15) and the same quantity of calcium nitrate (15.5-0-0) can be added to supply nitrogen and potassium. To supply phosphorus, 2 level tablespoons (about an ounce or 28.4 grams) of 20% superphosphate (0-20-0) should be added. Alternatively, a slow-release fertilizer and limestone will achieve the same effect.
After fertilizer and limestone are combined and blended with the primary ingredients, the media should be sifted through a piece of ½-inch wire mesh screen called hardware cloth to break any large clumps into fine pieces. Media used to germinate seeds should be sifted through a ¼ inch hardware cloth to a finer texture. Lastly, don't forget to moisten the media before sowing or planting begins. After the media has been mixed, the excess media should be stored in a watertight container such as a plastic trashcan.
Now that you have a better knowledge of the basic components and a recipe for making homemade media, you can adjust and change your mix as you see fit for your needs and situations. Keep in mind that not all bulk materials are created equal. If you choose to use a locally available source of compost or other alternative materials in your mix, you should then be aware of their nutrient contents and cleanliness. Both factors will affect the success of your plants, and experimenting may result in media you consider better than commercially available media, or it may result in poor plant health and death. As the mixer and designer, you are also the one responsible for the results. Good luck and good planting.
Prepared by, Kathleen M. Kelley, assistant professor of consumer horticulture, James C. Sellmer, associate professor of ornamental horticulture, and Phyllis Lamont, former consumer horticulture center library coordinator


Remember put two inches of builder sand as the fungus gnat cap layer on top to prevent those nasty vermin
;)

There use to be online, maybe it still exists a extension office with amazin old organix mix recipes
if anyone find such please remember to share it here :huggg:
 
Last edited:

acespicoli

Well-known member

Calculating Cation Exchange Capacity, Base Saturation, and Calcium Saturation​

Steve Culman, Meredith Mann, and Cassandra Brown
The purpose of this fact sheet is to define soil cation exchange capacity, base saturation and calcium saturation, and demonstrate how these values are calculated in soil test reports.

Cation Exchange Capacity (CEC)​

Cation exchange capacity (CEC) is a fundamental soil property used to predict plant nutrient availability and retention in the soil. It is the potential of available nutrient supply, not a direct measurement of available nutrients. Soil CEC typically increases as clay content and organic matter increase because cation exchange occurs on surfaces of clay minerals, organic matter, and roots. Soils in Ohio can encompass a wide CEC range, but typically fall somewhere between 5 to 25 meq/100 g soil (Table 1). Values over 25 meq/100 g soil are found with heavy clay soils, organic, or muck soils.
Table 1. The relationship between soil texture and CEC
Soil TextureTypical CEC (meq/100 g soil)
Sands3-5
Loams10-15
Silt loams15-25
Clay and clay loams20-50
Organic soils50-100


Cation exchange capacity is defined as a soil’s total quantity of negative surface charges. It is measured commonly in commercial soil testing labs by summing cations (positively charged ions that are attracted to the negative surface charges in soil). Exchangeable cations include base cations, calcium (Ca2+), magnesium (Mg2+), potassium (K+) and sodium (Na+), as well as acid cations such as hydrogen (H+), aluminum (Al3+) and ammonium (NH4+).
CEC = Base cations + Acid cations
(Ca2+ + Mg2+ + K+ + Na+) + (H+ + Al3+ + NH4+)
Figure 1 illustrates a low CEC soil, with a small number of negative charges and associated cations (left) and a high CEC soil with a larger amount of negative charges, occupied by a greater number of total cations (right).

Figure 1. Soils with different CEC values.

Base Saturation​

Base saturation is calculated as the percentage of CEC occupied by base cations. Figure 2 shows two soils with the same CEC, but the soil on the right has more base cations (in blue). Therefore, it has a higher base saturation. Base saturation is closely related to pH; as base saturation increases, pH increases.
Base Saturation (%) = (Base cations/CEC) x 100" role="presentation">x 100
Similarly, we can calculate the base saturation for each individual base cation. Calcium base saturation is calculated as the percentage of CEC occupied by calcium cations. In Figure 2, the soil on the right has twice as many calcium cations (Ca2+), thus a higher calcium saturation.

Calcium Saturation (%) = (Calcium cations/CEC) x 100" role="presentation">x 100

Illustration shows low base saturation on the left with a twice the calcium cations as the high base saturation on the right.

Figure 2. Soil with differences in base saturation.

Calculating CEC from a Soil Test​

CEC is reported as milliequivalents per 100 grams of soil (meq/100g), or charge per weight of soil. Milliequivalents are used instead of weight because charge is more useful when talking about ion exchange.

So, how do we take the concentration of nutrients in a soil test (ppm) and convert to charges (meq/100g soil)? Soil testing laboratories often provide these values already on the soil test report, or will provide them upon request. However, to gain a better understanding of the relationships, the steps to perform these calculations are outlined below.

Step 1: Determine the gram equivalent weight of each base cation. Each base cation has an atomic weight and valence number (charge) in the periodic table of elements. Figure 3 shows the base cations. For calcium, the atomic weight is ~40 grams per mole and the charge is 2. We divide each atomic weight (40) by the charge (2) to calculate the gram equivalent weight (20). The value for each base cation is outlined in Table 2.

 Periodic table of basic cations (clockwise starting at top left): sodium, magnesium, potassium and calcium.

Figure 3. Basic cations from the periodic table.

Step 2. Convert gram equivalent weight into charge per weight of soil (meq/100g soil).

equivalent×1000 milliequivalent1 equivalent×1100 g soil=10 meq g soil" role="presentation">equivalent×1000 milliequivalent1 equivalent×1100 g soil=10 meq g soil
Step 3. Multiply the gram equivalent weight by 10 to convert to meq/100g of soil. Again, for calcium, the gram equivalent weight of 20 grams multiplied by 10 gives us 200 meq/100 g soil. This meq/100g soil value is used as a conversion factor for the nutrient concentration values (ppm) received in a soil test. The bolded values in the last column in Table 2 can be used as a conversion factor each time and will not change.

Table 2. The meq/100g soil constants for the base cations Ca, Mg, K, and Na.
Base CationAtomic WeightCharge (Valence)Gram Equivalent Weight (g)Milliequivalent/ 100 g soil
Calcium (Ca)40220200
Magnesium (Mg)24212120
Potassium (K)39139390
Sodium (Na)23123230

Step 4. Convert soil test nutrient concentration to charge. Table 3 provides an example of typical soil test levels in Ohio (in ppm). We can calculate the collective charge each cation occupies on the exchange sites by taking the values calculated in Table 2 (last column) and dividing them by the soil test levels. For calcium, a soil test level of 2000 ppm, divided by 200 equals 10.0 meq/100 g soil. This is done for each cation individually.

Step 5. Calculate collective charge from base cations. Next, we add up the charges of each base cation. For this example, the sum of base cations equals 12.4 meq/100g soil (Table 3).

Step 6. Calculate exchangeable acidity, using the buffer pH with the empirically derived conversion equation (Table 3). If the soil has a pH greater than 7.0, you essentially have no exchangeable acidity and CEC is just the sum of base cations. A soil with a buffer pH of 6.6 indicates that acidic cations occupy 4.8 meq per 100 grams of soil.

Table 3. Conversion of soil test values (ppm) to meq/100 g soil for base and acid cations to determine CEC.
Base CationSoil test level (ppm)Milliequivalent/ 100 g soilmeq/100 g soil
Calcium (Ca2+)200020010.0
Magnesium (Mg2+)2401202.0
Potassium (K+)1003900.26
Sodium (Na+)202300.09
Subtotal12.4

Acid CationBuffer pHConversion Equationmeq/ 100 g soil
Exchangeable acidity (H+, Al3+, NH4+)6.612 x (7.0 – 6.6)4.8
*If soil test values are in pound per acre, then first convert pound per acre to ppm by dividing soil test values by 2.
**If buffer pH is 7 or above, then you have no exchangeable acidity (CEC = sum of base cations).

Step 7. Calculate CEC by adding the base cations and acid cations:

Cation exchange capacity (CEC) = Base cations + Acid cations

=12.4 + 4.8" role="presentation">=12.4 + 4.8
= 17.2 meq/100 g

With CEC, we can calculate the following (multiplying by 100 to get a percentage):

Base Saturation (%) = (Base cations/CEC) x 100" role="presentation">x 100

= (12.4/17.2) x 100" role="presentation">x 100

= 72%

Calcium Saturation (%) = (Calcium cations/CEC) x 100" role="presentation">x 100

= (10/17.2) x 100" role="presentation">x 100

= 58%

Magnesium Saturation (%) = (Magnesium cations/CEC) x 100" role="presentation">x 100

= (2.0/17.2) x 100" role="presentation">x 100

= 12%

Summary​

Cation exchange capacity and base saturation are important soil measurements that help determine how a soil is managed and fertilized. While standard soil testing laboratories commonly calculate and report these values in soil test reports, it is helpful to have a solid understanding of CEC and base saturation calculations.

References​

Barker, D., et al. Ohio Agronomy Guide, 15th Edition. (2017). Ohio State University Extension Bulletin 472. agcrops.osu.edu/publications/ohio-agronomy-guide-15th-edition-bulletin-472
LaBarge, G. and Lindsey, L. (2012). Interpreting a Soil Test Report. Ohio State University Extension AGF-514. ohioline.osu.edu/factsheet/agf-0514
Havlin, J., et al. Soil Fertility and Fertilizers, 8th Edition. 2013. Pearson, New Jersey. ISBN 13: 9780135033739
Reganold and Harsh. (1985). Expressing cation exchange capacity in milliequivalents per 100 grams and in SI units. Journal of Agronomic Education 14(2): 84–90.
Topics:
Ag Crops and Livestock
Energy and Environment
Farm Management
Tags:
cation exchange capacity
soil fertility
calculating cation exchange capacity
base saturation
calcium saturation
Program Area(s):
Environment and Natural Resources

Originally posted Aug 22, 2019.

 
Last edited:

Creeperpark

Well-known member
Mentor
Veteran

Calculating Cation Exchange Capacity, Base Saturation, and Calcium Saturation​

Steve Culman, Meredith Mann, and Cassandra Brown
The purpose of this fact sheet is to define soil cation exchange capacity, base saturation and calcium saturation, and demonstrate how these values are calculated in soil test reports.

Cation Exchange Capacity (CEC)​

Cation exchange capacity (CEC) is a fundamental soil property used to predict plant nutrient availability and retention in the soil. It is the potential of available nutrient supply, not a direct measurement of available nutrients. Soil CEC typically increases as clay content and organic matter increase because cation exchange occurs on surfaces of clay minerals, organic matter, and roots. Soils in Ohio can encompass a wide CEC range, but typically fall somewhere between 5 to 25 meq/100 g soil (Table 1). Values over 25 meq/100 g soil are found with heavy clay soils, organic, or muck soils.
Table 1. The relationship between soil texture and CEC
Soil TextureTypical CEC (meq/100 g soil)
Sands3-5
Loams10-15
Silt loams15-25
Clay and clay loams20-50
Organic soils50-100


Cation exchange capacity is defined as a soil’s total quantity of negative surface charges. It is measured commonly in commercial soil testing labs by summing cations (positively charged ions that are attracted to the negative surface charges in soil). Exchangeable cations include base cations, calcium (Ca2+), magnesium (Mg2+), potassium (K+) and sodium (Na+), as well as acid cations such as hydrogen (H+), aluminum (Al3+) and ammonium (NH4+).
CEC = Base cations + Acid cations
(Ca2+ + Mg2+ + K+ + Na+) + (H+ + Al3+ + NH4+)
Figure 1 illustrates a low CEC soil, with a small number of negative charges and associated cations (left) and a high CEC soil with a larger amount of negative charges, occupied by a greater number of total cations (right).

Figure 1. Soils with different CEC values.

Base Saturation​

Base saturation is calculated as the percentage of CEC occupied by base cations. Figure 2 shows two soils with the same CEC, but the soil on the right has more base cations (in blue). Therefore, it has a higher base saturation. Base saturation is closely related to pH; as base saturation increases, pH increases.
Base Saturation (%) = (Base cations/CEC) x 100" role="presentation">x 100
Similarly, we can calculate the base saturation for each individual base cation. Calcium base saturation is calculated as the percentage of CEC occupied by calcium cations. In Figure 2, the soil on the right has twice as many calcium cations (Ca2+), thus a higher calcium saturation.

Calcium Saturation (%) = (Calcium cations/CEC) x 100" role="presentation">x 100

Illustration shows low base saturation on the left with a twice the calcium cations as the high base saturation on the right.

Figure 2. Soil with differences in base saturation.

Calculating CEC from a Soil Test​

CEC is reported as milliequivalents per 100 grams of soil (meq/100g), or charge per weight of soil. Milliequivalents are used instead of weight because charge is more useful when talking about ion exchange.

So, how do we take the concentration of nutrients in a soil test (ppm) and convert to charges (meq/100g soil)? Soil testing laboratories often provide these values already on the soil test report, or will provide them upon request. However, to gain a better understanding of the relationships, the steps to perform these calculations are outlined below.

Step 1: Determine the gram equivalent weight of each base cation. Each base cation has an atomic weight and valence number (charge) in the periodic table of elements. Figure 3 shows the base cations. For calcium, the atomic weight is ~40 grams per mole and the charge is 2. We divide each atomic weight (40) by the charge (2) to calculate the gram equivalent weight (20). The value for each base cation is outlined in Table 2.

 Periodic table of basic cations (clockwise starting at top left): sodium, magnesium, potassium and calcium.

Figure 3. Basic cations from the periodic table.

Step 2. Convert gram equivalent weight into charge per weight of soil (meq/100g soil).

equivalent×1000 milliequivalent1 equivalent×1100 g soil=10 meq g soil" role="presentation">equivalent×1000 milliequivalent1 equivalent×1100 g soil=10 meq g soil
Step 3. Multiply the gram equivalent weight by 10 to convert to meq/100g of soil. Again, for calcium, the gram equivalent weight of 20 grams multiplied by 10 gives us 200 meq/100 g soil. This meq/100g soil value is used as a conversion factor for the nutrient concentration values (ppm) received in a soil test. The bolded values in the last column in Table 2 can be used as a conversion factor each time and will not change.

Table 2. The meq/100g soil constants for the base cations Ca, Mg, K, and Na.
Base CationAtomic WeightCharge (Valence)Gram Equivalent Weight (g)Milliequivalent/ 100 g soil
Calcium (Ca)40220200
Magnesium (Mg)24212120
Potassium (K)39139390
Sodium (Na)23123230

Step 4. Convert soil test nutrient concentration to charge. Table 3 provides an example of typical soil test levels in Ohio (in ppm). We can calculate the collective charge each cation occupies on the exchange sites by taking the values calculated in Table 2 (last column) and dividing them by the soil test levels. For calcium, a soil test level of 2000 ppm, divided by 200 equals 10.0 meq/100 g soil. This is done for each cation individually.

Step 5. Calculate collective charge from base cations. Next, we add up the charges of each base cation. For this example, the sum of base cations equals 12.4 meq/100g soil (Table 3).

Step 6. Calculate exchangeable acidity, using the buffer pH with the empirically derived conversion equation (Table 3). If the soil has a pH greater than 7.0, you essentially have no exchangeable acidity and CEC is just the sum of base cations. A soil with a buffer pH of 6.6 indicates that acidic cations occupy 4.8 meq per 100 grams of soil.

Table 3. Conversion of soil test values (ppm) to meq/100 g soil for base and acid cations to determine CEC.
Base CationSoil test level (ppm)Milliequivalent/ 100 g soilmeq/100 g soil
Calcium (Ca2+)200020010.0
Magnesium (Mg2+)2401202.0
Potassium (K+)1003900.26
Sodium (Na+)202300.09
Subtotal12.4

Acid CationBuffer pHConversion Equationmeq/ 100 g soil
Exchangeable acidity (H+, Al3+, NH4+)6.612 x (7.0 – 6.6)4.8
*If soil test values are in pound per acre, then first convert pound per acre to ppm by dividing soil test values by 2.
**If buffer pH is 7 or above, then you have no exchangeable acidity (CEC = sum of base cations).

Step 7. Calculate CEC by adding the base cations and acid cations:

Cation exchange capacity (CEC) = Base cations + Acid cations

=12.4 + 4.8" role="presentation">=12.4 + 4.8
= 17.2 meq/100 g

With CEC, we can calculate the following (multiplying by 100 to get a percentage):

Base Saturation (%) = (Base cations/CEC) x 100" role="presentation">x 100

= (12.4/17.2) x 100" role="presentation">x 100

= 72%

Calcium Saturation (%) = (Calcium cations/CEC) x 100" role="presentation">x 100

= (10/17.2) x 100" role="presentation">x 100

= 58%

Magnesium Saturation (%) = (Magnesium cations/CEC) x 100" role="presentation">x 100

= (2.0/17.2) x 100" role="presentation">x 100

= 12%

Summary​

Cation exchange capacity and base saturation are important soil measurements that help determine how a soil is managed and fertilized. While standard soil testing laboratories commonly calculate and report these values in soil test reports, it is helpful to have a solid understanding of CEC and base saturation calculations.

References​

Barker, D., et al. Ohio Agronomy Guide, 15th Edition. (2017). Ohio State University Extension Bulletin 472. agcrops.osu.edu/publications/ohio-agronomy-guide-15th-edition-bulletin-472
LaBarge, G. and Lindsey, L. (2012). Interpreting a Soil Test Report. Ohio State University Extension AGF-514. ohioline.osu.edu/factsheet/agf-0514
Havlin, J., et al. Soil Fertility and Fertilizers, 8th Edition. 2013. Pearson, New Jersey. ISBN 13: 9780135033739
Reganold and Harsh. (1985). Expressing cation exchange capacity in milliequivalents per 100 grams and in SI units. Journal of Agronomic Education 14(2): 84–90.
Topics:
Ag Crops and Livestock
Energy and Environment
Farm Management
Tags:
cation exchange capacity
soil fertility
calculating cation exchange capacity
base saturation
calcium saturation
Program Area(s):
Environment and Natural Resources

Originally posted Aug 22, 2019.

Thanks very interesting. I've been boosting CEC for years using organics placed in soil-less substrates.
 

pipeline

Cannabotanist
ICMag Donor
Veteran
Cottonseed meal works very well for cannabis. Its all slow release N, but it has P and K as well. Used Chicken manure at planting and top dressed after about 6 weeks of growth along with cottonseed meal. Cottonseed meal was top dressed another couple times monthly up to mid Aug.

full


October 2, 2023


44Cottonseed Meal6.62 - 31 - 2


acespicoli

Well-known member
1705113086004.png

Drug type cultivated Hemp type hollow stem for fiber
Cannabis is an annual, dioecious, flowering herb.


Definition​

In botany, the term herb refers to a herbaceous plant,[6] defined as a small, seed-bearing plant without a woody stem in which all aerial parts (i.e. above ground) die back to the ground at the end of each growing season.[7] Usually the term refers to perennials,[6] although herbaceous plants can also be annuals (plants that die at the end of the growing season and grow back from seed next year),[8] or biennials.[6] This term is in contrast to shrubs and trees which possess a woody stem.[7] Shrubs and trees are also defined in terms of size, where shrubs are less than ten meters tall, and trees may grow over ten meters.[7] The word herbaceous is derived from Latin herbāceus meaning "grassy", from herba "grass, herb".[9]

Another sense of the term herb can refer to a much larger range of plants,[10] with culinary, therapeutic or other uses.[6] For example, some of the most commonly described herbs such as sage, rosemary and lavender would be excluded from the botanical definition of an herb as they do not die down each year, and they possess woody stems.[8] In the wider sense, herbs may be herbaceous perennials but also trees,[10]
 
Last edited:

acespicoli

Well-known member

Potting Media and Plant Propagation​


Updated:
August 28, 2012


Potting Media and Plant Propagation


Skip to the beginning of the images gallery


Potting mixes should support developing seedlings. Most potting mixes are soilless to avoid soilborne diseases and promote good drainage. A mix of peat moss, vermiculite or perlite, and compost or organic fertilizers can provide a suitable environment with sufficient water-holding capacity, nutrient content, and aeration for plant growth and development. However, because organic nutrients are supplied slowly over time, meeting seedling nutrient needs can be difficult.

Commercial Mixes​

Numerous commercial mixes are available for organic growers. Make sure you know what the ingredients are in a commercial mix and check to see if it is listed by the Organic Materials Review Institute (OMRI). It should state "OMRI listed" on the packaging. If not, check the OMRI website to see if it is listed. It is always best to call your certifier to ensure that using the mix will not compromise your certification. Many commercial mixes contain wetting agents to facilitate water absorption by peat moss. Synthetic wetting agents are not allowed under organic production standards.
Depending on the certifier, a producer can also request that the certifier review a specific product/ media. OMRI has not reviewed all products. For example, Pennsylvania Certified Organic (PCO) has an internal materials review and publishes a list of materials that they have reviewed and approved. Members of PCO can request a review of any product free of charge. To prevent delays in your certification, be sure to have material input preapproved by a certifier.

Test Your Mix Before You Use It​

If you are unfamiliar with your mix or have received a new batch, perform a greenhouse soil test. Mixes made with compost can be high in salts, which can inhibit germination. To test your mix, send it to a reputable lab for greenhouse testing. Remember, this is different from a soil test. For example, Penn State's Ag Analytical Services Lab has a "Greenhouse Soilless Media" test that will analyze your media's pH, soluble salt (electrical conductivity), and nutrient content. Media sent in as a soil sample is tested differently and results will not make sense.
Premium potting mixes tested with the saturated paste method recommended for greenhouse media will have a pH between 5.5 and 6.5, soluble salts between 1.5 and 3 mmhos/cm, nitrate nitrogen (NO3) levels between 75 and 150 mg/L, phosphorus (P) levels between 5 and 20 mg/L, potassium (K) between 150 and 300 mg/L, calcium between 100 and 200 mg/L, and magnesium between 50 and 100 mg/L, with sodium contents falling below 160 mg/L (Warncke 1995).
Consider pretesting your potting mix by doing your own greenhouse bioassay. To do a bioassay, grow cress, oats, beans, lettuce, or another fast-growing crop with a high germination rate in your soil mix. If there is a problem with the mix, you will see it in reduced germination or poor seedling growth (see sidebar). You may also compare your new mix to a mix that you are satisfied with.
Recently, handheld EC (electrical conductivity) meters have become more popular and available at reasonable prices. See Saline Soils and Plant Growth (Sanchez 2010) for more information on how to test for salts using an EC meter.

How to Avoid the Effects of High Salt Levels or Herbicide Residue Steps​

  1. Fill a flat with potting mix.
  2. Count out 25 seeds of cress, lettuce, or other fast-germinating crop.
  3. Seed flat.
  4. Wait 5-7 days.
  5. Count number of seedlings. If less than the legal germination rate (for lettuce, 80 percent), you may want to test your media for salts.
Lettuce seeded - different potting mixes
Lettuce seeded in potting mix with high salts (right) exhibited slowed and reduced germination rates.

Making Your Own Mix​

Even when making your own potting media, it is still important to ensure that the individual components of the media are specifically approved for certified organic production (see sidebar, next page). If you are purchasing compost to add to your homemade potting mix, most certifiers will require this compost to be reviewed (e.g., PCO requires an ingredient list from the source and a compost log in cases when the raw manure restriction is applicable). Fertility amendments, peat, coir, and other components must also be approved. Check for the OMRI label and talk with your certifier.
When you first start making your own potting mix, it's a good idea to try several different recipes that have worked for other growers and compare how they do on your own farm. A list of common potting mix recipes is provided at the end of this fact sheet.
Many organic potting mixes contain compost, which can provide many benefits. Compost adds organic matter to the mix and supports diverse microbial populations that can suppress soilborne-disease causing organisms (Klein and Hammer 2006). Microbes break down organic material, releasing plant-available nutrients that are slowly available for your seedlings.
However, growers have increasingly reported problems with compost-based mixes. This may be because they rely on microbial release of nutrients, which may occur too slowly to meet plant needs.
A recent study compared 20 organic potting mixes (Leonard and Rangarajan 2007). They found that transplants grown in potting mixes that contained blood meal or alfalfa meal in addition to compost were significantly larger. This was probably in response to ammonium nitrogen (N) levels two to three times higher than that of mixes without either compost or blood meal amendments. It may be a good idea to use a mix with a more readily available N form, like blood meal or feather meal, in addition to compost. Blood meal seems to stimulate microbes and increase nutrient availability from compost.
If you use compost, make sure you are using high-quality compost at the right stage of maturity. Unfinished compost may release volatile organic acids that can negatively affect seedling growth and development (Grubinger 1999). One classic method of evaluating compost readiness is by smell. Finished compost has a sweet smell. Anaerobic, sour, or putrid smells are suspicious. If your nose detects an off smell, turn the pile and let it heat again before you consider using it in a mix (Klein and Hammer 2006).
Problems with compost-based mixes often occur during early season transplant production. This may be because the mix is too cold, especially overnight when greenhouse temperatures drop. Lettuce seeded in potting mix with high salts (right) exhibited slowed and reduced germination rates.
Compost supports an active biological system. Microbial activity is linked to temperature and will not release nutrients if temperatures are cold and do not support their activity. To alleviate this problem, many growers provide bottom heat to their transplants.

Supplemental Fertility​

Potting Mixes - nutrient levels
Commercial organic potting mixes to right with lower nutrient levels can result in stunted and nutrient stressed plants without supplemental fertilization.
If, after all possible precautions, your transplants are stressed due to nutrient-deficient media, you may need to use supplemental fertilizers such as fish emulsion. Organic sources of supplemental fertilizer include fish emulsion, soluble fish powder, kelp extracts, worm casting or compost tea, or other OMRI-approved products; see Using Organic Nutrient Sources (Sanchez and Richard 2009). These fertilizers can be applied to the soil by fertigation or foliar spray. Be careful with supplemental fertility. If you produce transplants in an area that is later used for in-ground production, leached fish emulsion or other products can build up soil nutrients to levels exceeding crop needs.

Seedling Mixes for Starting Transplants​

The following list was adapted from M. Wander in Organic Potting Mix Basics (2010).

Potting Mix--Quiet Creek CSA​

  • Compost (pasteurized) 1½ buckets
  • Vermiculite ¾ bucket
  • Perlite ¾ bucket
  • Peat ¾ bucket
  • Greensand 1 scoop
  • Dried Blood 1 scoop
  • Bonemeal ½ scoop
  • Lime ½ scoop
  • Rock phosphate ½ scoop
*scoop is a 1-lb butter dish, bucket is a 5-gallon bucket

Seed Mix--Standard Soilless​

  • 50-75 percent sphagnum peat
  • 25-50 percent vermiculite
  • 5 lbs of ground or superfine dolomitic lime per cubic yard of mix
  • Blood meal, rock phosphate, and greensand at 5-10 lbs per cubic yard

Soilless Potting Mix​

  • 1 part compost
  • 1 part vermiculite
  • 1 part peat moss
  • Screened with ¼-inch screen to mix together
  • Per 1 gallon mix add:
    • 0.6 oz blood meal (17.01 grams)
    • 0.4 oz clay phosphate (11.34 grams)
    • 0.4 oz greensand (11.34 grams)

Organic Potting Mix​

  • 1 part sphagnum peat
  • 1 part peat humus (short fiber)
  • 1 part compost
  • 1 part sharp sand (builder's)
  • To every 80 quarts of this add:
    • 1 cup greensand
    • 1 cup colloidal phosphate
    • 1½-2 cups crabmeal or blood meal
    • ½ cup lime

Soil Block Mix​

  • 3 buckets (standard 10-quart bucket) brown peat
  • ½ cup lime (mix well)
  • 2 buckets coarse sand or perlite
  • 3 cups base fertilizer (blood meal, colloidal phosphate, and greensand mixed together in equal parts)
  • 1 bucket soil
  • 2 buckets compost

Seedling Mix for Soil Blocks or Seedling Flats​

  • 2 3-gal. buckets sphagnum peat moss
  • ¼ cup lime
  • 1½ cups fertility mix (below)
  • 1½ buckets vermiculite
  • 1½ buckets compost

Fertility mix​

  • 2 cups colloidal (rock) phosphate
  • 2 cups greensand
  • 2 cups blood meal
  • ½ cup bone meal
  • ¼ cup kelp meal

Directions for mixing​

  1. Add peat to cement mixer or mixing barrel.
  2. Spread the lime and fertility mix over the peat.
  3. Mix these ingredients thoroughly.
  4. Add the compost and vermiculite and mix well again.
  5. When done, examine the distribution of vermiculite to ensure that it has been mixed in evenly.
Note that all bulk ingredients should be screened through ¼-inch hardware cloth. Well-matured, manure based compost should be used (avoid poultry manure and woodchip bedding).

Organic Standards for Compost​

The National Organic Program (NOP) is very explicit about compost preparation. Compost piles must maintain a temperature between 131 and 170°F for at least 3 days in a static or enclosed vessel system, or at least 15 days in a windrow system, with at least five turnings. Unless these criteria are met, the resulting product is not--in the eyes of the National Organic Program--considered compost. Rather, it is simply a pile of raw materials. If one of those raw materials is manure, it can make a big difference in how it may be used in crop production.
Raw livestock manure can carry pathogens that pose a danger to human health. According to the NOP's rules, raw manure can be applied at will to crops not intended for human consumption, cannot be applied to a crop within 120 days of harvest if the edible portion has direct soil contact, and cannot be applied to a crop within 90 days of harvest when the edible portions have contact with the soil.

References​

Grubinger, V. P. Potting Mixes for Organic Growers. Brattleboro: University of Vermont Extension, 2007.
------. Sustainable Vegetable Production from Start up to Market. Ithaca: National Resource Agricultural Engineering Service (NRAES), 1999.
Klein, J., and K. Hammer. "Compost-based potting mixes require different management for transplants." Growing for Market (February 2006).
Leonard, B., and A. Rangarajan. Organic Transplant Media and Tomato Performance 2007. Ithaca: Department of Horticulture, Cornell University, 2007.
Pennsylvania Certified Organic. "PCO Guidance on Manure, Compost, and Compost Tea Products." 2010.
Sanchez, E. Saline Soils and Plant Growth. University Park: Penn State Extension, 2010.
Sanchez, E., and T. L. Richard. Using Organic Nutrient Sources. University Park: Penn State Extension, 2009.
Wander, M. Organic Potting Mix Basics. eXtension.org, 2010.
Warncke, D. "Recommended Test Procedures for Greenhouse Growth Media." In J. Thomas Sims and A. Wolf, eds., Recommended Soil Testing Procedures for the Northeastern United States, 76-82. Northeast Regional Bulletin #493. Newark: Agricultural Experiment Station, University of Delaware, 1995.
Prepared by S. Tianna DuPont, former sustainable agriculture educator, Penn State Extension. Reviewed by Elsa Sanchez, Penn State Horticultural Systems Management, and Debra Brubaker, Pennsylvania Certified Organic.
This publication was supported in part by funding from the Beginning Farmer and Rancher Development Program of the National Institute of Food and Agriculture, USDA, Grant #2009-49400-05869.
 

acespicoli

Well-known member

Soilless Growing Mediums​


Published Sep. 2021|Id: HLA-6728

By Dharti Thakulla, Bruce Dunn, Bizhen Hu

Print-friendly PDF


History​


The term “hydroponics” was first introduced by American scientist Dr. William Gericke in 1937 to describe all methods of growing plants in liquid media for commercial purposes. Before 1937, scientist were using soilless cultivation as a tool for plant nutrition studies. In 1860, two scientists, Knop and Sachs, prepared the first standardized nutrient solution by adding various inorganic salts to water, then using them for plant growth. Later, scientists started using an aggregate medium to provide support and aeration to the root system. Quartz sand and gravel were the most popular aggregate mediums used in soilless cultivation at that time. In the late 1960s, Scandinavian and Dutch greenhouse growers tested rockwool plates as a soil substitute, which resulted in revolutionary expansion of rockwool-grown crops in many countries. Today, many alternative porous materials are used as growing media in hydroponics, including organic medias like coconut coir, peat, pine bark and inorganic mediums such as mineral wool, growstone, perlite and sand. For more information about hydroponics see OSU Extension fact sheet HLA-6442, Hydroponics.


Aquaponics couples hydroponics with aquaculture, using nutrient-rich water to feed the hydroponically grown plants. Nitrifying bacteria convert the ammonia into nitrates. For more information about aquaponics see OSU Extension fact sheet HLA-6721, Aquaponics. The three main live components of aquaponics are plants, fish (or other aquatic creatures) and bacteria. Producers also choose growing media that will provide plant nutrition, support the plants and provide surface area for the growth of bacteria. Clay pebbles, lava rocks and expanded shale are among the most widely used growing media in aquaponics.


Characteristics of Growing Mediums​


Selection of a growing medium depends on the type of plant, the pH of irrigation water, cost, shelf life of the product, the type of system that is being used and a grower’s personal preference (Table 1). A grower should look for specific qualities in choosing media. Soilless media must provide oxygen, water, nutrients and support the plant roots just as soil does.


Table 1. Comparison between the cost, lifespan and pH level of various hydroponics mediums.


Grow mediaCostLifespanpH
Mineral woolMediumRenewableBasic
Coconut fiberLow/MediumShortNeutral
Expanded clayHighReusableNeutral
PerliteLowReusableNeutral
VermiculiteMediumReusableBasic
Oasis cubesLowShortNeutral
SandLowReusableNeutral
PeatMediumShortAcidic
Grow stonesMediumReusableBasic
Rice hullsLowShortNeutral/Acidic
Pine barkLowShortAcidic
PumiceHighReusableNeutral
SawdustLowShortAcidic
Polyurethane foamLowShortNeutral
GravelLowReusableBasic
Expanded shaleLow/MediumReusableNeutral
Lava rockLowReusableNeutral


An ideal growing medium should have all or some of the following characteristics:


  • Good aeration and drainage. While the medium must have good water retention, it also must provide good drainage. Excessively fine materials should be avoided to prevent excessive water retention and lack of aeration within the medium.
  • Durability. The medium must be durable over time. Soft aggregates that disintegrate easily should be avoided.
  • Porosity. The medium must stay damp from the nutrient flow long enough for plants to absorb all their required nutrients between cycles.
  • Sterile. A clean and sterile growing medium will minimize the spread of both diseases and pests. A clean medium does not introduce additional nutrients to the roots. Some media can be reused by pasteurizing at 180 F for 30 minutes or using a 10% bleach soak for 20 minutes followed by multiple rinses of tap water.
  • Chemical properties. Neutral pH and good cation-exchange capacity (the ability to hold nutrients).
  • Functionality. Lightweight, easy to handle, reusable and durable.


Overview of the Most Popular Hydroponic Growing Mediums​


Mineral Wool​


Mineral wool (such as Rockwool) is a sterile, porous, non-degradable medium composed primarily of granite and/or limestone, which is superheated and melted, then spun into small threads and formed into blocks, sheets, cubes, slabs or flocking. It readily absorbs water and has decent drainage properties, which is why it is used widely as a starting medium for seeds, rooting medium for cuttings and for large biomass crops like tomatoes.


Mineral wool.


Figure 1. Mineral wool.


Advantages


  • It has a large water retention capacity and is 18% to 25% air, which gives the root system ample oxygen as long as the medium is not completely submersed.
  • It is available in multiple sizes and shapes for various hydroponic applications. Everything from 1-inch cubes to huge slabs can be found.
  • Mineral wool slabs can be reused by steam sterilizing the slabs between crops. Structurally, it does not break down for three to four years.


Disadvantages


  • It has a high pH, and nutrient solutions must be adjusted to accommodate for that factor. The initial pH of the commercial material is rather high (7.0 to 8.0), therefore, continuous pH adjustment to a more favorable range (5.5 to 6.0) is required, or the medium must be conditioned by soaking in a low-pH solution before use.
  • Mineral wool does not biodegrade, which makes it an environmental nuisance when disposed of. Lately there has been a decline in the use of mineral wool.
  • It has a restricted root environment and a low buffering capacity for water and nutrients. The water flow to plant roots may be hindered, even when the water content is apparently high.
  • Many people find mineral wool dust irritating to the skin.


Coconut Coir​


Coconut coir is also known by trade names like Ultrapeat®, Cocopeat® and Coco-tek®. It is a completely organic medium made from shredded coconut husks. Different sources and production procedures result in a large variability of end products in the market. The most popular is the compressed briquette form, which requires soaking in water before use. During soaking, the coir rehydrates and expands up to six times the size of the original briquette.


Coconut coir.


Figure 2. Coconut coir.


Advantages


Coconut coir is slightly acidic and holds moisture very well, yet still allows for good root aeration.


  • There are claims that coir dust enhances rooting due to the presence of root-promoting substances.
  • Coir can be used either as a stand-alone medium or as an ingredient in a mix for the cultivation of vegetables and cut flowers. It can also serve as a rooting medium for cuttings under mist and in high humidity chambers.
  • It is biodegradable, organic and non-toxic, which makes its disposal easier and environmentally friendly.
  • Since it is compactable, it can be bought compressed then expanded at home, which saves money on shipping.


Disadvantages


  • If the husks are soaked in salt water during manufacturing and not rinsed with fresh water, then there could be a problem with high salinity.
  • Coconut coir is rich in sodium and chlorine and may damage the plants, which is why it must be washed. Usually, calcium and magnesium need to be added to both facilitate sodium removal and provide nutrients.


Expanded Clay Aggregate​


Expanded clay pellets are made by heating dry, heavy clay and expanding it to form round porous balls. It is commonly known as lightweight expanded clay aggregate (LECA), grow rocks or Hydroton®. They are heavy enough to provide secure support for the plants, but are still lightweight. Their spherical shape and porosity help to ensure a good oxygen/water balance so as not to overly dry or drown the roots.


Expanded clay aggregate.


Figure 3. Expanded clay aggregate.


Advantages


  • Expanded clay pellets release almost no nutrients into the water stream and are neutral with a pH of about 7.0.
  • They have high pore space, which results in better flow of solution. They rarely become clogged or blocked, so water drains very effectively, which makes it a great option for ebb and flow systems as well as aquaponic media bed systems.
  • After use, the pellets can be washed and sterilized for reuse.
  • They are very stable and can last for many years.


Disadvantages


  • The clay pellets do not have good water-holding capacity as compared to many other substrates. They drain and dry very fast, which may cause roots to dry out.
  • They are fairly expensive.
  • They often bind tightly around roots in Dutch bucket systems and can be hard to separate.
  • Because clay pellets float for the first few months until they’re saturated, the pebbles can get sucked into filters or drain lines and cause blockages.


Perlite​


Perlite is a natural volcanic mineral that expands when subjected to very high heat, and becomes very lightweight, porous and absorbent. It is produced in various grades, the most common being 0 to 2 mm and 1.5 to 3 mm in diameter. Perlite can be used by itself or mixed with other types of growing media.


Perlite.


Figure 4. Perlite.


Advantages


  • It has one of the best oxygen retention levels of all growing mediums.
  • It is very porous and has a strong capillary action. It can hold three to four times its weight of water.
  • Its sterility makes it highly suitable for starting seeds. There is little risk of root rot or damping off.
  • It is comparatively inexpensive and is reusable. After use, it can be steam pasteurized.
  • Its stability is not greatly affected by acids or microorganisms.


Disadvantages


  • Since it is very lightweight, it easily washes away. This drawback makes perlite an inappropriate medium in the flood-and-flush type of hydroponic systems.
  • When used alone in hydroponic systems like drip systems, it does not retain water very well.
  • Perlite dust can create respiratory problems and eye irritation, necessitating precautions such as wearing goggles and a mask to reduce dust exposure when working with it. When dry, fans can blow it around the greenhouse.
  • Perlite is prone to algae growth that can lead to irrigation and fungus gnat problems.


Vermiculite​


It is a micaceous mineral that is heated at temperatures near 2,000 F until it expands into pebbles. It is considered an excellent rooting medium. It is often used in combination with other types of media like coconut coir or peat moss to start seedlings. It is produced in various grades, the most common being 0 to 2 mm, 2 to 4 mm and 4 to 8 mm in diameter.


Vermiculite.


Figure 5. Vermiculite.


Advantages


  • It has a relatively high cation exchange capacity and holds nutrients for later use.
  • It is very porous, has a strong capillary action and has excellent water-holding capacity.


Disadvantages


  • When used alone, it can retain too much moisture, which can result in waterlogged conditions, inviting bacterial and fungal growth.
  • It cannot be steam sterilized as it disintegrates during heating.
  • It is comparatively expensive and can contain a small amount of asbestos.


Oasis cubes​


Oasis cubes are a brand of medium manufactured from water-absorbent phenolic foam, also known as floral foam. It is a grow medium designed for both seeds and cuttings and is mostly used for plant propagation. Oasis cubes are most used for rapid germination of crops such as lettuce and cole crops (cabbage, collards and kale), onions and alliums, herbs and sometimes tomato and eggplant seedings.


Oasis foam cubes.


Figure 6. Oasis foam cubes.


Advantages


  • It has a neutral pH and a great water-retention capacity.
  • It is pretty versatile and can be transplanted into many different types of hydroponic systems and grow mediums.
  • It is inexpensive and no pre-soaking is required.
  • It comes in several different sizes.


Disadvantages


  • It does not have any buffering capacity, cation exchange capacity or initial nutrient charge.
  • Beyond seed germination and propagation, it is of limited value.
  • The foam can break off and clog pump filters.


Sand​


Sand is inarguably the oldest hydroponic medium and is very common. It is commonly mixed with other substrates like vermiculite, perlite and coconut coir. When using sand as a growing medium, growers often prefer coarse sand, as it helps to increase aeration to the roots by increasing the size of the air pockets between the grains of sand.


Advantages


  • It is comparatively inexpensive and is readily available in most locations.
  • The finer sand particles allow lateral movement of water through capillary action, which makes the solution applied at each plant evenly distributed throughout the root zone.
  • When mixed with vermiculite, perlite and/or coconut coir, it helps aerate the mix for roots.
  • Sand is very durable because it is neither chemically nor biologically affected.
  • It can be easily steam-sterilized for reuse.


Disadvantages


  • It has very low water- and nutrient-holding capacity and can exacerbate deficiencies quickly.
  • Salt buildup may occur in the sand during the growing period. This can be corrected by flushing the medium periodically with pure water.
  • It is very heavy.


Peat​


Peat consists of partially decomposed marsh plants, including sedges, grasses and mosses. Sphagnum peat moss, hypnum peat moss, and reed and sedge peat moss are three types of peat in horticultural classification. Sphagnum peat moss is the most desirable and popular type, as it has higher moisture-holding capacity and does not break down as rapidly as other types of peat.


Advantages


  • Peat moss has a high moisture-holding capacity and can hold up to 10 times its dry weight of water.
  • Most peat mosses are acidic with pH of 3.8 to 4.5, which can be an advantage for some acid-loving plants.
  • Even though peat moss retains water incredibly well, it can drain freely. Excess water quickly moves through the material to drain out.
  • Disposal of used peat moss does not pose any environmental problem.


Disadvantages


  • It is generally considered as a substrate conducive to numerous soil-borne diseases. Although peat can be sterilized, it does not alleviate the problem, as sterilization leaves a biological vacuum that can be easily filled by pathogenic fungi.
  • In some cases, its acidic property may be a disadvantage for some crops, so lime or dolomite is usually added to increase the pH.
  • It is not sustainable. Peat moss extraction from bogs is a destructive process that removes layers that took centuries to develop.


Growstones​


Growstones are made from recycled glass. They are light weight, unevenly shaped, porous and reusable. They have good wicking ability and can wick water up to 4 inches above the water line. It is important to have good drainage to prevent stems from rotting.


Growstones.


Figure 7. Growstones.


Advantages


  • Since growstone is inert, it does not supply plants with any additional inputs or elements that could interfere with the nutrient solution in the system.
  • It is highly porous and provides a lot of aeration to the roots.
  • Because it is made from glass, it is non-toxic and guaranteed to be free of contaminants like pathogens.
  • Growstones can be reused or further recycled.


Disadvantages


  • Sometimes growstones can cause root damage because they tend to grip the plant roots too much. This also makes it difficult to move the plants from one medium or grow area to another.
  • Growstones come coated with a fine dust of silica, which needs to be carefully washed off. This is best done outdoors or in a well-ventilated space as the dust can clog drains and is dangerous to inhale.


Rice hulls​


Rice hulls are a byproduct of the rice industry. Even though it is an organic plant material, it breaks down very slowly like coconut coir, making it suitable as a growing medium for hydroponics. It is often used as part of a mix of growing media such as 30% to 40% rice hulls and pine bark mix. Rice hulls are referred to as either fresh, aged, composted, parboiled or carbonized. Parboiled hulls have been shown to be superior to other hulls as a medium amendment.


Advantages


  • The overall pH of parboiled and composted rice hulls range from 5.7 to 6.5, which is right in the optimal pH range for most hydroponically-grown plants.
  • They are comparable to perlite in water-holding capacity per weight but have a greater air-porosity ratio and can hold more oxygen in the root zone.
  • They drain well and retain little water in general.


Disadvantages


  • Fresh and composted rice hulls often have high amounts of manganese. If pH is not maintained properly, manganese toxicity is a potential problem.
  • Rice hulls work well when mixed with peat or coir, but not as well when used as a standalone medium.
  • It has a low cation-exchange capacity.


Pine bark​


Composted and aged pine bark was one of the first growing media used in hydroponics. It was generally considered a waste product, but has found uses as a ground mulch, as well as substrate for hydroponically grown crops.


Advantages


  • Compared to other types of tree bark, pine resists decomposition better and has fewer organic acids that can leach into the nutrient solution.
  • A naturally biodegradable material, used bark can be recycled in many ways, including as mulch.
  • Because of its fibrous structure with pockets of many sizes, it holds nutrient solution and air well.


Disadvantages


  • It absorbs water easily, which may result in water-logged conditions. A layer of rocks at the bottom will aid drainage greatly.
  • Pine bark floats and may pose problems with an ebb and flow system. It is more suitable for a drip or a wick system.
  • The pH of pine bark is acidic and might be a disadvantage.


Pumice​


Pumice is a siliceous material of volcanic origin. It is graded and kiln dried to 80 F, making it sterile and ready to use. It can be mixed with other types of growing media, such as vermiculite or coir to improve aeration and drainage.


Advantages


  • It breaks down slowly and is very lightweight.
  • Its light-colored appearance makes it an ideal media for summer growing as it does not absorb heat.
  • It has a high oxygen-retention level.


Disadvantages


  • It has essentially the same properties as perlite but does not absorb water as readily.
  • It can be too lightweight for some hydroponics systems, if bought as small pieces.


Sawdust​


There are many variables that determine how well sawdust will work, predominantly the kind of wood used and the purity of it. Sawdust from Douglas fir and western hemlock have been found to give best results, while western red cedar is toxic and should never be used. A moderately fine sawdust or one with a good proportion of planer shavings is preferred, because water spreads better laterally through these than in coarse sawdust.


Advantages


  • The best thing about sawdust is that it is very cheap or usually free.
  • It retains a lot of moisture, so care must be taken while watering.


Disadvantages


  • Sawdust might acquire salt levels toxic to plants. Therefore, the sodium chloride content of the samples should be tested before using. If any significant amount of sodium chloride is found (greater than 10 ppm), sawdust should be thoroughly leached with fresh water.
  • Growers need to ensure their sawdust is not contaminated with soil and pathogens or chemicals from wood-processing facilities or undesirable tree species.


Polyurethane grow slab/cubes​


Polyurethane grow slabs and cubes are an uncommon hydroponics medium used as an alternative to oasis cubes or rockwool for starter cubes. It can be found as poly foam at hobby or fabric stores. It comes in rolls or sheets of different thickness and sizes. Starter cubes can be self-made by just cutting 1- to 2-inch-thick poly foam sheets/rolls.


Advantages


  • It is a comparatively cheaper alternative to rockwool or oasis cubes for starting seeds.
  • It is easy to find.


Disadvantages


  • It may contain harmful chemicals.
  • It is not likely to have predetermined holes for seed germination.


Gravel​


Gravel has been used with great success, especially in ebb and flow systems. It is a fragmented media from rocks like sandstone, limestone or basalt and has large spaces between each particle. This helps give a plentiful supply of air to the roots, however, the medium does not hold water well, which can cause roots to dry out quickly.


Advantages


  • Gravel is usually fairly cheap, works well as a starter medium and is typically easy to find.
  • It is durable and reusable as long as it is washed and sterilized between crops.
  • It does not break down in structure and can be reused.


Disadvantages


  • Its heavy weight makes it difficult to handle.
  • Gravel is not suitable for heavy plant roots.


Expanded shale​


Expanded shale is created when quarried shale is heated to temperatures above 2,000 F. The process renders the shale chemically and biologically inert. The heated shale loses its water, which causes the shale to expand. It is considered one of the best aquaponics grow media. It is lightweight and works well in aquaponic grow beds. Each stone has a large surface area for supporting the bacteria necessary to convert ammonia into nitrates.


Advantages


  • The free draining quality of this medium aids in the necessary oxygenation of roots.
  • Expanded shale holds up to 40% of its weight in water, allowing for better water retention around plants.


Disadvantages


  • Expanded shale has a slightly polished surface area, but edges can be sharp, which can harm the root system of plants.
  • Its heavy weight makes it difficult to handle.


Lava rock​


Lava rock is a lower cost alternative to expanded clay or expanded shale. These types of rock form when hot lava rapidly cools down. They contain air pockets inside, which gives an additional surface area for beneficial bacteria.


Advantages


  • They are lightweight, porous and provide beneficial drainage, aeration, water retention and even trace elements to the system.


Disadvantages


  • A notable disadvantage is their jagged texture. The sharp edges of lava rocks have the potential to cut your hands as well as damage the root system of plants.


References​


  • Resh, H.M. 1978. Hydroponic Food Production. 5th ed. Woodbridge Press Publishing
    Company, Santa Barbara, CA.
  • Roberto, K. 2004. How-to hydroponics. 4th ed. Electron Alchemy, Inc. Massapequa, NY.
  • Savvas, D. 2002. General introduction, 1-2. In: D. Savvas and H. Passam (eds.).
  • Hydroponic Production of Vegetables and Ornamentals. Embryo Publications, Greece.


Dharti Thakulla


Graduate Student


Bruce Dunn


Professor of Floriculture


Bizhen Hu


Assistant Professor Vegetables
 

acespicoli

Well-known member
Some random posts of information
Organics
Different medias for roots
Various sources of fertility

Note: Im always looking for ways of growing better and reusing waste products
Price is always a concern in potting media wasting money goes against the grain

I love coarse vermiculite dislike the cost
Peat moss used to be the goto, some of us were discussing leaf mold
A new idea is pine bark, pine fine shavings and biochar (animal bedding pine)
Forest products are available too many for free...
you may even be able to get paid to remove these resources win/win
beware of chemical lawn treatments and diseased plants care for raw products appropriately

CEC
BULK DENSITY
 

acespicoli

Well-known member

Containers and Potting Soil for Indoor Seed Starting​


plants growing indoors under grow lights


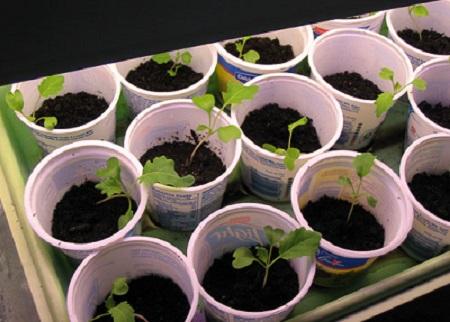
Seedlings growing in a container under grow lights. Photo: C. Carignan, UME

Updated: February 20, 2023


Containers for seed starting​

Almost any clean container may be used for seed starting provided it allows for good drainage and is at least 2” deep. Save money by reusing cottage cheese and yogurt containers, milk cartons, aluminum pans, and clear clamshells from the produce department or deli.

cell packs for transplants
4 - cell pack and 6 - cell pack
black landscaping flat with drainage holes
Black flat with holes for drainage
green flat for seed starting
Green plastic tray with no holes
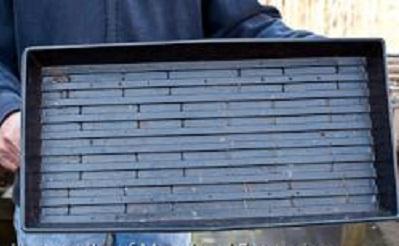
  • You can buy plastic trays (a.k.a flats) that are 10.5 in. X 21 in. X 2 in. deep and contain drainage holes. You can also purchase them with no holes. (These are great for minimizing the problem of water getting on the floor or the lights below. You just need to be careful not to over-water.)
  • Numerous types of small pots and pellets (expand when you add water) made of compressed peat are on the market for starting seeds.
  • Plastic cell packs (a.k.a. inserts or market packs) are square or rectangular plastic cells joined together and designed to fit into a plastic flat. The individual cells range in size from 1/2 in. to 4 in. in diameter.
  • Plug trays are sturdy one-piece plastic flats that are divided into individual cells.
seedlings planting in cups
Reused yogurt cups with drainage holes in the bottom

Growing media (medium) or "soil" for seed starting​

There are special types of growing medium for starting seeds. Growing media have three main functions: 1) supply roots with nutrients, air, and water, 2) allow for maximum root growth, and 3) physically support the plant.
soilless mix in a container
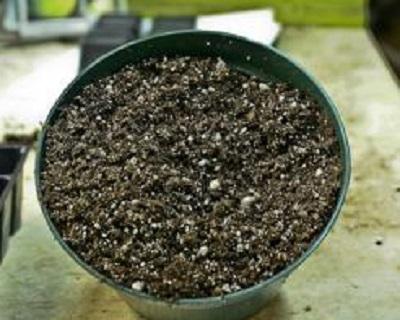
Soilless growing media
Purchase a soilless growing media (a.k.a growing mix, transplant mix, or potting mix). They are light and fluffy and formulated to produce uniform plant growth. They usually contain some proportion of sphagnum peat moss, perlite (small white "popcorn"), and vermiculite, and are generally free of diseases, weed seeds, and insects. These mixes are desirable because the peat moss holds water very well, yet the large pore spaces allow excess water to drain easily. Their high porosity also promotes quick and extensive root growth.
Use a standard, all-purpose transplanting mix. It is not necessary to purchase a special (finer) seedling mix. The latter is useful only for sowing extremely small seeds.
  • Avoid heavy, dense potting mixes that contain “forest products”.
  • Conventional mixes have lime and chemical fertilizer added; organic mixes use organic fertilizers and often contain compost. Some organic mixes are substituting coir and rice hulls for peat and perlite.
  • Don’t try to save money by using garden soil. It is too dense for the job and contains weed seeds and possibly pathogens.
  • If you grow a lot of seedlings and also do container gardening you might want to invest in a large bag or compressed bale of commercial soilless growing media. It is cheaper than buying the same amount in small quantities.

Peat moss and alternatives to peat moss​

  • Peat is an organic substance formed from plants (principally sphagnum moss) that decompose very slowly in waterlogged soils (bogs).
  • Peat has been valuable in horticulture because its fibrous structure helps it retain a lot of water and air.
  • There is concern over the ecological effects of excavating peat moss.
  • Rising fuel prices have increased the cost and caused professional growers to look for alternative ingredients for growing media.
  • Ground-up coconut husk fibers (coir) are a popular alternative, though the sustainability of harvesting and shipping this material from the tropics is widely debated.
  • Some gardeners and small farmers have learned to blend finished, screened compost with commercial growing media.
  • Compost is heavier than soilless media (about 25 lbs. /cubic foot) but is less expensive (especially if homemade!) and supplies nutrients and other compounds that promote plant growth and health. Try mixing compost 1:2 with soilless media.
Read more on this topic: Peat-free potting mixes
 

acespicoli

Well-known member
College of Agriculture, Health and Natural Resources

Soil Nutrient Analysis Laboratory


Search this SiteSearch in https://soiltesting.cahnr.uconn.edu/>


Skip to content


Pricing List (Effective 1/1/2022)
PLEASE NOTE: ONLY CHECKS OR MONEY ORDERS ACCEPTED FOR PAYMENT

Test & DescriptionPrice Per Sample
Standard Nutrient Analysis (Modified Morgan)$15.00
Samples submitted for the Standard Nutrient Analysis are analyzed for plant available calcium, magnesium, phosphorus, potassium, sulfur, iron, manganese, copper, zinc, aluminum and boron using a modified Morgan extractant. The soil pH and buffer pH are determined and the samples are screened for estimated total lead. Estimated Cation Exchange Capacity and % Base Saturation are also provided. Limestone and fertilizer recommendations are made based on test results and the crop being grown. (Soils sent in our pre-paid soil test collection kits sold by some Cooperative Extension Centers receive this test). The standard nutrient analysis is appropriate for lawns, vegetables, flowers, woody ornamentals, fruits, agronomic crops and for nursery crops (like Christmas trees) grown in mineral soil. This test is not suitable for composts or soilless media.
Saturated Media Extract (SME) – for Soilless Greenhouse Media Only$20.00
This analysis is appropriate for soilless greenhouse media or mixes containing 20 percent or less mineral soil. Samples submitted for the Saturated Media Analysis are analyzed for plant available calcium, magnesium, phosphorus, potassium, copper, boron, iron, manganese, and zinc. Quick diagnostic tests estimate nitrate-nitrogen and ammonium-nitrogen. Media pH and soluble salts are also determined. One pint of sample is required for this test. Recommendations for commercial crops can be requested by the University’s Extension Specialist for Greenhouse Crops.
Soil pH ONLY$5.00
The pH is determined and limestone recommendations are made if the soil pH needs to be increased while sulfur recommendations are given if the soil pH needs to be decreased. Recommendations can only be made if the crop being grown is listed. Soil pH testing is included in the standard nutrient analysis.
Soluble Salts$5.00
The total soluble salts are determined using a 1:2, V:V electrical conductivity method. Interpretation is provided.
Organic Matter Content$7.00
This analysis gives the percent organic matter in soil or compost determined by the loss on ignition. Most plants do best in soils with organic matter contents between 4 and 8 percent. Finished composts usually range from 40 to 60 percent organic matter. Recommendations are not made.
Soil Textural Analysis$15.00
The total amounts of sand, silt and clay sized particles are determined using a hydrometer method. Soils are categorized according to USDA soil textural classifications. No recommendations are provided.
Pre-Sidedress Soil Nitrate Test (PSNT)$10.00
The PSNT measures plant available nitrate-nitrogen in the soil and is used by commercial silage corn, sweet corn and pumpkin growers. Turf growers may also find this test useful. From June 1st until mid-August soil test results are ready by the next business day and the grower is contacted with the results and nitrogen fertilizer recommendations via email, fax or phone.
End-of-Season Cornstalk Test$10.00
Cornstalks collected in a prescribed manner at harvest are analyzed for nitrate-nitrogen. Results indicate whether below optimum, optimum or above optimum amounts of nitrogen were applied during the growing season. This test is often used in conjunction with the PSNT.

Discounts​

Discounts are offered to commercial and residential customers when 10 or more samples are sent at one time for either the Standard Nutrient Analysis or the Saturated Media Analysis. Please see our discount policy.
Miscellaneous Tests
The textural analysis, organic matter content, pH and soluble salts tests should be sampled in the same way as the Standard Nutrient Analysis. ***Please supply an additional 1 cup of soil if you require tests in addition to the Standard Nutrient Analysis. Only ½ cup of soil is required for the Soil pH only test.
039d_x355_58d2_9.jpeg

OUT OF STATE SOILS - PLEASE READ!
Counties in several states have either Fire Ant or Golden Nematode QUARANTINES! If you live in these areas and send soil to us, it needs to be documented and destroyed. There is an additional disposal fee of $20 per sample. The USDA APHIS website has information regarding which US counties are quarantined. To determine if you are in a fire ant quarantine area, CLICK HERE..pdf To determine if you are in a golden nematode quarantine area, CLICK HERE.jpg
 

acespicoli

Well-known member
Saturated Media Extract (SME) – for Soilless Greenhouse Media Only$20.00
This analysis is appropriate for soilless greenhouse media or mixes containing 20 percent or less mineral soil. Samples submitted for the Saturated Media Analysis are analyzed for plant available calcium, magnesium, phosphorus, potassium, copper, boron, iron, manganese, and zinc. Quick diagnostic tests estimate nitrate-nitrogen and ammonium-nitrogen. Media pH and soluble salts are also determined. One pint of sample is required for this test. Recommendations for commercial crops can be requested by the University’s Extension Specialist for Greenhouse Crops.
 

acespicoli

Well-known member

Growing Media (Potting Soil) for Containers​


Back to Resources
Found In


Related Programs


Updated: February 20, 2023


Choosing growing media (potting mixture) for your container gardens​

  • The material that your plants grow in is called the “growing medium or media” never dirt.
  • Dozens of different ingredients are used in varying combinations to create homemade or commercial growing media. By understanding the functions of growing media, you can evaluate the qualities of individual types and select which ones might work best for your container garden. The choice is very important because your plants are dependent on a relatively small volume of growing medium. Unlike their cousins growing in garden soil, containerized plant roots cannot grow around obstacles or mine the soil far and wide for nutrients and water.

Growing media (medium) or potting soil has three main functions​

  1. It supplies roots with nutrients, air, and water.
  2. Allows for maximum root growth.
  3. Physically supports the plant.
  • Roots grow in the spaces between individual particles of soil.
  • Air and water also travel through these pore spaces.
  • Water is the medium that carries nutrients that plants need to fuel their growth, and air is needed for root growth and the health of soil microorganisms that help supply plants with nutrients.
  • Irrigation water moves through the pore spaces, pushing out the air. If excess water cannot drain away, fresh air cannot enter and roots will suffocate.
  • Select light and fluffy growing media for good aeration and root growth.

Qualities of different types of growing media​

Garden soil​

Soils are too dense to allow for good air and water movement when added to a container garden. Soils hold water very well in their small pore spaces and can drown roots- especially in shallow containers. Topsoil should only be added to very large containers and not exceed 10% of the volume.


Commercial soilless mixes​

These are an excellent choice for containers. They are lightweight, drain well, hold water and nutrients, and are generally free of weeds, insects, and diseases. They have a pH of about 6.2 and are typically comprised of ingredients such as sphagnum peat moss, perlite, vermiculite, composted bark, compost, and coconut coir. Plus small amounts of lime and fertilizer. (To produce “organic” soil-less mixes, suppliers omit chemical wetting agents and substitute organic for synthetic fertilizers.) Soilless mixes tend to be hydrophobic - they repel water. Work water into the media with your hands (it is best to wear gloves) until it is thoroughly wetted.

Other types of commercial mixes​

They are advertised as “topsoil”, “planting soil”, “planting mix”, or “potting soil”. They vary a great deal in composition and quality. Avoid mixes that contain sedge peat, feel heavy or gritty, have very fine particles, or appear clumped.

Sharp sand​

Use only coarse builder sand, not play sand. Sand increases porosity because of the large particles. It is relatively inexpensive and heavy.

Bark fines and wood mulch​

Are high in carbon and low in nutrients and not recommended for container vegetables.

Compost is in a class by itself​

Compost is the dark, crumbly, earthy-smelling product of organic matter decomposition. Leaves, grass clippings, wood waste, and farm animal manures are some of the common ingredients that are combined with water in piles or windrows and digested by huge populations of oxygen-loving microorganisms. LeafGro™ is a well-known commercially available yard waste compost in Central Maryland. It’s highly recommended to include some compost in the growing media for your containers.
  • Compost contains all the major and minor nutrients that plants need for good growth. For gardeners, this makes it an excellent substitute for sphagnum peat moss, which has very few nutrients (although it does hold water better than compost). Composting effectively recycles the nutrients from gardens, landscapes, and farms thereby reducing nutrient pollution of waterways. However, fertilizing is still necessary because the nutrients in compost are released slowly and are usually not sufficient for an entire season.
  • Vegetables, herbs, and flower plants can be successfully grown in 100% compost or leaf mold. Baltimore City community gardeners have been doing this for decades!
  • Vegetable plants generally grow best when soil pH is in the 5.5-7.0 range. Many composts have a pH over 7.0 but research has shown that there is no benefit in reducing the pH to a more desirable level because nutrients in compost are available over a wide range of pH values.
  • Properly made compost is turned multiple times and reaches temperatures that kill weed seeds and plant and human pathogens.

Some examples of good media mixtures for container vegetables​

  • 100% compost
  • 100% soilless mix
  • 50% soilless mix + 50% compost
  • Topsoil should only be added to very large containers and not exceed 5-10% of the volume

Reusing growing media (potting soil) next season​

To save money - empty the growing media from container gardens. Remove all plant residues, plant tags, etc. Store the media in a trash can or heavy-duty trash bags. (Don't save the media if root diseases were a problem). Soilless growing media and compost lose nutrients and break down physically over time. Mix last year’s growing media 50:50 with fresh growing media and/or compost next year.

Related information​


Types of containers for vegetable gardens
Planting Vegetables in Containers
Maintaining Container Grown Vegetables
Building a Salad Table™
Building a Salad Box™
 

pipeline

Cannabotanist
ICMag Donor
Veteran
100% compost could be off pH I think. Blend with sand and a little topsoil and lime as needed. Many people have good success with home made compost. Must be turned as needed.
 

Latest posts

Latest posts

Top