What's new
  • As of today ICMag has his own Discord server. In this Discord server you can chat, talk with eachother, listen to music, share stories and pictures...and much more. Join now and let's grow together! Join ICMag Discord here! More details in this thread here: here.

DIY Organic Potting Mix's for Grass - Ace Spicoli

acespicoli

Well-known member

Thank you to everyone contributing their knowledge to this section :huggg:

Keeping in touch with the needs of the most discriminating cannasseur
going for vegan and organic methods

https://en.wikipedia.org/wiki/Plant_pathology
1693969346507.png

 
Last edited:

acespicoli

Well-known member

List of hemp diseases​

From Wikipedia, the free encyclopedia


Hemp leaf being attacked by red spider mites
This is a list of diseases of hemp (Cannabis sativa).

Bacterial diseases​

Bacterial diseases
Bacterial blightPseudomonas cannabina
Crown gallAgrobacterium tumefaciens
Striatura ulcerosaPseudomonas amygdali pv. mori
Xanthomonas leaf spotXanthomonas campestris pv. cannabis

Fungal diseases​

Fungal diseases
AnthracnoseColletotrichum coccodes
= Colletotrichum atramentarium
= Colletotrichum dematium
Black dot diseaseEpicoccum nigrum
= Epicoccum purpurascens
Black mildewSchiffnerula cannabis
Brown blightAlternaria alternata
= Alternaria tenuis
Brown leaf spot and stem cankerAscochyta spp.
Ascochyta prasadii
Phoma
spp.
Didymella spp. [teleomorph]
Phoma exigua
Phoma glomerata
Phoma herbarum
Charcoal rotMacrophomina phaseolina
Cladosporium stem cankerCladosporium cladosporioides
Cladosporium herbarum
Mycosphaerella tassiana
[teleomorph]
Curvularia leaf spotCurvularia cymbopogonis
Curvularia lunata
Cochliobolus lunatus
[teleomorph]
Cylindrosporium blightCylindrosporium spp.
Cylindrosporium cannabinum
Damping-offBotrytis cinerea
Botryotinia fuckeliana
[teleomorph]
Fusarium oxysporum
Fusarium solani
Nectria haematococca
[teleomorph]
Macrophomina phaseolina
Pythium aphanidermatum
Pythium debaryanum
Pythium ultimum
Rhizoctonia solani
Thanatephorus cucumeris
[teleomorph]
= Pellicularia filamentosa
Downy mildewPseudoperonospora cannabina
Pseudoperonospora humuli
Fusarium foot rot and root rotFusarium solani
Fusarium stem cankerFusarium sulphureum
Gibberella cyanogena
[teleomorph]
= Gibberella saubinetii
Fusarium wiltFusarium oxysporum f.sp. cannabis
Fusarium oxysporum f.sp. vasinfectum
Gray moldBotrytis cinerea
Hemp cankerSclerotinia sclerotiorum
Leptosphaeria blightLeptosphaeria cannabina
Leptosphaeria woroninii
Leptosphaeria acuta
Olive leaf spotCercospora cannabis
Pseudocercospora cannabina
Ophiobolus stem cankerOphiobolus cannabinus
Ophiobolus anguillides
Phoma stem cankerPhoma herbarum
Phoma exigua
Phomopsis stem cankerPhomopsis cannabina
Phomopsis achilleae
Diaporthe arctii var. achilleae
[teleomorph]
Phymatotrichum root rot
Cotton root rot
Phymatotrichopsis omnivora
= Phymatotrichum omnivorum
Pink rotTrichothecium roseum
= Cephalothecium roseum
Powdery mildew
(of Cannabis)
Leveillula taurica
Oidiopsis taurica [anamorph]
Podosphaera macularis
= Sphaerotheca humuli = Sphaerotheca macularis
Oidium
sp. [anamorph]
Golovinomyces cichoracearum sensu lato
Golovinomyces ambrosiae
Red bootMelanospora cannabis (secondary on hemp canker)
Rhizoctonia soreshin and root rotRhizoctonia solani
RustAecidium cannabis
Uredo kriegeriana
Uromyces inconspicuus
Southern blight
Sclerotium root and stem rot
Sclerotium rolfsii
Athelia rolfsii
[teleomorph]
Stemphylium leaf and stem spotStemphylium botryosum
Pleospora tarda
[teleomorph]
Stemphylium cannabinum
Tar spotPhyllachora cannabis
Tropical rotLasiodiplodia theobromae
= Botryodiplodia theobromae
Twig blightDendrophoma marconii
Botryosphaeria marconii
[teleomorph]
Verticillium wiltVerticillium albo-atrum
Verticillium dahliae
White leaf spotPhomopsis ganjae
Yellow leaf spotSeptoria cannabis
Septoria cannabina

Nematodes, parasitic​


Viral diseases​

Viral diseases
Alfalfa mosaic & Lucerne mosaicgenus Alfamovirus, Alfalfa mosaic virus (AMV)
Arabis mosaicgenus Nepovirus, Arabis mosaic virus (ArMV)
Cucumber mosaicgenus Cucumovirus, Cucumber mosaic virus (CMV)
Hemp mosaicgenus ?Tobamovirus
Hemp streakgenus ?, Hemp streak virus

Phytoplasmal diseases​

Phytoplasmal diseases
Witches' broom

Miscellaneous diseases and disorders​

Miscellaneous diseases and disorders
FasciationCause undetermined
Grey fleckMagnesium deficiency
Tipburn & leaf margin necrosisPotassium deficiency
 

acespicoli

Well-known member

Hot water seed sterilization tool evaluation​


Benjamin Phillips, W. Garrett Owen and Will Jaquinde, Michigan State University Extension - March 26, 2020

Seedborne diseases can be treated with hot water, but the water must be heated and held at a certain temperature for specific times. Here we evaluate affordable options for hot water treatment.

A sous vide cooking tool

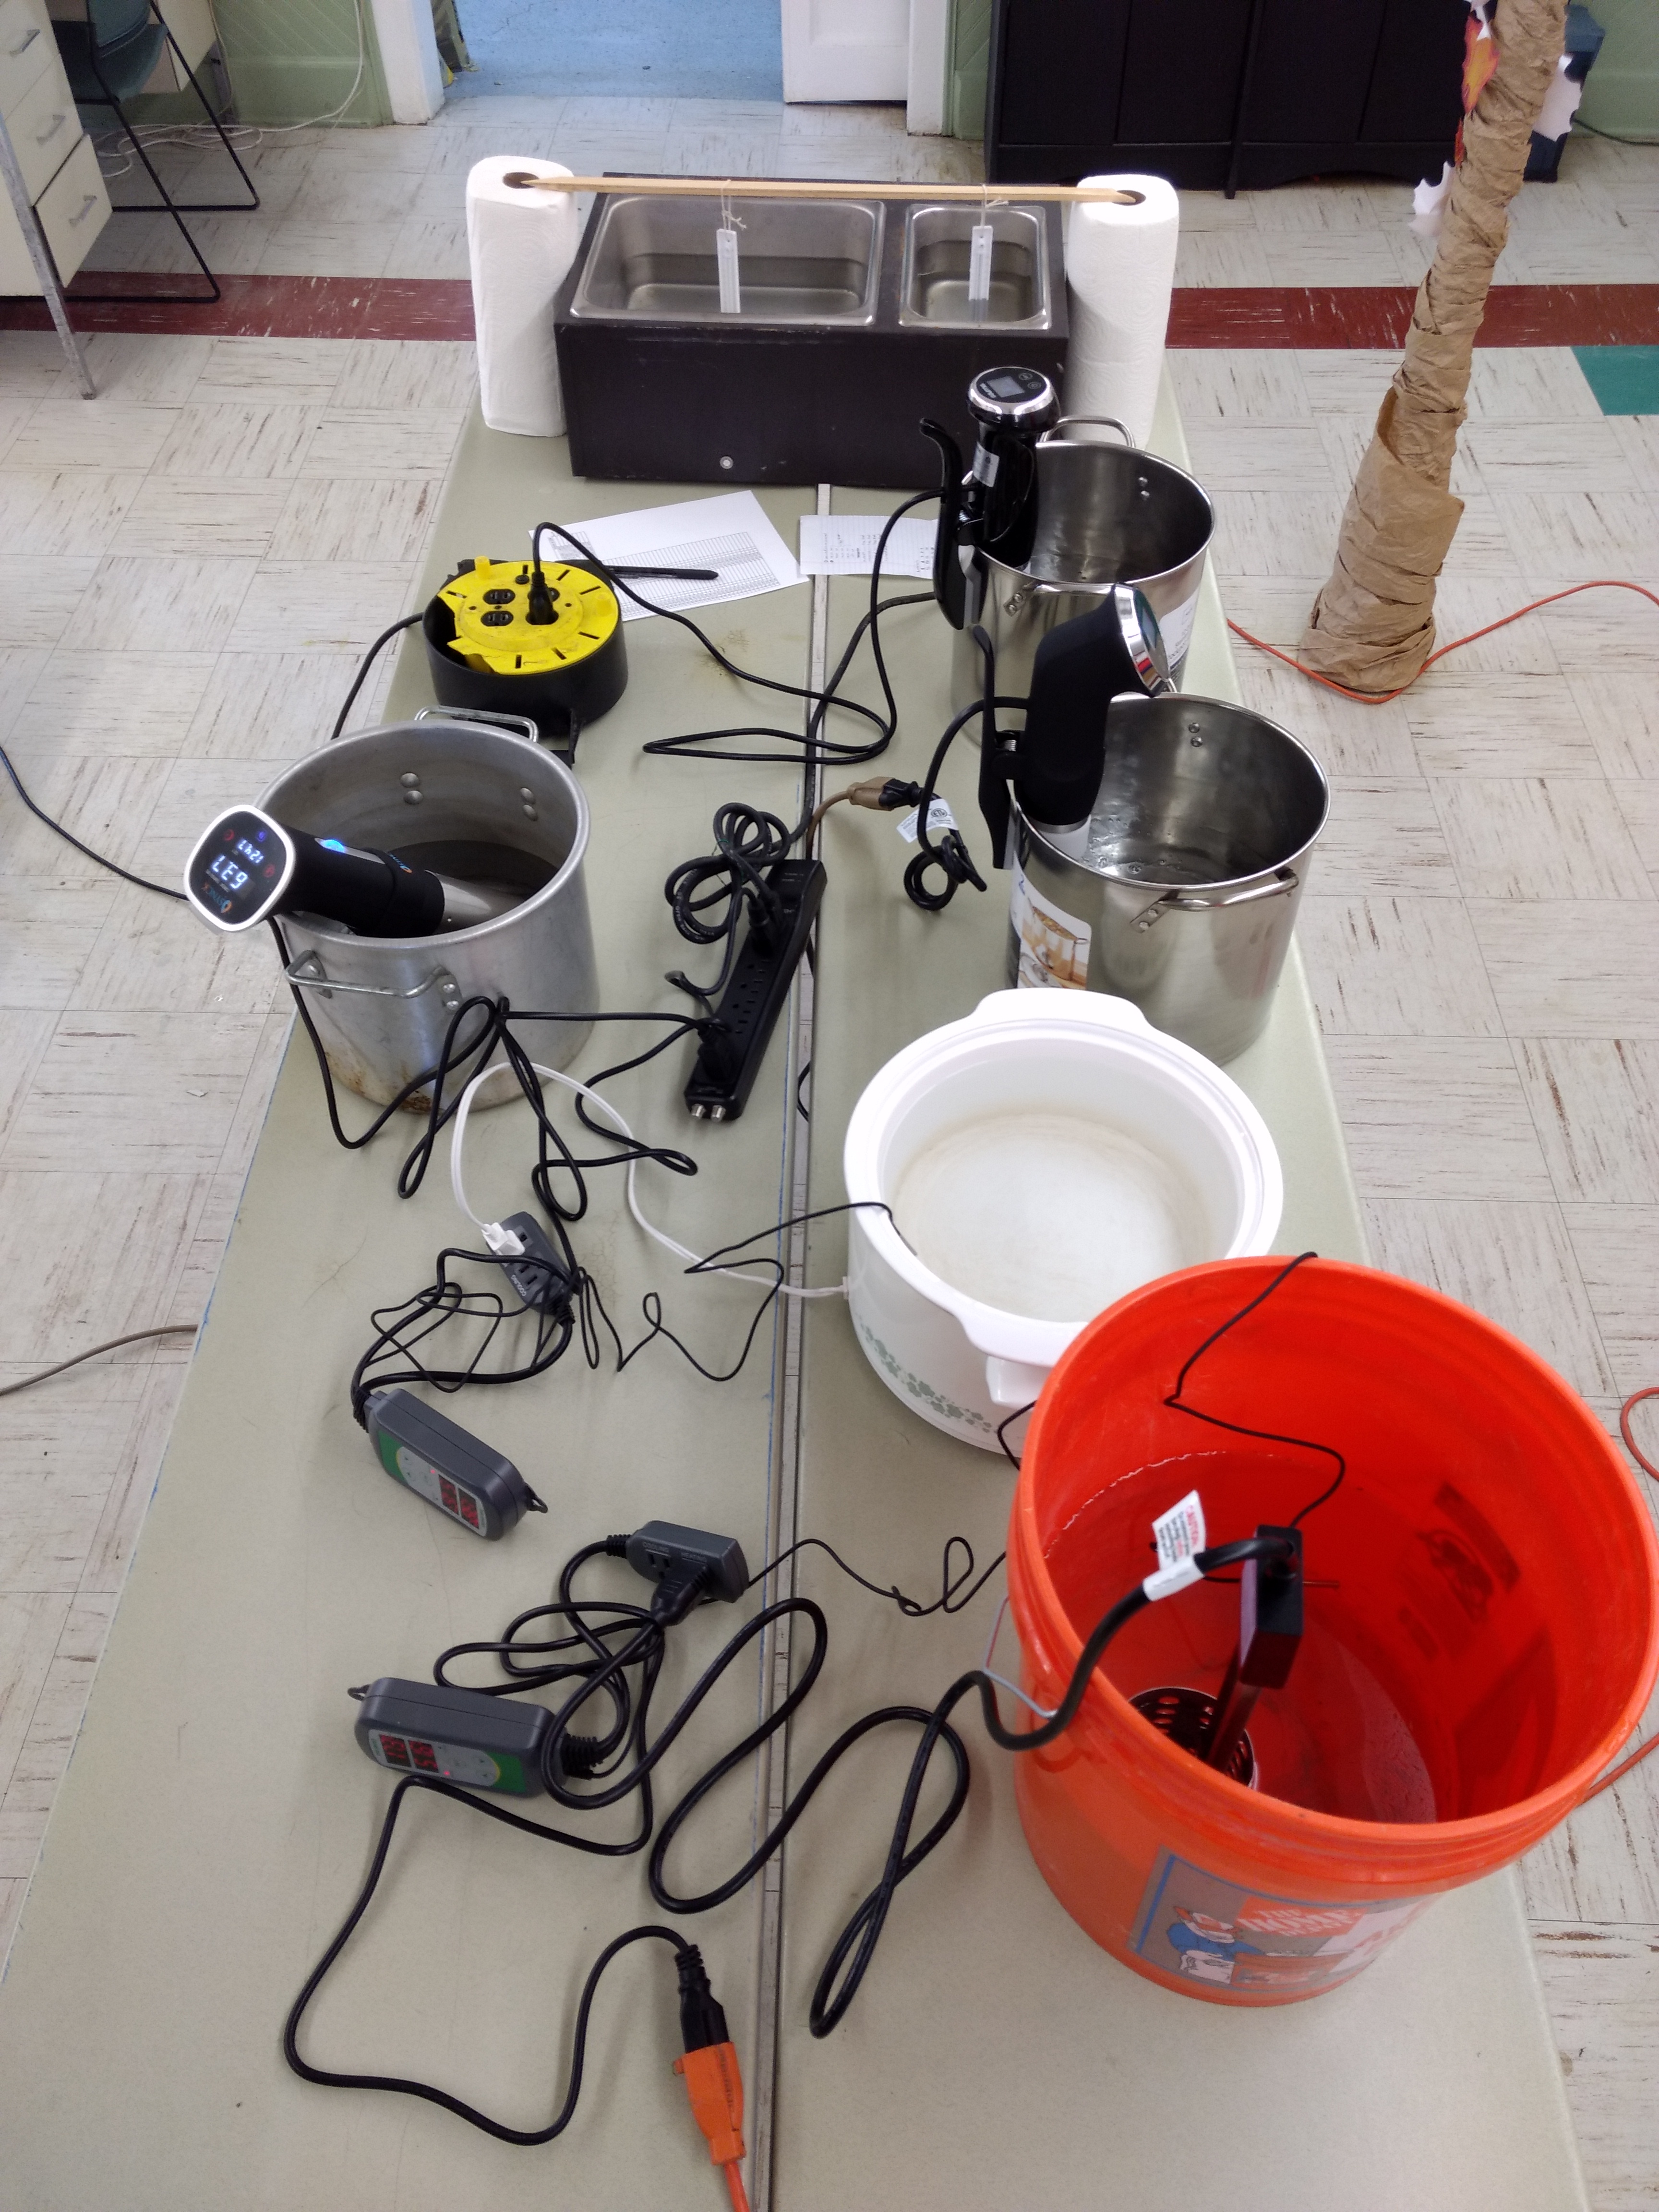
A sous vide cooking tool does an admirable job heating, holding temperature and circulating water to treat vegetable seed secured in paint strainer bags. Photo by Ben Phillips, MSU Extension.
Hot water seed treatments for vegetable crop species is a preventative management tool for seed-borne diseases. The goal is to heat and maintain water temperature for a specific amount of time. Seeds are soaked in warm water (100 degrees Fahrenheit) for about 10 minutes before going into the hot water for crop-specific times. After the time has passed, they are placed in cool water to rapidly remove the heat. They can then be planted right away, treated further with a fungicide or dried for storage. Specific recommendations have been developed by numerous organizations for certain species of vegetables (Table 1).
Table 1. The crop-specific table below shows all the prescribed temperatures and times that water must be held to adequately treat vegetable seed to kill pathogens without harming germination.
CropTemperature (F)Time (minute)References
Onion (sets)115604, 7
Garlic (sets)118207, 11
Celeriac, celery, lettuce118301, 3, 4
Sweet potato (cuttings, sprouts)120104, 8
Cress, mustard, radish122151, 3, 4
Broccoli, carrot, cauliflower, Chinese cabbage, collards, cucumber, kale, kohlrabi, onion (seeds) rutabaga, turnip122201, 2, 3, 4
Brussels sprouts, cabbage122251, 3, 4
Eggplant, spinach, tomato122251, 3, 4
Parsley122305, 9
Pepper125301, 3, 4
Pumpkin, squash131152, 6
Basil1332010
The standard tool used to develop these recommendations were lab grade water bath systems which cost upwards of $1,000 or more. However, there are more affordable tools to raise and maintain water temperature in small batches between 5 quarts and 5 gallons at a time. Our objective in this article is share information on heating tools that cost $100 or less (Table 2).
Table 2. Heating tools used can all be purchased for under $100. Time to heat 5 quarts of water from 58 F to 125 F. *The bucket heater treatment contained 11 quarts to maintain the minimum depth of 8 inches. **The stove top treatment was performed on a separate day and location in which we timed the entire process of bringing 4 quarts of water to a boil and adding it to 4 quarts of 58 F water in a 16-quart cooler until the entire solution was 125 F.
ToolModelWattageCostTime to heat
Lab Line Imperial III 10-quart analog water bath18800AQ-22531500 W$100 - $200 used on eBay32 min 45 sec
Gourmia sous vide immersion circulatorGSV-130B1200 W$79.99 new on Amazon10 min 50 sec
VAVA sous vide immersion circulatorVA-EB0161000 W$79.99 new on Amazon13 min 50 sec
Synck sous vide immersion circulatorNo model number800 W$79.99 new on Amazon20 min 57 sec
Allied Precision Bucket water heater742G1000 W$47.99 new on Amazon15 min 20 sec
Corningware 5-quart analog crock potSC-6026340 W~$30 new (we already had one)1 hr 48 min 45 sec
Inkbird Digital thermostatic outlet controllerITC-3081100 W allowance$35 new on Amazon33 min 50 sec

Methods​

Heating time​

We recorded the time for each heating tool to increase the base temperature of 5 quarts of water from 58 F to 125 F. The 5 quarts of tap water was measured into the crock pot, water bath and three 12-quart stainless steel stock pots. We used 11 quarts of water in the 5-gallon plastic bucket in order to cover the bucket heater with 8 inches of water. A sous vide tool was set into each of the stock pots and the bucket heater was placed into the bucket. The bucket heater and crock pot were controlled by Inkbird thermostats, which were set with high and low set points of 125 F and 123 F, respectively. The crock pot knob was set to “High.”. Each sous vide tool was set to 125 F. Each unit was simultaneously powered-up and a stopwatch started. As each tool reached the target temperature set point, we recorded the time from the stopwatch. We did not use a lid on any container, until after 1 hour when we placed a lid on the crock pot.
On a separate day and location, we also timed the procedure to bring 4 quarts of water to a boil (212 F) with an electric stove top burner, and then adding it to 4 quarts of 58 F water in a 16-quart cooler until the entire solution was 125 F. We also recorded the time elapsed until it fell below 120 F. The entire trial was performed inside a temperature-controlled building with multiple electrical circuits to manage the wattage.
seed treatment tools
These tools were evaluated for their ability to heat water to 125 F and hold the temperature for 20 minutes for the purposes of treating vegetable seed. From top, in clockwise order, 1500 W Lab Line Imperial III water bath, 1200 W Gourmia sous vide tool, 1000 W VAVA sous vide tool, 340 W Corningware 5-quart crock pot, 1000 W Allied Precision bucket water heater, and 800 W Synck sous vide tool. Photo by Ben Phillips, MSU Extension.

Results and discussion​

In the indoor environment, all systems raised water temperature to the target temperature set point and maintained constant for about 20 minutes (Table 2). The fastest heating systems were the 1200 W and 1000 W sous vide tools and 1000 W bucket heater, followed by the 800 W sous vide tool, 1500 W water bath and stove top water added to a cooler. The 340 W crock pot was slowest.
There were some operational differences among the tools that may likely differentiate their performance in other situations, as discussed below. In general, if performing heating treatments with multiple batches of water for seed treatment simultaneously with multiple electronic heating tools, we recommend that each tool be plugged into its own circuit breaker or GFCI outlet. Also, make sure that any external temperature controller is rated for the wattage of the heater.

Water bath​

The electric bench-top water bath heats a solution to a specified temperature by heating and maintaining the temperature of the bottom and sides of a container. Water baths can feature precise temperature controls for cooling and heating water. Some water baths feature circulators.
The 1500 W Lab Line Imperial III water bath unit we tested was slow to heat without a circulator. A lid would have hastened heating. The old model did not have an internal thermometer to set temperature, and the controller knobs only provided relative temperature settings, 1–10. We tracked temperature with a mercury thermometer and overshot our temperature setpoint, thus delaying seed treatment until the water cooled. An external thermostat to control power would have worked better than the knob settings without an internal thermometer, however the Inkbird thermostatic controller we used was limited to 1100 W. It is likely that newer digital water bath systems would work better, at a cost.

Crock pot​

Crock pots work similar to water baths by heating the bottom and sides of a container of static water to broad ranges of high temperatures and with programs that vary by make and model (e.g., Warm, Low, Med, High, Auto). These tools do not circulate the water. A digital programmable crock pot can allow the user to program the cooking time at one or more temperature ranges. However, all these settings are too hot for seed treatment, and so an external thermostatic controller is needed to cut the power at a lower temperature. A digital crock pot may not turn on again when the controller reconnects the power, but crock pots with a manual switch tend to remain “on” when the power is cut and restored. Some of the newer Instant Pot-type pressure cookers offer accurate temperature control for sous vide cooking and are speculated to work well for this application.
The 340 W crock pot unit we tested was the slowest method to heat water. After one hour, water temperature was not warm enough without a lid. Once a lid was added, temperature raised more quickly. A higher wattage unit would have also been more effective.

Sous vide tools​

Sous vide tools, also called water cookers, are portable heating elements that can be fastened to the sides of many types of thin-walled containers made of metal and plastic or set on their bottom. These tools warm surrounding water by passing electricity through a resistant metal heating element. Sous vide cooking tools all feature an onboard temperature controller and most also feature water circulators. All sous vide tools have parameters for minimum and maximum water depth, and maximum volume for optimal heating and circulation.
These were the fast heaters in our trial and all heated the water to 125 F within 21 minutes, but there were some differences in performance. The 1200 W Gourmia and 1000 W VAVA tools had aggressive and loud circulators and temperature settings had to be reset if powered off. The default temperature was in Fahrenheit (F) with these models. The 800 W Synck tool had a gentle circulator with a directional adjustor and remembered its set temperature when power was cut. The temperature on the Synck model was in Celsius (C) by default.
The VAVA required water depths between 2.75 inches and 4.9 inches. The Gourmia required a minimum depth of 2.75 inches and a maximum depth of 5 inches. The Synck required a minimum depth of 2.5 inches and a maximum depth of 6.125 inches. These water levels must be considered when choosing container and seed displacement of water.
All models beeped once the set temperature was reached and continued to maintain heat and circulation, but the Gourmia model beeped continuously unless the timer was set. All models featured internal timers which could be used to maintain accurate seed treatment times. However, no sous vide tool in this test lowered their temperature once their 20-minute timers went off. Instead, they maintained their temperatures.
We checked the onboard thermometers with the Inkbird thermoprobe (Table 3). All tools were within 2 F of the Inkbird at target temperatures, though the Gourmia and Synck models did not measure ice water accurately. However, only the Synck tool included a calibration mode to manipulate a -0.9–0.9 C correction factor.
Table 3. We double checked the temperature of the water as reported by the onboard temperature reading of each sous vide tool. Each sous vide tool was within 2 F of the target temperature. Only the Synck tool has a calibration function.
Target Temperature1200 W Gourmia1000 W VAVA 800 W Synck
Onboard readingCheck probeOnboard readingCheck probeOnboard readingCheck probe
32 F3532.53232.934.732.7
120 F120120.6120122.7120.2119.5
125 F125125.8125127.6124.7124.2
130 F130129.9130131.5130.6129.6

Other heaters​

Aquarium heaters, bird bath heaters, pond heaters and bucket heaters are similar to sous vide tools in that they are portable heating elements. Most of these do not have onboard temperature controls. Bird bath and pond heaters are meant to keep water just above freezing, and aquarium heaters usually will not bring the temperature above 80 F. Some high-wattage bucket heaters can bring water to a temperature that is high enough to treat seed.
We tested a 1000 W bucket heater. It was a fast tool to heat water but would have benefited from circulation due to the minimum of 8 inches of water required to safely use it. There was a 35 F difference between the top water and bottom water in the bucket. The thermostatic controller probe showed that when the top water was at the target temperature, the bottom water remained around 89 F. When the thermostatic controller probe was moved to the bottom, the top water became too hot for seed treatment. When left unregulated, it brought 11 quarts of water up to 210 F. This tool could damage the thermostat probe cable if it were to touch the heating element.

The stove top/cooler method​

Standard gas and electric stove tops and outdoor single-burner fryers using various fuels heat water from the bottom of the container and usually do not measure temperature. To treat seeds with this method requires separate volumes of heated water, and cold water that you mix to achieve the proper temperature, and an insulated container to maintain the temperature over the needed time.
We raised 4 quarts to a boil and then offset 4 quarts of 58 F water to bring the solution to 125 F. Note, this would need to be cooled before treating seeds. The pouring action circulated the water and the insulated lid and sides of the Styrofoam cooler maintained temperature above 120 F for 20 minutes.

External temperature controller​

For high-wattage bucket heaters and non-programmable crock pots, it is recommended to have a thermostatic controller. The controller plugs into the wall and gates power to the heating element based on the set point temperature you desire. There are many thermostatic controllers available with a similar price and features. They are often marketed to home brewers and pet owners. Some of these tools feature alarms that sound when the temperature setting is reached, or when the low/high thresholds are crossed. For treating seeds, it is important to use a controller with a waterproof probe that can handle the wattage of the heating tool and the probe must be kept away from heating elements and side walls to accurately maintain the proper water temperature.
The Inkbird model we chose for this trial limited out at 1100 W. The temperature defaulted to Celsius without a Fahrenheit option and remembered its temperature setting when unplugged.

Overall recommendations

The best and safest tools to treat seed with hot water will heat, maintain and measure temperature with accuracy. In this test, the sous vide tools offered the best combination of affordability and features to heat 5 quarts of water, measure temperature and time the treatment accurately. Of all the sous vide tools, the Synck brand had the widest depth parameters, lowest energy draw and was the only one with an adjustable circulator, temperature calibration and settings memory after shutoff. It wasn’t the fastest to heat 5 quarts of water, but these other factors made it the best in this trial.
Before going all in, compare the on-board temperature readings of the sous vide tool with another thermometer. In addition, test out this method with a small batch of old seed first. Count out 200 seeds. Sandwich 100 seeds in a wet paper towel and put it in a plastic bag. Treat the other 100 seeds according to the protocols outlined and then put those in a wet paper towel in a separate bag. After a few days, count how many have sprouted to find your germination percentage. If your germination is worse after treatment, then your tool or technique needs some adjustment before moving on to larger batches.

References


This article was published by Michigan State University Extension. For more information, visit https://extension.msu.edu. To have a digest of information delivered straight to your email inbox, visit https://extension.msu.edu/newsletters. To contact an expert in your area, visit https://extension.msu.edu/experts, or call 888-MSUE4MI (888-678-3464).

Hot Water Treatment of Seeds​


Some pathogens can occur on or within seed and can be responsible for spreading diseases or introducing them to areas where they had not previously occurred. Even when only a small percentage of seeds are infested, disease can spread among transplants in the greenhouse or in the field, causing significant crop loss or increasing the need for sprays. In some cases, , whole seedlots may be infested and this can result in severe disease outbreaks, as all seedlings will be affected and young plants may not be able to overcome early, systemic infections. Using disease-free seed is an important first step in management of many diseases, especially for small-seeded crops where seed-borne diseases are common such as tomatoes, peppers, spinach, onions, carrots, and all the brassicas. Hot water seed treatment is a cheap and effective way to penetrate the seed and kill pathogens that might be present.
Not all pathogens can penetrate and survive within the seed but bacterial pathogens are commonly seed-borne, while some fungi (e.g. Alternaria leaf spot of brasscias), oomycetes (e.g. some downy mildews), and many viruses (e.g. TMV and CMV) are also seed-borne. Tomato, pepper and brassicas are good candidates for hot water seed treatment because there are common bacterial diseases of these small seeded crops (eg. bacterial leaf spot of pepper and tomato, black rot of brassicas, bacterial canker of tomato, etc.). Even though bacterial pathogens do not survive well in soil once infected crop residues have decayed, they can be difficult to manage once established on a farm. Preventing establishment of these diseases, or reintroduction year after year, is a critical management tool. Large seeded crops (beans, cucurbits, peas, etc.) cannot be effectively disinfested with hot water treatment because the temperature required to heat the whole seed inside and out would kill the outer seed tissue and the seed will not germinate.
To decide whether to use heat treatment, first determine the likelihood that seed-borne pathogens could be present based on the crop (see table). Next, ask your seed supplier if the seed was produced in a way to minimize exposure to seed-borne pathogens and if the seed was tested for their presence. Find out if the seed has already been treated with hot water, as treating again could adversely affect the seed.
The temperature of water for treating seed varies from 115 to 125°F, depending on the crop, and the treatment period varies from 10 to 60 minutes. It is important to use the appropriate protocol for each crop to control pathogens without damaging the seed. While hot-water seed treatment can be done effectively on a stovetop, it is much better to use a precision water bath and an accurate thermometer. For details on treatment procedures for each crop and for a list of supplies needed please see the following factsheet published by Cornell and Rutgers Cooperative Extensions: http://vegetablemdonline.ppath.cornell.edu/NewsArticles/HotWaterSeedTreatment.html(link is external).


Crop

Temp (°F)

Time (min)

Diseases Controlled

Brussels sprouts

122​

25​

Alternaria leaf spot, bacterial leaf spot, black leg, black rot

Broccoli

122​

20​

Alternaria leaf spot, bacterial leaf spot, black leg, black rot

Cabbage

122​

25​

Alternaria leaf spot, bacterial leaf spot, black leg, black rot

Carrot

122​

20​

Alternaria leaf blight, bacterial leaf blight, cercospora leaf spot, Crater rot/foliar blight

Cauliflower

122​

20​

Alternaria leaf spot, bacterial leaf spot, black leg, black rot

Celeriac

118​

30​

Bacterial leaf spot, Cercospora leaf spot, Septoria leaf spot, Phoma crown and root rot

Celery

118​

30​

Bacterial leaf spot, Cercospora leaf spot, Septoria leaf spot, Phoma crown and root rot

Chinese cabbage

122​

20​

Alternaria leaf spot, bacterial leaf spot, black leg, black rot

Collards

122​

20​

Alternaria leaf spot, bacterial leaf spot, black leg, black rot

Coriander

127​

30​

Bacterial leaf spot

Cress

122​

15​

Alternaria leaf spot, bacterial leaf spot, black leg, black rot

Eggplant

122​

25​

Anthracnose, Early blight, Phomopsis, Verticillium wilt

Kale

122​

20​

Alternaria leaf spot, bacterial leaf spot, black leg, black rot

Kohlrabi

122​

20​

Alternaria leaf spot, bacterial leaf spot, black leg, black rot

Lettuce

118​

30​

Anthracnose, Bacterial leaf spot, lettuce mosaic virus, Septoria leaf spot, Verticillium wilt

Mint

112​

10​

Anthracnose, Cercospora leaf spot

Mustard

122​

15​

Alternaria leaf spot, bacterial leaf spot, black leg, black rot

Onion (seeds)

122​

20​

Purple blotch, Stemphylium leaf blight

Onion (sets)

115​

60​

Botrytis, downy mildew, purple blotch, smut, Stemphylium leaf blight

Parsley

122​

30​

Alternaria leaf blight, Cercospora leaf spot

Pepper

125​

30​

Anthracnose, bacterial leaf spot, cucumber mosaic virus, pepper mild mosaic virus, tobacco mosaic virus, tomato mosaic virus

Radish

122​

15​

Alternaria leaf spot, bacterial leaf spot, black leg, black rot

Rutabaga

122​

20​

Alternaria leaf spot, bacterial leaf spot, black leg, black rot

Shallot

115​

60​

White rot

Spinach

122​

25​

Anthracnose, Cladosporium leaf spot, cucumber mosaic virus, downy mildew, Fusarium wilt, Stemphylium leaf spot, Verticillium wilt

Sweetpotato (roots)

115​

65​

Scurf, black rot

(cuttings, sprouts)

120​

10​

Scurf, black rot

Tomato

122​

25​

Alfalfa mosaic virus, Anthracnose, bacterial canker, bacterial speck, bacterial spot, cucumber mosaic virus, early blight, Fusarium wilt, leaf mold, Septoria leaf spot, Tomato mosaic virus, Verticillium wilt, double virus streak

Turnip

122​

20​

Alternaria leaf spot, brown spot, black leg, black rot

Yam (tubers)

112​

30​

Nematodes


Topics:
Agriculture
 
Last edited:

acespicoli

Well-known member

***Important***​

This is a bottom layer feeder soil, if used improper will kill young plants!!!​

Subcool’s Super Soil Step-by-Step​

Avatar photo byHigh Times
August 7, 2009

22_8.7subcool_09.jpg
There’s nothing that compares to the flavor of properly grown organic pot: The subtle tastes and aromas created by using only “Mother Earth” are overwhelming to the senses when it’s done properly. As with vegetables, a rich organic soil can bring out the best in cannabis.
Over the past 20 years, I have tried almost every possible way to cultivate our favorite plant. And while hydro is certainly faster and the yields blow soil away, I’ve developed an organic-soil mix that consistently performs extremely well, with very little guesswork involved (i.e., I don’t have to worry about pH or ppms ever).
I spent a few years developing the recipe for this Super Soil mix, and using it in 7-gallon nursery pots, I can run from start to finish adding only plain water. Other than a bit of sweat equity every 90 days or so, using this soil takes a huge amount of the science out of gardening and puts nature back in charge. Also, the recipe is always changing in slight ways as I continue to fine-tune it in my efforts to achieve perfection.

The Base​

22_8.7subcoolmix_02.jpg

Start with at least six to eight large bags of high-quality organic soil. This is your base soil—i.e., your regular potting soil without the additives. The selection of your base soil is very important, so don’t cut corners here. I can’t begin to discuss all the different products out there, but I will mention a few in this article. A good organic soil should cost you from $8 to $10 per 30-pound bag. Since I want to give you a very specific idea of what I consider to be a balanced soil, take a look at the ingredients in a product called Roots Organic:
Lignite, coco fiber, perlite, pumice, compost, peat moss, bone meal, bat guano, kelp meal, greensand, soybean meal, leonardite, k-mag, glacial rock dust, alfalfa meal, oyster shell flour, earthworm castings and mycorrhizae.

Another local product we’re trying out now, Harvest Moon, has the following ingredients:
Washed coco fibers, Alaskan peat moss, perlite, yucca, pumice, diatoms, worm castings, feather meal, fishmeal, kelp meal, limestone, gypsum, soybean meal, alfalfa meal, rock dust, yucca meal and mycorrhizae fungi.
So far we’ve found that Roots Organic produces a more floral smell in the finished buds, while Harvest Moon generates larger yields.
If you have access to a good local mix like these, then I highly recommend starting with a product of this type. We’ve also had decent results using commercial brands, but never “as is.” The best results we’ve had to date using a well-known commercial soil has been with Fox Farms’ Ocean Forest soil combined in a 2-to-1 ratio with Light Warrior. Used on its own, Ocean Forest is known for burning plants and having the wrong ratio of nutrients, but when cut with Light Warrior, it makes a pretty good base-soil mix.
You can also just use two bales of Sunshine Mix #4, but this would be my last choice, since plants grown in this mix may not respond well to my “just add water” method of growing.
After choosing your base soil, the Super Soil concentrate is placed in the bottom one-third to one-half of the container and blended with the base soil. (With strains that require high levels of nutrients, we’ll go so far as to fill ¾ of the container with Super Soil, but this is necessary only with a small percentage of strains.) This allows the plants to grow into the concentrated Super Soil layer, which means that in the right size container, they’ll need nothing but water throughout their full cycle. One of the things I like best about this soil mix is that I can drop off plants with patients, and all they have to do is water them when the soil dries out.

Stir It Up​

22_8.7subcoolmix_03.jpg
1695300642502.png

There are several ways to mix these ingredients well. You can sweep up a patio or garage and work there on a tarp, or you can use a plastic wading pool for kids. (These cost about 10 bucks apiece and work really well for a few seasons.) Some growers have been known to rent a cement mixer to cut down on the physical labor. Whatever method you use, all that matters in the end is that you get the ingredients mixed properly.
22_8.7subcool_05.jpg


This can be a lot of work, so be careful not to pull a muscle if you’re not used to strenuous activity. On the other hand, the physical effort involved is good for mind and body, and working with soil has kept me in pretty good shape. But if you have physical limitations, you can simply have someone mix it up for you while you supervise. As far as the proper steps go: Pour a few bags of base soil into your mixing container first, making a mound. Then pour the powdered nutrients in a circle around the mound and cover everything with another bag of base soil. In goes the bat poop and then more base soil. I continue this process of layering soil and additives until everything has been added to the pile.
Now I put on my muck boots, which help me kick the soil around and get it mixed up well using my larger and stronger leg muscles instead of my arms. The rest is simple; as my skipper used to say, “Put your back into it.” This is hard work that I obsess over, even breaking up all the soil clods by hand. I work on the pile for at least 15 minutes, turning the soil over and over until it’s thoroughly mixed.
22_8.7subcool_07.jpg

Then I store my Super Soil in large garbage cans. (And before using any of it, I pour the entire load out and mix it well once more.) Once it’s placed in the cans, I water it slightly—adding three gallons of water to each large garbage can’s worth. Though it makes stirring the soil harder, adding water will activate the mycorrhizae and help all the powders dissolve.

Before Planting​

22_8.7subcool_01.jpg

So we’ve added the water, and now we let it cook in the sunshine—30 days is best for this concentrate. Do not put seeds or clones directly into this Super Soil mix or they will burn. This is an advanced recipe to be used in conjunction with base soil. First you place a layer of Super Soil at the bottom of each finishing container; then you layer a bed of base soil on top of the Super Soil concentrate; and then you transplant your fully rooted, established clones into the bed of base soil. As the plants grow, they’ll slowly push their roots through the base soil and into the Super Soil, drawing up all the nutrients they need for a full life cycle. The Super Soil can be also be used to top-dress plants that take longer to mature. I’ll use this mix for a full year.
Buds grown with this method finish with a fade and a smoother, fruitier flavor. The plants aren’t green at harvest time, but rather purple, red, orange, even black—plus the resin content is heavier, and the terpenes always seem more pungent. This method is now being used by medical growers all over the world, and with amazing results. The feedback I’ve received is really positive, including reports of hydro-like growth and novice growers producing buds of the same high quality as lifelong cultivators. So give it a try! You won’t be disappointed.

The Mix​

22_8.7subcoolint_06_0.jpg

Here are the amounts we’ve found will produce the best-tasting buds and strongest medicines:
  • 8 large bags of a high-quality organic potting soil with coco fiber and mycorrhizae (i.e., your base soil)
  • 25 to 50 lbs of organic worm castings
  • 5 lbs steamed bone meal
  • 5 lbs Bloom bat guano
  • 5 lbs blood meal
  • 3 lbs rock phosphate
  • ¾ cup Epson salts
  • ½ cup sweet lime (dolomite)
  • ½ cup azomite (trace elements)
  • 2 tbsp powdered humic acid
1695300406109.png

This is the same basic recipe I’ve been using for the past 15 years. The hardest ingredient to acquire are the worm castings (especially since many people don’t even know what they are. FYI: worm poop). But don’t decide to just skip them: Be resourceful. After all, worms comprise up to ¾ of the living organisms found underground, and they’re crucial to holding our planet together. Also, don’t waste money on a “soil conditioner” with worm castings; source out some local pure worm poop with no added mulch.

TGA has several proven hybrids and they have developed quite a reputation for customer support and for very accurate descriptions of there genetics. Our strains have been featured in the High Times Top 10 in 2006 and 2007 and 2008 and 2009 being awarded the Cover Shot as well as inside and on the cover of the big book of buds 3 and soon Big Book 4. Our main goal when making a new strain is to combine the characteristics of two strains or to replicate as close as possible a clone only phenotype that’s already in demand by the growing public. We provide these to the Medical Cannabis Community as well. When combining strains it is usually to work in better or different taste such as a high potency variety such as Jack’s Cleaner using Space Queen, or making available in seed form old clone only strains like Purple Urkle in our new release Querkle *(Featured in the Hightimes 2008 Grow Guide*). We test all of our crosses personally and our stash jars are full of our own hybrids. We back up every cross with lots of pictures and test grows performed by people who actually buy the seeds online. We also donate free seeds heavily to the medical community so supporting TGA is donating to a very good cause. , Subcool is the Author of Dank, The Quest for the Very best Marijuana. Published by Quick Trading available @ www.tgagenetics.com, Subcool is a contributor to High Times, Skunk, Treating Your Self and West Coast Cannabis Magazines

High Times Lifetime Achievement Award​

1695300488383.png
1695300557865.png

RIP Subcool
 
Last edited:

acespicoli

Well-known member
Basic Recipe

6 1gal scoops - 75%Peat
2 1gal scoops - 25%Forest Compost
Lime to desired ph runoff

Advanced Recipe

60%Peat
40%Forest Compost
5 lbs Tomato Tone or Plant Tone
Lime to desired ph runoff


Roots Organic:
Lignite, coco fiber, perlite, pumice, compost, peat moss, bone meal, bat guano, kelp meal, greensand, soybean meal, leonardite, k-mag, glacial rock dust, alfalfa meal, oyster shell flour, earthworm castings and mycorrhizae.
  • 8 large bags of a high-quality organic potting soil with coco fiber and mycorrhizae (i.e., your base soil)
  • 25 to 50 lbs of organic worm castings
  • 5 lbs steamed bone meal 3-15-0
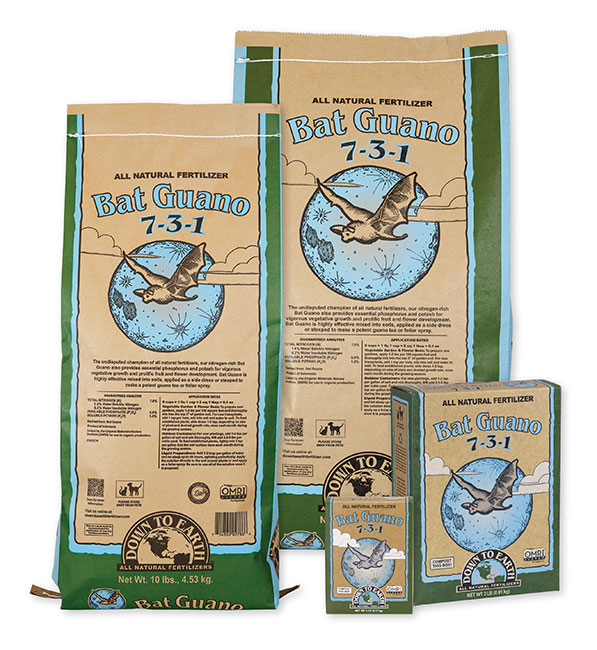
  • 5 lbs Bloom bat guano 7-3-1
  • 5 lbs blood meal 12-0-0
  • 3 lbs rock phosphate 0-3-0
03-15-0
07-03-1
12-00-0
00-1.7-0

22-19.7-1 (K deficient) langbeinite as well as P too high
  • ¾ cup Epson salts
  • ½ cup sweet lime (dolomite)
  • ½ cup azomite (trace elements)
  • 2 tbsp powdered humic acid
ferrous sulfate (FeSO4. 2H2O). Mix 1 to 2 oz of ferrous sulfate in 1 gallon of water.

So we’ve added the water, and now we let it cook in the sunshine—30 days is best for this concentrate. Do not put seeds or clones directly into this Super Soil mix or they will burn. This is an advanced recipe to be used in conjunction with base soil. First you place a layer of Super Soil at the bottom of each finishing container; then you layer a bed of base soil on top of the Super Soil concentrate; and then you transplant your fully rooted, established clones into the bed of base soil.


20% decrease in roots and a 40% increase in shoot and root

Based on the results of this study, we recommend providing plants with a nutrient solution containing N and P at approximately

N 194 mg L–1 and 59 mg L–1, K 175-240 mg L–1


N - P - K
194-59-200

414 (almost ideal) in DWC atleast


7.3.1
1.01.2
0.00.22 Reduced as needed
8-3.1-8

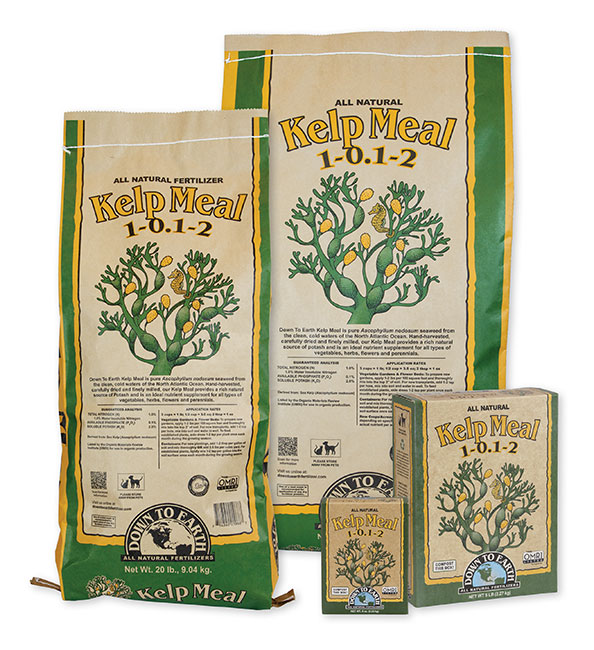
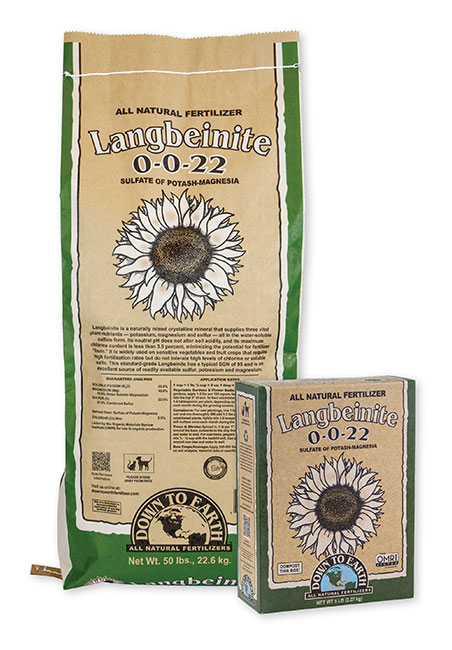
Bat - Kelp - Langbeinite

1695779817694.png

What color is potassium deficiency?


1695780560675.png


If there is not enough potassium in the soil for the whole plant, the initial symptoms first appear on the leaves. The common symptom is yellowing tissue appearing around the edges of some of the leaves. Entire leaves can turn a light green if the deficiency progresses.
 
Last edited:

acespicoli

Well-known member
1695780937078.png

1695780972560.png

1695781968450.png

1695781054788.png

1695781088104.png

1695782034744.png

1695781150848.png
1695781178640.png

1695781210354.png

1695781919093.png


Holytone or Palmtone ? Holytone has the preferable sulfur content ...as well as much higher calmag
Cannabis is an annual, dioecious, flowering herb.


Definition​

In botany, the term herb refers to a herbaceous plant,[6] defined as a small, seed-bearing plant without a woody stem in which all aerial parts (i.e. above ground) die back to the ground at the end of each growing season.[7] Usually the term refers to perennials,[6] although herbaceous plants can also be annuals (plants that die at the end of the growing season and grow back from seed next year),[8] or biennials.[6] This term is in contrast to shrubs and trees which possess a woody stem.[7] Shrubs and trees are also defined in terms of size, where shrubs are less than ten meters tall, and trees may grow over ten meters.[7] The word herbaceous is derived from Latin herbāceus meaning "grassy", from herba "grass, herb".[9]

Another sense of the term herb can refer to a much larger range of plants,[10] with culinary, therapeutic or other uses.[6] For example, some of the most commonly described herbs such as sage, rosemary and lavender would be excluded from the botanical definition of a herb as they do not die down each year, and they possess woody stems.[8] In the wider sense, herbs may be herbaceous perennials but also trees,[10] subshrubs,[10] shrubs,[10] annuals,[10] lianas,[10] ferns,[10] mosses,[10] algae,[10] lichens,[8] and fungi.[8] Herbalism can utilize not just stems and leaves but also fruit, roots, bark and gums.[8] Therefore, one suggested definition of a herb is a plant which is of use to humans,[8] although this definition is problematic since it could cover a great many plants that are not commonly described as herbs.


Drug type cannabis absolutely has a woody stem where as hemp may have a hollow stem...?
 
Last edited:

acespicoli

Well-known member

USDA Hemp Descriptor and Phenotyping Handbook, Version 3​

Editors: Zachary Stansell, Tyler Gordon, Anthony Barraco, Daniel Meyers, Anthony Rampulla, Tori Ford, Anya Osatuke​

20-Jul-2023​


I spent more than a few hours lately trying to decide which lines were valuable enough to continue
Much work still needed... Not enough time for them all 😥

This is beautiful :huggg: thx for sharing
 

GenghisKush

Well-known member

USDA Hemp Descriptor and Phenotyping Handbook, Version 3​

Editors: Zachary Stansell, Tyler Gordon, Anthony Barraco, Daniel Meyers, Anthony Rampulla, Tori Ford, Anya Osatuke​

20-Jul-2023​


Amazing resource. Thank you for sharing it.

I'm digging these procedures from the USDA for cloning cannabis

Cloning​

🧪Cloning🧪
Cuttings should be harvested from disease-free stock plants under non-stressed conditions. Collect turgid cuttings during optimal water conditions (non-wilted plants). Environmental conditions that increase propagation success are provided by an atmosphere that reduces water loss and maintains leaf turgidity, with optimal humidity between 75 and 90%, often achieved using humidity domes or “mini greenhouses”. Ample but not excessive light and clean, moist, and well aerated rooting media should also be provided (Casillas 2016). Ideal temperature should be around 25-27 °C (78-80 °F) with a root zone temperature of about 27-30 °C (80-85 °F). Once cuttings are taken, check for disease daily along with moisture content of media. If using humidity domes, monitor humidity levels and include fresh air daily.
Materials
  • Scissors/Pruning shears
  • Lab Gloves
  • IBA based rooting Hormone (we use Clonex™)
  • Beakers/Cups
  • Spray Bottle w/ water
  • Sterile medium (potting soil/Oasis Cubes/Water)
  • Humidity domes (if using potting soil + trays)
  • 70% ethanol (alternative isopropyl alcohol)
  • Paper towels
  • Seedling flats
  • Disease-free Cannabis plants (ideally in the vegetative state)
  • Aeroponic apparatus
  • Mist timer
  • Heating mat
Common cloning tools and supplies

Common cloning tools and supplies
Methods (Aeroponic/Hydroponic)
  1. Start with clean water (DI or tap) with no fertilizer
  2. Cut lateral branch close to a node at a 45-degree angle
  3. Gently scrape the stem around the cut to expose cambium layer
  4. Remove any lower branches, keep approximately 3-5 nodes worth of leaves, leaving cutting looking like a “palm tree”
  5. If taking many cuttings at a time, place cuttings in a beaker/cup of water until ready to dip into rooting hormone
  6. Dip bottom 2 cm of cutting in rooting hormone, IBA (Clonex™)
  7. Place cutting in aeroponic/hydroponic system
  8. Let sit and watch for roots (7-14 days)
  9. Use alcohol to disinfect tools before moving on to the next accession
Aeroponic cloning setup at PGRU

Aeroponic cloning setup at PGRU
Methods (Potting soil/Oasis Cubes/Humidity Dome)
  1. Cut lateral branch close to a node at a 45-degree angle
  2. Gently scrape the stem around the cut to expose cambium layer
  3. Remove any lower branches, keep approximately 3-5 nodes worth of leaves, leaving cutting looking like a “palm tree”
  4. If taking many cuttings at once, place cuttings into beaker/cup filled with water until ready to dip into rooting hormone
  5. When ready to root cuttings, emerge bottom 2cm of cutting in rooting hormone (Clonex™)
  6. Place cutting with rooting hormone into seedling tray with potting soil or oasis cubes
  7. Place humidity dome onto tray, mist water on inside of humidity dome
  8. Let sit and watch for roots (7-14 days)
  9. Use isopropyl alcohol to disinfect tools before moving on to the next accession
Typical humidity dome setup

Typical humidity dome setup
Modified aeroponic rooting system protocol (Regas et al. 2021)
  1. Generation of a mother plant for clonal propagation
    1. Select healthy, female mother plant that exhibits desirable traits
    2. Allow mother plant to reach the appropriate size (roughly 25 mature shoots) for clonal propagation
    3. Allow mother plants to remain in the vegetative growth stage (light:dark = 18h:6h) to promote shoot growth for future propagation
  2. Construction and preparation of aeroponic system
    1. Begin by positioning the lid on top of the container. Drill desired number of holes into the lid while providing adequate space (~3cm) between each
    2. Position water pump in the center of the container
    3. Pour 7-8 L of distilled water into the container so that the pump nozzle remains roughly 2.3 cm above the waterline. NOTE: This ensures the submersible water pump can push water with enough force to spread across the container lid. Distilled water is recommended; however, regular tap water may also be used.
    4. Situate the appropriate amount of Oasis Cubes or media of choice into each slot. Turn on the pump and allow it to run for 24 h on a set timer.
  3. Selecting and excising appropriate shoots
    1. Collect shoots near the apical meristem using a sterilized scalpel or scissor. Cuttings are ~10 cm in length, ideally with several nodes. NOTE: Cut the stem at a 45° angle. Cutting at a 45° angle increases the surface area of the basal portion of the cutting, allowing more space for root development.
    2. Remove all foliage except foliage present on the top three nodes
    3. Dip the newly excised cutting into the rooting solution containing indole-3-butyric acid (IBA) ~ 2-5 cm up from the base of the stem for ~5 s
    4. Insert the cutting into the center of an Oasis cube positioned in the aeroponic system. NOTE: the cutting insertion depth is to remain ~1-2 cm from the bottom of the Oasis Cube
    5. Mist the unrooted cuttings with the water every 100 seconds for 20 seconds
    6. Grow the cuttings with 18-24 h of light per day with a photosynthetic photon flux density (PPFD) of 100 µmol/m2/s at 24-29°C and 40-60% relative humidity.
  4. Aeroponic system maintenance and propagule health
    1. Replenish the system with water at a pH between 5.0-6.0 every 2-5 days
    2. Lightly mist the cuttings every 100 seconds for 20 seconds
    3. Add 5 mL of each nutrient solution to the reservoir every 3-5 days
    4. Add 15 mL of the algae and bacteria cleaning solution containing hypochlorous acid (0.028%) per 10 L of water every 5 days
  5. Transplanting propagules
    1. Select the cuttings with long, white, fibrous roots. NOTE: Avoid cuttings with brown, slimy, and short root systems as this is an indicator for the presence of root rot and will usually take longer to acclimate to the new growing medium and can bring unwanted diseases.
    2. Place cutting into potting soil media, transplant propagules to 4 L nursery pot filled with a nutritious soil mix. NOTE: Watering immediately is recommended to prevent the roots from drying out.
  6. Cleaning and storage of aeroponic system
    1. When the system is no longer in use, wash with water and clean with 70% ethanol or another disinfectant (i.e Greenshield)
    2. Remove the filter from the water pump and rinse with water to remove debris
    3. Dry the system by wiping it down with paper towels or washcloth
    4. Place pump inside the tub with the lid on and store until it is needed.
 

GenghisKush

Well-known member
Amazing.

Pollen Collection Protocol​

🧪Pollen Collection🧪
Watch the pollen collection training tutorial by Tony Barraco!
Created by: Daniel Meyers (last updated: March 30, 2023). Based on an unwritten protocol developed by Nicholas Genna during Summer 2022.
Background
Reliable pollen collection and storage methods are important for germplasm conservation, breeding efforts, and scientific inquiry. This protocol evolved during the collection and study of hemp (Cannabis sativa L.) pollen at the Plant Genetic Resources Unit (USDA-ARS) in Geneva, New York during the summer of 2022. The fine meshes were added to the existing components to eliminate the collection of insects and parts of flowers and leaves.
Materials
  • Spore collection kit (Large Spore Cyclone, GRA-101, Tallgrass Solutions Inc.)
  • Vacuum (Super Coach Pro 6, 107310, ProTeam)
  • Glass vials (three included in above kit)
  • 100 µm mesh, cut into squares (~12 cm x 12 cm)
  • Rubber bands
  • Air compressor or shop-vac with a blower port
  • OPTIONAL: 10 µm mesh, cut into squares (~12 cm x 12 cm)
  • RECOMMENDED:
    • Cooler with ice packs
    • Gloves
    • Ethanol (70%, spray bottle)
    • Face mask (for use if collecting for a long time, the author recommends N-95 or comparable)
Figure 1: Demonstration of pollen collection. Picture of Tony Barraco, by Anthony Rampulla.

Figure 1: Demonstration of pollen collection. Picture of Tony Barraco, by Anthony Rampulla.

Methods
  1. Assemble the pollen collection apparatus and attach it to your vacuum (figs. 4-7). OPTIONAL: Place the 10µm mesh between the collection device and the vacuum. This is advised when collection of all pollen is the goal (e.g., if you are measuring total pollen produced at the individual level), as minimal pollen is lost into the vacuum, and some suction power is sacrificed.
  2. Place a 100 µm mesh square on the nozzle of the pollen collection apparatus and fix in place with a rubber band. NOTE: As collection goes on, suction power will be lost over time due to the mesh getting plugged up with a mixture of pollen and secondary metabolites. This issue can be resolved by moving the mesh over slightly and fixing it in place again, and eventually by replacing the mesh sheet. Mesh sheets are reusable after washing. The author recommends scrubbing with dish soap and, if the mesh is still sticky or stained, soaking it in 10% bleach for 24 hours, then rinsing with DI water.
  3. Turn on the vacuum and collect the desired pollen by holding the pollen collection apparatus in one hand to an inflorescence and using the other hand to cup the inflorescence opposite the nozzle. Collect from the entire plant moving from inflorescence to inflorescence, and from lower branches to upper branches, attempting not to shake the plant during this process (and therefore lose pollen).
  4. Turn off the vacuum, unscrew the collection vial and cap it. If you are not using the pollen or taking it back to be stored immediately, place it in a cooler with ice packs while you continue collecting.
Figure 3: Pollen can collect along internal grooves and corners of the collection apparatus.

Figure 3: Pollen can collect along internal grooves and corners of the collection apparatus.

  1. To minimize contamination, take the following steps between pollen collections:
    1. Replace all mesh used for the previous collection.
    2. Disassemble the pollen collection apparatus and blow it out using an air compressor or the blower port on a shop-vac. Make sure to clean out inside corners of the apparatus where pollen can collect (fig. 3).
    3. Wear gloves, sterilize with 70% ethanol, and allow to dry.


*Figures 4 (top left): The pollen collection apparatus completely disassembled with arrows indicating where parts are insert for assembly. Figure 5 (top right): The next stage in assembly of the apparatus. Figure 6 (bottom left): Additional pieces that both come with the apparatus (labeled with blue) and those that are modifications or the vacuum (labeled with red). Arrows indicate assembly. Figure 7 (bottom right): The pollen collection apparatus completely assembled as described in this protocol & ready for collection. *

Figures 4 (top left): The pollen collection apparatus completely disassembled with arrows indicating where parts are insert for assembly. Figure 5 (top right): The next stage in assembly of the apparatus. Figure 6 (bottom left): Additional pieces that both come with the apparatus (labeled with blue) and those that are modifications or the vacuum (labeled with red). Arrows indicate assembly. Figure 7 (bottom right): The pollen collection apparatus completely assembled as described in this protocol & ready for collection.
 

acespicoli

Well-known member

Neem Cakes for Gardening​


by Alec McClennan, on March 10, 2018


Benefits of Using Organic Neem Cakes as a Soil Amendment​

The use of Neem, in its various forms, in gardening and farming for amending the soil is a well-known practice. What is good about Neem too is that various research studies have been done, and it has been proven that Neem extracts are non-toxic to humans. These extracts also aren’t toxic to birds, to beneficial insects and help to protect crops from over 200 crop eating pests.

Where Does Neem Come From?​

Neem comes from the Neem tree which is a tropical evergreen tree. This tree is native to India as well as other southeastern countries on the globe. Now the Neem tree also has many other uses besides just for enhancing soil. The seeds bark and leaves all contain compounds of the Neem tree are proven antiseptics, antivirals, antipyretics, anti-inflammatories, and antifungals in their uses. The Neem tree is thus called “the village pharmacy” in India because of all the ways it’s used. However, Neem does have a garlic-like odor as well as a bitter taste so you aren’t going to find it soon in American restaurants.
Neem Cake

Ways Other Parts of the Neem Tree are Used​

Every part of the Neem Tree has a use and these have been well documented:
  • The Neem Oil which is extracted from the Neem Seeds has insecticidal and medicinal properties and is used in pest control.
  • Neem Seed Cake is used as a soil amendment which enriches the soil and lowers nitrogen loss. Plus it works as a nematicide.
  • The leaves of the Neem Tree can be used to treat chicken pox and warts. It is used by applying the leaves in paste form directly to the skin. Neem leaves too are used to make a tea to reduce the fever caused by Malaria. Also, the leaves can be added to hot water to brew a foot soak to treat various foot fungi. It can also be used by adding it to the bath water for a relaxing time in the tub.
  • The twigs of Neem Trees are used in both India and Africa as toothbrushes. You can buy toothpaste with Neem extract commercially too.
  • Both the leaf and the seed of the Neem Tree produce pain relieving, anti-inflammatory and fever reducing compounds. This can aid in the healing of cuts, burns; earaches sprains and headaches.
  • The bark and roots in powdered form can be used to control fleas and ticks on pets.
  • Skin infections such as acne, psoriasis, scabies, and eczema can be treated with the anti-bacterial properties of Neem.
As you can see, Neem has many beneficial uses.

What Exactly is Neem Cake?​

Neem Cake is the de-oiled residue that can be used after Neem kernels are crushed for their oil. In this seed kernel are nutrients like NPK (nitrogen-phosphorus-potassium) as well as nortriterpenoids and isoprenoids. These nutrients are nematicidal in nature so the seed cake ends up with these properties.
Neem Cake is used in agriculture, horticulture, floriculture and the turf industry as an organic fertilizer as well as a natural nematicide. Neem Cake is used as an organic fertilizer because of the various micro and macro nutrients which it is composed of. It will control, at the same time, soil based pathogens as well as nematodes. It will also inhibit nitrification of the soil plus enhance the efficiency of nitrogen providing fertilizer.

Why Should You Use Neem Cakes?​

There are several reasons why you should use Neem Cake as a soil amendment:
  • It’s bio-degradable and can be used with many other different types of fertilizers.
  • It will enhance the efficiency other fertilizers you use because it will inhibit nitrification.
  • It's free from any heavy metals so it’s safe for crop use.
  • It has a slow release, which means the nutrient release is uniform. This ensures constant growth of your crops or plants during the growing season. Because it will release the nutrients slowly that means your crops will have nutrients throughout the growing time.
  • The Neem Cakes act as a nutrient for plants instead of being a nutrient collector. The Neem Cake contains NPK (nitrogen- phosphorus-potassium) plus other micro nutrients so your plants are fed continually.

What are Some Other Benefits of Using Neem Cakes?​

There are other benefits to using Neem cakes as well such as:
  • Neem Cakes are more cost efficient because the fertilizer in them lasts longer. The Neem Cake remains effective until the next crop is planted because of its long sustaining organic fertilizer compounds too. This, in turn, cuts the cost of having to add extra nutrients; always a bonus.
  • This soil amendment is twofold. It will provide a better crop yield because it will provide the nutrients that crops need. And secondly, it helps to cure diseases and will control the growth of nematodes and harmful plant pathogens. Plus, the crop yield is15-25% higher when using Neem Cakes than with any other fertilizer.
  • Neem Cakes can also improve the organic content of the soil by providing lots of micro and macro nutrients. This also improves the fertility of the soil in which your plants or crops are planted.
  • The use of Neem Cakes too will increase the water holding capability of the soil and improve soil structure. With the soil improvement there will be an increase in beneficial organisms like earthworms also. Plus, Neem Cakes will control harmful organisms like nematodes and pathogens. And the use of these cakes reduces the alkaline content in the soil because when they decompose, this produces organic acids.
Neem is also compatible with the microbes in your soil and will improve the rhizosphere micro flora which will help to ensure your soil is fertile too. Additionally, Neem Cake will help improve to the texture of your soil, the organic content and water holding capacity as stated as well as helping to keep the soil aerated for root development.

How do Neem Cakes Work Against Nematodes?​

Nematodes are hidden enemies that lurk in your soil ready to destroy or reduce crop yield in both your crops and your plants. Neem Cake uses different mechanisms to help control nematodes and plant pathogens which are soil borne.
  • When Neem Cakes are used at the earlier stages of a crop cycle, this provides protection from nematodes and plant pathogens. The Neem Cakes do contain, in their makeup, nortriterpenoids and isoprenoids which are nematocidal. So the earlier it’s used in planting, the more protection that is provided.
  • Crops will show nematocidal properties in the roots too as a systemic feature because of using Neem Cakes in the early stage of your crops or plants’ cycle.
  • When it organically decomposes, the Neem Cakes release fatty acids, Ketones, aldehydes, Amino acids, free sulphur and carbohydrates. These affect the nematode population because the metabolites are nema-toxic in nature. Plus, the by-products of the Neem Cake decomposing will increase the microbes in the soil parasitic activity on nematodes. The end result is a reduced population of nematodes.
  • As an extra feature, Neem Cakes can manage pest control of insects and pests. This is because the cakes contain salannin, nimbin, azadirachtin and azadiradione as major components. These components cause seven types of activities to happen in the soil: a) antifeedant, b) attractant, 3) repellent 4) insecticide, 5) nematicide, 6) growth disruptor and, 7) antimicrobial.

Using Neem Cakes with Urea​

Urea is produced by animals and humans but it is also produced synthetically with anhydrous ammonia. This is a form of nitrogen fertilizer with a NPK (nitrogen- phosphorus-potassium) ratio of 46-0-0. When Neem Cake is used with urea and other fertilizers with nitrogen in them, it increases their efficiency because it reduces the rate of nitrification. This then reduces the rate that the nitrogen is released and increases the length of time nitrogen is in the soil. Now Neem Cake makes the soil become more fertile because it has an ingredient in it that blocks soil bacteria from turning nitrogenous compounds into nitrogen gas. This is what prolongs how long the nitrogen is available in the soil for both the growing of long duration crops and short duration crops.

What Kind of Neem Cakes are Available?​

Neem Cakes come in different types of packaging and there are different ways to use them. Below is a list of the different types of cakes available:
  • Neem Cake granules are used as a fertilizer and manure in farming and in agriculture. The cake is made from the Neem Tree seed residue; it’s environmentally friendly too and has the highest azadirachtin content as it is made from all the parts of the Neem Tree.
  • Neem Cake Powder is rich in nitrogen, phosphorus, sulphur and calcium. It’s a natural product and is used for growth and a high yield of crops. The nutrient content and fertility of the soil increase when Neem Powder is mixed with it.
  • Neem Cake manure helps in producing a greater crop harvest than synthetic manures. It not only helps to increase the fertility of the soil but also acts as a pest repellent.
  • Neem Cake Bio Mix is a mixture of bio and organic fertilizer with Neem being one of its main ingredients. It is used to enrich the soil by providing essential required nutrients.
  • Neem Cake Fertilizer is the most favored product used for plant fertilization by farmers and gardeners. It also acts as a bio fertilizer by providing the required nutrients, nitrogen and phosphorus necessary for growing crops and plants. Its use basically ensures a high yield of crop. Neem is used for both cash and food crops, such as sugarcane and vegetables.

Tips on How to Apply Neem Cakes​

Neem Cakes are applied when you are preparing your soil for sowing. You will need to plough the soil deeply and mix the Neem Cakes thoroughly in doing this. By mixing the cakes thoroughly through the soil, this will yield you better results with your harvest. Neem Cake not only works as an organic fertilizer, but it can also be used as an IPM fertilizer when used with mixed crops. When using it in mixed crops, it enhances the IPM techniques. IPM is Integrated Pest Management which is an ecosystem approach to grow healthy crops. It is an approach which uses different crop management and growing strategies to yield the most crops with a minimum use of pesticides.
If you are planning to switch from a chemical fertilizer to Neem Cakes, you will need to apply both over time still while in transition. Reduce the chemical fertilizer you are using continuously until you are just using the Neem Cakes in place of the fertilizer. Since Neem Cakes are effective longer and decompose so slowly, their use is more cost effective as well as better for the environment in the long run.

How to Apply Neem Cakes​

The following methods of application for Neem Cakes will work best:
  • Plough the soil deeply that’s to be amended with Neem Cakes. This will give you better control of nematodes that are lurking around ready to eat whatever you plant. This will bring them to the surface and disrupt where they are living.
  • Mix the Neem Cake thoroughly at the rate that’s recommended with the soil you are amending. When you do it this way, it gives you better results than if you only apply it to the surface of the ground.
  • If Neem Cake is mixed with the soil around the roots of plants, vegetables bushes and trees, it will boost the immune system of the plant. Some of the crops which benefit from using Neem Cakes are:
  • Oranges by controlling the citrus nematodes
  • Tomato by controlling Tomato Seedling nematodes
  • Tobacco by controlling Root Knot nematodes
  • Fodder trees by controlling nematodes
  • Rice, when used with Urea, by increasing the nitrogen uptake and slowing the release of the fertilizer urea.
Neem products haven’t any bad effects on humans or animals and the effects on the agricultural crops which are produced are beneficial. This makes Neem an acceptable alternative to harmful fertilizers and pesticides. Neem Cakes are a totally organic plant food which will increase productivity of your crops and improve your soil’s fertility.
 

acespicoli

Well-known member

Principles​

An American IPM system is designed around six basic components:[12]


  • Acceptable pest levels—The emphasis is on control, not eradication. IPM holds that wiping out an entire pest population is often impossible, and the attempt can be expensive and unsafe. IPM programmes first work to establish acceptable pest levels, called action thresholds, and apply controls if those thresholds are crossed. These thresholds are pest and site specific, meaning that it may be acceptable at one site to have a weed such as white clover, but not at another site. Allowing a pest population to survive at a reasonable threshold reduces selection pressure. This lowers the rate at which a pest develops resistance to a control, because if almost all pests are killed then those that have resistance will provide the genetic basis of the future population. Retaining a significant number of unresistant specimens dilutes the prevalence of any resistant genes that appear. Similarly, the repeated use of a single class of controls will create pest populations that are more resistant to that class, whereas alternating among classes helps prevent this.[13]
  • Preventive cultural practices—Selecting varieties best for local growing conditions and maintaining healthy crops is the first line of defense. Plant quarantine and 'cultural techniques' such as crop sanitation are next, e.g., removal of diseased plants, and cleaning pruning shears to prevent spread of infections. Beneficial fungi and bacteria are added to the potting media of horticultural crops vulnerable to root diseases, greatly reducing the need for fungicides.[citation needed]
  • Monitoring—Regular observation is critically important. Observation is broken into inspection and identification.[14] Visual inspection, insect and spore traps, and other methods are used to monitor pest levels. Record-keeping is essential, as is a thorough knowledge of target pest behavior and reproductive cycles. Since insects are cold-blooded, their physical development is dependent on area temperatures. Many insects have had their development cycles modeled in terms of degree-days. The degree days of an environment determines the optimal time for a specific insect outbreak. Plant pathogens follow similar patterns of response to weather and season. Recently, automated systems based on AI have been developed to identify and monitor flies using e-trapping devices.[15]
  • Mechanical controls—Should a pest reach an unacceptable level, mechanical methods are the first options. They include simple hand-picking, barriers, traps, vacuuming and tillage to disrupt breeding.
  • Biological controls—Natural biological processes and materials can provide control, with acceptable environmental impact, and often at lower cost. The main approach is to promote beneficial insects that eat or parasitize target pests. Biological insecticides, derived from naturally occurring microorganisms (e.g.Bt, entomopathogenic fungi and entomopathogenic nematodes), also fall in this category. Further 'biology-based' or 'ecological' techniques are under evaluation.
  • Responsible use—Synthetic pesticides are used as required and often only at specific times in a pest's life cycle. Many newer pesticides are derived from plants or naturally occurring substances (e.g.nicotine, pyrethrum and insect juvenile hormone analogues), but the toxophore or active component may be altered to provide increased biological activity or stability. Applications of pesticides must reach their intended targets. Matching the application technique to the crop, the pest, and the pesticide is critical. The use of low-volume spray equipment reduces overall pesticide use and labor cost.

An IPM regime can be simple or sophisticated. Historically, the main focus of IPM programmes was on agricultural insect pests.[16] Although originally developed for agricultural pest management, IPM programmes are now developed to encompass diseases, weeds and other pests that interfere with management objectives for sites such as residential and commercial structures, lawn and turf areas, and home and community gardens. Predictive models have proved to be suitable tools supporting the implementation of IPM programmes.[17]
 

acespicoli

Well-known member

Nothing but the purest ingredients can pull your plants from average status into spectacular. NPK Industries RAW Yucca is an all-natural surfactant that ejects salts from the growing medium and drives nutrients down to the roots where they can be picked up quickly. It can also help your hydroponic system by keeping drip irrigation lines clog-free!

Features:
• No fillers
• Perfect for nutrient, foliar and flush solutions
• Highly concentrated — only a pinch needed per 5 gallons of water!
• Helps plants recover from drought stress
• Keeps minerals and nutrients in suspension for smooth delivery

Available in 2-oz (makes up to 1,000 gallons) and 8-oz sizes.

Recipe Book (PDF)
Feeding Schedule (PDF)

DIRECTIONS FOR USE:
Add 1/16 to 1/8 tsp per 5 gallon in reservoir for irrigation. Apply as needed.
Add 1/16 to 1/8 tsp per 5 gallon of final spray solution.
Apply directly to soil or foliage as needed.

Grower’s Tip:
In Europe, many growers are switching from copper sulfate to this plant extract to help prevent fungus and apple scab.
 

acespicoli

Well-known member
1698850236301.png

3$ @ Tractor Supply 50# bag any decent farm feed store should carry this or similar

The 82 Lime Barnlime neutralizes soil acid and is great anywhere you want to strengthen your soil. The lime for horse stalls increases fertilizer efficiency and contains no caustic or synthetic additives. This stall lime can be applied to horse stalls, kennels, animal pens, gardens and lawns.

  • Barn lime increases fertilizer efficiency
  • Makes potash and phosphorous available
  • Lime for horse stalls open heavy clay soils and close light sandy soils
  • Apply stall lime to horse stalls, kennels, animal pens, gardens and lawns
  • Contains no caustic or synthetic additives
  • Comes in 50 pound bag
SpecificationDescription
BrandUnbranded
Country of OriginMade in USA
FeaturesSlip Resistant
Package Quantity1
Manufacturer Part Number82

This is made from limestone and mechanically powdered it is naturally alkaline and will reduce PH
White powder

Determine Aglime Quality
Once you know the soil test aglime recommendations,
you should adjust these according to aglime quality. The
quality of aglime is determined by how fine the aglime is
ground and its chemical composition. The higher the
quality of aglime, the more efficient it is in neutralizing
soil acidity.
You can determine the quality of aglime by its
“neutralizing index zone.” This is a set of numbers that
indicates its neutralizing efficiency. Neutralizing index
zones usually range from 50–59 through 90–99 in
Wisconsin. The higher the zone number, the higher the
quality. For example, 0.7 ton of 90–99 aglime neutralizes
the same amount of soil acidity as 1.0 ton of
60–69 aglime. Wisconsin ASCS-approved labs give
recommendations for zone 60–69 and 80–89 aglimes.
Use the aglime conversion data in table 7 if your lime
vendor has a different grade of lime

"82"

 
Last edited:

acespicoli

Well-known member

Understanding Soil pH​

June 19, 2022
soil

Understanding the pH of your growing space is critical for every garden​

You probably know that healthy soil is important to grow healthy plants. If you’ve ever bought fertilizer or tested your soil, you’re familiar with the primary “N-P-K” (for more info on these, check out our video), and maybe you even know about secondary nutrients and micronutrients (if not, read our post). But there’s another side to soil chemistry that can be a little trickier to understand: pH.

The Chemistry of Soil pH

Soil pH is a measurement of the acidity or alkalinity of the soil. Neutral pH is 7.0; larger numbers are alkaline (also called “sweet soil”), and smaller numbers are acidic (or “sour soil”). Chemically speaking, pH is a measure of “free” Hydrogen ions (H+), which are not yet bound to any chemical compounds in the soil. More H+ calculates as lower or more acidic pH. Most plants prefer a slightly acidic soil around 6.8. Some plants, such as blueberries and azaleas, like an even more acidic soil in the range of 4.1 to 5.0. Few plants prefer alkaline soil, though some are more tolerant of a high pH, such as mock orange, locust, and chicory.
bleeding hearts

An important but often overlooked mathematical fact about pH is that the values are “logarithmic.” For those of us that no longer remember trigonometry, this means that a pH of 5 is 10 times more acidic than a pH of 6, but 100 times more acidic than 7. Practically speaking, this means that small changes in pH numbers are actually large changes in the soil chemistry. Fortunately, getting the pH exactly right is not essential.
All plants have a range of pH in which they can grow, although they do best at a specific pH level. Some plants tolerate a larger range of pH than others, so if your soil is less than perfect you may want to select from these tolerant plants. Good choices include serviceberry, hydrangea, bleeding hearts, ferns, and potatoes.

Life in Balance

It’s not just plants that need a healthy soil pH. Everything in the soil is affected by the levels of free hydrogen ions, especially microorganisms such as mycorrhizae and bacteria (both beneficial and disease-causing). Microorganisms that benefit plants tend to have the same pH requirements as the plants themselves. For example, both the beneficial bacteria that fix nitrogen in legumes and the legumes themselves prefer a range of 6.0 to 6.8. Many disease-causing organisms thrive in excessively acidic or alkaline soil. Further, the plant’s health is weakened when grown in suboptimal pH, making it even easier for plants grown in such soil to become diseased.
hydrangeas
pH also affects the availability of nutrients in the soil, because the H+ will bind to the other nutrients and thus alter their chemical structure. If your pH is out of balance, your plants may not be able to use the nitrogen in the soil, even if you apply an excessive amount.
Hydrangeas, for example, change bloom color at different pH levels, in large part due to the changing availability of aluminum (for more on this, read our post). Alkaline soils tend to be deficient in iron, copper, zinc and boron; acidic soils tend to be deficient in calcium, magnesium, and molybdenum.

Naturally Changing Conditions

The pH of your soil is constantly changing in response to the environment and the activity in your garden. For example, the decomposition of organic matter, addition of rainwater, and even root respiration result in the release of H+ ions into the soil, naturally decreasing pH and thus making the soil more acidic. Organic matter has a buffering effect on the soil, meaning that it makes the soil resistant to changes in pH. This is typically a good thing for your soil, as buffered soil is less likely to experience unhealthy swings in pH that could damage sensitive plants and microorganisms. However, it can make your job more challenging if you are actively trying to change the pH.

Adjusting Your Soil’s pH
Healthy garden soil

To adjust soil that is too acidic, you can add alkaline soil amendments such as limestone, oystershell, or dolomite lime. To adjust soil that is too alkaline, add acidic soil amendments such as cottonseed meal, an “acid-lovers mix,” or soil sulfur. Follow the guidelines on your soil amendment packaging, but be ready to adjust application levels if needed, as some soil types are more resistant to pH change than others. Remember not to overdo it, as it is much easier and healthier for your soil to bring it closer and closer to perfect over time rather than fluctuating between too acidic and too alkaline. Also, quick and large changes in pH can harm the beneficial microorganisms in your soil.
For a more in depth look at the chemistry of soil pH, check out Soil Quality for Environmental Health. We also have an interesting article on hydrangeas and soil chemistry in our Resource Center.
 

pipeline

Cannabotanist
ICMag Donor
Veteran
Dolomite lime is the best because it contains magnesium which is used to build chlorophyll for photosynthesis.

A soil test using multiple samples is good to determine rate for lime application.

Some soils that are clay based are calcarius, or rich in calcium and are naturally buffered because rock is the parent material. It doesn't hurt to add a little lime to offset acid produced from fertilizer and organic matter breakdown. I use about 1/4 cup per hole, or about 4-9 square feet.
 

acespicoli

Well-known member
Chapter 12

Greenhouse Soil Pasteurization, Fumigation, and Solarization​


Soil Pasteurization​


Soil pasteurization kills pathogenic organisms and weed seeds using aerated steam. It is customary to apply steam for 30 minutes beyond the time when the coldest spot in the batch of root substrate being pasteurized reaches 140 degrees F (60°C), although many growers pasteurize at a temperature of 160 degrees F (71°C). Most plant pathogens are killed by exposure to aerated steam at 140 degrees F (60°C) for a minimum of 30 minutes while higher temperatures are required to kill weed seeds (See Figure 12.1). Some growers, however, over-steam the soil by increasing the temperature to 212 degrees F (100°C) and hold it at this level for several hours. Over-steaming can cause a build of harmful substances in the soil—manganese toxicity and ammonium toxicity. Steam is provided by a portable steam generator (See Figure 12.1) or main steam line in the greenhouse. Soilless root media do not usually requiresteaming because the ingredients do not harbor pathogens and other harmfulorganisms. However, if soil-mixing equipment is exposed to dust and debris, or soilless media ingredients become contaminated (bags torn open and contents exposed), it is a good idea to pasteurize even soilless root media.

Freeflow versus Aerated Steam Treatment​


There are two common methods of steam treatment: freeflowing and aerated. When steam leaves the boiler it is under slight pressure (5 to 15 psi). As soon as it is released into the growing mix it drops to atmospheric pressure giving up its heat. At this point it is considered freeflowing. As the temperature drops, it creates a heat zone that advances as the surrounding soil is heated.

Soil Preparation​


Soils must be thoroughly mixed before they are steamed given that steam does not penetrate large lumps of soil to bring the temperature to the necessary level. The large pores in loose root substrates facilitate the movement of steam and thereby cut down the length of time required to pasteurize the soil as well as more effective in controlling soil-borne diseases, insects, nematodes, and weeds

Ammonium Toxicity​


High levels of ammonium can be released by soils or substrates high in organic matter after pasteurization. When the soil is heated to 180 degrees F (83°C), most of the bacteria that convert organic matter to nitrate are killed. However, the bacteria that convert organic matter to ammonia are hardier and often survive. Therefore, several weeks after steaming it is not unusual that high ammonia nitrogen is found in the soil. Often levels are high enough to burn roots.

Types of Steam Application​

Surface Steaming​


The easiest system to set up but the least effective is to lay perforated pipe on top of the bed. Perforated metal pipe is placed on top of the soil. A porous canvas hose is often used because it is easier to handle than pipe and works as well.

Buried Pipe Steaming​


A better system uses perforated poly pipe buried 12 inches (30.5 cm) or deeper under the top of the bed.

Chamber (Vault) Steaming​


Chamber steaming is commonly used by propagators and some potted plant growers. Metal containers, flats, wooden boxes, and clay pots are filled with the growing medium.

Click on the following topics for more information on greenhouse soil pasteurization and fumigation.

Topics Within This Chapter:​


acespicoli

Well-known member
Dolomite lime is the best because it contains magnesium which is used to build chlorophyll for photosynthesis.

A soil test using multiple samples is good to determine rate for lime application.

Some soils that are clay based are calcarius, or rich in calcium and are naturally buffered because rock is the parent material. It doesn't hurt to add a little lime to offset acid produced from fertilizer and organic matter breakdown. I use about 1/4 cup per hole, or about 4-9 square feet.
Ph up and Ph down Dolomite and Micronized Sulfur Flowers ?
This is my current gardening practice, the other big thing is bio available Iron really keeps the leaves healthy!
1698979620710.png


forest product compost is notoriously low in iron
If you already have iron rich ground water it may not be needed, dont forget share some feedback
 
Last edited:

Latest posts

Latest posts

Top