What's new
  • ICMag with help from Phlizon, Landrace Warden and The Vault is running a NEW contest for Christmas! You can check it here. Prizes are: full spectrum led light, seeds & forum premium access. Come join in!

Yet Another PC Grow Thread

ReikoX

Knight of the BlackSvn
2015.11.21
IMG_20151121_183136.705.jpg
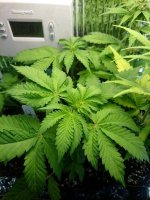
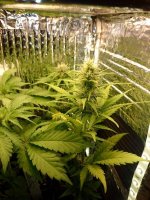
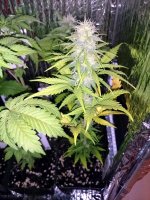
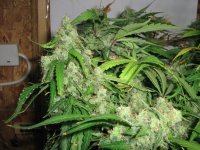
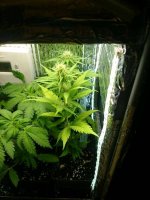
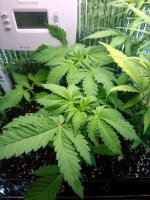
The SLH x PE at seven weeks from seed.
IMG_20151121_183144.847.jpg
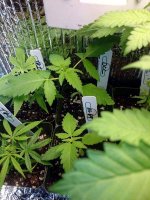
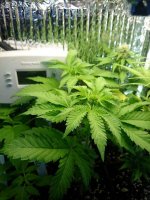
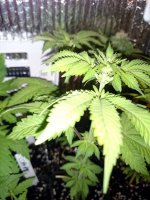
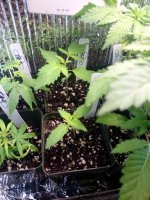
The DOG at five weeks from seed, pretty sure DOG 2 is a girl. Still think DOG 1 is a boy though.
IMG_20151121_183159.710.jpg
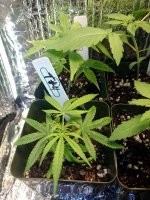
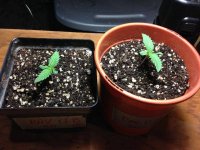
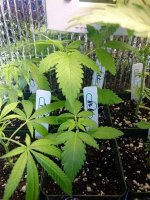
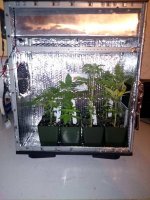
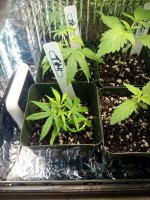
Here is the DCC and HG69, they are three weeks from seed. They are both feminized seeds, so should be female as well.
IMG_20151121_183205.257.jpg
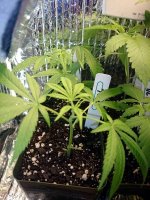
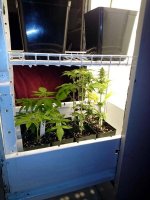
These are cuttings from my main grow. They are unsexed THC Bomb cuts. I just put them in here temporarily, though may flower them out if they are female. None of the PTW germinated. The Nordle didn't germinate either.
IMG_20151121_183219.900.jpg
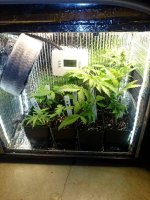
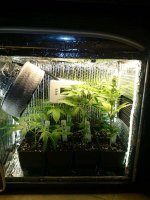
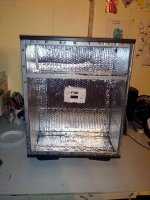
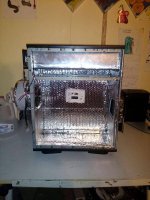
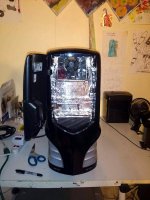
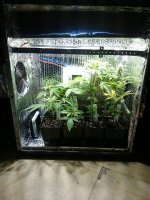
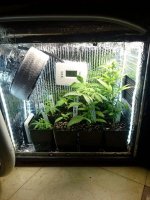
Here is a shot of the overall box. I have some upgrades coming soon (parts should be here Tuesday).
IMG_20151121_183454.907.jpg
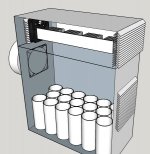
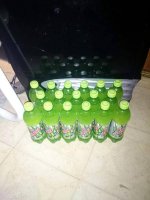
I've been studying up on Dr. Bud and found these 500 ml Mtn Dew containers. I can fit 17 of them in the box! That's 2 a week on a 9 week cycle with one week just having 1.
IMG_20151121_183545.046.jpg
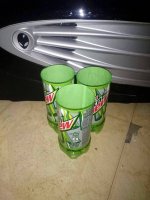
Here they are cut down to about 12 ounces. Dr. Bud uses the 20 oz bottles cut to 16 oz. I've drilled 10 1/4" holes in the bottom. I also decided to follow his methods as close as possible. For medium he suggests 1/3 perlite to a commercial potting soil. For nutrients he uses Shultz 10-15-10, Fish Emulsion 5-1-1, and Superthrive. Found everything I needed at Home de Pot, but the Shultz 10-15-10. Apparently they don't make it anymore, they were bought by Scott's and they discontinued it. I picked some up at Amazon, but am open to suggested replacements (jack's makes a 15-30-15 I considered). I plan to water and re-veg the same way.

So why am I changing my soil and nutrients? Basically my buddy challenged me to do a chemical fertilizer grow instead of organic. Particularly he wanted me to use Superthrive, he swears by it.

Hang on folks, this is about to get interesting!
 

shawkmon

Pleasantly dissociated
Veteran
dont let your friend manipulate you into growing cough kush , keep it organic , maybe 1 plant to prove to your self and his or herself that organic=orgasmic
 

ReikoX

Knight of the BlackSvn
dont let your friend manipulate you into growing cough kush , keep it organic , maybe 1 plant to prove to your self and his or herself that organic=orgasmic

My main grow will remain organic. I prefer my medication that way. Remember this is just a side project. :biggrin:
 

Dion

Active member
Mmmm
Im an organic guy myself, just because I find it easier

A lil potassium solfate and Epsom salts and calcium carbonate if needed but nothing bottled

Good luck with ur new project
 

ReikoX

Knight of the BlackSvn
You know, I always have this argument with myself. I think, "but that's not natural" but counter with, "there is nothing natural about growing indoors". BTW checked FedEx and my package should be here tonight.
 

Dion

Active member
You know, I always have this argument with myself. I think, "but that's not natural" but counter with, "there is nothing natural about growing indoors". BTW checked FedEx and my package should be here tonight.


cool

i believe i overestimated the cooling power of the heatsinks(that will teach me to trust data sheet)


i only tell u because i dont want u to destroy your cobs- test the temps every 15 min for an hour and every hour or so for 1 light cycle
if the sinks get too hot to hold with your hand than will have to add a fan/have a fan blowing on them

sorry
 

ReikoX

Knight of the BlackSvn
2015.11.23

IMG_20151123_162855.713.jpg
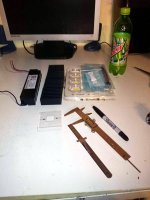
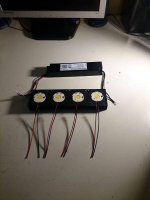
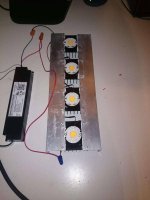
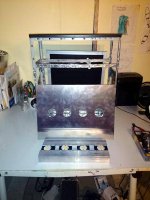
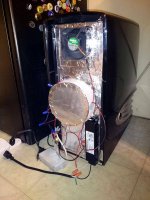
I got my order from digikey! COBs heatsinks, connectors, and a driver. The PC is going LED! First I made a template for the holes and the thermal pad.
IMG_20151123_170954.324.jpg
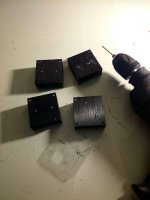
Next I drilled the mounting holes. This was the most difficult part.

IMG_20151123_171649.270.jpg
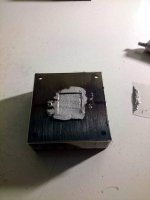
Apply thermal grease and squeegee it level.

IMG_20151123_171921.805.jpg
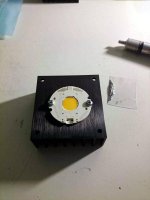
Place cob and screw it in place.

IMG_20151123_173945.492.jpg
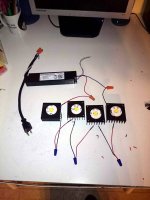
The COBs have a connector so you don't even have to solder anything.

IMG_20151123_204416.033.jpg
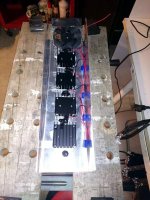
Hooked it up in series, and connected everything with wire nuts.

IMG_20151123_204446.153.jpg
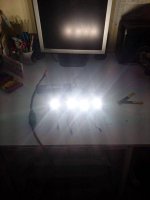
First fire successful. The first heat test was not too successful. My IR themometer needs a new battery, but they got pretty warm. Blowing a fan across them will help.

I may pick up some aluminum angle iron and mount the heat sinks on that. Then I can run some tests with the heat sinks in the correct orientation. I'll also get the battery so I have some real numbers to work with.
 

ReikoX

Knight of the BlackSvn
2105.11.24

IMG_20151124_151016.238.jpg
The heat sinks aren't quite big enough for passive cooling. So I bought a piece of aluminum angle iron, cut two pieces to length, drilled holes, and riveted the heatsinks to it.

IMG_20151124_151040.884.jpg
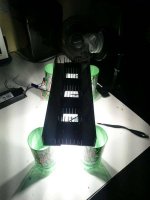
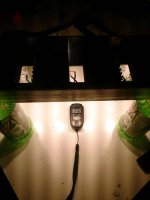
The aluminum helped out quite a bit. I also got a battery for my IR themometer. This time after two hours they were running much cooler. The reading I got was 45-50*C on the back of the heat sink. As you can see it's pretty cool under the lights too.

IMG_20151125_002947.091.jpg
Here you can see the thermal grease I put between the heatsinks and the aluminum. Also you can see how the whole thing was riveted together to make a rigid piece.

IMG_20151125_003009.076.jpg
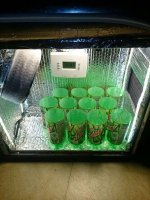
As you can tell, I've been drinking a lot of Mtn Dew. There are 12 in there now, cut down, and holes drilled. Only five more to go.

I've been debating how I'm going to run the LEDs in there. All of my ideas take some major rework. Watered what needed it with pH 6.0 water.

IMG_20151125_003301.050.jpg
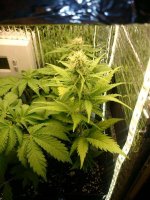
SLH x PE doing their thing. PE1 (in the back) is shorter and fatter.

IMG_20151125_003310.263.jpg
Both DOG are looking like they are female as well. I am surprised how many of these are turning out female. Starting to bet there was a hermie not a male in there.

IMG_20151125_003315.832.jpg
DCC and HG69 are growing slowly but surely.

IMG_20151125_003323.886.jpg
Finally T#1 and T#4 not showing sex yet. T#1, however has a clone in veg that is showing female pre-flowers.

IMG_20151125_003335.426.jpg
Overall shot of the PC
 

Dion

Active member
Thanks for that 50c is very decent

Any idea what the sinks got too wothout the extra Alu?

Sorry agian, I just went off the numbers on the data sheet but I should have calculated the surface area myself before publishing, I will revise the build in the thread.
 

grouchy

Active member
Would it be possible to seal off the back of the heatsinks from the grow area? This would allow you to use a fan to pull air over them that doesn't need to be run through a carbon filter similar to a cool tube.
 

ReikoX

Knight of the BlackSvn
Thanks for that 50c is very decent

Any idea what the sinks got too wothout the extra Alu?

Sorry agian, I just went off the numbers on the data sheet but I should have calculated the surface area myself before publishing, I will revise the build in the thread.
No worries, if I didn't build it we wouldn't have known. Not sure exactly what the temp were without the aluminum. My themometer wasn't working the first night, but after 15 minutes it was uncomfortable to handle.

Would it be possible to seal off the back of the heatsinks from the grow area? This would allow you to use a fan to pull air over them that doesn't need to be run through a carbon filter similar to a cool tube.

Yes, that's what I'm doing now with the CFL. I think I will be able to modify the reflector (don't need it with LED) and raise the plexiglass up. To move it up will require me to redo the front and back.

Something like this :
PC-Concept.jpg
 

grouchy

Active member
No worries, if I didn't build it we wouldn't have known. Not sure exactly what the temp were without the aluminum. My themometer wasn't working the first night, but after 15 minutes it was uncomfortable to handle.


Yes, that's what I'm doing now with the CFL. I think I will be able to modify the reflector (don't need it with LED) and raise the plexiglass up. To move it up will require me to redo the front and back.

Something like this :
View attachment 341097
I would try and skip the plexiglass and use the heatsink as the divider. Leds inside, heatsink fins outside. Maybe use a piece of aluminum or sheet metal plate and drill holes a litlle bigger than the chips. You may have to rerun the wires to the chips but stick them through the holes and seal it up. The plexiglass will cause lumen losses and possibly spectrum shifts and would be best avoided
 

Dion

Active member
hey u can check the thread now i updated it

fyi you have 18V left on that driver so if u do decide to you could add some more Xml 2s or monochromes ect and switch the vero to another heatsink

sending you virtual buds
 

ReikoX

Knight of the BlackSvn
2015.11.25

IMG_20151125_232918.696.jpg
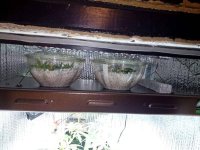
Trying Dr. bud's cloning tech. Perlite and Superthrive at 10 drops per gallon. This container has 6 SLH cuttings.

b11's
This is a side branch from DOG 2. It will be cool if they root this small. This container has a J -11 cutting and a (probably way too small) T#1 cutting.

IMG_20151125_233953.343.jpg
I put them above my veg light (no ballast) to keep them warm. I think they will get enough light up there.
 

ReikoX

Knight of the BlackSvn
2015.11.27

IMG_20151127_221950.132.jpg
SLH x PE. I like the structure of #1 (in back) best.

IMG_20151127_222001.842.jpg
DOG are getting tall. I'm going to trim some fan leaves to slow it down.

IMG_20151127_222020.871.jpg
DCC in back and HG69 in front. DCC is only a few days older, but much larger.

IMG_20151127_222030.123.jpg
THC Bomb in back is female, the one in front still hasn't shown sex one way or the other.

IMG_20151127_222052.428.jpg
Group shot. They all got fed:
6 ml/gal Bio Flores
4 ml/gal Bio Boost
2 ml/gal Rhizotonic
 

ReikoX

Knight of the BlackSvn
2015.11.29

IMG_20151129_175532.028.jpg
I decided to take the time to do the two stage cooling correctly. I got a sheet of aluminium and cut holes with a hole saw for the COBs.

IMG_20151129_201544.585.jpg
Next I drilled the holes for the heatsinks and bent the aluminum so the sides were as tall as the fan (90mm). I then remove the old angle iron and riveted the heatsinks to the new box. I put thermal grease between the aluminum and the heatsinks.

IMG_20151129_225611.257.jpg
I picked up some corrugated plastic to use for the front and back. Got it cut to fit.

IMG_20151130_002924.193.jpg
Next I covered it with reflextix. I still need to cut out the holes for the light box, exhaust, and intake.
 

grouchy

Active member
Make sure you seal it all up tight. The first try I had some smell leaks where the heatsink contacted the aluminum plate. Some silicone and aluminum tape fixed the problem. It looks great!
 

ReikoX

Knight of the BlackSvn
Make sure you seal it all up tight. The first try I had some smell leaks where the heatsink contacted the aluminum plate. Some silicone and aluminum tape fixed the problem. It looks great!

Thanks man, I was sceptical about it but it's working out great so far. Not even sealed and the heatsinks were running at 35*C! And I gained another 2-3 inches in height.

I'm getting rid of the runway lights. They look cool, but really weren't doing anything. And I think I can get away with the 12v fan now. That should eliminate two of the relays and let me use a smaller timer. I also hope to get rid of the power strip.

I already moved my scrubber to the outside on the back. I'll put the LED driver and 12VDC power supply back there too. Hope to have it finished up this week.
 

ReikoX

Knight of the BlackSvn
2015.11.30

IMG_20151130_224348.028.jpg
I got the holes cut and installed with the intake and exhaust vents. The light is not sealed yet, it's just in there enough to test fire it and test the fit. Heat sinks measured 35*C even like this. They all got fed 1/2 strength and put in the PC case for pictures.

IMG_20151130_224552.242.jpg
SLH x PE are now 8 weeks from seed. They have been flowering for about 4 weeks.

IMG_20151130_224614.475.jpg
These DOG are about 6 weeks from seed. They have been flowering for about a week.

pBnugnearly
The DCC and HG69 are about 4 weeks from seed. They have not showed flowers yet. T#1 has started to flower, its a girl! T#5 is still unknown, but I have a feeling it's going to be a male. For some reason I've had a HIGH number of males from these seeds.

IMG_20151130_224633.556.jpg
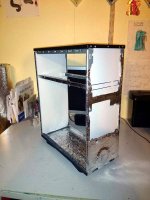
Here is a shot of the whole case.You can see the extra couple of inches I got from these lights. The Plexiglas used to be where that horizontal beam was.

IMG_20151130_232314.396.jpg
Here they are in their temporary home. They are actually under two more plants. Yes that is a filing cabinet ;) I'll be unveiling that soon.
 

ReikoX

Knight of the BlackSvn
2015.12.01

IMG_20151201_202027.548.jpg
Lots of aluminum tape a swearing later, the light is completely sealed in on both sides. I did some smoke tests and it doesn't appear that there are any leaks between the aluminum and the heat sinks. I was pretty liberal with the thermal grease, so I think that worked out in the end.

IMG_20151201_204519.984.jpg
I still need to solder and put the components into a project box. But right now it's all hooked up and functional.

IMG_20151201_204916.142.jpg
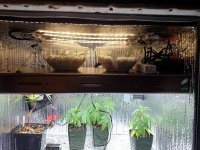
I moved the plants back in after doing some temperature tests to make sure I wasn't putting them in an EZ-Bake oven. You can really tell there is more blue in these than the 2700K CFL I was using. Hopefully it will keep them a little shorter. Those DOG are getting bigger than I would like.

IMG_20151201_205053.867.jpg
Remember those lights I had as side lighting? Well I decided they were complicating things too much electronics wise and not really doing much for me (they are very low wattage). So instead I put them above my 4-bulb 24" T5HO. There is no ballast in there (it's been moved to my utility room). Now my clones will have a little bit of light on 24/0 while the rest of veg is on 18/6.

IMG_20151201_212027.241.jpg
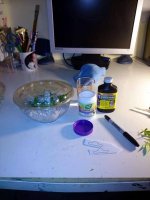
I got totally sidetracked by this whole LED upgrade and forgot the best part about this project. To pop some beans! Now, I planned on putting two a week and culling males. I figured 50% males was average so that's why I picked to plant two. I'm pretty sure that T#5 is a male and will need to be pulled. So back to the point of this whole project, I popped some more seeds. This is the first time I'm popping seeds that I actually paid for! If they both germ, I'll put one in veg and the other in the PC. They are taking a bath in pH 6.0 water with Superthrive at 10 drops per gallon.
 
Top