What's new
  • ICMag with help from Phlizon, Landrace Warden and The Vault is running a NEW contest for Christmas! You can check it here. Prizes are: full spectrum led light, seeds & forum premium access. Come join in!

ReikoX's Workshop Rebuild 2020

ReikoX

Knight of the BlackSvn
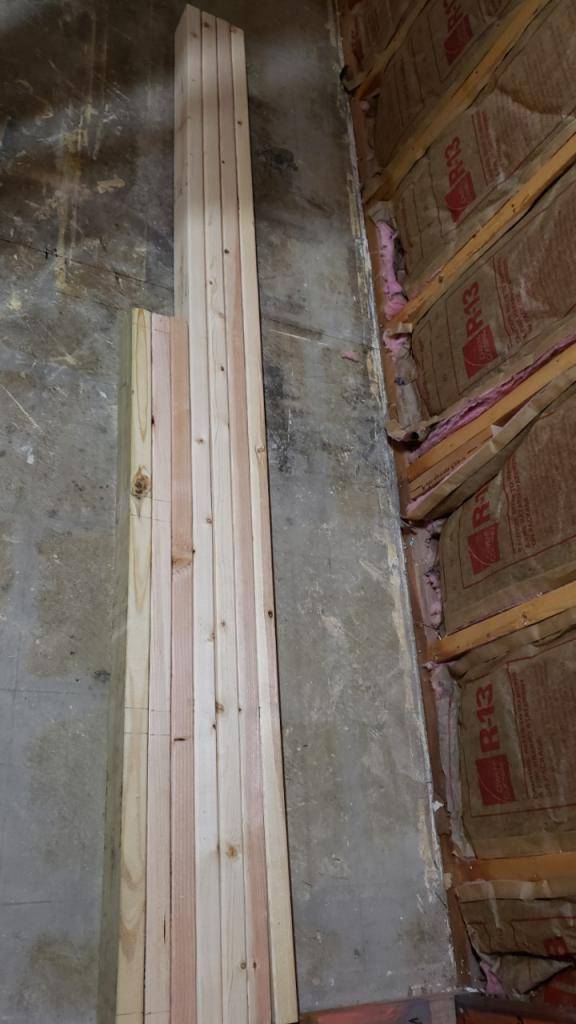
After some dinner, and another bowl, i busted out the cut list for the next wall. I love my miter saw, it made quick work of these cut lists at nice right angles. My grandpa used to cut 2x4s by hand.
picture.php


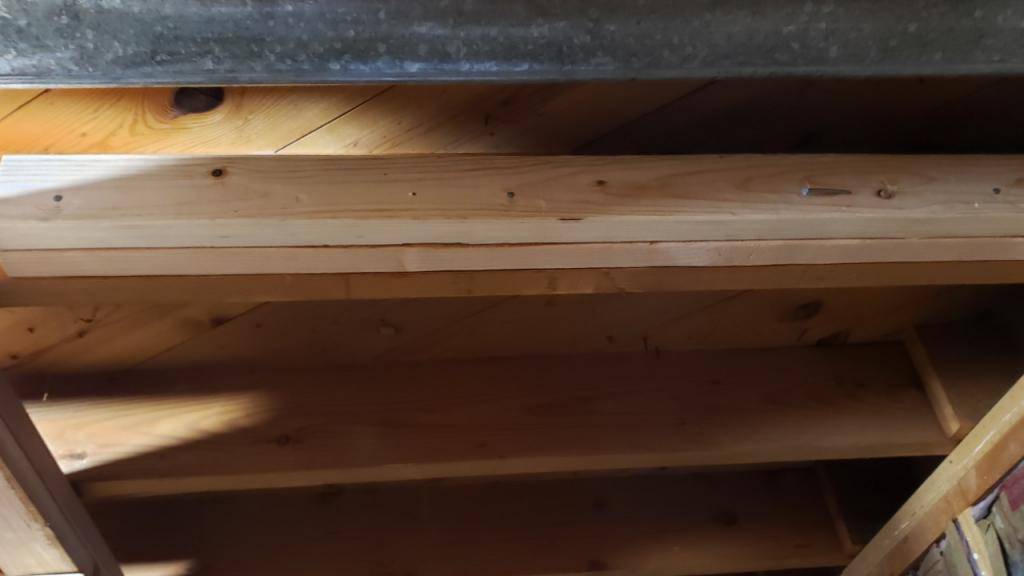
I wanted to make sure I had something to nail the wall into, so i nailed a couple of 2x4s to the rafters.
picture.php


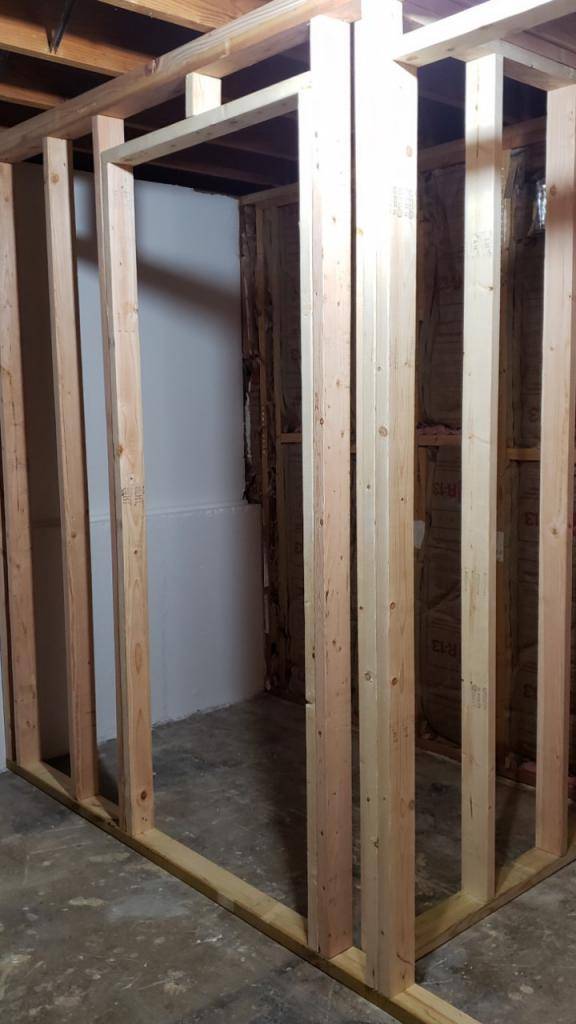
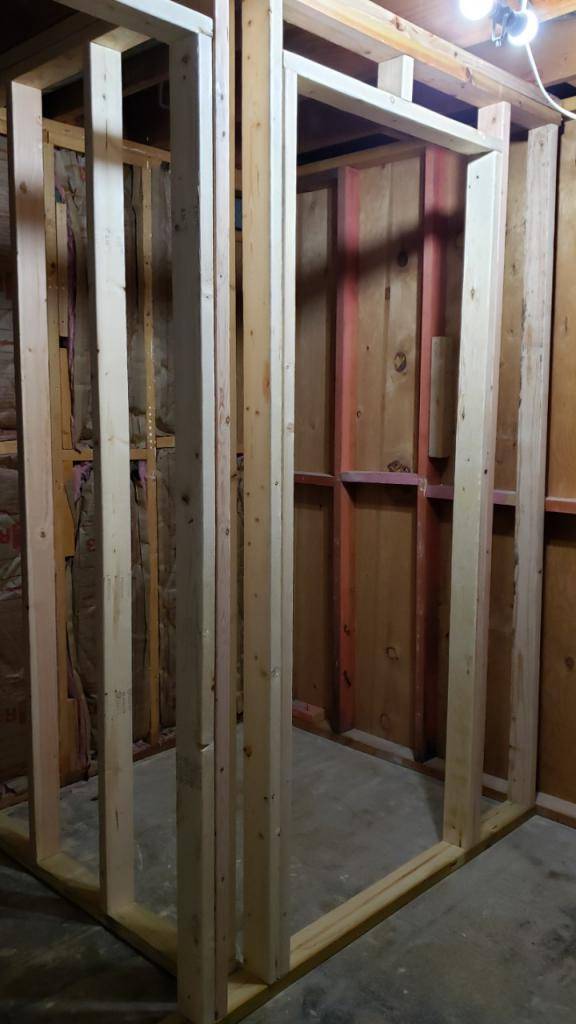
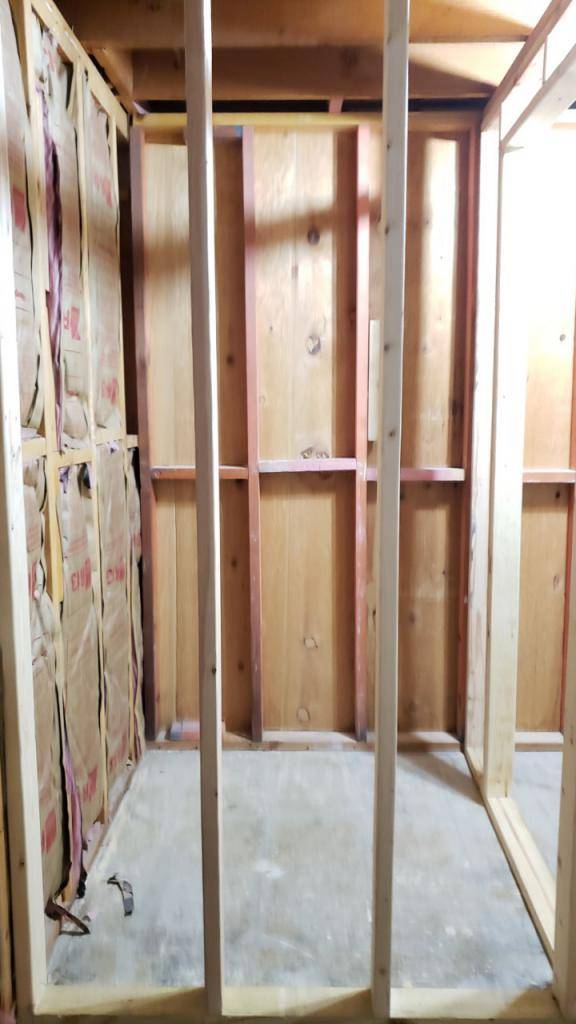
This wall was much easier to build. I had a lot more room, and didn't have any doors to deal with. This time I checked my bottom measurements before securing the wall.
picture.php


4' x 6' Flower Room
picture.php


4' x 4' Mother and Clone Room
picture.php
 

ReikoX

Knight of the BlackSvn
When I was putting up the walls, I had to remove the trim around the entrance door. When I removed the trim pieces, the door swung open. Apparently the latch was not connected to the door casing at all, one good bump with your shoulder and you would have been in the workshop. What I thought was going to be an easy project, ended up taking me three days. The first issue to deal with was the door frame. It's hard to see in this picture, but the door was framed with two studs and a top piece between them. When I measured the rough opening, it was an inch too narrow.
picture.php


To frame the door properly, I needed to move the studs over. First I cut out the header with the sawzall, then I removed the trim and nails holding the paneling to the studs. After that I was able to get the studs out and move them over. Remember to always measure twice and cut once.
picture.php


With the studs moved over, I was then able to build the door frame with the proper rough opening size. Once in place, the frame was nailed to the studs. The last thing to do was trim the leftover paneling and footer. I tried using the sawzall on the paneling and ripped it. I had much better luck using my jigsaw.
picture.php


With the proper rough opening size, I was able to get the door shimmed in place and level. In retrospect, I would have cut the bottom of the frame so the door didn't have such a large clearance. Apparently this pre-hung door is pre-measured for carpet clearance.
picture.php


Than's okay, I installed a threshold to make up the difference. I think it gives it a nice look, even if it may be a tripping hazard. The trim pieces were a bit smaller than the other door, so I trimmed them down, then used one of the interior scrap pieces for the top, which is now an inch wider. I filled all the nail holes with wood filler and sanded it. Now the threshold and the trim is all taped up and ready for paint.
picture.php
 

ReikoX

Knight of the BlackSvn
While the trim pieces were drying, I decided to turn my attention to another project. The way they wired these rooms was quite interesting. The workshop light is on the same switch as the family room light, which is by the stairs to the basement. I turned off the breaker in that room so I could work on the light.


When I looked in the box, I could see a jumble of wire and tape, I'm sure it was totally to code.... One thing that bothered me, was this box was wired to the outlet that my workbench was using, turns out that plug was never grounded. So after cleaning up some wiring, I am ready to install my switch. I love wago connectors.
picture.php


The old outlet wasn't run properly either, They ran the wire under the studs between the furring strips and the ceiling tiles. Nothing a drill and a paddle bit won't fix. Seriously, it took me about five minutes, why didn't they do this originally?
picture.php


Wired in a basic switch and mounted it to the studs bu the door.
picture.php


After double checking all of my connections, I turned back on the breaker. The light switch now works perfectly. It is on regardless of whether the family room light is on or not.
picture.php
 

ReikoX

Knight of the BlackSvn
I wasn't too happy with the way the door latch plate was mounted. It wouldn't take a whole lot more than a good kick or two to bust it down.
picture.php


To improve security I bought a security door latch plate. This latch has four holes with extra long screws that can be angled to attach to the studs. I also added a long screw into the studs at each of the three door hinges.
picture.php


Finally, I painted the doors. I took an old can of paint that was used in the family room and got a color match done on it. It came out pretty close.
picture.php


I liked the way it came out so much, I went ahead and did the bathroom door across the hall to match.
picture.php
 

zif

Well-known member
Veteran
This is such a fun thread! Thanks for throwing in the ‘side’ projects along the way - they’re the icing on the cake. =)
 

ReikoX

Knight of the BlackSvn
When designing the workshop, I was going to run a new 20-amp circuit for the rooms. When trying to figure out how I wanted to run the wiring, I decided to use a 70-amp sub panel I already had from my storage cabinet. It already has two tandem breakers, giving me a total of four 15-amp circuits. One will be used for the flower room, another one for the veg room, a third one for the driver cabinet, and the last one will be unused for now.
picture.php


I was looking at my service panel to see if I had room for another circuit. Clearly I have a few knockouts left, so I could put more breakers in there. It says it is a 125-amp panel, but already has 155 amps of breakers on it. From what I understand, it is typical to have up to two times the amperage of the panel worth of breakers. If that's the case, I have plenty of room left for a 60-amp breaker. Any sparky's want to chime in here?
picture.php


The plan was to run conduit from the service panel outside of the house to the workshop. I should be able to come in above my window and run it between the ceiling joists then drop straight down to the sub-panel. I'm still uncertain about what I want to do with the LED drivers. I found a decent sized DIN box that would be large enough to hold the drivers, Sonoff automation, and Blufish controller. I am thinking I will use conduit and run the LED wires outside the walls. I ran a lot of conduit for the workbench and storage cabinets, so I should have all of the pieces to run it. This will allow me to upgrade my lights at a later date.
picture.php


Finally I decided on how to run my outlets. As you can see I have outlets on the walls for where the fans will be, as well as an outlet in the ceiling for the exhaust fans. I may move them so they are on the walls, but high. Anyone see an issue with an outlet in the ceiling?
picture.php
 

ReikoX

Knight of the BlackSvn
The Green Crack cuttings are still alive, no roots yet. It's been seven days, but I am not using a heat mat.
picture.php


And I had to trim my bonsai mothers. They are definitely happy and healthy. Been feeding them pH adjusted megacrop (V2) and tap water.
picture.php
 

ReikoX

Knight of the BlackSvn
So I was browsing through OG and ran into someone using these totes for no-till beds. They are 64-gallon totes that measure perfectly to fit in a 2' x 4' area. Looking at the measurements, three of them would fit perfectly in the 4' x 6' flowering room. The wheels are rated at 400 lbs, so I should be able to put around 50-gallons of water/soil in them.
picture.php


They are pretty cheap at $37 USD a pop, and they are already built. If you factor in my time to build the rolling base and fabric beds, this is a lot cheaper. I can also pick them up locally at Lowes, so no ordering or shady grow stores. They can hold quite a bit more than my design. My design was for 30-gal of soil, these could do 45-gal (6 cubic feet) of soil and still have a bit of room for my mulch layer. They also fill the room better, leaving me with less empty floor space. I plan to do these like a traditional Soma style bed. The PVC will also allow me to insert a trellis like in my previous design.


They are going to be a lot harder to move than what I had originally planned. I only really need to move them for maintenance, as I can easily reach everywhere to water with my Chapin concrete sprayer. I tested that out already. These will be sitting directly on the concrete floor which is generally cold, using lava rock on the bottom, like a Soma bed, should give a small layer of insulation. There are no drain holes on these, and there are no drip trays. I was thinking about putting a drain hole on the side like an Earthbox or Hempy bucket. I could then put a tray under that if I happen to water to runoff, which I rarely do in my no-till beds. They wont have the air pruning that I would get with the typical air pot, but I doubt that will matter much in this sized bed, plus fabric pots dry out much faster in the desert.
 

packerfan79

Active member
Veteran
So I was browsing through OG and ran into someone using these totes for no-till beds. They are 64-gallon totes that measure perfectly to fit in a 2' x 4' area. Looking at the measurements, three of them would fit perfectly in the 4' x 6' flowering room. The wheels are rated at 400 lbs, so I should be able to put around 50-gallons of water/soil in them.
View Image

They are pretty cheap at $37 USD a pop, and they are already built. If you factor in my time to build the rolling base and fabric beds, this is a lot cheaper. I can also pick them up locally at Lowes, so no ordering or shady grow stores. They can hold quite a bit more than my design. My design was for 30-gal of soil, these could do 45-gal (6 cubic feet) of soil and still have a bit of room for my mulch layer. They also fill the room better, leaving me with less empty floor space. I plan to do these like a traditional Soma style bed. The PVC will also allow me to insert a trellis like in my previous design.


They are going to be a lot harder to move than what I had originally planned. I only really need to move them for maintenance, as I can easily reach everywhere to water with my Chapin concrete sprayer. I tested that out already. These will be sitting directly on the concrete floor which is generally cold, using lava rock on the bottom, like a Soma bed, should give a small layer of insulation. There are no drain holes on these, and there are no drip trays. I was thinking about putting a drain hole on the side like an Earthbox or Hempy bucket. I could then put a tray under that if I happen to water to runoff, which I rarely do in my no-till beds. They wont have the air pruning that I would get with the typical air pot, but I doubt that will matter much in this sized bed, plus fabric pots dry out much faster in the desert.

You could build or buy some heavy duty dolly's to keep them mobile. We have some at my work that hold a thousand pounds or more.
 

ReikoX

Knight of the BlackSvn
That's a good idea, I'll see how hard they are to move with the built in wheels first. :good:
 

ReikoX

Knight of the BlackSvn
My buddy was supposed to be here this weekend to add a 60-amp service. He ended up flaking on me, but I was still able to get the boxes installed, holes drilled, and wire ran.
picture.php


Next I wired the three sockets to the flower room on one breaker and the three sockets to the veg room on another breaker. Finally I ran a short run on a third breaker for my driver panel. I need to do something better with the ground wires.
picture.php


Flower
picture.php


Veg
picture.php


Finally, I sealed the holes with fire stop expanding foam. I'm going to give that a day to cure and put the insulation back up.
picture.php
 

ReikoX

Knight of the BlackSvn
Finding a particle mask these days is a challenge. Luckily, my dad has me covered. Long sleeve shirt, long pants, gloves, glasses, respirator, and hat. It got hot, but I didnt get itchy. I put back the old insulation and sandwiched the wires between the insulation.
picture.php


I then cut out the holes for the electrical boxes, etc. This all went pretty quick because it was already cut.
picture.php


I then insulated the east wall. This wall is the side with painted wood paneling on the other side. The insulation already makes it feel more solid.
picture.php


And then I insulated the ceiling. I had to staple the ceiling, and of course, I ran out of staples about 2/3 of the way through.
picture.php


I left the area with the ducting, this is also where I want to run the electrical service. The main reason for insulating is to reduce the noise, I'm not worried about exhaust noise coming from my vents.
picture.php
 

ReikoX

Knight of the BlackSvn
I decided on the floor. I will have to do it in two parts, but it should work out well. Time to start scraping the old glue off the floor. Most of it comes up pretty easy, but is quite dusty. I'll be needing the respirator for scraping.
picture.php
 

ReikoX

Knight of the BlackSvn
I've been preparing the floor for the epoxy coating. Most of the glue from the tile was able to be scraped up dry. I then washed the floor with dawn twice, the rinsed it twice.
picture.php


It came out pretty good. There is still some paint and glue on the floor.
picture.php


I did the same thing to the flower room this side was worse. Lots of glue still stick on the floor under the storage cabinet.
picture.php


More paint and adhesive on this side.
picture.php


So I picked up some paint stripper and some stripper blades. I'll start on this tomorrow, would be nice to get the first half done this weekend.
picture.php
 

ReikoX

Knight of the BlackSvn
I applied the Rustoleum paint stripper to the floor and let it set for about three hours. I then scraped it up and washed it with dish soap again. A couple more times rinsing it and I think it is about ready for the epoxy. I still have the other side to prep as well.

Veg side, before and after.
picture.php


Flower side, before and after.
picture.php
 

ReikoX

Knight of the BlackSvn
I did a little art project last night. A plano waterproof tackle box, $5 at walmart. Two pieces of craft foam, $2 at Michael's. Travel container for dabs, priceless.
picture.php
 

ReikoX

Knight of the BlackSvn
Got the first piece of sheetrock on the ceiling and hung my cabinets back up. These were moved from the east wall to the west wall, and will still be above the workbench.
picture.php


Got the doors put back on, but waiting to fill them. I am debating painting them white.
picture.php


I also moved two pieces of the workbench into the flower room. This gives me the next 5'x8' area to prep for the epoxy floor.
picture.php
 

ReikoX

Knight of the BlackSvn
I pour it directly on the floor, then spread it around with an old paintbrush. Let it set for three hours, then scraped it up and cleaned with a paper towel. Finally I washed everything with soap and rinsed well.
 

Latest posts

Latest posts

Top