What's new
  • As of today ICMag has his own Discord server. In this Discord server you can chat, talk with eachother, listen to music, share stories and pictures...and much more. Join now and let's grow together! Join ICMag Discord here! More details in this thread here: here.

Pissed off UC

T

TreehouseJ

Attachments

  • image.jpg
    image.jpg
    101.1 KB · Views: 25

Mr Blah

Member
I will try it in reverse as I did it the forward way before and they are leaking.
Love the garden RamCTD1027.
I thought about doing PPK before I green lighted the upstairs UC system but felt thee would be too large of a learning curve that I do not have time or patients for at this time. I might set up a small PPK system later for learning, later.
 

Mr Blah

Member
OK, done some research.
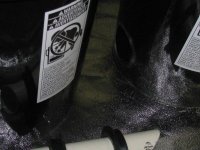
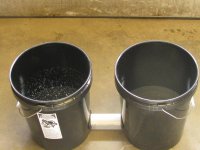
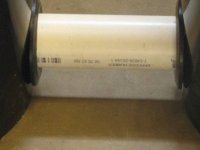
First vacuumed out any remaining water in the buckets, and took the first connecting pipe that is between two buckets;
With a lot of persuasion it came out.....all of it! Uniseal and all. Don't think the pipe moved.
[FONT=Arial, Helvetica, sans-serif]IMG_3549.jpg[/FONT]
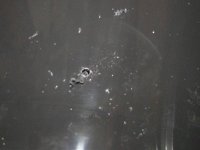
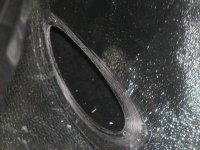
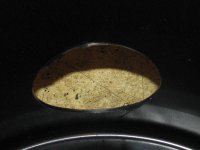
It felt smooth, but as you can see I sanded the burs off with 220 grit paper.
[FONT=Arial, Helvetica, sans-serif]IMG_3553.jpg[/FONT]
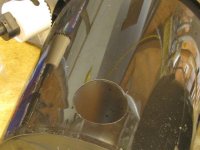
So I took your advice and thought what the hell......Started with a small pilot hole (didn't do this one in reverse) and than used my Milwakee drill (more power) and hole saw in reverse. Using just the weight of the drill to set the tension and let'er rip.....
[FONT=Arial, Helvetica, sans-serif]IMG_3552.jpg
[/FONT]
[FONT=Arial, Helvetica, sans-serif]IMG_3556.jpg
[/FONT]Took about 15 seconds per hole. tried not to move. The hole was warm.
[FONT=Arial, Helvetica, sans-serif]IMG_3557.jpg
[/FONT][FONT=Arial, Helvetica, sans-serif]IMG_3561.jpg
[/FONT][FONT=Arial, Helvetica, sans-serif]https://www.icmag.com/ic/attachment.php?attachmentid=354182&stc=1&d=1458661349[/FONT]Noticed some burs in some places so I shaved off with a razor angled toward the inside of the hole where burs are on.
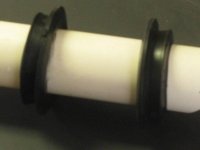
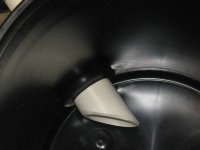
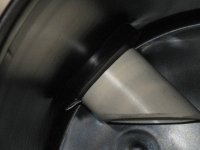
Connected a new Uniseal (same size) inserted a new pipe.
Filled up about 8 gals of water and waited.......waited. I wanted to be right.....SO I was screaming at it.....better F**Ken leak!! Not a drop after 10min..Finally I had to kick it a few times and after a few mins of abuse it finally leaked. Cooked out of alignment will do it..:biggrin:
 

Attachments

  • IMG_3557.jpg
    IMG_3557.jpg
    47.4 KB · Views: 21
  • IMG_3556.jpg
    IMG_3556.jpg
    27.1 KB · Views: 25
  • IMG_3552.jpg
    IMG_3552.jpg
    73.5 KB · Views: 24
  • IMG_3553.jpg
    IMG_3553.jpg
    23 KB · Views: 26
  • IMG_3549.jpg
    IMG_3549.jpg
    73.8 KB · Views: 23
  • IMG_3561.jpg
    IMG_3561.jpg
    37.1 KB · Views: 21
  • IMG_3563.jpg
    IMG_3563.jpg
    30.3 KB · Views: 23
  • IMG_3566.jpg
    IMG_3566.jpg
    34.5 KB · Views: 22
  • IMG_3568.jpg
    IMG_3568.jpg
    49.4 KB · Views: 22
  • IMG_3567.jpg
    IMG_3567.jpg
    27.6 KB · Views: 23
T

TreehouseJ

Glad it worked! If you haven't run multi buckets before, I think pathogens become a bigger issue since they build up in the nooks and crannies of the system. I couldn't get it figured out and suffered immensely for it. Would never advise running rdwc with RO water that wasn't uv treated, and wasn't treated with any bennies or teas or enzymes or sufficient h2o2 or bleach or what have you, not that I know anything about any of the above, that's just what I tried to do for an entire year to no avail. Maybe my house is just nasty from all the cats over the years, but I just couldn't get it to work, and I'm a pretty methodical person.
 
Last edited:

Mr Blah

Member
Didn't say it worked....just saying you got my attention with the drilling backwards.
Just ran to my hydro store and picked up 12-$3 saucers to go under each bucket.
Came back and she is still has a dribble on the concrete floor. I know I kicked it but was hopping for a miracle.
I think I am just going to throw them saucers under each bucket I got in there now (the ones that leaked) and see how long it will drip for.....my experience with the UC/RDWC Patient buckets downstairs is that they will eventually stop leaking.

Thanks, and I hope this little test will help others in the future with uniseals. :tiphat:
 

Mr Blah

Member
Filled up the system after emptying it this morning.....I placed the drip saucers under each one..There is about 4 buckets leaking.........I'm fucken done with this shit!!!!!........Just bought 12 black square buckets. But they are only 4 gal.
Oh well.....I am confident they wont leak. We will see.

I will update my findings when they come in and put it together. In the mean time I am dissembling this piece of shit and throwing it down stairs where it can leak till the cows come home.
 
bro either you make your own bulkheads or spend $15 bucks to buy the UC bulkheads. It will save u all the time in the world to spend the 15 bucks and give you a piece of mind.
 

Mr Blah

Member
bro either you make your own bulkheads or spend $15 bucks to buy the UC bulkheads. It will save u all the time in the world to spend the 15 bucks and give you a piece of mind.
Thanks, I will think of that next time. I all ready ordered the square buckets. If this fails than, ya....I'll go the bulk head way.
 
T

TreehouseJ

I would always deburr using a material that is softer than the plastic you are drilling through. I use my fingernail. Providing you drill backwards and deburr without marring your holes, your seals should seal up/salt up just fine.
 
T

TreehouseJ

I PERSONALLY wouldn't use any razor blades or sand paper. I've never used an actual deburrer, but when I'm working with $10k Apple countertops, we deburr using soft plastic or fingernails, or else we would be liable to replace the fixture out of pocket. Always use a softer material for cleaning or scraping or what-have-you.
 
T

TreehouseJ

ALSO, if you get to it quick enough, the "burr" should be warm enough to peel off effortlessly. Maybe have your ol lady there to clean your cut as soon as you are done, should come out clean as a whistle.
 

Latest posts

Latest posts

Top