What's new
  • ICMag with help from Phlizon, Landrace Warden and The Vault is running a NEW contest for Christmas! You can check it here. Prizes are: full spectrum led light, seeds & forum premium access. Come join in!

Organic Grow by BReal (50x50x140)

aCBD

Well-known member
Lemon Cherry Cookies Auto by Fast Buds (Day 11)

View media item 18723527
@aCBD I thought about what you said and I followed your advice. I didn't want to use a towel but I put a few kitchen sponges inside cups. They soak moisture really well. Humidity didn't increase much but +4% is still a progress :tiphat: I will have to wash them with soap every few days to make sure that there is no nasty stuff growing on that :biglaugh:

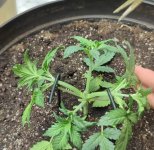
I have a different dilema now: I'm not sure if I should train this strain :biglaugh: haha... Here is a thing: Fast Buds claims that this strain should grow between 80 and 120 cm - however autoflowers might grow smaller depending on a few conditions. Distance between the surface of the pot and cobs is 95 cm. They also claim that it's a very fast strain... should I train it then or just let it grow as it is? :chin:

Originally I was thinking about topping (I would have to do it soon), to stratch side branches with hooks as wide as possible. If it was a photoperiodic strain I wouldn't have any doubts what to do, but becasue it's an autoflower (that is supposed to flower fast) I just don't know man... :thinking:
The green sponges are an eyecatcher. :biggrin:
You can get some more humidity if you fill the glass some more and put the sponges on a string so that they're only emerged half and the other half gets some wind. Good that you think about changing them. :good:

If your first idea was to top the plant and train it accordingly, you should do that. Listen to your gut. :biggrin:

Don't have experience with autos but when i see what @bibi40 is doing, you don't need to hold back. :D
Happy growing ☮️
 

LHC

Well-known member
Good luck with your new run! :lurk:
A cheap and effective way to raise the humidity in a small space is to hang a piece of cotton/kitchen towel on a string with the towel sucking up water from the water reservoir.
With air ventilation the water will evaporate faster than just the glasses you're using right now. Hope my description makes sense. :biggrin:
Very nice to read your thread @BReal. And you buds look awesome :canabis:
I have done exactly as @aCBD explains in my small veg chamber, and it works very well. I also spray the plant and cabinet with water twice a day. Small plants like a humid environment like 50-60% RH

I would really recommend that you invest in a an EC and pH meter. Learning how to grow is all about taking the guessing out by monitoring temps, RH, EC, pH and light intensity. If you monitor and take notes, progress will be fast:)
 

bibi40

Well-known member
The green sponges are an eyecatcher. :biggrin:
You can get some more humidity if you fill the glass some more and put the sponges on a string so that they're only emerged half and the other half gets some wind. Good that you think about changing them. :good:

If your first idea was to top the plant and train it accordingly, you should do that. Listen to your gut. :biggrin:

Don't have experience with autos but when i see what @bibi40 is doing, you don't need to hold back. :D
Happy growing ☮️
Sure !

@BReal

you can top her first ( i often top auto's at 5th node and remove the two lower branch , makin 8 branch plants ) ,
then Lst' her ,
i got excellent results doin' that .

Cheers .

:tiphat:
 
Last edited:

BReal

Well-known member
Veteran
What about that technique? 🤔😳
 

Attachments

  • Screenshot_20241128_213740_YouTube.jpg
    Screenshot_20241128_213740_YouTube.jpg
    701.7 KB · Views: 23

aCBD

Well-known member
How long are you operating your worm bin already?
I'm always on the fence of getting one but i don't know if it would survive the winter here with some frosty days and nights.
Do you think it will be fine if i just insulate it? Will the biological process generate warmth and the worms survive?
I would mainly use potatoes, some kitchen scraps, few leaves and stems with roots from plants and things like that.
Sadly a compost is impossible on the balcony but a wormbin will fit easily and is faster.
 

BReal

Well-known member
Veteran
Ah.. I'm not an expert, and I could be wrong about a few things but I think I learned enough to share some basics :)

Just as I said before: I live in a flat, so I don't have the best conditions for compost production. I can't make huge quantities of that because this stuff may attract a lot of flies - which is not great in a long term: for me and my neighbours.

My production process looked like that:

I bought 2 packages of red worms in a fishing shop - it didn't cost much, just a few Euro. Different companies might sell different species of worms in these packages, but most of them are great for composting usually and they are able to reproduce which is very important. Red worms are almost identical to californian worms, and they are great not only for fishing but for composting as well. I don't see any differnce between them and californian one - californian might be a little bit bigger maybe... idk. but they cost more as well.

For vermi-composting: plastic container is more than enough, but it has to be at least 10-15L. I would recommend a bigger one: 45L is a sweet spot in my opinion and it should be enough to make vermi-compost for about 4 medium size pots (for mixing with peat moss and perlite - 1:1:1 ratio).

Container should have ventilation holes on the top - If I had a garden and if I didn't mind having a mess, I would drill very tiny holes on the sides as well. From the top is good enough though: but you have to remember about 2 things:

1. Compost mix has to be moist but not wet. If you will have a little bit of water on the bottom it's gonna be fine, but I would recommend to be careful how much water you add to compost. I was sprinkling some tap, filtered water (without chlorine!!!), once every few days or few weeks depending on temperature outside.

2. When using worms it might be not necessary, but I would recommend mixing your vermi-compost once a week or two - it prevents reproduction of anaerobic bacteria. Do it carefuly and slowly to not harm your worms.

I started vermi-compost production in June I think. I don't remember exactly. I would recommend making it for longer than just a month - my mix is about 4 months old and I still found some stuff inside it, that wasn't processed yet - but 2-4 months of production is perfect in my opinion. If your vermi-compost gonna be too fresh, you will definitely have a lot of unprocessed stuff inside. Very fresh vermi-compost might be risky to use depending on what you made it of. If you put a lot of chicken/cattle manure there - you may end up with too many nutrients, that would burn roots of your plant. If you give it more time: worms, fungis, bacterias should process it to a safer form. I added a lot of cattle manure, but my plant doesn't mind it :)

What did I use for my compost?

A lot of banana peels haha.. XD Of course not only. That would be stupid as hell, because you want your mix to be balanced. List of yummy, yummy "ingridients":

1. Banana peels
2. Food scraps like onion peels, potato peels, etc.
3. Leafs, cut grass, nettle - it's rich in nitrogene
4. Dolomite - magnesium, calcium
5. Silica - micro nutrients
6. Chicken/cattle manure - all kind of good stuff
7. Dried and crushed egg shells - calcium
8. Some used soil and broken wood/roots
9. Paper scraps - cellulose is very important for worms' reproduction ❗

Keep in mind that worms need at least a few weeks for reproduction: in reality more than that.

If you want to keep the production process running there are a few ways to do it: you can collect vermi-compost by hand, while seperating it from worms - just throw them to a new mix with some wormcastings left in it maybe. Some worms may stay in the collected vermi-compost - it's fine and it's hard to avoid anyway. If you want to have a living soil, you need to have some worms left in your final product anyway. You throw worms to a new/fresh mix and keep "ready to use" vermi-compost in a seperate container. At least this is how I've done it.

Or... you can build a contraption/container, that allows worms to move from composted mass to non-composted. There are many ways to do it, but it's a large topic and too much to talk about :biglaugh:

How long you can store vermi-compost?

In right conditions you can store it up to 6 months - keeping bacterias and fungi alive.

How to store it?

I think this Youtube tutorial explains that really well :)


I find this method really simple. You can use different buckets of course, as long as they have a cover. It's pretty much all I know. I hope that I helped a little bit :wave:
 
Last edited:

aCBD

Well-known member
Thank you for this detailed response. :good:
I will check the video and take a look for some worms around the area. Having frost in winter is my only concern, a few flies on my balcony is no problem. :biggrin:
 

BReal

Well-known member
Veteran
Thank you for this detailed response. :good:
I will check the video and take a look for some worms around the area. Having frost in winter is my only concern, a few flies on my balcony is no problem. :biggrin:
No problem mate :good: Do you have a cellar or a garage? You could store worms there temporarily (in a vermi-compost that is not fully processed), as long as temperature stays at least a little bit above 0°C. Worms should survive as long as soil is not frozen. Simple as that... I think 😅
 

aCBD

Well-known member
Did some more research and most important is no frost inside the box, which could be possible with some insulation. Will look around for some black boxes that are safe for food and build it over the winter.
Have to finish other projects first. :biggrin:
Still have some bought bags of worm humus left. Always feel sorry when i find a dead worm inside.
 

BReal

Well-known member
Veteran
Did some more research and most important is no frost inside the box, which could be possible with some insulation. Will look around for some black boxes that are safe for food and build it over the winter.
Have to finish other projects first. :biggrin:
Still have some bought bags of worm humus left. Always feel sorry when i find a dead worm inside.

If you don't have space for that at home, you can try to build guerilla style storage for them. You would have to find a place in a wild, where you could dig a very deep hole. Then you secure it with some kind of material or buckets connected together. It can't have gaps to not let worms escape, but the bottom has to be made out of a mesh or other material that lets the water pass through. You put soil with some food/paper scraps, worms inside of it and... voilà! You got your own worm incubator 😅😉
 

Attachments

  • Screenshot_20241129_174139_Samsung Notes.jpg
    Screenshot_20241129_174139_Samsung Notes.jpg
    236.9 KB · Views: 10

BReal

Well-known member
Veteran
Lemon Cherry Cookies Auto by Fast Buds (Day 16)

View media item 18723655
View media item 18723656
View media item 18723657
Ok this is crazy! I spotted first preflowers on my lady :yoinks: So.. Fast Buds didn't lie about the strain being fast. I'm not going to train it then. I'm gonna let it grow as it is :biglaugh: It's hilarious how compact and low profile it is. Burrying this 5-7 cm in the soil maybe was unnecessary after all 😅 We will see how big this is going to grow in a few weeks :chin: I don't water it often - once a week is more than enough for now. Soil is still moist.
 

aCBD

Well-known member
wanted to comment on the fast growth during those few days but then i saw your last picture :D a real fast bud
 

Rocket Soul

Well-known member
D
Some autos do a fair bit of vertical growth even after they started flowering. Aw for general id try choosing a "slow" auto with longer harvest time for bigger size and yield.
 

BReal

Well-known member
Veteran
Some autos do a fair bit of vertical growth even after they started flowering. Aw for general id try choosing a "slow" auto with longer harvest time for bigger size and yield.

Most of Fast Buds strains take about 20-35 days to show preflowers. Gorilla Cookies Auto would give me more time to perform an actual training, but I bought Lemon Cherry Cookies instead, because I was curious how fast can I finish a grow, and I'm impressed so far 😅
 

BReal

Well-known member
Veteran
Lemon Cherry Cookies Auto by Fast Buds (Day 18)

View media item 18723705
View media item 18723704
She is doing good so far. I removed 2 leaves from the bottom because they were a little bit annoying when watering. Inspite being low profile and compact (for now) the plant developed a pretty thick main trunk already :bigeye:

View media item 18723703
I opened another jar of Girl Scout Cookies Auto today. I still got a few of them left :biggrin:

View media item 18723708
View media item 18723707
View media item 18723706
 

Latest posts

Latest posts

Top