What's new
  • As of today ICMag has his own Discord server. In this Discord server you can chat, talk with eachother, listen to music, share stories and pictures...and much more. Join now and let's grow together! Join ICMag Discord here! More details in this thread here: here.

NoobwannaB's Fabric Pot SIP method (works with hard pots too)

noobwannaB

Member
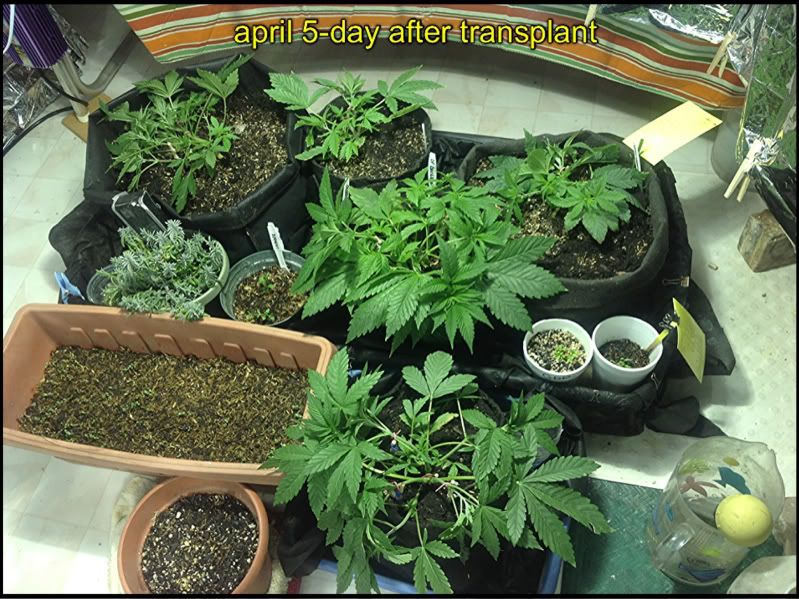
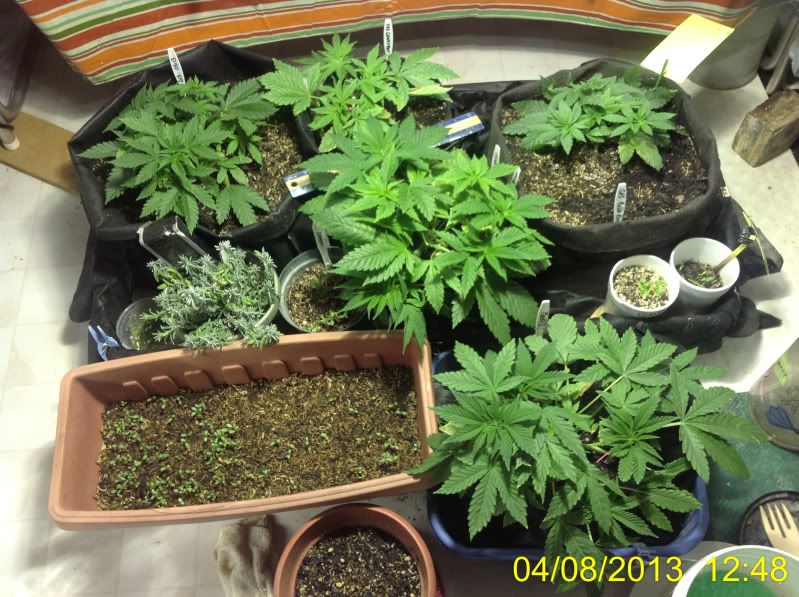
These plants are still babes, all in organic water only soil. Recently did a transplant and wanted to document the growth rate under this system. NOTHING was added to accelerate growth, repotted into the same soil mix their old pots contained, same light, etc....

Normally after a tp you'll get a lag where the plant recuperates and it takes awhile to see any growth at all....these photos were taken 3 days apart. The first immediately after the transplant, the second 3 days later :)

f2ae49348fec517377d777082d6eeeb6_zpsad3eef7b.jpg


ace7a6027353f5e427e90151fc4b1f68_zps1df0f49d.jpg


Goes to show you what a steady supply of water and a good organic soil can do.

Sent from my iPad using Tapatalk HD
 

2 Legal Co

Active member
Veteran
So what is really the drawback of having 2" of perlite in the bottom of hard pots and have them standing in water?

I think my setup is landing on a no-till solid chunk of soil in the entire room. The paper bags are bio degradable so when filled up I might just leave them there until they become one. In this case it would be a good idea to have some weed blocker in between, my guess the hydroton and soil will start to mix and that's no good.

Sounds like you are about to mix a couple of different methods/ideas.

If you are sitting on dirt,,, and using biodegradable pots.... You don't have a way to have the Perlite contained so it can water from the bottom.

If you are really on a dirt floor you probably should just amend the floor and plant into it?

BluMats maybe to keep it watered?

If you do a good job on the floor... at least you won't have to worry about 'pot' size.:laughing: Pun intended.

Perhaps call it a 'sheltered' garden? :biggrin:
 

hbj1891

Member
These plants are still babes, all in organic water only soil. Recently did a transplant and wanted to document the growth rate under this system. NOTHING was added to accelerate growth, repotted into the same soil mix their old pots contained, same light, etc....

Normally after a tp you'll get a lag where the plant recuperates and it takes awhile to see any growth at all....these photos were taken 3 days apart. The first immediately after the transplant, the second 3 days later :)

View Image

View Image

Goes to show you what a steady supply of water and a good organic soil can do.

Sent from my iPad using Tapatalk HD
I Love You!!!:blowbubbles:
 

TLoft13

Member
Wow. Talk about a bomb :chin::clock watch::peek:
So much for "Would love to see you spit the Perlite Tray knowledge to more willing people."

I tried buddy :laughing:

Don't worry mate I'm sure many people here will find your build and instructions usefull!
I liked it very much, though i would never use perlite again, hate the stuff. (I basically used your system for years for my outdoor starts, tray with 1-2 inches perlite, seedlings in cocopots, Jiffies or regular soilpots on top.
Fucking awesome, easy, nearly 100% successfull. And you can actually leave the extra roots on the plants when they go outside. The perlite is so light and fluffy most roots will stay on the plant when you dig it out.)
The only thing i hold against perlite are the health concerns.
I neither want to do me unneccesary damage nor do i want this fucking mess rinsing perlite every time i have to handle it.
Oh, and the "styropor-effect", this stuff has a live of it's own and if you are not 100% cleanly all the time the shit will be in every crevice and nook in your house in no time.
 

noobwannaB

Member
Don't worry mate I'm sure many people here will find your build and instructions usefull!
I liked it very much, though i would never use perlite again, hate the stuff. (I basically used your system for years for my outdoor starts, tray with 1-2 inches perlite, seedlings in cocopots, Jiffies or regular soilpots on top.
Fucking awesome, easy, nearly 100% successfull. And you can actually leave the extra roots on the plants when they go outside. The perlite is so light and fluffy most roots will stay on the plant when you dig it out.)
The only thing i hold against perlite are the health concerns.
I neither want to do me unneccesary damage nor do i want this fucking mess rinsing perlite every time i have to handle it.
Oh, and the "styropor-effect", this stuff has a live of it's own and if you are not 100% cleanly all the time the shit will be in every crevice and nook in your house in no time.

So....do you have anything against lava rock? Coz you can use that instead :tiphat:

I know a LOT of folks have issues with perlite. I pick my battles (there are so many) and that's not on the list ;) Thanks for stoppin by! :thank you:
 

TLoft13

Member
So....do you have anything against lava rock? Coz you can use that instead :tiphat:

I know a LOT of folks have issues with perlite. I pick my battles (there are so many) and that's not on the list ;) Thanks for stoppin by! :thank you:
Thanks for the suggestion, but I'm not searching right now, I have read your thread just out of curiosity.
 

2 Legal Co

Active member
Veteran
Dug out some of my old canvas scrap.
Spent the afternoon yesterday and this A.M. playing 'cloth butcher'. Made canvas bags 10"x14"x 18" tall. So something over the size of a Homer bucket.

Still have to run into a reasonable source for Perlite or volcanic rock. Only rock I've see was way coarse, and the Perlite I've found (Homey D), was $19.00 for a medium sized bag. Seemed high?

I've got 4 Jilly Beans, spending time in 1 gallon nursery pots. No sex showing yet, as they are only a couple weeks old. If the ratios are right I'll probably make some seeds too.

It seems that spring is indeed here. Getting some snow now! lol

:bump:
 

noobwannaB

Member
Dug out some of my old canvas scrap.
Spent the afternoon yesterday and this A.M. playing 'cloth butcher'. Made canvas bags 10"x14"x 18" tall. So something over the size of a Homer bucket.

Still have to run into a reasonable source for Perlite or volcanic rock. Only rock I've see was way coarse, and the Perlite I've found (Homey D), was $19.00 for a medium sized bag. Seemed high?

I've got 4 Jilly Beans, spending time in 1 gallon nursery pots. No sex showing yet, as they are only a couple weeks old. If the ratios are right I'll probably make some seeds too.

It seems that spring is indeed here. Getting some snow now! lol
:bump:

Good deal...on the canvas I mean. I visited the board because I wanted to post a landscape fabric I just found (and LOVE), and saw this...didn't get an email for some reason???? Anyway, yeah...that perlite is WAY too expensive!! They have it online (ship free to store) for $16.97 for 2cu ft (I think). Might be a better option for you. Order it online then have it shipped to the store for free and pick it up??

I live in the Great Lakes area and it's still winter here...SO ready for spring!! Supposed to warm up a bit tomorrow...looking forward to trying out the new compost tumbler I just got and start cleaning up the yard. My grow should wrap up by July at the latest....want to spend THIS summer outside gardening this year ;)

Thanks for stoppin by!


Sent from my iPad using Tapatalk HD
 

noobwannaB

Member
I just finished a little project that I'm SO excited about I had to jump right on board (on board, get it??)..anyway...and SHARE!!

SO, I did a bit of research on landscape fabric...my experience has been the thin, cheap stuff, but I found something on amazon (my preferred shopping destination with my lack of mobility) that looked pretty promising and thought I'd give making a few smarties a try. This is what I got
Amazon.com: Dewitt Black 3-Foot by 50-Foot 3oz Weed Barrier Pro Landscape Fabric PBK350: Patio, Lawn & Garden

At the time of this posting the price is $19.14 shipped. It's called DeWitt Weed Barrier Pro (in case you look for it locally) and it says Professional Grade as well. Anyway, it's fuzzy on one side and smooth on the other, and really QUITE thick! (they also make even THICKER stuff...more expensive of course)

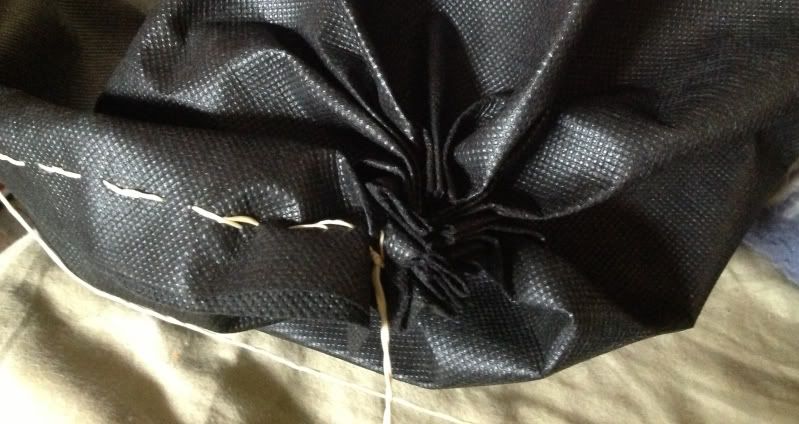
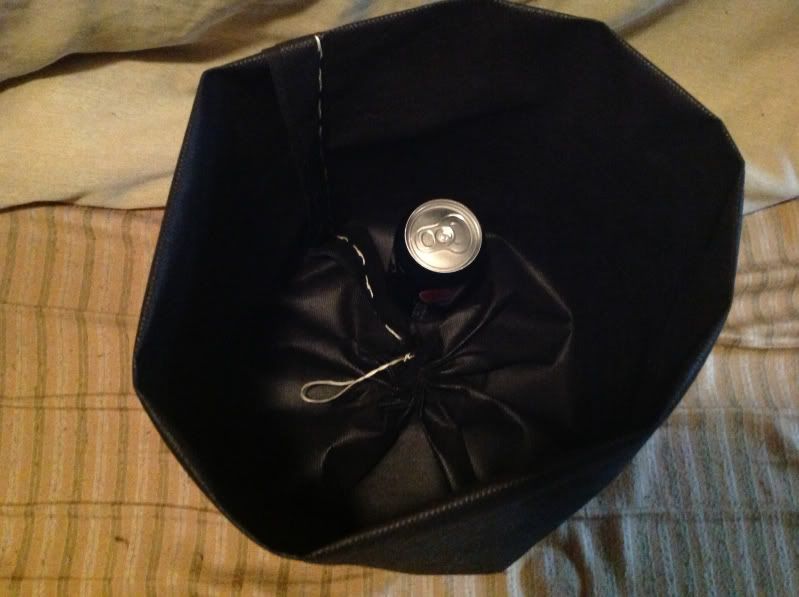
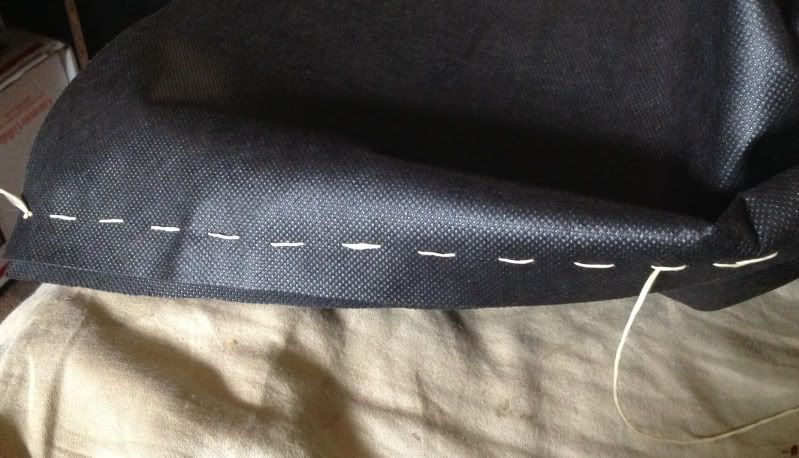
I cut a 4ft length of it today, then cut that in half lengthwise. Then I used some heavy duty 'thread' (made from kevlar - figure that'd hold up pretty well) mrnoob got from work before he retired, but you could use fishing line, or anything that will go through the fabric and resist rot. I could have easily used my machine, but I wanted to do it by hand for the sake of those without one, and so I could illustrate it a little easier. I sewed the two ends together (leaving about an inch hem) with shiny side out, then sewed about 1/2" in from the bottom and pulled that tight like a drawstring...here are the photos. They're poor quality to be sure, but good enough to illustrate the point.

Sew sides together using a basting stitch, then went back and did it again...probably unnecessary, but with wet soil you want to be sure ;)

b0af2203687c579abb031ccf8466771b_zps6969e4d5.jpg


then the bottom:

974efe79c471babc6c9377516f92c806_zpse969a4df.jpg


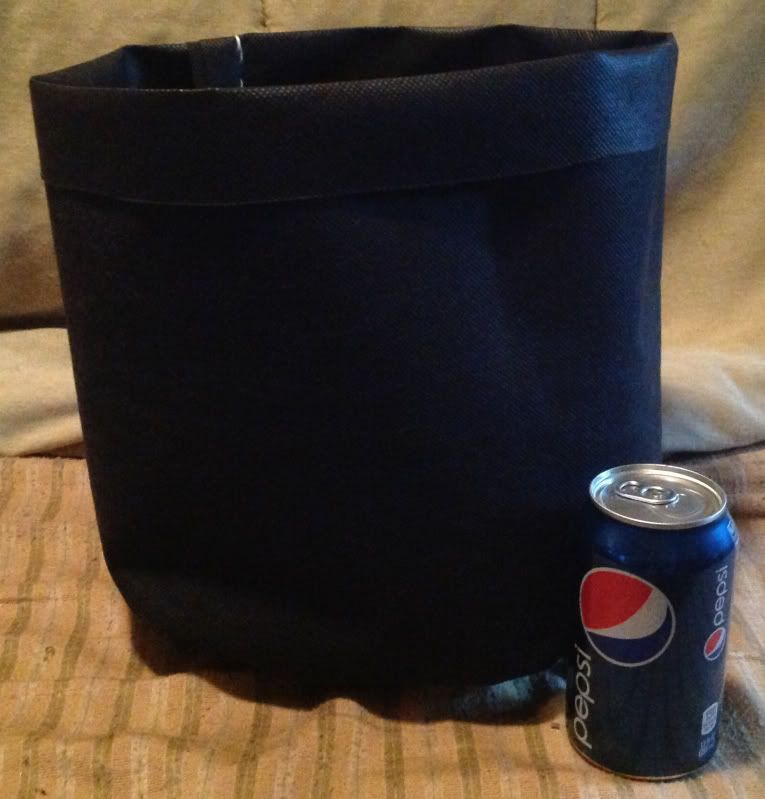
I turned the pot with the seam inside and took pics.

8154b7cd9416f9724f038d428ec472e9_zps90db5c56.jpg


82983c0989e0e9223450afb5450731ad_zpsd40728f2.jpg


I measured, and the resulting 'pot' is about 12" across from top to bottom, and 12" deep. I used my trusty calculator, and the roll (3x50') would make approximately 25 of these large size pots at about SEVENTY SIX CENTS A PIECE!!!!!!! Well, 76 cents and a bit of time (maybe 15-20 minutes including cutting. My guess is they have to be close to the 7 gal smart pots I have...they look pretty close.

Again, VERY sturdy fabric that I'm sure will hold up well. Not sure about running it through a washing machine like you can with the smart pots, but for the price...they're almost disposable anyway!! I'll be planting it it soon, so I'll be sure and report back my findings. I realize that making smart pots out of weedblocker isn't a NEW idea, but you really have to be careful about the 'grade' because soil is ....well, heavy. Just sharing my 'discovery' of an affordable alternative to an expensive product for those that just can't afford the cost of smart pots.

Just a note: You can of course make just about any size pot you want (up to 3ft tall and as wide as the roll allows) and if you wanted to reinforce the corners, you could also make them square You could also easily make your own 'handles' should you care to as well.


Sent from my iPad using Tapatalk HD
 

2 Legal Co

Active member
Veteran
Noob;

I admire your nerve, going at it with needle and thread. I always end up 'giving blood', when I use a needle. lol Even button replacement can be dangerous, for me.

Besides my old Singer 3115 tailor's machine needed the exercise. I used nylon thread, so it won't rot but the sun will kill it. I did 'hand grenade' one #16 needle. Tweeked it sideways and it hit the throat plate, going at the full 1650 rpm...... that was exciting, for a second.

I figure the untreated cotton canvas will last 4-5 runs, before it rots out. But I had it laying from previous projects. Since it's been laying there since the early to mid 90's, I figured it was time. Think I ended up with 9 bags... and mine DO have handles. I keep seeing Smarties without handles. I've got some acrylic awning cloth laying as well. It'll get used when the canvas rots out.

That landscape fabric sounds very promising. Cut in half length ways it'd be 18"s, give or take. Homer buckets are 16"s IIRC. I wanted the extra depth, since weed seems to dig deep when it can.

Buck up, it'll quit snowing soon! lol
 

2 Legal Co

Active member
Veteran
I MAY have lied,,, about the snow stopping.... Have more snow again today. Oh well, Nebraska needs the water.....

Just a note. Using a locally produced 'potting' soil, using wicking (w/o the perlite bed, as of yet), My 1 gallons stay too wet on top, and the 5 gallon bucket setups stay dry almost 2 knuckles worth down.

Noob; What's your experience with perlite bedding? Will a couple of inches of perlite bed under the pots slow the wicking action? thx

PS; My 1 gals. are nursery pots. Haven't gone to the bags yet.
 

noobwannaB

Member
I MAY have lied,,, about the snow stopping.... Have more snow again today. Oh well, Nebraska needs the water.....

Just a note. Using a locally produced 'potting' soil, using wicking (w/o the perlite bed, as of yet), My 1 gallons stay too wet on top, and the 5 gallon bucket setups stay dry almost 2 knuckles worth down.

Noob; What's your experience with perlite bedding? Will a couple of inches of perlite bed under the pots slow the wicking action? thx

PS; My 1 gals. are nursery pots. Haven't gone to the bags yet.

Hey 2 Legal :) S'ok about the snow....seems even the weather man/person gets it wrong from time to time ;)

I like at least 2" of perlite, because I like to keep at least an inch between the water level and the bottom of the pots. As for too wet, I suppose some folks would consider them so, but my plants aren't complaining so far. No mold or anything funky, just lush green growth, so if they like it, I like it.

I've seen a lot of folks running the buckets say it's kinda important (or desirable at least) to seal the top of the bucket or add a heavy layer of mulch to keep the top moist. If I were to run one, that's what I'd do.


Sent from my iPad using Tapatalk HD
 

2 Legal Co

Active member
Veteran
Thx for the quick response.

That's kinda what I figured, but this potting mix I got is new to me. It's done less than 50 miles from me. That and the slightly lower price made the decision easy. I have not set up yet to mix, compost, etc., and don't need a large volume. Consequently I was looking for a product that I can perhaps re amend, and add 'goodies', to make/keep it organic. We'll see how this EKO works out.

I don't mind the top 2"s being dry. But if MJ is like most trees and shrubs the surface needs to get air to/for the root system. I've left mine open to the air so far. Thinking maybe I'll plant a micro clover 'cover' crop, though.

I've seen several on the utube vids that closed the tops and it made me uncomfortable to watch. However I could be dead wrong.... lol
 

noobwannaB

Member
Thx for the quick response.

That's kinda what I figured, but this potting mix I got is new to me. It's done less than 50 miles from me. That and the slightly lower price made the decision easy. I have not set up yet to mix, compost, etc., and don't need a large volume. Consequently I was looking for a product that I can perhaps re amend, and add 'goodies', to make/keep it organic. We'll see how this EKO works out.

I don't mind the top 2"s being dry. But if MJ is like most trees and shrubs the surface needs to get air to/for the root system. I've left mine open to the air so far. Thinking maybe I'll plant a micro clover 'cover' crop, though.

I've seen several on the utube vids that closed the tops and it made me uncomfortable to watch. However I could be dead wrong.... lol

I know what you mean...I've seen the results of bucket SIPs, and know they work and work well, but there's something about growing in a wet bucket that bothers me too. Silly, but we all have our little idiosyncrasies I guess ;)


Sent from my iPad using Tapatalk HD
 

2 Legal Co

Active member
Veteran
Yes, that 'dead' reservoir bothers me as well. I'm sure it becomes anaerobic very quickly. I may decide to add an air stone to each one.

Makes me wish I had some acreage to play on, instead of 'city' environment.
 

noobwannaB

Member
Yes, that 'dead' reservoir bothers me as well. I'm sure it becomes anaerobic very quickly. I may decide to add an air stone to each one.

Makes me wish I had some acreage to play on, instead of 'city' environment.

Seems to me somebody did that at the other place and reported no real difference, or I should say gain. Seems like if you're water only it'd be pretty safe, anything else added I would think would be easy enough to syphon out. Just gives me the bejeebies though lol! One of those unexplainable uncomfortable feelings. Go figure.

Lots of folks into sips outdoors as well...unless on a patio or in a drought environment, just give me the plain old ground. ;)


Sent from my iPad using Tapatalk HD
 

2 Legal Co

Active member
Veteran
These two setups I made, are for the patio,,, and Real tomatos.

I wanted some reserve water, as we leave home once in a while, to go to the Mtns.... We do have someone who plays 'caretaker' for us but I try not to be too demanding. lol Most of the 'caretaking' involves a 12 gauge over the fence when needed. Smiles everyone!

And I don't even 'grow' here.
 
Top