What's new
  • As of today ICMag has his own Discord server. In this Discord server you can chat, talk with eachother, listen to music, share stories and pictures...and much more. Join now and let's grow together! Join ICMag Discord here! More details in this thread here: here.

From start of cloning to harvest 13 week scrog

Ichabod Crane

Well-known member
Veteran
I am running out of time so I started the Hempy buckets today.

For those who dont know what that is I will explain. It is a bucket with a hole drilled just above the bucket bottom. Then it is filled to just above that hole with a course media. Then above that goes your potting media.

For my course media I used perlite. Above that will go my coco coir.

I drilled my hole a inch and a half above the bottom of my bucket. This gives me a reservoir of about a inch and a quarter. Here is a picture of my bucket.
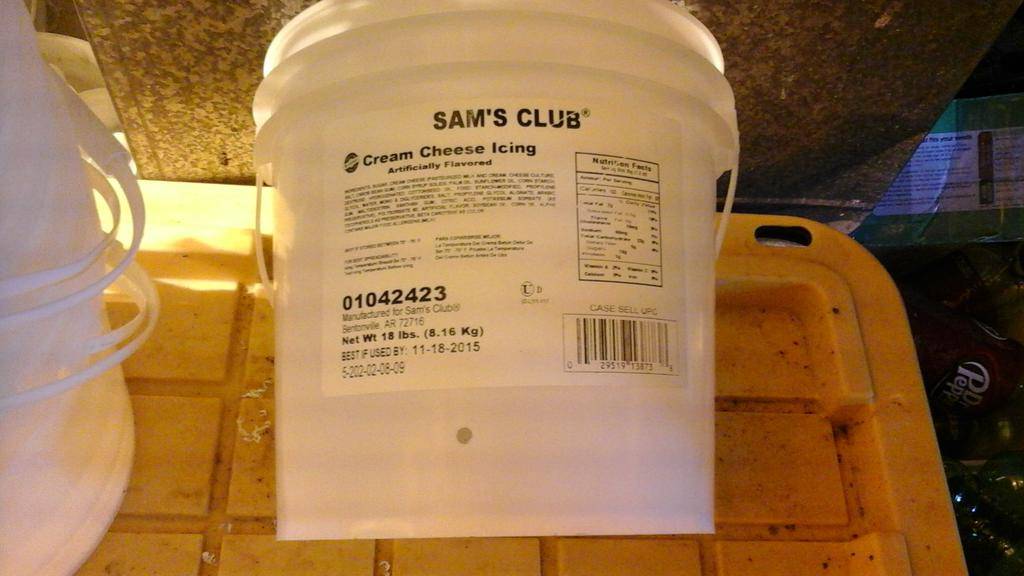


As you can see it comes from Sams Club. It is a 2 gallon bucket. Best of all they will give them to you for free in the bakery. That is the best price for a cheap ass like me.

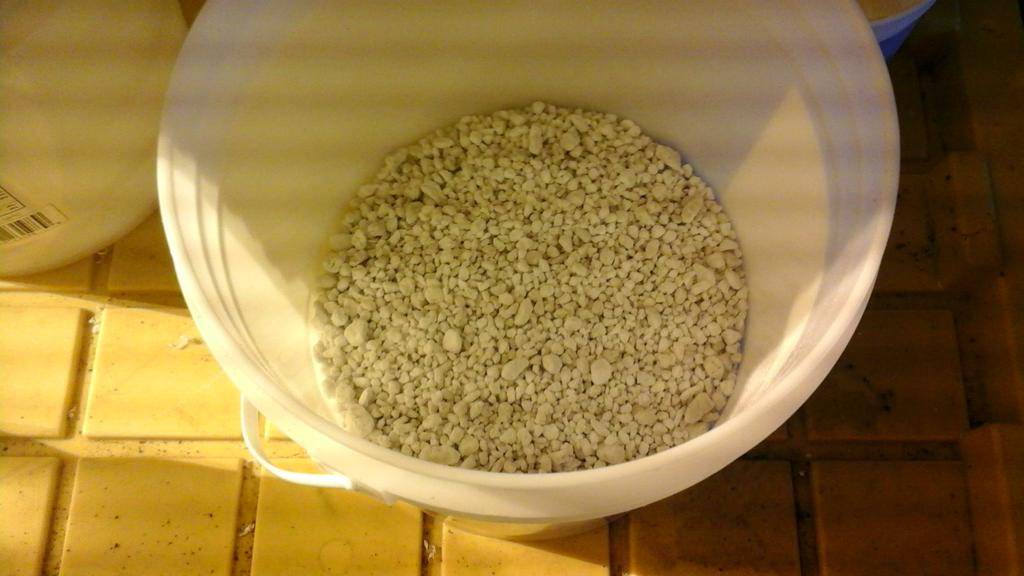
So I filled the bottom of the buckets after drilling the hole with perlite. Looking in you can see that the hole is covered. The hole is at the bottom of the label if you are looking for it. It took a Cool Whip container and a half of perlite for each bucket. Here is what it looks like now.


Now I need to get the coco coir ready. I will be dunking it like I did for the cups with the cuttings. To keep it from drying out I will cap each bucket till I transplant into them.

And the reason for the rush is this.
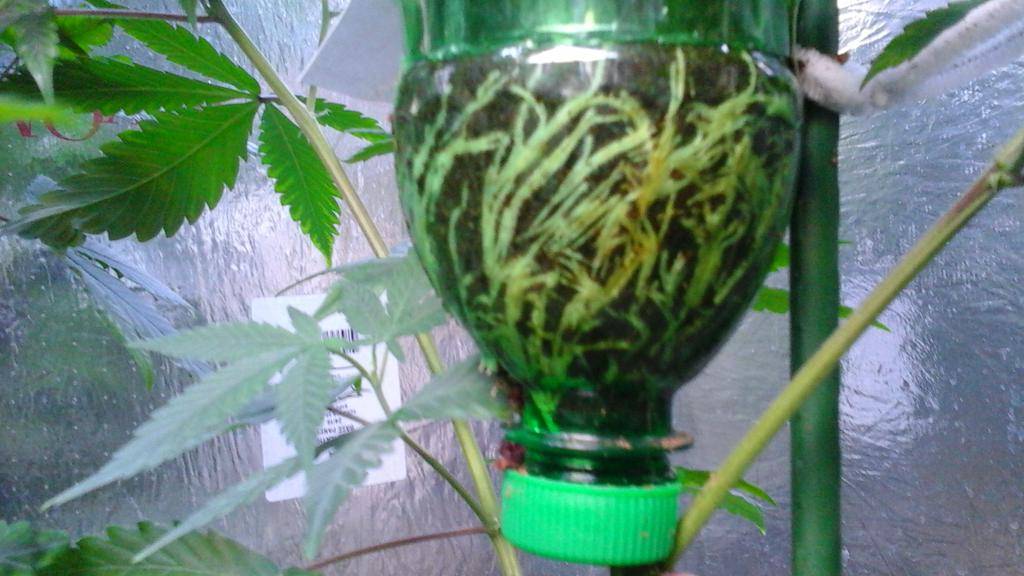


This is the best rooted air layered clone. I give it a day or two before I will have to up pot it. It is the second Bruce Banner #3 clone to show roots and is at day 13 from the start.

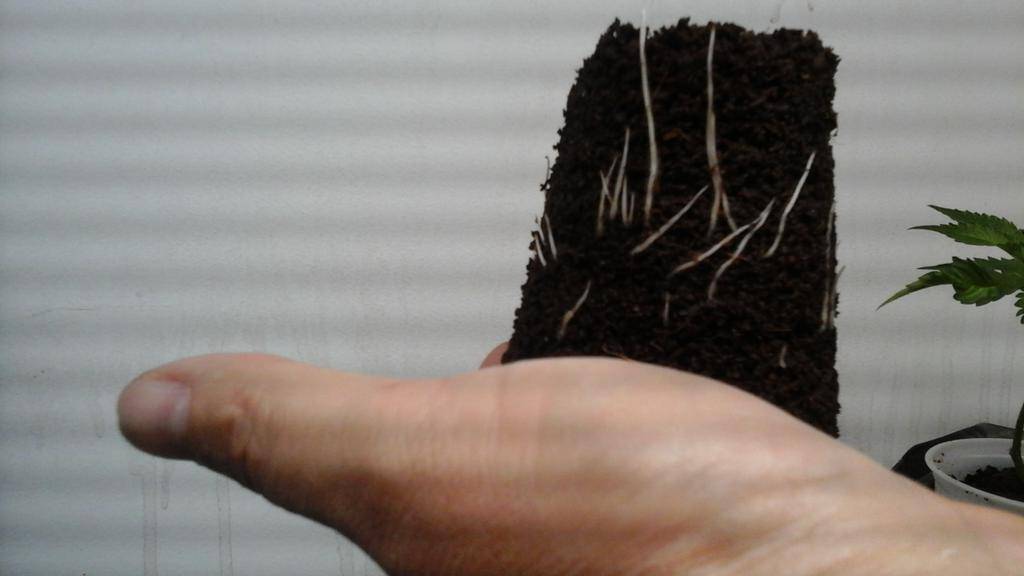
As a comparison here is the best clone from a cutting. It is a Death Star clone at day 13.


I will keep you guys updated. I know how many f-ing times a day is he going to post? I know you all need to be kept informed on how fast the grass is growing multiple times a day. haha
 

Ichabod Crane

Well-known member
Veteran
Today I topped off my Hempy buckets with coco coir. All the coco was precharged with nutrients.

To precharge the coco I used the paint strainer like before inside another bucket. This time though there was more coco to squeeze the water out so I used a different method. I used a three bucket method.

I use a untouched bucket for the top and another for the bottom. The middle bucket is drilled out on the bottom and side as such.


This bucket will hold the paint strainer bag. The set up looks like this next picture.


As you can see it is untouched bucket then drilled bucket then paint strainer bag, and finally another untouched bucket. Once you have this set up just press the top bucket down on the bag. And bam like magic you get this.


A nutrient solution in the bottom bucket. One tip is not to do to much at a time so you can squeeze the water out. I do about a gallon to a gallon and a half at a time.

So now my buckets are ready to transplant into. I capped them and set the aside for when I need them.
 

DunHav`nFun

Well-known member
Veteran
Thanks for sharing personal experience Icky....Nuthin like proof in da pudding for your air-layering mom plants for considerably larger more developed rooted cuts once transplanted....now....

It only makes sense that a larger rootmass would develop from increased media volume in the coke bottles compared to the smaller root cubes with smaller cuts....

Older/lower limbs on mom plants are woodier and hold more root hormones than upper new growth , so air layering falls right into place the way you`ve illustrated as well as holding bigger ready to transplant plants in stasis until needed in a low plant count medical garden.....my kinda shit....genius for a damn yankee btw...:moon:....anyways....

Wanted to stop by and show respect for an ongoing job well done , and hey.....Be wary of perlite in the bottom rez of Hempy buckets ONLY cuz the shit breaks down and turns into a solid chunk o shit that won`t hold juice and when fed/watered everything runs out the overflow hole and no passive rez exists any more for wicking....but....

Washing/screening the large/chunky perlite will help the smalls and dust from congealing into that solid white chunk`o`shit , and pea gravel or lava rock is a better substitute if available ....aight....

Nuff outta my old ass today.....Gonna check the crab traps on my pier and hopefully catch a few redfish and speckled trout fer supper......

Peace....DHF.....:ying:.....
 

Ichabod Crane

Well-known member
Veteran
Thanks for coming by DHF.

I would use NAPA if I was going to run them more than 11 weeks. I would use it after this but I have a bag that has been sitting around for two years. And since I have had the duds I have not been reworking my media so it will be used 11 weeks at most.

But great point about it breaking down. I hate the shit.

And if you dont hold being a yankee over my head I wont talk about your speech impediment k? lol
 

Ichabod Crane

Well-known member
Veteran
I am surprised no Jacks user have anything about my ratio.

If you look I am adding extra Calcium Nitrate. It is not at 1 to 2/3s. I am running the extra because of the added Potassium in the Drip Clean and Potassium Silicate. And I am running extra Phosphorus in the acid and the Drip Clean.

So it balances the NPK out. I would not recommend running this mix if you dont run it like I have listed. Instead run 590 grams of the Calcium Nitrate per gallon and still using 10 ml of each.

And here is a tip for you guys. It will save you a few pennies. And that works for me because I am cheap. I use cheap PH meters. They have a cap that goes over the tip. I buy two meters. I use the cap from the second meter to put my calibration solution in. I only use it for this. By doing this I only use a half meter cap of solution to calibrate with at a time. Here is my meter that I use in the picture below.


As you can see I use the cheap meters off Amazon. Cost between 10 and 12 dollars. I have a stack of them. I get 4 or 5 at a shot. Always some one who freaks at ten o'clock at night because their meter went out. Then they call me.

The point is dont wait till the last minute to get shit or you will be screwed.
 

Ichabod Crane

Well-known member
Veteran
Dang 10 people views this thread in 12 minutes.

Well I wont keep you waiting. Can I have a drum roll please.

I cut one of the Bruce Banner #3 down in that 12 minutes. I potted it up in one of the buckets and here is what it looks like. Sorry it is sideways. It was the only was to get it all in the picture. It is 26 inches from the top of rootball to the top.


Here is a picture of it when I cut it down. It is next to three 1 gallon pots for a size comparison.


Now lets look at the roots. Take notice of the tag on the branch telling when what time and the date. It will flip in the next two pictures. That way you can see the pictures are the front and back of the root ball.


Ichabod Crane

Well-known member
Veteran
After I potted it I watered just the root ball. It was dry. At this point I dont want to saturate the media I made up yesterday. But the roots were pretty dry so I watered just them. I am afraid to over water at this point. I will use my turkey baster to water it when I feel it needs it.

To help it right now I put a clear bags over it and stuck it in low light. Here is a picture of the bag in place. It is a 5 gallon clear plastic bag. Again sorry it is sideways.


Now lets compare they best clone from a cutting to this one. The first picture is the roots that it has. It is a Death Star clone. And here it is.


Now lest look at it next to the air layer.


I have a Death Star air layer and a Blue Dream clone to pot up as well tonight.
 
can't speak for other viewers but I'm a huge fan of this thread b/c of what it represents.

don't see many threads with pics (and this level of success) on this topic. plus you've done a side-by-side w/a conventionally rooted cutting.

look at the finished size of your air-layered clone... plus take into account the time-frame. Unreal... very, very cool.

I suspect this technique might be slightly more forgiving than what D9 demonstrates where he's rooting whole branches in Turface. A grower must have his environment pretty dialled to cut a branch off, plant in medium and then root from there.... whereas here the cut has the supply from the existing root system while it grows a new root mass. Temperature and relative humidity maybe not as critical... like if you don't have those parameters within tolerable ranges you won't lose the cutting.

I like what you're saying with the pH meters. After going thru many $200 meters, which often give no indication they've malfunctioned, I've stepped up to $6 pH drops exclusively.
 

Ichabod Crane

Well-known member
Veteran
can't speak for other viewers but I'm a huge fan of this thread b/c of what it represents.

don't see many threads with pics (and this level of success) on this topic. plus you've done a side-by-side w/a conventionally rooted cutting.

look at the finished size of your air-layered clone... plus take into account the time-frame. Unreal... very, very cool.

I suspect this technique might be slightly more forgiving than what D9 demonstrates where he's rooting whole branches in Turface. A grower must have his environment pretty dialled to cut a branch off, plant in medium and then root from there.... whereas here the cut has the supply from the existing root system while it grows a new root mass. Temperature and relative humidity maybe not as critical... like if you don't have those parameters within tolerable ranges you won't lose the cutting.

I like what you're saying with the pH meters. After going thru many $200 meters, which often give no indication they've malfunctioned, I've stepped up to $6 pH drops exclusively.
It is still early and things could go to hell yet haha.

And this clone grew some while I was rooting it. I may have to reduce the number of clones.:chin:

It is all new to me. I have never grown flat before. I normally do a grow like this.


As for the PH trick with the meter cap, there are a lot of little things like that people never think of. Another is using the paint strainer to flush the coco. If you have something like that post it up so everyone can use it.

I know a lot of people are reading this thread and not posting so I know there is interest in this way. Just have to see how it goes. But you are not the only one following along.
 

Budley Doright

Active member
Veteran
I got my banner same time as you did.....very interesting plant.....

My original clone has almost dried....... I will let you know what I think in a few days.....

Great job on the air layering thread.....

I plan to do one as well when I get my shit together and have my moms ready....

Much different idea on how to use air layering for our respective grows......
 

Ichabod Crane

Well-known member
Veteran
Cant wait to see what you do with the air layering.

Curious to see what you think of the Banner.

As for getting shit ready I still have to clean out my room to flower these in mount a fan and hood. So I am so there with you on getting shit together lol.
 

Budley Doright

Active member
Veteran
Cant wait to see what you do with the air layering.

Curious to see what you think of the Banner.

As for getting shit ready I still have to clean out my room to flower these in mount a fan and hood. So I am so there with you on getting shit together lol.

Banner.... from all indications....we have the real bb3.....

everything checks out up to smoking it....

QUite different looking compared with glue.....

Air layering.... part of the problem for bothuvus.....is we know we want to do air layering but arent quite sure how to best do that.....

different strokes...I guess....
 

Bmac1

Well-known member
Veteran
This is blowing my mind Ichabod, lol. I am watching close and will be giving this a try for certain. It makes so much more sense for us smaller guys with lower numbers. I always get a little uptight when I take a round of cuts cause I take say 12-15 to make sure I get some good ones. I usually have great success with taking cuts but I like to keep my numbers low, like 6 or less.

Great stuff. Bravo!
 

Budley Doright

Active member
Veteran
This is blowing my mind Ichabod, lol. I am watching close and will be giving this a try for certain. It makes so much more sense for us smaller guys with lower numbers. I always get a little uptight when I take a round of cuts cause I take say 12-15 to make sure I get some good ones. I usually have great success with taking cuts but I like to keep my numbers low, like 6 or less.

Great stuff. Bravo!


There is one key thing that probably determines success.....

and thats ringing the limb correctly.....

If you get that wrong......this process works poorly.....

If you want to do this grab a branch..... take it to your desk and ring the branch.....

use some magnification so you can see the green cambium layer....

If you understand what you are trying to achieve you cant help but experience greater success....

if you break that cambium connection with the roots... the clone often roots quickly and vigorously.....
 

Budley Doright

Active member
Veteran
Mr crane..... You have inspired another experiment.....

It will be clonex vs dip n' grow.....

My feeling my friend....is that dip n' grow is the deal for this purpose......

One way to find out....:biggrin:
 

Latest posts

Latest posts

Top