What's new
  • ICMag with help from Phlizon, Landrace Warden and The Vault is running a NEW contest for Christmas! You can check it here. Prizes are: full spectrum led light, seeds & forum premium access. Come join in!

86W LED Filing Cabinet

ReikoX

Knight of the BlackSvn
2016.09.04

2016.09.04
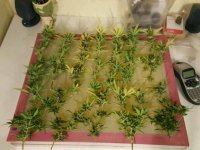
20160904 - Harvest.jpg
So today I decided to harvest the filing cabinet. These clones were exactly 9 weeks. I went ahead and weighed each plant pre-trim. The weights are listed below.
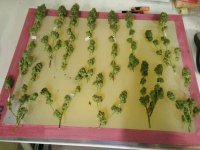
20160904 - Tagged and Trimmed.jpg
Here they are all tagged and trimmed.
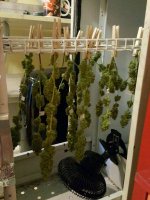
20160904 - Hanging.jpg
Finally I turned off the lights and hung them back in there to dry for a few days.
  1. - 26.2
  2. - 21.8
  3. - 26.0
  4. - 24.2
  5. - 26.7
  6. - 20.9
  7. - 25.7
  8. - 20.2
  9. - 14.8
  10. - 17.0
  11. - 25.2
  12. - 20.0
 

ReikoX

Knight of the BlackSvn
Coming Soon...

Coming Soon...

I stumbled upon this concept called OBBT (Organic Bubble Bath Tub). It's a stupid name, I know. I found the concept intriguing and decided to make my own. The goal is a low maintenance grow style. I'll try and explain it in text, followed by a few pictures.

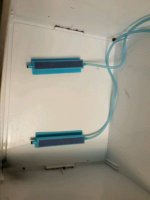
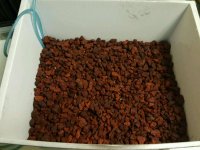
Basically it's a tub with a couple of air stones in the bottom. Those are covered with four inches of lava rock. An overflow of three inches is added so water remains below the top of the lava rock. Finally a quick draining organic soil is added to the top.

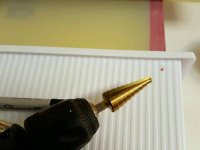
20160902 - Drill Holes.jpg
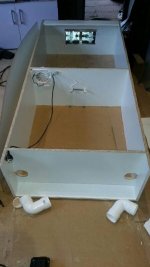
Using a step drill I drilled a 3/4 inch hole at the top and bottom of the tub.

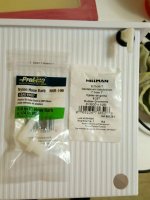
20160902 - Insert Barbs.jpg
I then used these grommets and hose barbs to make a sight line/overfill/drain. The barb can spin freely without leaking.

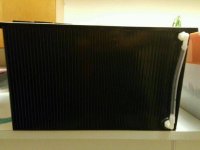
20160902 - Painted Black.jpg
Next I painted the outside black and added a bit of silicone to the grommets to keep them water tight.

20160902 - Airstones.jpg
20160902 - Lava Rock.jpg
Then I rinsed out the lava rock and added it to the bottom of the tubs with the air stones.

Finally I added a mix of 1 part perlite, 1 part vermiculite, 1 part floor dry, and 6 parts Coco Loco soil, to this i added some white lightning. I covered the top with an inch of floor dry, then watered with pH 6.1 water and left in the dark to cook.

I plan to run a single feminized seed in there. I have Fast and Vast Auto, Critical+, Blueberry, and Zamaldelica. Im leaning towards the Auto. I have a bunch of clones I haven't run yet either, Afghani 1, Strawberry Blues, Agent Orange, and Tahoe OG.

Decisions decisions... :dunno:
 

Gnz

Member
Man this Wednesday has DELIVERED for posts. Looking forward to this experiment and some dried shots of that candy! Now off to the 150w thread...:tiphat:
 

ReikoX

Knight of the BlackSvn
2016.09.09

2016.09.09

After four days drying they spent another day in paper bags. Today I cut them from the stem and weighed them. When they were weighted wet, it was before trimming, so the loss includes trim and stems as well as moisture. I got a total of about 40 grams. They are now in the jars with hygrometers ready to be burped for the next couple of days. Thats a pretty nice yield, I'm pleased. I smoked some of the shake from the top of the screen and was pleased with the dry. Still a little wet, and needs a good cure. I'll get some pics this weekend.

Wet/Dry/Loss
  1. 26.2/4.2/84.0%
  2. 21.8/3.4/84.4%
  3. 26.0/4.6/82.3%
  4. 24.2/4.3/82.2%
  5. 26.7/3.1/88.4%
  6. 20.9/2.8/86.6%
  7. 25.7/4.3/83.3%
  8. 20.2/2.5/87.6%
  9. 14.8/2.1/85.8%
  10. 17.0/2.7/84.1%
  11. 25.2/3.5/86.1%
  12. 20.0/2.9/85.5%

Wet/Dry
Total Yield (g): 268.7/40.4
Average Yield (g/plant): 22.4/3.4
Average Loss: 85%
 

Chloemobile

Active member
Nice work!!!! Funny....I have also just been pontificating over a low maintenance watering solution...also came to bottom feeding. But with using hydro-static pressure. if you wanted to flood/flush just open the top to let the air in, other wise as the plants drink the water is replace to the end of the tube.


picture.php
 

ReikoX

Knight of the BlackSvn
Ive still been debating the OBBT thing. Most of these seemed to crash and burn. I could go nack to plan A, 14 clones of multiple strains.
 

Gnz

Member
Nice work!!!! Funny....I have also just been pontificating over a low maintenance watering solution...also came to bottom feeding. But with using hydro-static pressure. if you wanted to flood/flush just open the top to let the air in, other wise as the plants drink the water is replace to the end of the tube.


View Image

I've been working on something very similar but using a float valve to allow a bit more freedom with how I mount the reservoir. With a float valve it can also be mounted at desired water level in the tray, but feed water into the top of the plant containers and more thoroughly water the plants. I may try using both a mini ballcock type and liquid level type of valve to see which is more reliable.
http://m.ebay.com/itm/262040394821

I'd just like to be able to have a weekend away this summer so following these ideas with interest!
 

Chloemobile

Active member
I've been working on something very similar but using a float valve to allow a bit more freedom with how I mount the reservoir. With a float valve it can also be mounted at desired water level in the tray, but feed water into the top of the plant containers and more thoroughly water the plants. I may try using both a mini ballcock type and liquid level type of valve to see which is more reliable.
http://m.ebay.com/itm/262040394821

I'd just like to be able to have a weekend away this summer so following these ideas with interest!

Very nice because my idea was a bust because having to try to put the rez at the right level ended up being prohibitive. Would be interested in seeing how you end up using that float valve
 

ReikoX

Knight of the BlackSvn
Very nice because my idea was a bust because having to try to put the rez at the right level ended up being prohibitive. Would be interested in seeing how you end up using that float valve

Sorry to hear your idea didn't pan out. Seems a lot of us micro guys are trying some automation. Dropped Cat, Gnz, Chloemobile, and myself. Mr. Sparkle seems to have it worked out using Arduino boards, but there is a steep learning curve there. My biggest concern is flooding, that's why I went with the OBBT idea. So far the soil is staying WAY too moist, hopefully all the O2 will keep it aerobic and healthy. I'll be cracking some auto flower beans this weekend.
 
M

Mr. Sparkle

Sorry to hear your idea didn't pan out. Seems a lot of us micro guys are trying some automation. Dropped Cat, Gnz, Chloemobile, and myself. Mr. Sparkle seems to have it worked out using Arduino boards, but there is a steep learning curve there. My biggest concern is flooding, that's why I went with the OBBT idea. So far the soil is staying WAY too moist, hopefully all the O2 will keep it aerobic and healthy. I'll be cracking some auto flower beans this weekend.


I'll say im glad i put in the effort to automate, the learning curve isn't too bad, it does require effort though, but now that i have things setup mostly, tweak are easy and are becoming fewer and fewer as i get it more dialed in.

I have had that odd bad res dump in the past, and the odd recent but non damaging ones, but it shows me if there is a current weak point in mysetup or programming, because of them i have since changed things here and there to factor in those issues that caused res dumps.

For your setup the OBBT looks like it will work, kinda a variation on a air aided wicking bed mixed with hempy buckets mixed in.

Will be watching how it turn outs
 

Gnz

Member
The ultimate solution would be an arduino soil moisture sensor controlled solenoid valve, I feel like the float valve solution is an effective manual way to do it but we'll see how it works in practice.

I've been thinking about arduino or even raspberry pi (their new starter kit looks good) to automate a few things around the farm, may as well start with the smallest farm I have..
 
M

Mr. Sparkle

with ebay parts minus a power supply, one can easily be made for under $20, just have to add or make a few things to make it reliable, and a few bits of choice coding

But there are many ways to do watering systems, i just went that route as it was what worked for me, and i was using arduinos to control my lighting and fans anyways.
 

Gnz

Member
I think this calls for an "automation" discussion in the microgrow forum, maybe even arduino specific. I'm interested to hear more detailed information about your setup and coding etc but this might not be the place for it.

ReikoX! What autos did you pop? Are they going in the filing cab next?
 

Chloemobile

Active member
It looks like the Gravity fed solenoid valve ( what Mr.Sparkle has) is the best way to go with the arudino's. I did find this though which is the new direction I am going to go in ( i did find it for $10 somewhere else):

https://www.amazon.com/SainSmart-2014-Newer-Version-Programmable/dp/B00P0TZ5CY/

if you dont want to go full arduino...its just a precise timer with 2 timer options with a 12v relay. You can add a switch to just manually open the valve also and then change the mode settings to go into automate mode when you need. where timer 1 would be off(circuit open) for X hours and the timer 2 would be the trigger on(circuit closed) for Y seconds. dont have to burn a program into it or anything like you would an arduino its all programmable from the board that is smaller than a credit card.

so ...12v Wall Wart...The board mentioned above...and then this valve:

https://www.adafruit.com/products/996


The brass one is better for a gravity fed system because it does not have a gasket so there is no PSI requirement.

You could even power both with a 9v battery.

small bit of wiring and time programming to figure out but not nearly as complex as setting up an arduino. id much rather deal with just opening and closing a valve for a few seconds to dump some water in a pan then deal with a pump since they are kind of loud and take a log of juice.
 

ReikoX

Knight of the BlackSvn
ReikoX! What autos did you pop? Are they going in the filing cab next?

Well, I put a Fast and Vast Auto in water last night. Then tried to fit the OBBT in the cab and it didnt fit!
:laughing:

Plan A: SOG, I gave away most of my clones (9 of them) last night to another patient.

Plan B: OBBT doesn't fit. Should have at least measured it once. :YaRight:

I will go with plan C: A regular container with the soil I put in the OBBT.

:plant grow:
 

Dion

Active member
as a cab builder do you think its better to renovate an existing piece of furniture or to build from scratch?
 
depends what you have, want and can afford, and even where you live, i wouldnt able to "afford" the pieces of wood to build a decent micro closet, but i can pick them up for free every single day of the week, taking some powertool to something thats close to what you want can save a lot of time

its also a matter of experience, experience building (wood, metal, lightleaks, having tools) and experience growing (how much of x, how high should y be, will z be enough to hold a) if i were to build another i would be a shitload better

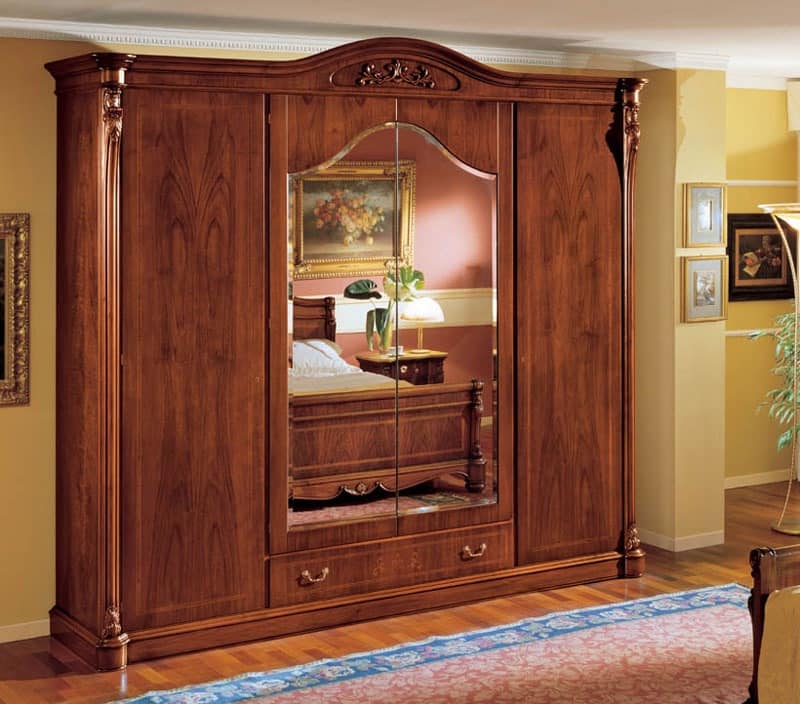
id totally grow this out:
althea-wardrobe-storing-tall-cabinets.jpg
 

ReikoX

Knight of the BlackSvn
:yeahthats

Having done both, It's definitely easier to renovate than build from scratch. If you have the tools and experience, building from scratch will let you use your space more efficiently. Not to mention the piece will be one of a kind.


The workbench I made has a 150-watt CMH on each side.
 

Gnz

Member
I'm looking forward to seeing one large auto in contrast to the candy SOG, hope it responds well to training.


Adding to the cab debate:
If I was wanting something that was going to last more than a few years, or was for a specific purpose like ReikoX's CMH cab, I would build my own solid timber box.

Otherwise, I'm a fan of MDF storage cabinets. They're cheap, can be put together quickly with a screwdriver and a hammer, last a couple of years if you're gentle, are usually coated in flat white plastic veneer and can be found in almost any dimension. This cab took $50 to buy and two hours to plan, build and modify.

Some downsides are that MDF is prone to mold, the hinge quality can be poor and they eventually just start to fall apart.
 

Attachments

  • 2016-09-13 21.34.21.jpg
    2016-09-13 21.34.21.jpg
    27.7 KB · Views: 35
Last edited:

Chloemobile

Active member
I have done both build and buy. You are going to be hard pressed to buy something like an NGB box.... I made one and enjoyed making it but hardly being the carpenter it had some glaring flaws I had to work around (specifically making everything perfectly square so the door would close properly) however there are a few nice easy cheap builds I've seen on here if you have more patience and can be meticulous about the consttuction then you can make a very nice custom piece out of nice hardwood way cheaper than buying. For me I find 'rennovating' easier,less time consuming and I can focus on the guts.


Thanks for letting us hijack your thread a bit Reikox to talk about micro things!! :smoker:
 

Latest posts

Latest posts

Top