G
-
ICMag with help from Landrace Warden and The Vault is running a NEW contest in November! You can check it here. Prizes are seeds & forum premium access. Come join in!
You are using an out of date browser. It may not display this or other websites correctly.
You should upgrade or use an alternative browser.
You should upgrade or use an alternative browser.
150w HPS Club and Resource Guide......
- Thread starter Pipedream
- Start date
Vern Equinox
Member
G
Guest
8g without the stem. probably 9-10 if i left them on there. please keep in mind that these buds were very dense, and that definitely weighs things down. good to hear all is well dude, i'm getting really excited as we near harvest time! i can't remember, Vern, are you growing bagseed too?
Vern Equinox
Member
Female Seeds C99. The tall plant in my box has hundreds of bud sites, and the other two have many dense 14 inch buds already (at day 35), but most are only @ half the box height. Female Seeds says this is an 8 week strain, so three weeks left, but already they are starting to get incredibly frosty.
I'll use nutes for @ 7-10 more days, then straight RO water. No traditional flush.
I'll use nutes for @ 7-10 more days, then straight RO water. No traditional flush.
 Morning all and a happy memorial day weekend to all
let's not forget to take a moment to remember those who served


Looks like I will be harvesting soon as most of the hairs have turned and we're starting week 7. They've been on an h2o only diet for 5 days now too.
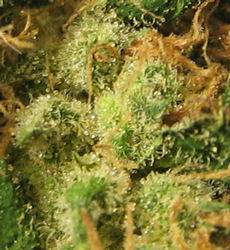
Here's a macro.
I tried a sample and it was pretty good
Vern - how's that female seeds c99? any hermies? I've been considering picking up some of the grapefruit, skunk special, and ice or nl. I've already got a nl x c99 that I love so no new c99 needed for me... In fact here's some nl x c99 at 7 months cured in the jars.... super smooth pinapple flavor and rushing high followed by mellow down

G
Guest
sugabear_II said:I tried a sample and it was pretty good
so modest....everything looks fantastic suga!
Vern Equinox
Member
So far no hermies, and truthfully, I've abused the hell out of these poor things, and still they smile at me! Now I've read that Female Seeds C99 is very stable, but not so with some of their other strains (GF being one of them). I'd definitely get a reserve pack or two of the C99...just in case! Those buds look spectacular, suga, BTW.
What date are you projecting for harvest of the clusterfuck, User Name? Mine's 17 June, but the one plant may need a week or two more. I have nothing to go in anyways, as I'm pushing it on cloning some cuttings that have been in stasis five weeks...we'll see!
What date are you projecting for harvest of the clusterfuck, User Name? Mine's 17 June, but the one plant may need a week or two more. I have nothing to go in anyways, as I'm pushing it on cloning some cuttings that have been in stasis five weeks...we'll see!
Last edited:
G
Guest
Good to hear, Vern! I've had many hermies, but it's expected with bagseed. On a positive note, the lemon strain I acquired is very much resistant to herm. I've stressed and neglected these ladies a good amount  , and the lemon REFUSES to herm. Wonderful strain!
As far as the clusterfuck, I said fuck that thread because I didn't want to upload all the pics from when IC was down... I know, I know, what a waste.
Anyways, I've harvested half of the small cabinet. One of the lemon, then one of the Humboldt stuff, and I cut one Berryhaze last night. This cab worked out perfect, flowering right from clones, because I really had no room left vertically, maybe an inch or two. It's really better suited as a cab for my mothers, but I wanted to maximize this run.
The C25 and the closet are on day 44. The lemon stuff will be ready within a week (chopped my first one around day 50), but everything else will take another 2-3 weeks. The Shishkaberry just keeps on growing, but finally starting to turn those hairs dark. It will yield me the very biggest nug I've grown under a 150! I'm falling in love with DWC, I just wish I knew what I know now back when I started 'em.
EDIT: Please keep in mind that these are all bagseed, not the real Shishkaberry as far as I know.
 , and the lemon REFUSES to herm. Wonderful strain!
As far as the clusterfuck, I said fuck that thread because I didn't want to upload all the pics from when IC was down...
 I know, I know, what a waste.
 Anyways, I've harvested half of the small cabinet. One of the lemon, then one of the Humboldt stuff, and I cut one Berryhaze last night. This cab worked out perfect, flowering right from clones, because I really had no room left vertically, maybe an inch or two. It's really better suited as a cab for my mothers, but I wanted to maximize this run.
The C25 and the closet are on day 44. The lemon stuff will be ready within a week (chopped my first one around day 50), but everything else will take another 2-3 weeks. The Shishkaberry just keeps on growing, but finally starting to turn those hairs dark. It will yield me the very biggest nug I've grown under a 150! I'm falling in love with DWC, I just wish I knew what I know now back when I started 'em.
EDIT: Please keep in mind that these are all bagseed, not the real Shishkaberry as far as I know.
Last edited:
G
Guest
looking yummy username!


senseless
Active member
whats up 150w club?
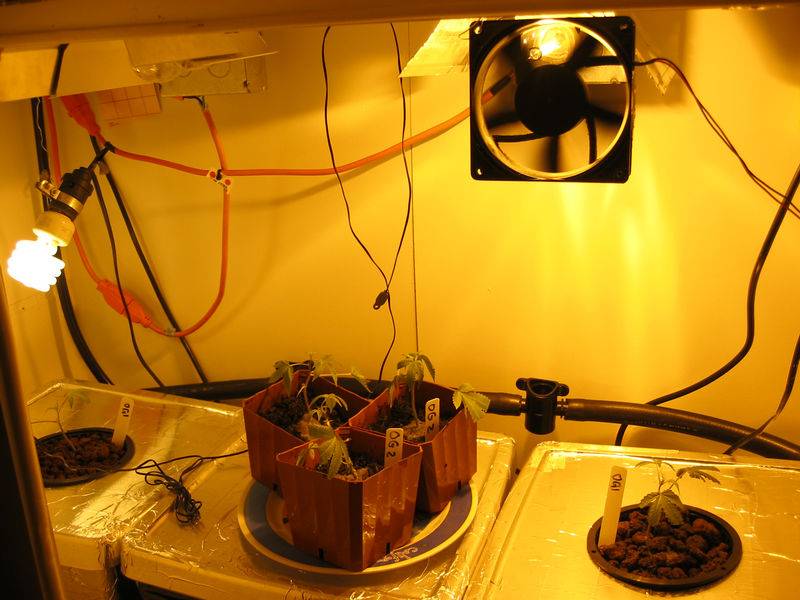
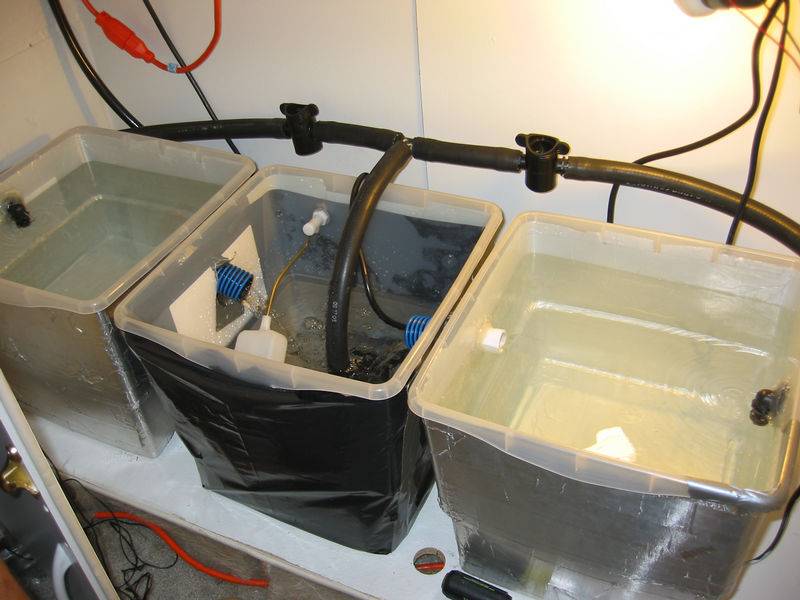
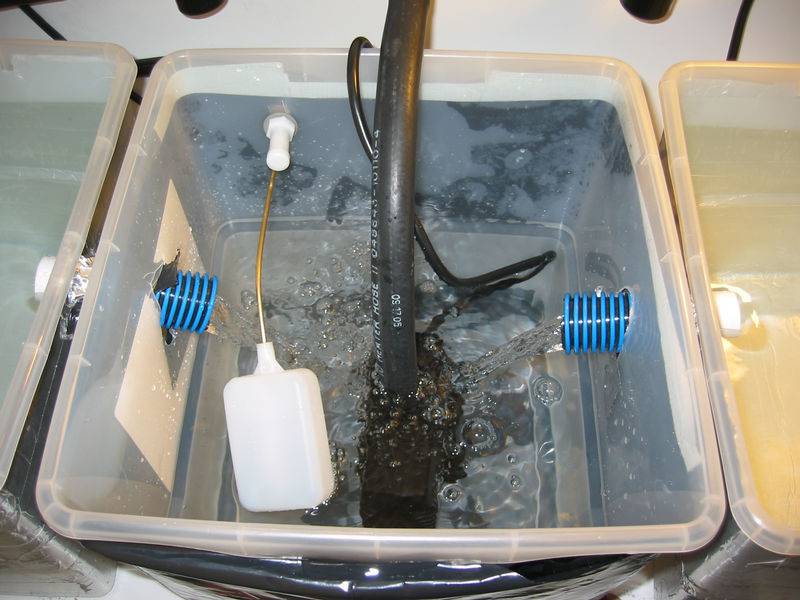
a couple upgrades to my garden-
i built a bio bucket hydroponic system that im pretty proud of, and changed my lighting around so i have a beter footprint and no shadows. im not using any cooltubes and i have a 4 inch computer fan blowing directly at each of the 150w bulbs and a 265 cfm blower sucking air out of the top of the cabniet.
new clones as well. same strain as last run.


chop chop, clip clip, oh what a fun time it is!
chop chop, clip clip, oh what a fun time it is!
 well after about 50 days of flower the axe has fallen
Here they are after 24 hours of darkness and 12 days of h2o flush.
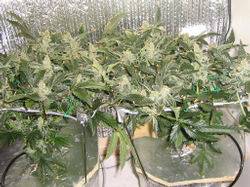
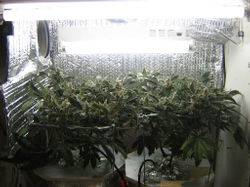
Like unsespecting sheep they were herded down well troden paths into the valley of steel
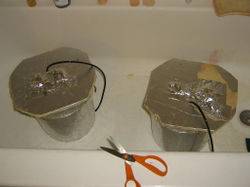
before they knew what happened they were dismembered and hung
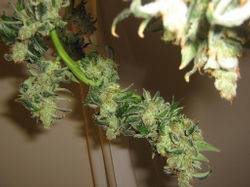
hung all together just pieces of what they were before...

looking a little closer we see the shine is still in her eyes
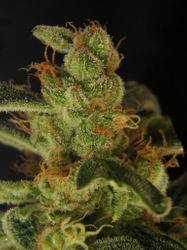
yummy yummy yummy crystal covered goodness
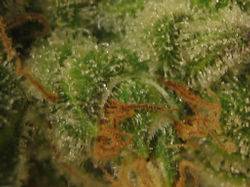
That was tough work so now it's time to relax with a little scissor hash
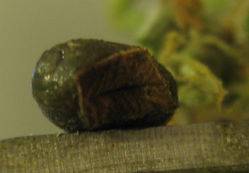
nothing quiet as lovely as the fresh fresh scissor hash

Another round brought to you by the amazing, ever suprising, 150 watt HPS
chop chop, clip clip, oh what a fun time it is!
 well after about 50 days of flower the axe has fallen
Here they are after 24 hours of darkness and 12 days of h2o flush.
Like unsespecting sheep they were herded down well troden paths into the valley of steel
before they knew what happened they were dismembered and hung
hung all together just pieces of what they were before...
looking a little closer we see the shine is still in her eyes

yummy yummy yummy crystal covered goodness
That was tough work so now it's time to relax with a little scissor hash
nothing quiet as lovely as the fresh fresh scissor hash


Another round brought to you by the amazing, ever suprising, 150 watt HPS
Vern Equinox
Member
Looking good, suga, and nice adaptation of the pure Bio-Bucket concept, senseless! Welcome to the club.
Well, I survived a little scare, as one of my powerheads air tubes clogged up and no DO in the water for 48-72 hours. I lost dozens of fan leaves, but all is recovering with new bud tip growth already starting. Day 39 of flowering (first 7 days 12/12, 14/10 therafter). This is the only real drawback to the NIMBY Bio-Tub design; you've got to check that airline everyday. I'm considering using one large tub for my next run, as I'd be able to double (or triple) up on the powerheads, and if one fails, you still have the others.
I took my first proper sample tonight, 3 gs after the microwave short-burst dry method. All I can say is I'm glad someone knows what the hell they're doing at Female Seeds! Three hits, and this is easily the most stoned I've been since rejoining here under The Vern Identity. Nearly three weeks early, too! (FST says this is an 8 week strain).
I'm sure losing the fanners won't help my yield any, but it did give me the best look at what's really going on over the screen. It quickly gets to a point where you can hardly see the light without moving stuff, and by the time you install the upper screens, your options on training get pretty limited (under the screen at the bottom of the tube or over it; you pick!
I told you I'm really stoned; I'm babbling like an idiot... Good-night!
G
Guest
Vern Equinox said:I told you I'm really stoned; I'm babbling like an idiot... Good-night!
No way Vern, this is stuff we can all learn from. Great to hear everything is well aside from that pump failure. I run the Wal-Mart aquarium pumps, 2 for every 10 gallons tub, that way I always have a backup in case of failure. DWC is really growing on me, and I think it will be a bigger part of my next project. The real test will be smoking organic buds vs smoking hydro buds.
hey vern, thanks for the kind words. sorry to hear about the DO issue, been there before when I forgot to turn the air pump on. she'll recover.
I've been reading up on senseless and vern's bio-buckets and tubs and it is pretty interesting to me. I've always been a DWC person but I've heard better results are achieved if the water is running and splashing instead of just bubbling. Anyways maybe I'll have to give it a try. seems it would be kinda hard in my little cabinet. I've been thinking of going bigger though... hmm..
made some bubble last night and damn is it good. Did a new method of just hand stirring instead of using the mixer and the results were much better, the 74 micron grade is light tan white and just one hit gets me blasted, it is nothing but pure THC crystals and melts under heat (yeah baby full melt!!!!)
user_name - hydro is addictive 'cause the growth is so fast. if you grow with organic based nutrients and use some fulvic acid plus enzyme products you'll find the taste and smoke is comparable to anything grown in soil, IMHO. I base this on comparing my buds to a friends who grows organic soil only's buds.
So tell me Clorise, I mean Sug, and what did you hear as those spring lambs were being chopped? Beautiful job!
User Name & Senseless, it's amazing how the act of growing in DWC can be addictive in itself, isn't it?
While my health has taken a slight turn for the worse, which is preventing me from growing for the time being, I do enjoy following everyone's progress. I'm hoping that after surgery this summer and a bit of recoup time I'll get the OK to get back to physical activity. (which means growing to me) In the mean time I'm forced to live vicariously through you fine folks, and I'm glad that I had the fore-sight to store up a large stock of meds.
CarpeNoctem
Member
Hey guys can you dirrect me in the way of the the conversion guide for security lights? I've looked jsut cant find it. Thanks guys
How do I convert a common home security light into a remote ballast grow light?
How do I convert a common home security light into a remote ballast grow light?
Added by: 10k Last edited by: 10k Viewed: 590 times Rated by 48 users: 9.40/10

How do I convert a home security light into a remote ballast grow light?
Contributed by: Spliffco, Inc.
For some reason growlight manufacturers are completely ignoring the small, personal grower. A quick look around Overgrow and you can see some very respectable bud being grown under 150's, and even 70 watt HPS lights. But the smallest ready made remote ballast growlight you can buy is a 250 watter, and they usually cost well over $150 (US).
So, as usual in the medicinal herb growing world, you need to take matters into your own hands.
Here’s how to turn a 150 watt HPS security light available at most Home improvment stores, into a nice remote-ballast grow light.
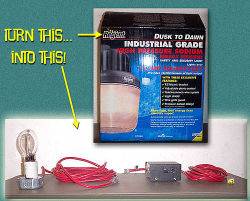
Materials & Tools:
MATERIALS
Regent GT150H, (About $79)
Heavy Duty extension cord of suitable length
One heavy duty grounded electrical plug end (male)
Electrical box
Electrical box plate
Romex cable connectors (3)
Wire nuts
Bolts, nuts washers
Strip of metal to secure ballast
Project case from Radio Shack ($6.99) #270-253A
TOOLS
5/16 nut driver (for removing parts from the casing -- regular pliers will work)
Philips head screwdriver
Regular screwdriver
Hammer
Power drill and assorted bits
Metal file
Wire cutters
Utility knife or wire stripper
Diagonal Pliers
Pliers
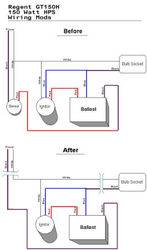
Wiring Diagram
Be careful...
Remove guts
Remove the guts from the casing - bulb socket, ignitor, light sensor socket, ballast. The ballast was glued to the casing. I heated the casing for a couple of minutes on an oven burner (high), and when it was getting too hot to hold, I put it on the floor and wedged a hammer between the ballast and casing and popped it out gently.

REMOVE LIGHT SENSOR
These security lights are designed to automatically turn on when it gets dark, so there is a built in light sensor that needs to be removed.
Remove all wire nuts.
Disconnect the white wire that comes out of the sensor (currently connected to all 3 other white wires).
Disconnect the black wire that comes out of the sensor (currently connected to the black “power in” wire).
The red wire coming out of the sensor is currently connected to the black wire coming out of the ballast. Remove the red wire, and then connect the black wire coming out of the ballast to the black “power in” wire.
Reattach wire nuts (there were 5 originally, now you only need 4).
Refer to the wiring diagram!

WIRE THE SOCKET
The socket on this particular light had some metal wiring connectors that stuck up and made it impossible to attach to the electrical plate without some modification (sorry no photo). Just pull the black and white wires off of the connectors, and cut the connectors down flush with socket base with diagonal pliers. Now loosen the connectors (screws inside the socket), slip the wires under them and tighten them back down. Please use some plastic electrical tape on the end of the socket to prevent any chance of the metal from the connectors making contact with the electrical box cover plate.
Secure the cord in the electrical box with a romex cable connector and wire it to the socket: black to black, white to white, secure with wire nuts. Some electrical boxes have a green screw inside to fasten ground wires, use that if yours has one, otherwise fasten the green ground wire to the box using one of the cover plate screws when you tighten the cover plate.

WIRE THE REMOTE BALLAST
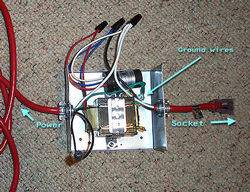
Hopefully you can see the wiring clearly in the photo, but if not, refer to the wiring diagram for details.
You’re going to have to cut some holes in the Radio Shack project box for the power cords and some bolts to hold the ballast, ignitor and ground wires down.
I used a short length of metal (plumbing department) to secure the ballast. The ignitor had a notch that made it easy to bolt down. The ground wires from both electrical cords are screwed to the base of the box.
Cut a short length off the socket (female) end of the extension cord and wire it appropriately (again - see diagram). Wire the remaining electrical cord, including the grounded male plug to the other end of the box.
Use a tie wrap to bundle up the wires in the box and try to keep them away from the ballast, which will heat up during use.
TEST IT!
If you've done everything right, it should light.
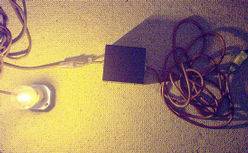
Now, build a reflector and you’ve got a nice little custom grow light.
Safety Warnings:
Always wire the male plug to the bulb socket and the female receptacle to the ballast to avoid possible electrocution! Always use an all metal project box which already has ventilation cooling slots, or if your project box has none, please cut adequate cooling slots, or drill several vent holes in the ballast enclosure (project box) to allow the heat to escape the box. Not adding the cooling slots or holes, could result in failure of the insulation and/or the transformer. Also, please be sure the enclosure is located in a well ventilated area to aid cooling.
How do I convert a common home security light into a remote ballast grow light?
Added by: 10k Last edited by: 10k Viewed: 590 times Rated by 48 users: 9.40/10

How do I convert a home security light into a remote ballast grow light?
Contributed by: Spliffco, Inc.
For some reason growlight manufacturers are completely ignoring the small, personal grower. A quick look around Overgrow and you can see some very respectable bud being grown under 150's, and even 70 watt HPS lights. But the smallest ready made remote ballast growlight you can buy is a 250 watter, and they usually cost well over $150 (US).
So, as usual in the medicinal herb growing world, you need to take matters into your own hands.
Here’s how to turn a 150 watt HPS security light available at most Home improvment stores, into a nice remote-ballast grow light.

Materials & Tools:
MATERIALS
Regent GT150H, (About $79)
Heavy Duty extension cord of suitable length
One heavy duty grounded electrical plug end (male)
Electrical box
Electrical box plate
Romex cable connectors (3)
Wire nuts
Bolts, nuts washers
Strip of metal to secure ballast
Project case from Radio Shack ($6.99) #270-253A
TOOLS
5/16 nut driver (for removing parts from the casing -- regular pliers will work)
Philips head screwdriver
Regular screwdriver
Hammer
Power drill and assorted bits
Metal file
Wire cutters
Utility knife or wire stripper
Diagonal Pliers
Pliers
Wiring Diagram
Be careful...

Remove guts
Remove the guts from the casing - bulb socket, ignitor, light sensor socket, ballast. The ballast was glued to the casing. I heated the casing for a couple of minutes on an oven burner (high), and when it was getting too hot to hold, I put it on the floor and wedged a hammer between the ballast and casing and popped it out gently.

REMOVE LIGHT SENSOR
These security lights are designed to automatically turn on when it gets dark, so there is a built in light sensor that needs to be removed.
Remove all wire nuts.
Disconnect the white wire that comes out of the sensor (currently connected to all 3 other white wires).
Disconnect the black wire that comes out of the sensor (currently connected to the black “power in” wire).
The red wire coming out of the sensor is currently connected to the black wire coming out of the ballast. Remove the red wire, and then connect the black wire coming out of the ballast to the black “power in” wire.
Reattach wire nuts (there were 5 originally, now you only need 4).
Refer to the wiring diagram!

WIRE THE SOCKET
The socket on this particular light had some metal wiring connectors that stuck up and made it impossible to attach to the electrical plate without some modification (sorry no photo). Just pull the black and white wires off of the connectors, and cut the connectors down flush with socket base with diagonal pliers. Now loosen the connectors (screws inside the socket), slip the wires under them and tighten them back down. Please use some plastic electrical tape on the end of the socket to prevent any chance of the metal from the connectors making contact with the electrical box cover plate.
Secure the cord in the electrical box with a romex cable connector and wire it to the socket: black to black, white to white, secure with wire nuts. Some electrical boxes have a green screw inside to fasten ground wires, use that if yours has one, otherwise fasten the green ground wire to the box using one of the cover plate screws when you tighten the cover plate.

WIRE THE REMOTE BALLAST
Hopefully you can see the wiring clearly in the photo, but if not, refer to the wiring diagram for details.
You’re going to have to cut some holes in the Radio Shack project box for the power cords and some bolts to hold the ballast, ignitor and ground wires down.
I used a short length of metal (plumbing department) to secure the ballast. The ignitor had a notch that made it easy to bolt down. The ground wires from both electrical cords are screwed to the base of the box.
Cut a short length off the socket (female) end of the extension cord and wire it appropriately (again - see diagram). Wire the remaining electrical cord, including the grounded male plug to the other end of the box.
Use a tie wrap to bundle up the wires in the box and try to keep them away from the ballast, which will heat up during use.

TEST IT!
If you've done everything right, it should light.

Now, build a reflector and you’ve got a nice little custom grow light.
Safety Warnings:
Always wire the male plug to the bulb socket and the female receptacle to the ballast to avoid possible electrocution! Always use an all metal project box which already has ventilation cooling slots, or if your project box has none, please cut adequate cooling slots, or drill several vent holes in the ballast enclosure (project box) to allow the heat to escape the box. Not adding the cooling slots or holes, could result in failure of the insulation and/or the transformer. Also, please be sure the enclosure is located in a well ventilated area to aid cooling.
Last edited:
CarpeNoctem said:Hey guys can you dirrect me in the way of the the conversion guide for security lights? I've looked jsut cant find it. Thanks guys
well there you go that's the Original OG FAQ. Pulled off the google cache this morning - with pictures to boot!


