BattleAxe
Member
Greetings all 
First and foremost, I wanna give a big shout out to Petemoss, who has served as a RDWC Guru to me over the last 3 mo's as I picked his brain over countless PM's.
Back in Sep, I reached out to Pete, telling him that I wish to build an RDWC system and wanted to know what his perfect system entailed. He then started breaking the concepts of RDWC down to me and basically designed this system. I have made some mods to the design that I will cover later but it's important to note that Pete was instrumental to every step of this build.
Links:
buckets: 13 Gl square pails from:
http://www.bayteccontainers.com
Pumps: Danner 1200 for the feed and a 500 for the chiller lines
ebay.com sellers name: 'wminnovations'
-DIY bulkheads here:
http://www.truetex.com/bulkhead.htm
PVC fittings: http://flexpvc.com
HD and Lowes didn't carry specialty fittings such as spigot to barb adapters for the feed hoses.
Now on to the construction. I apologize in advance, I should have taken more pics for visual aids but I am the type that once I have acquired a target, I have trouble focusing on anything else. Hopefully the limited amount of pics that I present will illustrate this build. If not, feel free to fire away with ?s.
Bucket Construction:
for each bucket, you are going to need:
-outer bucket
-inner bucket
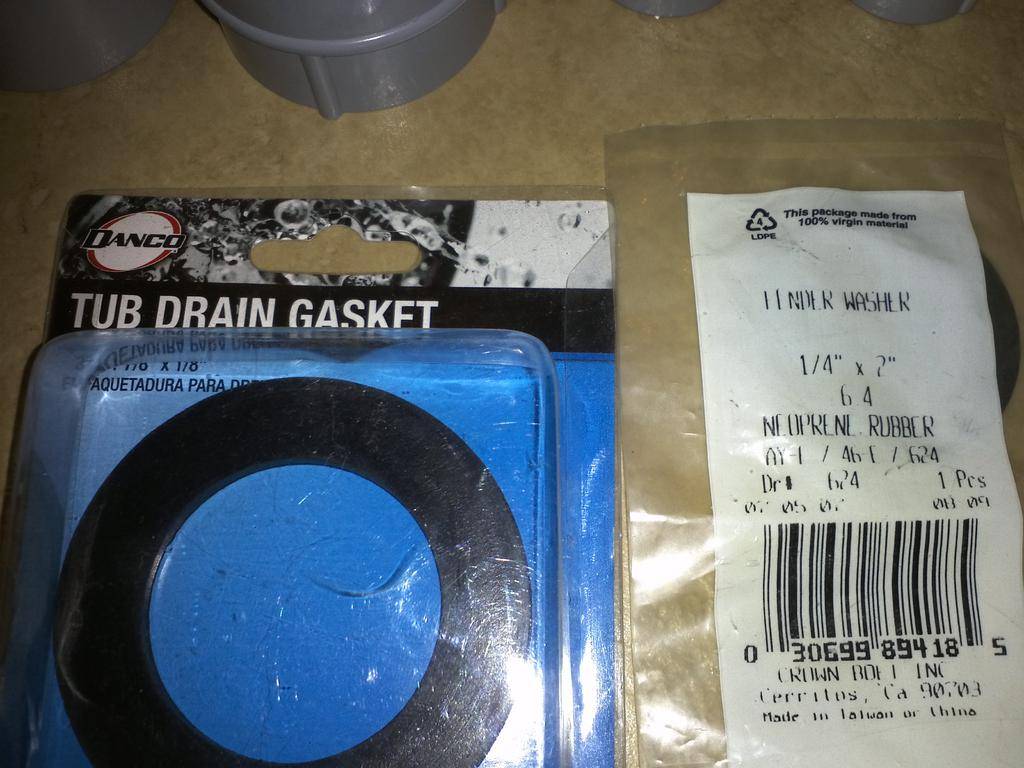
-2 rubber washers, one for each, feed and drain DIY bulkhead that you will construct
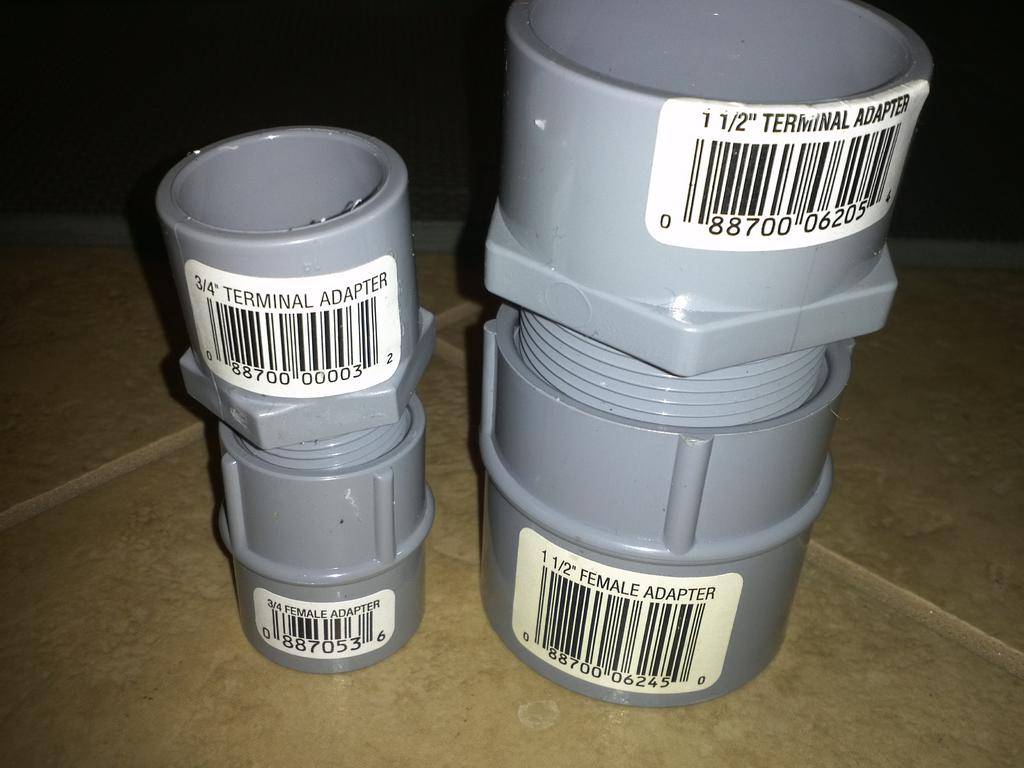
-1/2" slip, thread male adapter
-1/2" slip, thread female adapter
-3/4" slip, thread male adapter
-3/4" slip, thread female adapter
-3/4" slip spigot to barb adapter
-2" PVC stub 3/4"
-1.5" slip spigot to barb adapter
-2" PVC stub 1.5"
-teflon tape
First, you have to determine the water level in your buckets. So the first step is to cut the lids to fit an inner bucket like so

Remember to leave enough clearance between the outer wall of the inner bucket and the inner wall of your outer bucket so the fitting will fit. I had to order more lids because I learned this the hard way.
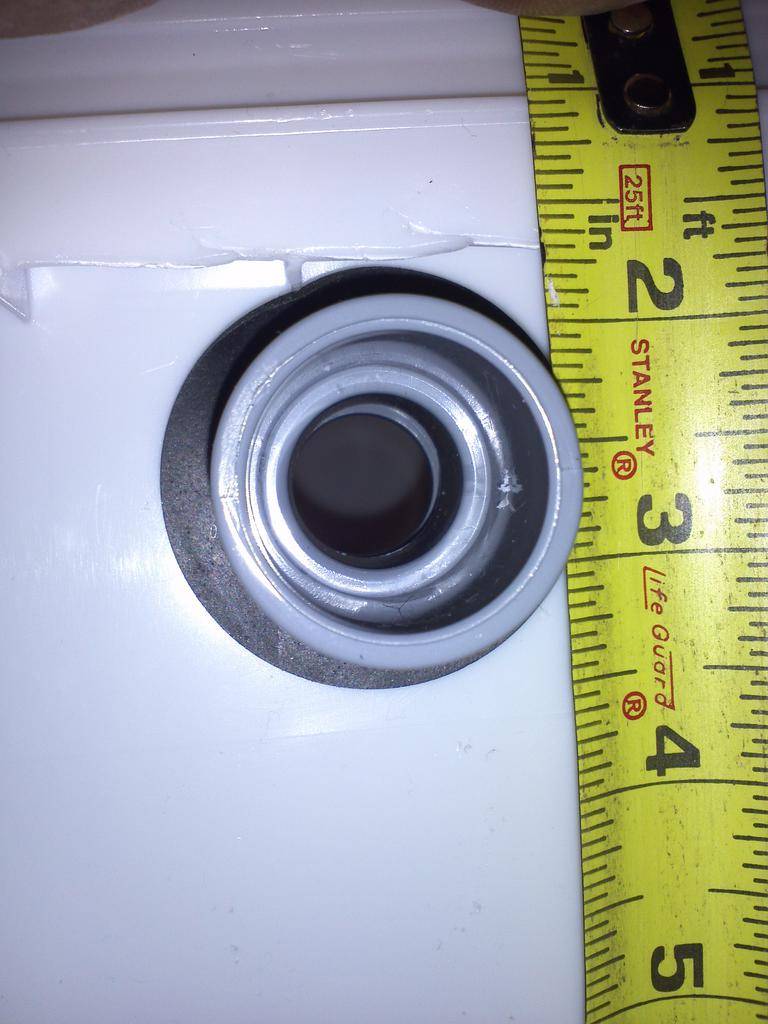
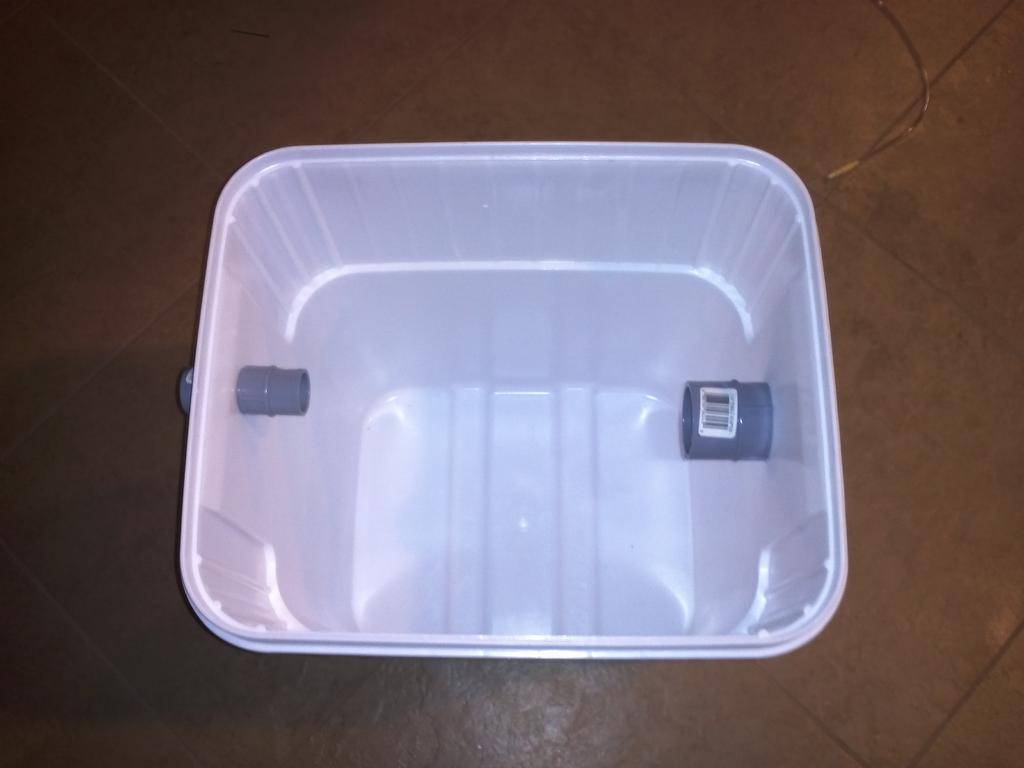
Once that is done, determine where the bottom of the bucket will be and mark it. This will be your drain. In my case, I rounded it off to 14" from the bottom of the bucket for simplicity purposes, my water line sits just above the bottom of my buckets. Find a hole saw that isn't too big and drill it out, build your bulkhead and tape the male threads. The fit should be tight, in my case, I had to punch the first thread in and then thread it the rest of the way. Note: the washer should be on the outside of the bucket as shown above, male threads should be penetrating to the inside of the bucket. I used a 1.5" drain, the grey PVC fittings and the washers depicted above are the materials that I used and are readily available at HD or Lowes. Now use the 1.5" PVC stub to attach your 1.5" spigot to barb adapter to your drain bulkhead.
Now that you have accomplished your drain, you need to drill and bulkhead the feed. My feeds are located 2.5" from the top of the bucket a la Big Tokes Bio Buckets. After this is done, attach the 3/4" spigot to barb adapter using the 3/4" PVC stub cut to 2". Same process, different size. I bought washers that I had to mod as the inner hole did not fit the 3/4" fitting, simply trace the thread onto the washer and cut it out. Repeat this process on all your buckets.
One your buckets are built, it's time for the manifold.
Parts list:
-3/4" slip, slip, ball valves x 6
-3/4" slip, slip, slip T x 6
-3/4" slip, spigot to barb adapter x 6
-3/4" slip, slip 90 degree elbow x 4
-3/4" slip slide tees (for scrog applications only)
I didn't take many pics of the manifold construction because it's pretty simple. Build a 4x4 square using the 4 elbows and 3/4" PVC. Lay your buckets inside the manifold to determine where your manifold will break off to feed the buckets.

Feed Tee assembly:
You have to splice into the manifold with the tees once the tees are in, shove a PVC stub in your tee to your ball valve, then use another stub to connect the spigot to barb adapter to your ball valve. Once this is done, it should look like this.
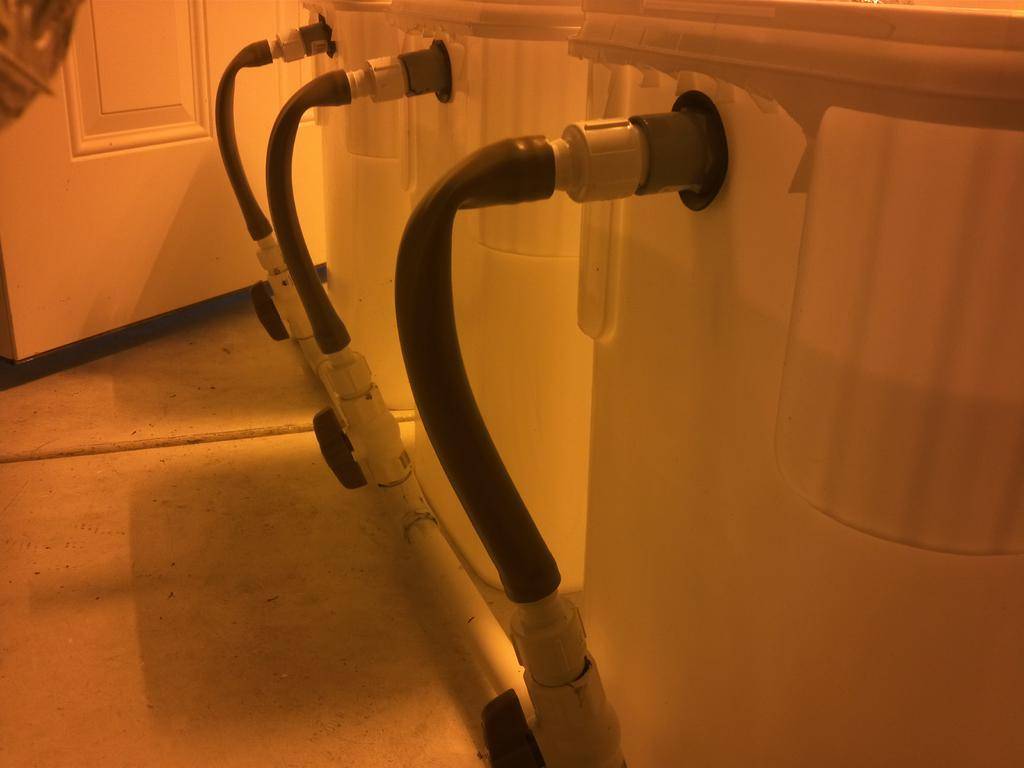
Now that your buckets are complete and tied into the manifold, you are ready to connect your drains.
Drains:
-Wayne 1.5" sump pump hose discharge kit found at Acehardware.com
-zip ties
Connect your sump pump hose length to your 1.5" slip spigot to barb adapter and waterfall it into the res. I used a 14 Gl Rubbermaid tote because the height allowed for a waterfall to add aeration and agitation. I zip tied the drains to the res handles to secure them in place.

Res:
-3/4" bulkhead for feed pump
-1/2" bulkhead for line into chiller
-1/2" slip, thread male adapter
-1/2" pex poly fitting to secure poly tube to side of res
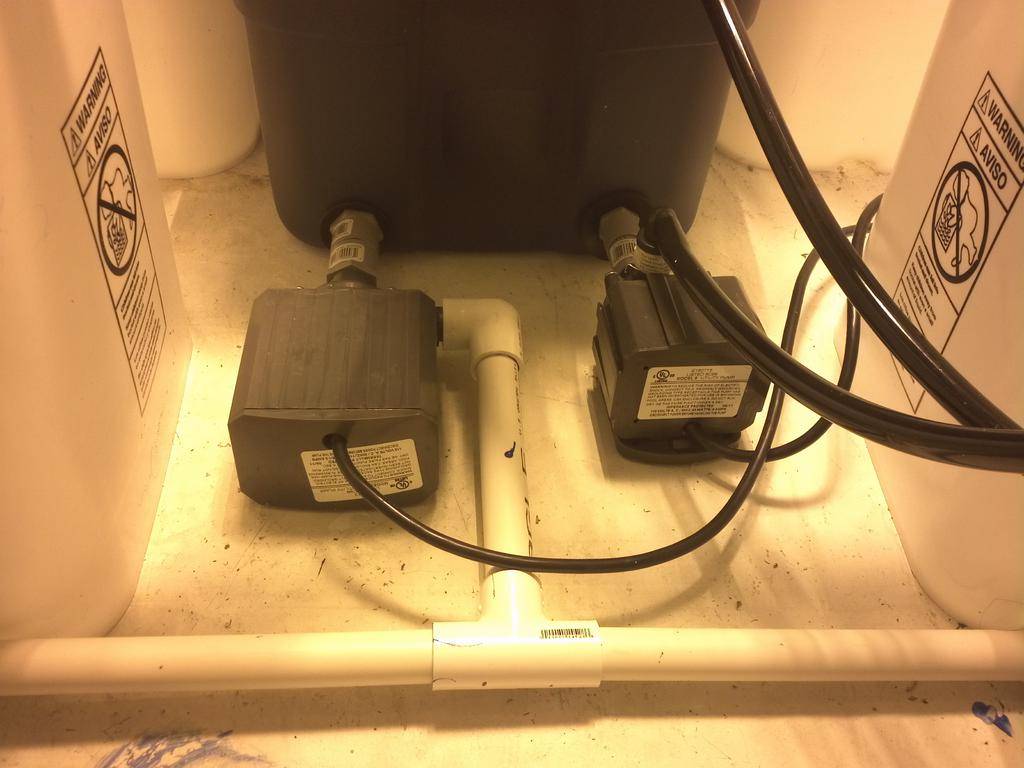
Same story here folks, drill the holes, place the bulkheads and plumb your lines. I places the return chiller line to also waterfall adding additional aeration and agitation.

SCROG:
I'm scroggin this bitch this time. I have the frame built but still have to weave it. Once completed, it will slide right in and will be held in place using slip slide tees that are attached to the manifold and PVC lengths cut to place the screen 12" above my inner buckets.
Drip:
I have top hat grommets and 1/4" poly tubing, I just need to find a suitable location to punch into the feed and go and pickup a 1/4" drill bit as I seem to have misplaced mine.
This is what the system looks like now
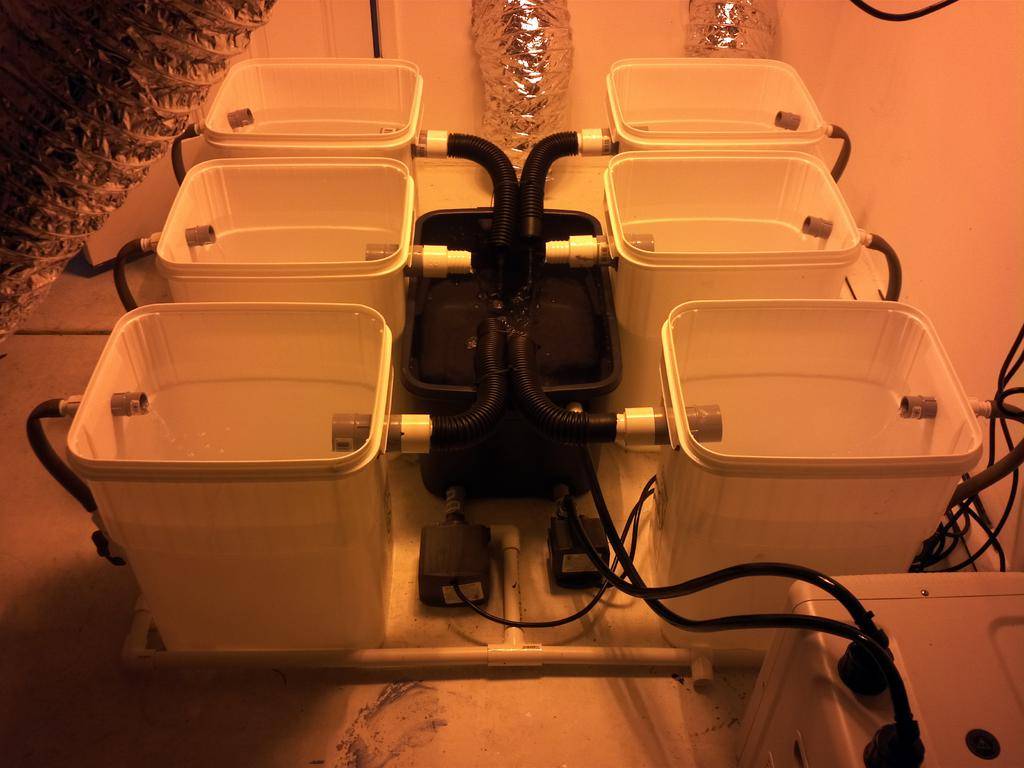
The SCROG will be added sometime today or tomorrow as well as the drip. Once my second set of lids come in, we can get this show in the road.
Stay tuned...

First and foremost, I wanna give a big shout out to Petemoss, who has served as a RDWC Guru to me over the last 3 mo's as I picked his brain over countless PM's.
Back in Sep, I reached out to Pete, telling him that I wish to build an RDWC system and wanted to know what his perfect system entailed. He then started breaking the concepts of RDWC down to me and basically designed this system. I have made some mods to the design that I will cover later but it's important to note that Pete was instrumental to every step of this build.
Links:
buckets: 13 Gl square pails from:
http://www.bayteccontainers.com
Pumps: Danner 1200 for the feed and a 500 for the chiller lines
ebay.com sellers name: 'wminnovations'
-DIY bulkheads here:
http://www.truetex.com/bulkhead.htm
PVC fittings: http://flexpvc.com
HD and Lowes didn't carry specialty fittings such as spigot to barb adapters for the feed hoses.
Now on to the construction. I apologize in advance, I should have taken more pics for visual aids but I am the type that once I have acquired a target, I have trouble focusing on anything else. Hopefully the limited amount of pics that I present will illustrate this build. If not, feel free to fire away with ?s.
Bucket Construction:
for each bucket, you are going to need:
-outer bucket
-inner bucket
-2 rubber washers, one for each, feed and drain DIY bulkhead that you will construct
-1/2" slip, thread male adapter
-1/2" slip, thread female adapter
-3/4" slip, thread male adapter
-3/4" slip, thread female adapter
-3/4" slip spigot to barb adapter
-2" PVC stub 3/4"
-1.5" slip spigot to barb adapter
-2" PVC stub 1.5"
-teflon tape
First, you have to determine the water level in your buckets. So the first step is to cut the lids to fit an inner bucket like so
Remember to leave enough clearance between the outer wall of the inner bucket and the inner wall of your outer bucket so the fitting will fit. I had to order more lids because I learned this the hard way.
Once that is done, determine where the bottom of the bucket will be and mark it. This will be your drain. In my case, I rounded it off to 14" from the bottom of the bucket for simplicity purposes, my water line sits just above the bottom of my buckets. Find a hole saw that isn't too big and drill it out, build your bulkhead and tape the male threads. The fit should be tight, in my case, I had to punch the first thread in and then thread it the rest of the way. Note: the washer should be on the outside of the bucket as shown above, male threads should be penetrating to the inside of the bucket. I used a 1.5" drain, the grey PVC fittings and the washers depicted above are the materials that I used and are readily available at HD or Lowes. Now use the 1.5" PVC stub to attach your 1.5" spigot to barb adapter to your drain bulkhead.
Now that you have accomplished your drain, you need to drill and bulkhead the feed. My feeds are located 2.5" from the top of the bucket a la Big Tokes Bio Buckets. After this is done, attach the 3/4" spigot to barb adapter using the 3/4" PVC stub cut to 2". Same process, different size. I bought washers that I had to mod as the inner hole did not fit the 3/4" fitting, simply trace the thread onto the washer and cut it out. Repeat this process on all your buckets.
One your buckets are built, it's time for the manifold.
Parts list:
-3/4" slip, slip, ball valves x 6
-3/4" slip, slip, slip T x 6
-3/4" slip, spigot to barb adapter x 6
-3/4" slip, slip 90 degree elbow x 4
-3/4" slip slide tees (for scrog applications only)
I didn't take many pics of the manifold construction because it's pretty simple. Build a 4x4 square using the 4 elbows and 3/4" PVC. Lay your buckets inside the manifold to determine where your manifold will break off to feed the buckets.
Feed Tee assembly:
You have to splice into the manifold with the tees once the tees are in, shove a PVC stub in your tee to your ball valve, then use another stub to connect the spigot to barb adapter to your ball valve. Once this is done, it should look like this.
Now that your buckets are complete and tied into the manifold, you are ready to connect your drains.
Drains:
-Wayne 1.5" sump pump hose discharge kit found at Acehardware.com
-zip ties
Connect your sump pump hose length to your 1.5" slip spigot to barb adapter and waterfall it into the res. I used a 14 Gl Rubbermaid tote because the height allowed for a waterfall to add aeration and agitation. I zip tied the drains to the res handles to secure them in place.
Res:
-3/4" bulkhead for feed pump
-1/2" bulkhead for line into chiller
-1/2" slip, thread male adapter
-1/2" pex poly fitting to secure poly tube to side of res
Same story here folks, drill the holes, place the bulkheads and plumb your lines. I places the return chiller line to also waterfall adding additional aeration and agitation.
SCROG:
I'm scroggin this bitch this time. I have the frame built but still have to weave it. Once completed, it will slide right in and will be held in place using slip slide tees that are attached to the manifold and PVC lengths cut to place the screen 12" above my inner buckets.
Drip:
I have top hat grommets and 1/4" poly tubing, I just need to find a suitable location to punch into the feed and go and pickup a 1/4" drill bit as I seem to have misplaced mine.
This is what the system looks like now
The SCROG will be added sometime today or tomorrow as well as the drip. Once my second set of lids come in, we can get this show in the road.
Stay tuned...


