thunderbunny
Member
Finally got some photos of some higher quality permanent type swamp tubes that are able to be used year after year. This is my goal; to place swamp tubes in different areas year after year so that they can be used year after year.Im not trying to put down or insult any other swamp methods; I just go for a more permanent installation.
There are now up to a grand total of 13 swamp tubes in two different swamps over the last three and a half years or so (middle 2006). There is also a 100 gallon rubbermaid trough out in the cattails with appx. twenty 1 inch holes drilled in the bottom.This trough cracked and sprung a leak on me a few years ago, so I figured "what the hell", instead of throwing the trough in the garbage i dragged it out into the swamp and filled it with grow mix. Over the winter and into next spring, a third location with another 4-6 swamp tubes will be installed. I figure, put in the hard and dirty work for two or three years hauling soil and camouflaging the tubes, and, come year 3 or 4:
BUMPER CROP AND THE BIG PAYOFF!
There has been a lot of activity on IC mag the last couple of years concerning the swamp tube, and I just wanted to show everyone that it can be done-that no extra lime is needed in the grow mix (just the amount that is normally added to a grow mix)--that it doesnt matter that the bottom 1 to 1.5 foot of grow mix is sitting in the standing (and stagnant) swamp water-and that cannabis seems to absolutely love a moist (or even wet) peat-based grow mix, as long as there is a foot or two of buffer grow mix in order to keep a portion of the roots oxygenated.
I estimate that I have about two hours of work, hauling, and camouflaging into each swamp tube. They are all filled to the top with a local grow mix called HECO 1 or HECO 2 (depending which one is on sale at the time) consisting of finely shredded peat moss and a little bit added lime. Heco worked great in my other location with 8 swamp tubes, so I am going to use it again-don't mess with success. This stuff comes in compressed 4 cu ft bales (uncompressed opens to about 6 cu ft of grow mix) with each 80 lb bale being carried by hand at least 1/4 mile into the swamplands.
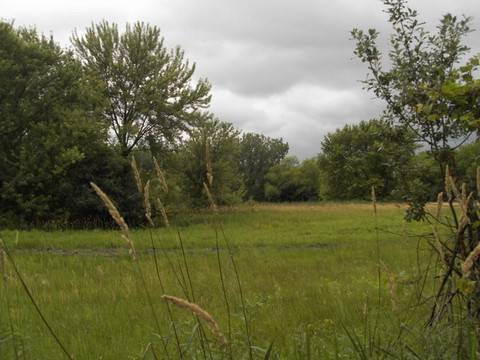
Almost to the swamp entrance
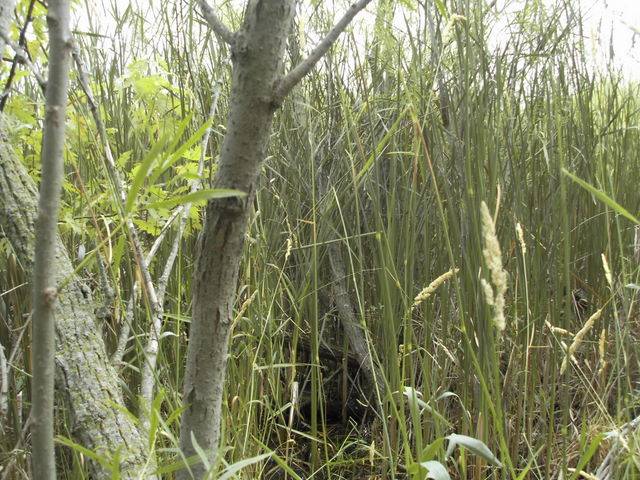
Believe it or not-you are looking at three large swamp tubes just 40 feet away
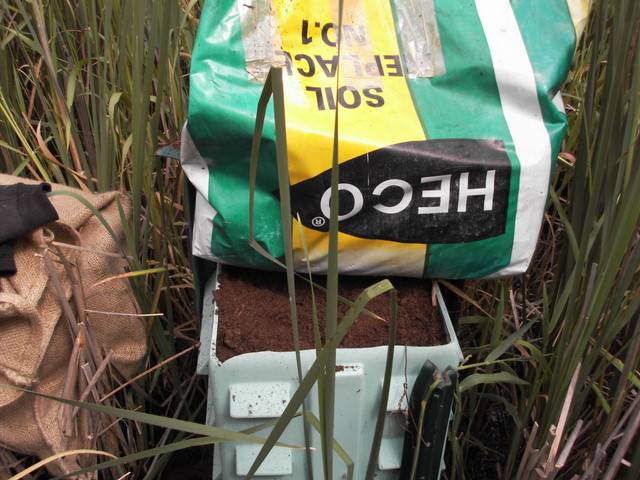
Topping off one of the tubes with Heco grow mix
you can see in this picture that the tubes are made of heavy duty plastic. Yes, that is a cable TV box cover, I had a friend who worked for a cable co. last year and when I saw these things sitting in his garage I knew EXACTLY what they would be good for. The top of the covers were cut out using a jigsaw. The tubes are supported by three 6 foot tall metal fenceposts, sledge hammered about 2.5 feet into the ground. The tubes are then wired to the fenceposts using heavy duty steel baling wire. Not even a hurricane could move these babies! They are rock solid!
Always be looking for stuff that can be used as a swamp tube at garage sales, flea markets, craigslist, etc.-large diameter pvc, short sections of plastic 12 -30 inch culvert tubing, etc.
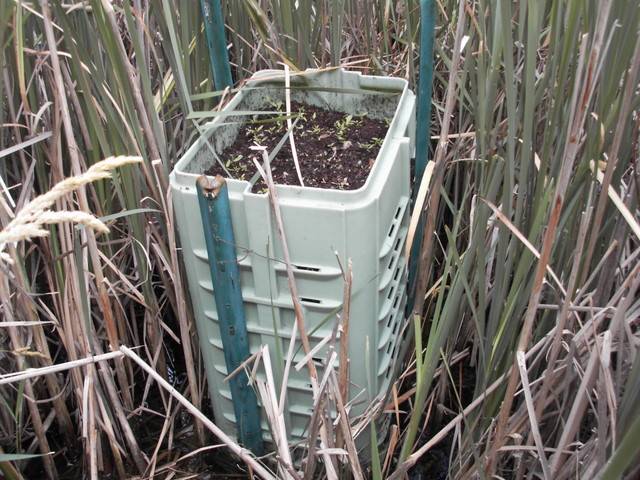
swamp tube #1-THE BIG ONE-holds 1/3 more soil than the other two swamp tubes-you can see the wicking action of the peat moss in this photo. This tube was placed out and filled about 10 days prior to this photo being taken, and you can see that the top layer of the peat is already supporting some plant life. The top 12 inches or so is just damp enough that, when squeezed in your hand, it gives up just a few drops of water. The next twelve inches or so is definitely moist, kinda like peat moss just after it has been well watered almost to full capacity. But not waterlogged in any sense of the word. Just the bottom 12 inches or so will get really wet.
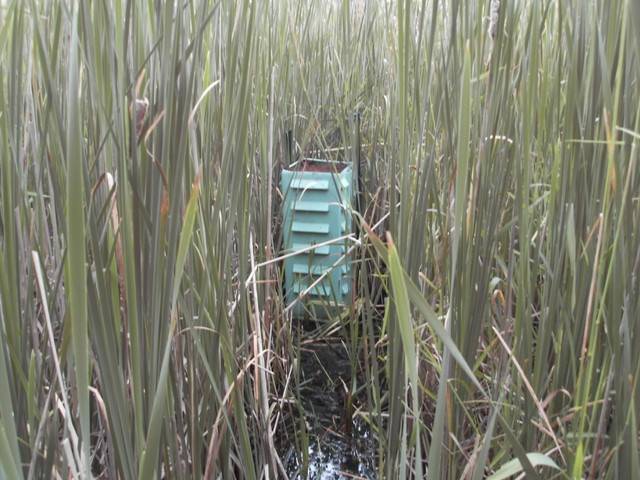
swamp tube #2
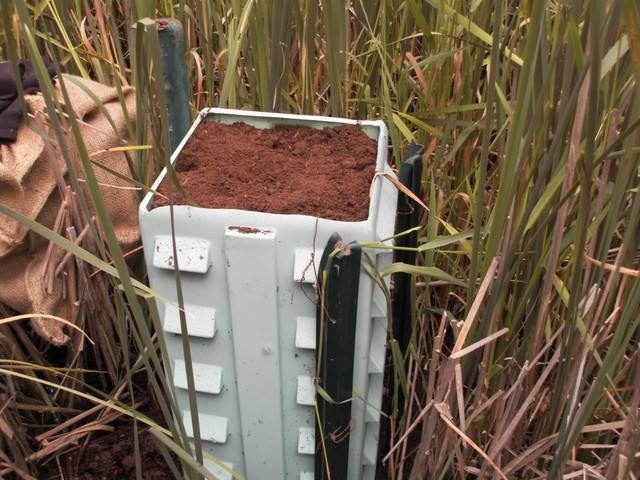
and swamp tube #3
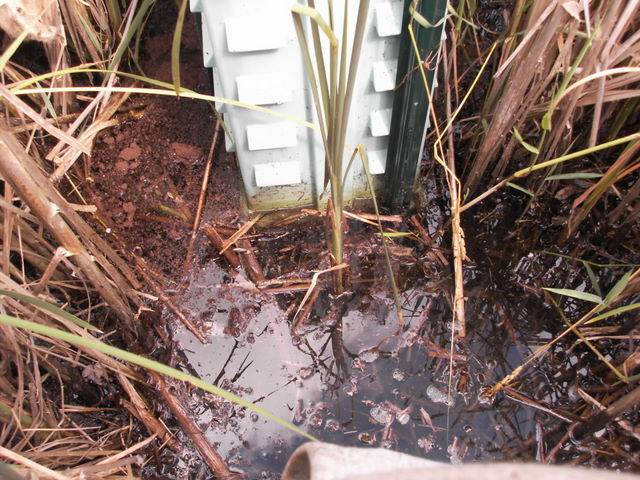
The base of the tube is simply pushed a couple of inches into the soft swamp and does not really form a "seal", but allows the bottom 6 to 12 inches of soil to be completely saturated-the cannabis plant will send a fat taproot right down into this waterlogged soil and drink from it like a straw in a bottle of soda pop.
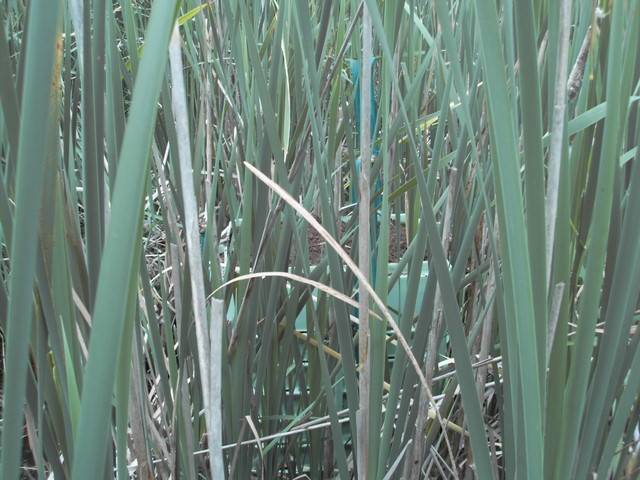
Now, you didnt think that I was going to leave those BRIGHT green swamp tubes sitting there under the sun, just calling out to the spotter planes or the choppers now, did you? Hmmmmmm, what we need here is some camouflage!Although, as you can see here, even the bright green swamp tube starts to fade into the surrounding swamp at just five feet away.
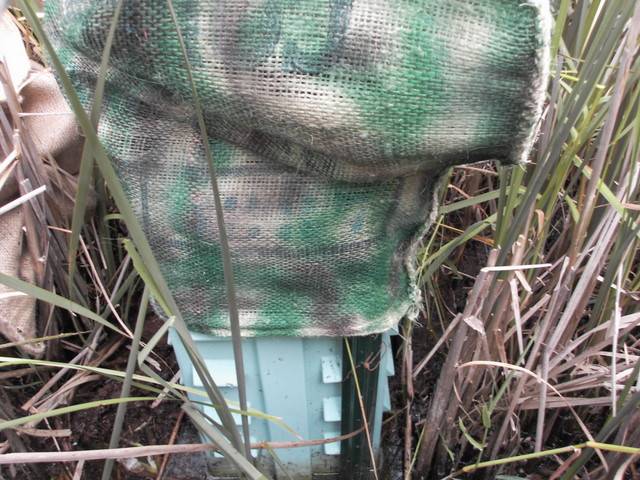
For camouflage, these burlap coffee bean sacks were picked up at a local garage sale. Three colors of camouflage color (green, black, grey) spray paint were used to paint camo patterns on the sack. The sacks were big enough that they could be pulled over the top of the swamp tubes, and the supporting fenceposts, like a T-shirt.
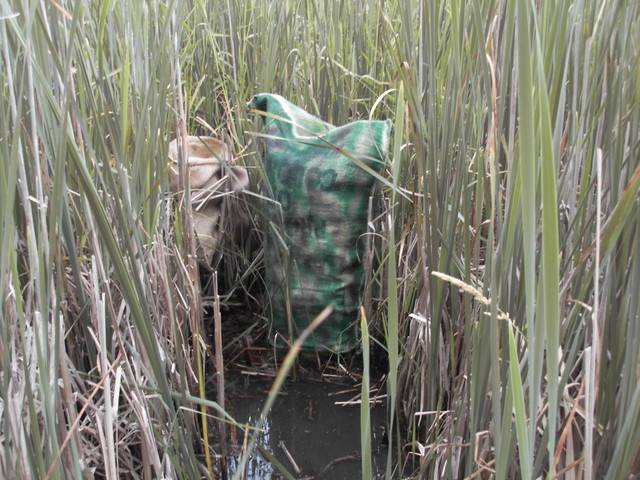
Here is the completely camouflaged swamp tube. The bag was pulled over the top and down to just above the waterline.
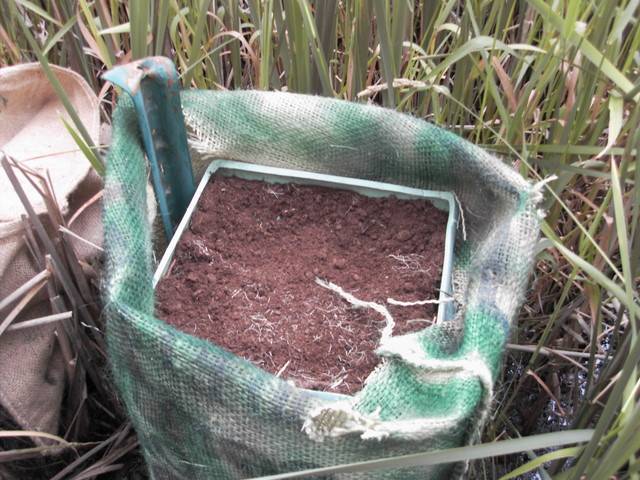
After pulling the bag all the way down, the top was cut open and folded over and secured to the top of the tube and the metal fenceposts. One cutting of Chimera Seeds Calizahr strain is going to be planted in each swamp tube. Once the cuttings are planted, the bag will be pulled back over to cover the top of the tube and the top of the soil completely, adding further to the camo effect.
http://www.icmag.com/ic/picture.php?albumid=6670&pictureid=125219[IMG]
20 feet or so back from the camouflaged swamp tube, once the cattails and the branches of the surrounding trees are bent, pulled over, and tied across this access path, the tube will be undetectable. For over the wintertime, I will take the green and brown camo bag off of the swamp tubes, and replace it with a bag painted tan, brown, and white; in order to blend in with the winter surroundings. Even the dead cattails remain 6-7 feet tall in the middle of winter and provide plenty of cover.
[IMG]http://www.icmag.com/ic/picture.php?albumid=6670&pictureid=125220
Entryway off of the path into the swamp tube area. You can look straight back and kind of see swamp tube #2. What you cannot see at all is swamp tube 1 and swamp tube 3; they are to the right and to the left of the tube that you can see, and are completely invisible. This entrance will not be used again after one more trip to plant the cuttings, and to water for the first time with 20-20-20 for a nice growth spurt right out of the gate. After that, I will take a different path through the cattails so that the initial path can become grown over with vegetation once again, making it harder to detect;the new path will only be used a couple of times up to harvest time, so that it will not be trampled down and easily spotted by a passer-by. If you can make a narrow trail through the cattails, without tramping down a lot of the vegetation, most people will look at it and think that it is just a deer trail that leads off into the cattails and to nowhere.
After another week or so, I will give them another 8 gallons of water, but this time I will go organic, using High N Earth Juice at about 4 times the recommended rate. I go this strong with the organics because the soil will always be moist or wet. When you are 100% sure that the soil will be very moist at all times, with no chance of drying out, you can "push" the plant with higher levels of N than they could normally survive. But, be careful, because if moisture levels do drop below a certain point, the roots and the plant will burn up and die very quickly. This is the reason that a permanent swamp is the absolute best place to grow cannabis outdoors-it just takes a hell of a lot of work during the grow season, and more working out over the off season, just to stay in shape for this bullshit.
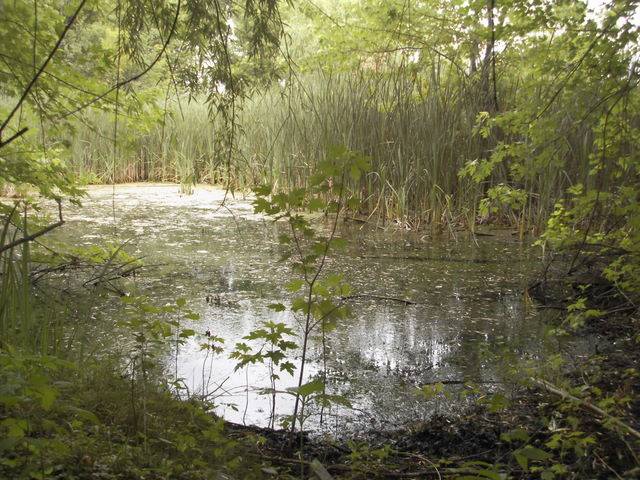
Entryway to swamp #2-the entrance to this swamp is at the rear end of a buddies 40 acre spread. The swamp and wetlands area is just steps off of his land and forms the border of my buddys back 20 or so acres. So, short of trespassing 40 acres deep into my buddys property (his german shepherds would have you for dinner before you got 100 yards), you would have to enter the swamp from the other side (at least a half mile trek) of its border and somehow come across my swamp tubes, buried deep in the swamp for almost three years now, well camoed and grown over with vegetation and shrubbery. The entrance shown in the picture is probably the easiest way into the interior areas of the swamp, but even here the water is at least knee deep and at most times of the year, comes up to just below the pockets on my blue jeans.
These are the first 2 of ten total tubes back here. These tubes are formed using hog wire fencing (4 ft tall) rolled into a tube, with the two ends held together by steel baling wire. Cheap plastic tarps from Menards with grommet holes were purchased, in a size big enough to fold over the inside and the outside of the fencing tube.The green side was left facing out for camo purposes, with the brown side to the inside. Then, using the metal grommets in the tarp, the tarp was attached to the fencing in many different places, using the steel wire. The steel wire was run thru the grommets and then twisted around the fencing itself. In areas where there were no grommets, the wire was poked thru the three layers of tarp material, wrapped around the fencing, poked back thru the tarp again, and then twisted tight onto the fencing. The top 12 inches of fencing was then actually folded over on itself to the inside of the tube, and was bent and compressed against the inside of the tube so that the folded over part held the tarp even more securely. They end up being about 40 inches tall.
When the tubes are filled with grow mix, the weight of the grow mix actually pins the tarp against the inside of the tube, holding the whole thing together. 5 foot tall plastic fenceposts from menards were pounded into the swamp in three locations around the tube, and the fencepost was then wired to the swamp tube using the steel baling wire. You can kinda see the fenceposts in the pictures, just below the tops of the swamp tubes.
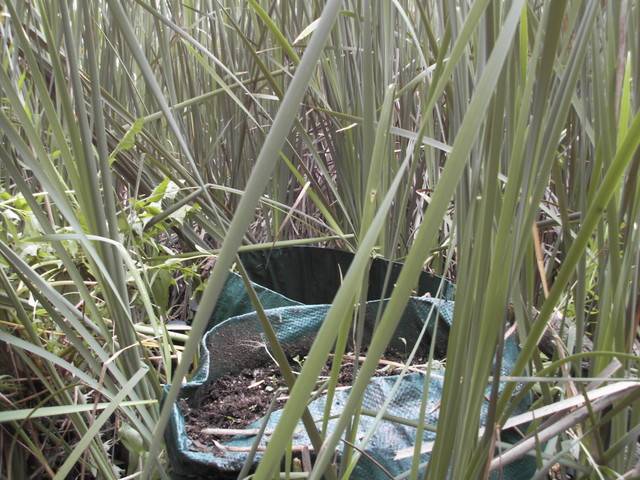
Tubes 3 and 4 (you can only see #3 in this pic) this one is attached to the small tree trunk, as well as the plastic fenceposts. These have been here-spring, summer, winter, and fall for three years now, and they are still rock solid. These $5.00 mesh plastic tarps are still holding their integrity-no tears or weakening of the material from solar radiation-and I tried actually poking thru the material with my finger, but it is still very sturdy and will not allow me to poke a hole thru it. After three years exposed to the elements. Maybe it was made with some kind of UV inhibitor--whatever it is-don't doubt these tarps for building grow holes and tubes.
And the duct tape......barely affected after three years time.........Ahhhhhhh duct tape....fixes anything, anywhere, anytime-the stuff will survive nuclear war and beyond.
This area will soon be planted with Mental Floss and Calizahr cuttings
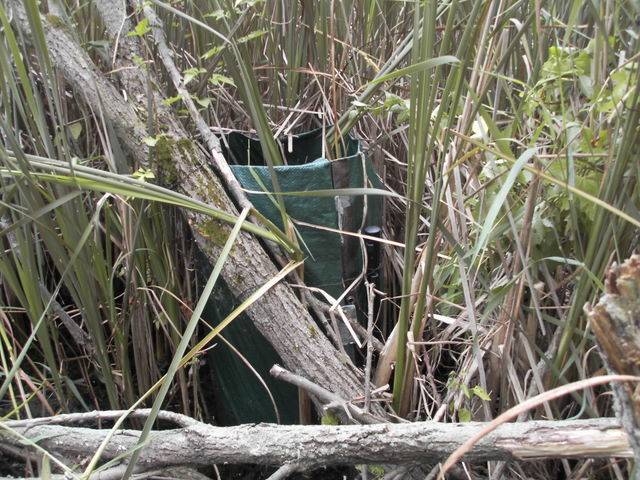
another one using three metal fence posts and baling wire-see how, as time goes by, these tubes become surrounded by, and a part of, the swamp and the woods.
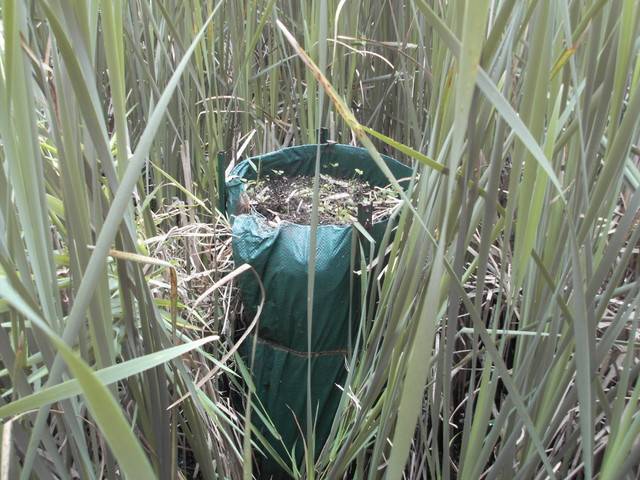
another one, very well camouflaged and surrounded
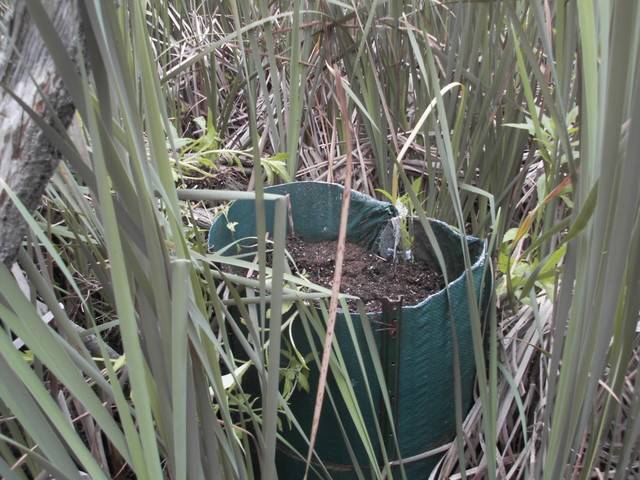
Some wierd nitrogen-deficient? swamp weed enjoying the benefits of the swamp tube
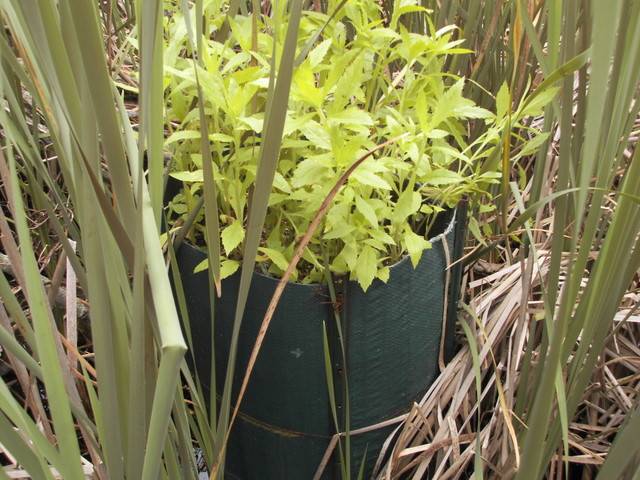
You can see that the water is not as deep here as at the other location. The water around these containers will be anywhere from just above ground level to more than half way up the sides of the tubes.
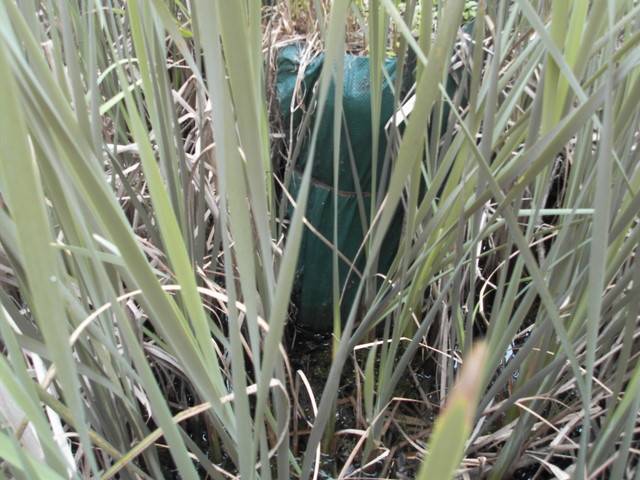
the rest of these tubes will be planted with Calizahr and Mental Floss clones in the coming weeks. I am not worried about the late start because the last time I used these tubes, the Mendocino Madness plants planted May 30 were from 10 to 13 feet tall on July 30, and the Mango plants were ten feet tall minimum, also on July 30- exactly 8 weeks and the fan leaves were bigger than my hand and the stems (at the base) looked like small tree trunks. Unfortunately, one of the "pre-sexed" clones was actually a male and pollinated the entire crop. The male was 12 feet tall (Mendo Madness) so it covered the entire garden in pollen. Be careful when rushing to sex your cuttings--one missed male could mean the end of every one of your sites if you planted cuttings from him at every one of your grows!
All I can say is I almost cried-I usually check on the plants once a week at my buddys location, but this time I waited two weeks and I got called on my laziness!
The three Calizahr have been planted in the three swamp tube location and, of course, the only thing I forgot to bring was my camera. I will post some pics of the Calizahr in about a week when I go out for the second watering.
Hope that this stuff helps some of you guys visualize the swamp method a little more clearly......there seem to be a lot of doubters concerning swamp tubes and growing in the water?
Happy 4th of July and God Bless America
There are now up to a grand total of 13 swamp tubes in two different swamps over the last three and a half years or so (middle 2006). There is also a 100 gallon rubbermaid trough out in the cattails with appx. twenty 1 inch holes drilled in the bottom.This trough cracked and sprung a leak on me a few years ago, so I figured "what the hell", instead of throwing the trough in the garbage i dragged it out into the swamp and filled it with grow mix. Over the winter and into next spring, a third location with another 4-6 swamp tubes will be installed. I figure, put in the hard and dirty work for two or three years hauling soil and camouflaging the tubes, and, come year 3 or 4:
BUMPER CROP AND THE BIG PAYOFF!
There has been a lot of activity on IC mag the last couple of years concerning the swamp tube, and I just wanted to show everyone that it can be done-that no extra lime is needed in the grow mix (just the amount that is normally added to a grow mix)--that it doesnt matter that the bottom 1 to 1.5 foot of grow mix is sitting in the standing (and stagnant) swamp water-and that cannabis seems to absolutely love a moist (or even wet) peat-based grow mix, as long as there is a foot or two of buffer grow mix in order to keep a portion of the roots oxygenated.
I estimate that I have about two hours of work, hauling, and camouflaging into each swamp tube. They are all filled to the top with a local grow mix called HECO 1 or HECO 2 (depending which one is on sale at the time) consisting of finely shredded peat moss and a little bit added lime. Heco worked great in my other location with 8 swamp tubes, so I am going to use it again-don't mess with success. This stuff comes in compressed 4 cu ft bales (uncompressed opens to about 6 cu ft of grow mix) with each 80 lb bale being carried by hand at least 1/4 mile into the swamplands.
Almost to the swamp entrance
Believe it or not-you are looking at three large swamp tubes just 40 feet away
Topping off one of the tubes with Heco grow mix
you can see in this picture that the tubes are made of heavy duty plastic. Yes, that is a cable TV box cover, I had a friend who worked for a cable co. last year and when I saw these things sitting in his garage I knew EXACTLY what they would be good for. The top of the covers were cut out using a jigsaw. The tubes are supported by three 6 foot tall metal fenceposts, sledge hammered about 2.5 feet into the ground. The tubes are then wired to the fenceposts using heavy duty steel baling wire. Not even a hurricane could move these babies! They are rock solid!
Always be looking for stuff that can be used as a swamp tube at garage sales, flea markets, craigslist, etc.-large diameter pvc, short sections of plastic 12 -30 inch culvert tubing, etc.
swamp tube #1-THE BIG ONE-holds 1/3 more soil than the other two swamp tubes-you can see the wicking action of the peat moss in this photo. This tube was placed out and filled about 10 days prior to this photo being taken, and you can see that the top layer of the peat is already supporting some plant life. The top 12 inches or so is just damp enough that, when squeezed in your hand, it gives up just a few drops of water. The next twelve inches or so is definitely moist, kinda like peat moss just after it has been well watered almost to full capacity. But not waterlogged in any sense of the word. Just the bottom 12 inches or so will get really wet.
swamp tube #2
and swamp tube #3
The base of the tube is simply pushed a couple of inches into the soft swamp and does not really form a "seal", but allows the bottom 6 to 12 inches of soil to be completely saturated-the cannabis plant will send a fat taproot right down into this waterlogged soil and drink from it like a straw in a bottle of soda pop.
Now, you didnt think that I was going to leave those BRIGHT green swamp tubes sitting there under the sun, just calling out to the spotter planes or the choppers now, did you? Hmmmmmm, what we need here is some camouflage!Although, as you can see here, even the bright green swamp tube starts to fade into the surrounding swamp at just five feet away.
For camouflage, these burlap coffee bean sacks were picked up at a local garage sale. Three colors of camouflage color (green, black, grey) spray paint were used to paint camo patterns on the sack. The sacks were big enough that they could be pulled over the top of the swamp tubes, and the supporting fenceposts, like a T-shirt.
Here is the completely camouflaged swamp tube. The bag was pulled over the top and down to just above the waterline.
After pulling the bag all the way down, the top was cut open and folded over and secured to the top of the tube and the metal fenceposts. One cutting of Chimera Seeds Calizahr strain is going to be planted in each swamp tube. Once the cuttings are planted, the bag will be pulled back over to cover the top of the tube and the top of the soil completely, adding further to the camo effect.
http://www.icmag.com/ic/picture.php?albumid=6670&pictureid=125219[IMG]
20 feet or so back from the camouflaged swamp tube, once the cattails and the branches of the surrounding trees are bent, pulled over, and tied across this access path, the tube will be undetectable. For over the wintertime, I will take the green and brown camo bag off of the swamp tubes, and replace it with a bag painted tan, brown, and white; in order to blend in with the winter surroundings. Even the dead cattails remain 6-7 feet tall in the middle of winter and provide plenty of cover.
[IMG]http://www.icmag.com/ic/picture.php?albumid=6670&pictureid=125220
Entryway off of the path into the swamp tube area. You can look straight back and kind of see swamp tube #2. What you cannot see at all is swamp tube 1 and swamp tube 3; they are to the right and to the left of the tube that you can see, and are completely invisible. This entrance will not be used again after one more trip to plant the cuttings, and to water for the first time with 20-20-20 for a nice growth spurt right out of the gate. After that, I will take a different path through the cattails so that the initial path can become grown over with vegetation once again, making it harder to detect;the new path will only be used a couple of times up to harvest time, so that it will not be trampled down and easily spotted by a passer-by. If you can make a narrow trail through the cattails, without tramping down a lot of the vegetation, most people will look at it and think that it is just a deer trail that leads off into the cattails and to nowhere.
After another week or so, I will give them another 8 gallons of water, but this time I will go organic, using High N Earth Juice at about 4 times the recommended rate. I go this strong with the organics because the soil will always be moist or wet. When you are 100% sure that the soil will be very moist at all times, with no chance of drying out, you can "push" the plant with higher levels of N than they could normally survive. But, be careful, because if moisture levels do drop below a certain point, the roots and the plant will burn up and die very quickly. This is the reason that a permanent swamp is the absolute best place to grow cannabis outdoors-it just takes a hell of a lot of work during the grow season, and more working out over the off season, just to stay in shape for this bullshit.
Entryway to swamp #2-the entrance to this swamp is at the rear end of a buddies 40 acre spread. The swamp and wetlands area is just steps off of his land and forms the border of my buddys back 20 or so acres. So, short of trespassing 40 acres deep into my buddys property (his german shepherds would have you for dinner before you got 100 yards), you would have to enter the swamp from the other side (at least a half mile trek) of its border and somehow come across my swamp tubes, buried deep in the swamp for almost three years now, well camoed and grown over with vegetation and shrubbery. The entrance shown in the picture is probably the easiest way into the interior areas of the swamp, but even here the water is at least knee deep and at most times of the year, comes up to just below the pockets on my blue jeans.
These are the first 2 of ten total tubes back here. These tubes are formed using hog wire fencing (4 ft tall) rolled into a tube, with the two ends held together by steel baling wire. Cheap plastic tarps from Menards with grommet holes were purchased, in a size big enough to fold over the inside and the outside of the fencing tube.The green side was left facing out for camo purposes, with the brown side to the inside. Then, using the metal grommets in the tarp, the tarp was attached to the fencing in many different places, using the steel wire. The steel wire was run thru the grommets and then twisted around the fencing itself. In areas where there were no grommets, the wire was poked thru the three layers of tarp material, wrapped around the fencing, poked back thru the tarp again, and then twisted tight onto the fencing. The top 12 inches of fencing was then actually folded over on itself to the inside of the tube, and was bent and compressed against the inside of the tube so that the folded over part held the tarp even more securely. They end up being about 40 inches tall.
When the tubes are filled with grow mix, the weight of the grow mix actually pins the tarp against the inside of the tube, holding the whole thing together. 5 foot tall plastic fenceposts from menards were pounded into the swamp in three locations around the tube, and the fencepost was then wired to the swamp tube using the steel baling wire. You can kinda see the fenceposts in the pictures, just below the tops of the swamp tubes.
Tubes 3 and 4 (you can only see #3 in this pic) this one is attached to the small tree trunk, as well as the plastic fenceposts. These have been here-spring, summer, winter, and fall for three years now, and they are still rock solid. These $5.00 mesh plastic tarps are still holding their integrity-no tears or weakening of the material from solar radiation-and I tried actually poking thru the material with my finger, but it is still very sturdy and will not allow me to poke a hole thru it. After three years exposed to the elements. Maybe it was made with some kind of UV inhibitor--whatever it is-don't doubt these tarps for building grow holes and tubes.
And the duct tape......barely affected after three years time.........Ahhhhhhh duct tape....fixes anything, anywhere, anytime-the stuff will survive nuclear war and beyond.
This area will soon be planted with Mental Floss and Calizahr cuttings
another one using three metal fence posts and baling wire-see how, as time goes by, these tubes become surrounded by, and a part of, the swamp and the woods.
another one, very well camouflaged and surrounded
Some wierd nitrogen-deficient? swamp weed enjoying the benefits of the swamp tube
You can see that the water is not as deep here as at the other location. The water around these containers will be anywhere from just above ground level to more than half way up the sides of the tubes.
the rest of these tubes will be planted with Calizahr and Mental Floss clones in the coming weeks. I am not worried about the late start because the last time I used these tubes, the Mendocino Madness plants planted May 30 were from 10 to 13 feet tall on July 30, and the Mango plants were ten feet tall minimum, also on July 30- exactly 8 weeks and the fan leaves were bigger than my hand and the stems (at the base) looked like small tree trunks. Unfortunately, one of the "pre-sexed" clones was actually a male and pollinated the entire crop. The male was 12 feet tall (Mendo Madness) so it covered the entire garden in pollen. Be careful when rushing to sex your cuttings--one missed male could mean the end of every one of your sites if you planted cuttings from him at every one of your grows!
All I can say is I almost cried-I usually check on the plants once a week at my buddys location, but this time I waited two weeks and I got called on my laziness!
The three Calizahr have been planted in the three swamp tube location and, of course, the only thing I forgot to bring was my camera. I will post some pics of the Calizahr in about a week when I go out for the second watering.
Hope that this stuff helps some of you guys visualize the swamp method a little more clearly......there seem to be a lot of doubters concerning swamp tubes and growing in the water?
Happy 4th of July and God Bless America

 Makes me wish I had a swamp to plant.
 Exactly right, at least in my limited experience. It's taken a while to find rural swamp/marsh settings with plausible cover stories for my being in the area.


