What's new

Malawi Style Cob Curing.

Tangwena

Well-known member
Veteran
Hi Tangwena
I am sure you can find banana bark in WA, please try it, the material is the trick. That article you posted blew my mind. It was very enlighting, the material is incredible, much better than teflon. It makes a better job than corn I think
And to wrap the banana bark cob with scotch tape is a serendipity, I never expected such results. I mean this natural fermenting method is foolproof, it doesnt seem to fail

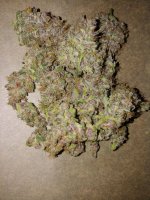
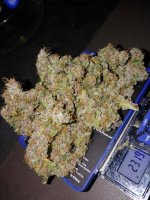
I made a cob on february 17th with 30 grs of these buds of Tom Hill Haze 3/1 Xiskito repro, this is the oldest of the rest of cobs coming

This is 30 grs material on 17/2 going into the cob


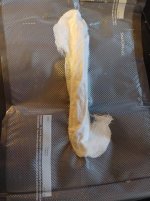
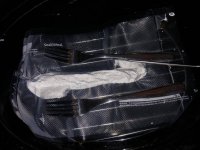
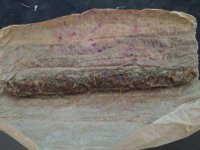
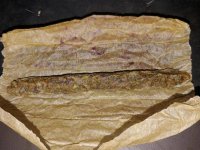
Today after 22 days fermenting at temperatures ranging between 15C-38C I opened it up. If it wasnt fermented I would wrap it up again and back to nature. To my surprise the banana bark was wet. The cobs I didnt wrap with Scotch or masking tape had the banana bark dried. I am thinking these 22 days out is equivalent to 6-8 hours in the yoghourt maker. I think this cob will not lose too many terpenes, but it has fermenting smells. It is not too wet but I am drying for as long as needed in my very high humidity environment until I get a window of enough hours with humidity at less than 65% and then I send it for long cure. In comparison the Lemon Thai is really very wet, I believe it is overfermented, something like 48-72 hours of yoghourt maker, this one will need a long time to get dry. I hope you can see on the first picture that the banana bark is wet after opening it from the scotch tape wrapping


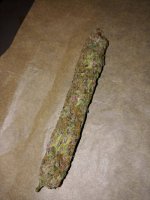
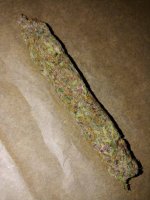
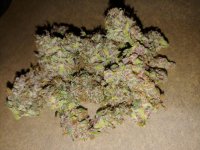
So here we have Tom Hill Haze cob on the left, Lemon Thai cob on the center and PHM x Pak on the right. Pictures are from both sides. Lemon Thai and PHM cob are changing colours while drying

Pd: guys, instructions are very clear. Your cob should have the thickness of a big man penis. A penis with prepuce, puce and postpuce. And if you dont have enough material to make it, then dont make long finger thin cobs, change shape. It might be possible that you have never seen a big man penis, but I am absolutely sure that you people have seen big turds more than once. So make a big turd shape cobs. Or make round cobs, it will ferment and cure better. Fermentation smells are very clear. You dont have to have a gourmet nose for this. It is fermented or not, there are no third options. If it ferments it has a very typical unmistakable smell, I am a newbie and I am getting lucky, but I am trying to help luck by following instructions carefully

Awesome information my friend when I lived in Africa the Banana bark cobs were differently cured than the corn husk cobs it def makes a difference.
I am in between grows at the moment but my next grow I will def give it a go.
You have opened another door for me my friend that is the beauty of sharing on the internet things that might otherwise take years can be accomplished in a few weeks by sharing.
The thicker the better my cobs might look thin but they start off at around 50mm thick around 60 to 90 grams its only after curing that they shrink to 25 to 30mm thick.
I used to score cured grass in large loaf of bread size cobs also they were usually in tubes of bark from a tree about 300mm long and 200mm diameter again a different type of cure going by the results.
There were at least 6 different outcome cures in the central African region where I lived Congo, Zambia, Malawi and Zimbabwe that I came across while I was there.
Really any shape thats dense works well friends who have posted on this thread have had great results with large slabs and bags crammed full of buds.
The results speak for themselves if it looks and smells good it is good usually. I know I love opening the bags and sniffing the aroma sometimes it floors you its so good.
 

Tangwena

Well-known member
Veteran
Well ... you are right that cobs with an oval shape are keeping their moisture in their inner core for longer.

However, even with different shapes, the flowers located on the peripheral layer of any cobs are as good as those located in the inside ... which means that no matter the shape, the quality and fermentation happened mainly when the flowers were still wrapped .

As my aging and curing is done in a very tight oxygen free vacuum, the process will happen mainly all over the cobs' volume, no matter its shape : the proof being that for a well fermented cob, the external layer also becomes coated with crystals.
And yes, it will ferment longer in its core simply due to geometrical distance.

But as you seem to be a purist, dont you think that for curing/fermenting the most evenly it would be even better if the cob was shaped as a ball, no ? 😎

And to tell you the whole story, I'm waiting for the end of covid to go in a shop to create a "cob shape creator" that would be a cylinder of 4 cm diameter and 20 cm long ... I guess it would require more than 100 gr of flowers to fill it, but it would be a better size for fermenting, imho.
Of course, it would need to be coated with silicon in the inside otherwise, removing 100 gr of tighly stuck fresh flowers might require the helpd of a nuclear bomb .... 😉

It doesn't seem to matter how you get there the finished product speaks for itself.
As I said above I experienced at least 6 different cure outcomes that I can remember and they were all good if the pot was good when they were made.
There is plenty of room for different methods and approaches to this type of cure the only thing that matters is the end result it will be obvious if it has worked or not when you try it.
More than one way to skin a cat as the saying goes.
 

funkyhorse

Well-known member
It seems the cobs made with only banana bark without wrapping as the article says would give a fermented product which is ready for use
But when wrapping it with scotch or masking tape it seems to give a treatment similar to the yoghourt maker under natural conditions

This is the Lemon Thai cob after 3 days drying. It fermented for 54 days and results seem to be similar to what Tangwena shows happens on 48-72 days on the youghurt maker. It really got dark. The outside is dry so I sent it for long cure. It is not ready yet. It needs at least one month cure minimum but I will give it much longer
Lemon Thai cob.jpeg


I measured the dried cobs before wrapping them. This Lemon Thai cob shown above is now 10grs. I put 18 grs of fresh material. And the fattest part of the cob is 30mm. 30 mm seems to be the magic number for fermentation to occur. The PHM x Pak is also 30mm at the widest part. The thinner Malawi Gold cob 10/15mm wide didnt ferment
Today I took out my first Congo 3 cob after 3 weeks. I note the banana bark comes out wet. And the cobs need one day drying or more before sealing them for long cure. This one was 50 grs of fresh material. I will weigh again tomorrow after one day drying before I wrap it
Congo 3 cob size.jpeg
Congo 3 cob.jpeg
Congo 3 cob b.jpeg


Have a nice weekend everybody
 

Tangwena

Well-known member
Veteran
Hi funkyhorse wow that dark one has really darkened up make sure its well dried before aging or you may loose the terps it has retained.
That last pic looks very very nice and after aging will be awesome I'm sure.
I would love to score some small cobs like you have made they are just the right size for an in depth tasting ha ha.
Thanks for the detailed info brother you are doing great work the lemon Thai should be spectacular once aged if all goes well.
Today I opened a Panama x Honduras cob from 2018 wow! its tasty and terpy as well like fermented fruit excellent taste. I only just chewed about 0.3g and my ears are ringing already ha ha.
 
Hello all,

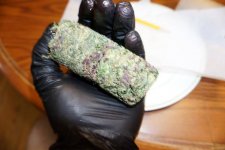
I started reading this thread from page 1 a few months back, and am almost up to current (I'm at page 255 now haha).

I am in the middle of making my first cob, and am hoping someone could answer a question for me.

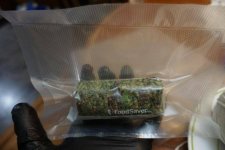
I vacuum sealed 56 grams of 2 day dried flower (strain is Freakshow) and am doing a 20hr sweat at 40°C.

When the sweat is over, do i either:

1. Pad dry it with paper towel, reseal it, and right away start the fermentation process.

Or

2. Pad dry it with a paper towel, let it air dry for X amount of hours, then reseal it and start the fermentation process.

I appreciate any advice!
 

Attachments

  • photo2028543.jpg
    photo2028543.jpg
    41.5 KB · Views: 55
  • photo2028544.jpg
    photo2028544.jpg
    39 KB · Views: 71

Raziel819

Active member
Hey all... I have a sativa question, since I'm a indoor grower, should I give my new girls a 12/12 start in life from seed like they would get in a equator environment?
 

Tangwena

Well-known member
Veteran
Hello all,

I started reading this thread from page 1 a few months back, and am almost up to current (I'm at page 255 now haha).

I am in the middle of making my first cob, and am hoping someone could answer a question for me.

I vacuum sealed 56 grams of 2 day dried flower (strain is Freakshow) and am doing a 20hr sweat at 40°C.

When the sweat is over, do i either:

1. Pad dry it with paper towel, reseal it, and right away start the fermentation process.

Or

2. Pad dry it with a paper towel, let it air dry for X amount of hours, then reseal it and start the fermentation process.

I appreciate any advice!

Hi my friend good on you for having a go its another world once you start getting into cobbing the grow fun is extended for months years even ha ha.
Looking at the pics you have supplied if it was mine I would sweat it for 12 hours and then leave it sealed up for 5 days in a warm environment say 30c plus.
Before opening it and drying the surface either with paper towels or other method eg dehydrator ect.
Please keep posting pics like you have if you want advice as it makes it easier when you see what your working with.
The shorter sweats are easier to manage and make for terpyer end results which make checking the progress a lot more interesting as the fermented smells can be mind blowing good.
 

Tangwena

Well-known member
Veteran
Hey all... I have a sativa question, since I'm a indoor grower, should I give my new girls a 12/12 start in life from seed like they would get in a equator environment?

I can only tell you what I would do myself. I only have 1mtr of grow height so I cant let them get away from me, so its 12/12 from day one as the preflower stretch usually fills up that space easily.
If you have 2 or 3 mtrs head height you can afford to go 18/6 for a week or two then 12/12.
Another way is scrog ect but you really need to know the strain your dealing with and have a large grow area.
My last grow in 1mtr square footprint with 1 mtr headroom on 12/12 I easily got 12 oz a pound is easy as well so its possible in small areas.
 
Hey all... I have a sativa question, since I'm a indoor grower, should I give my new girls a 12/12 start in life from seed like they would get in a equator environment?

Not necessarily.
It's always a good idea to veg for atleast 1 to 2 months so the cultivar can be expressed to its full genetic potential.

You can restrict height by being strategic with your pot sizing and utilizing LST.

In flower, most sativas will keep on stretching and won't stop if started in too big a pot.
To combat this, keep your plant in a smaller pot in flower until the stretching has stopped (usually right before the flowers start to bulk up.) This stretch can take up to 8 weeks until it tapers off.
At this point you can transplant to a bigger pot (I like 10 gal) and watch your beautiful flowers bulk up while the roots are encouraged to fill up the new medium.

Furthermore, although many tropical/equatorial varieties will flower just fine under 12/12, others will flower quicker/be less prone to intersex traits with a shorter photoperiod like 11 on/ 13 off


just my 2 cents!
 
Hi my friend good on you for having a go its another world once you start getting into cobbing the grow fun is extended for months years even ha ha.
Looking at the pics you have supplied if it was mine I would sweat it for 12 hours and then leave it sealed up for 5 days in a warm environment say 30c plus.
Before opening it and drying the surface either with paper towels or other method eg dehydrator ect.
Please keep posting pics like you have if you want advice as it makes it easier when you see what your working with.
The shorter sweats are easier to manage and make for terpyer end results which make checking the progress a lot more interesting as the fermented smells can be mind blowing good.

Thanks a bunch brother, I value your input and will follow your advice to the T!
I'll be back with more pictures. 😎
 
G

Guest

Cant see your pics Tang... dunno why...
And Polish Cobbing it will also hide it better from said friends... then when you bust a cob out 5 months later they will be unprepared....
 

Tangwena

Well-known member
Veteran
Cant see your pics Tang... dunno why...
And Polish Cobbing it will also hide it better from said friends... then when you bust a cob out 5 months later they will be unprepared....

Hi my friend I'm not sure which pics your referring to maybe its your end as I can see everything even some that are not there right now ha ha.
Mulanje fills in the spaces left by nature.
 
What an amazing stash! Props to you for having the sense to leave some to the side for a rainy day. If I have something that's good, I usually burn right through it for the most part😅

Per your recommendation, I did a 12 hour sweat in the sous vide.
DSC00669.JPG

I was very pleased to see some condensation sweat on the inside of the bag!

After removing it from the sous vide, I placed it in my home-made incubator I had made for a mycology experiment in the past.
DSC00696.JPG

It's very simple; just 2 plastic totes, the bottom filled with water, some empty mason jars for support, and an aquarium heater; the top with my vacuum sealed cob in it and the lid on.

With this setup I am maintaining a constant 86°F (30°C).

This Saturday morning will be the 5 day mark for fermenting, and that's when I'll open it for the first time!

After opening it up and drying it with some paper towel, should I reseal it right away and put it back to fermenting, or should I let it sit out for a bit and air dry before doing so?

Man am I excited for that first whiff!!🤤
 

Tangwena

Well-known member
Veteran
What an amazing stash! Props to you for having the sense to leave some to the side for a rainy day. If I have something that's good, I usually burn right through it for the most part😅

Per your recommendation, I did a 12 hour sweat in the sous vide.

I was very pleased to see some condensation sweat on the inside of the bag!

After removing it from the sous vide, I placed it in my home-made incubator I had made for a mycology experiment in the past.

It's very simple; just 2 plastic totes, the bottom filled with water, some empty mason jars for support, and an aquarium heater; the top with my vacuum sealed cob in it and the lid on.

With this setup I am maintaining a constant 86°F (30°C).

This Saturday morning will be the 5 day mark for fermenting, and that's when I'll open it for the first time!

After opening it up and drying it with some paper towel, should I reseal it right away and put it back to fermenting, or should I let it sit out for a bit and air dry before doing so?

Man am I excited for that first whiff!!🤤

Looking good my friend depending on how wet it is when you open it will dictate how much you need to dry it.
The smells right now will not be too intense the real pong comes in the coming weeks.
The process will have been started by the sweating now you need to regulate the moisture content of the cob.
Dry the outside to the touch how long this takes depends how wet it is, better a little too dry than too wet for the next stage.
Your custom made temp control should enable you to get a top drawer cure.
Fingers crossed here for a stellar result its all looking great from here.

As for making it last I urge you to stop smoking and start chewing cob. Half a gram chewed lasts all day long and makes an ounce last forever.
I regularly use 0.2g thats 5 doses per gram my last harvest was 300g plus dried and cured ha ha. You do the maths its about 4 years worth at the rate I use it.
AND I'm high as a kite all day everyday.

I have a theory about smoking that it causes a huge tolerance build up and after 40 years of smoking and not getting the high's I was after.
I can now get as high as I want whenever I want.
But you will need to wean your system off the smoke. Once your tolerance is back to zero you can start to enjoy highs you only dreamed of from cannabis.
It took me about 3 months to loose my tolerance from a lifetime of smoking.
I started chewing 0.75 to 0.50g but as my tolerance adjusted to the chewing from smoking I now only need 0.2 to 0.3 depending on the strain potency any more and I over dose and spend the day drifting in and out of morphia. I prefer to be bouncing off the walls with energy which is what happens when I get it right.
 
G

Guest

wooo ha. im glad you are including a final reminder of best use, Tang. It certainly is the best part of the whole deal of making cob.

that board of samples is something. the color on the zamaldelica is wild.
 

Tangwena

Well-known member
Veteran
wooo ha. im glad you are including a final reminder of best use, Tang. It certainly is the best part of the whole deal of making cob.

that board of samples is something. the color on the zamaldelica is wild.

My friend the high is something I only use now and then its like going up on acid ha ha.
Today I'm just starting my trip on the Mulanje it kinda gets you by the goolies you have to go or it gets painful ha ha. Completely changes your whole day for the whole day Malawi at its best.
You have a new life reborn once you start cobbing and chewing the aged cobs there is nothing even close.
 

Maple_Flail

Well-known member
Welp, Jumping in headfirst! gatta check on it in a few hours its been going over 8hrs now.

PCBuds
@ReikoX , apparently this is your creation
 

Attachments

  • photo2030039.jpg
    photo2030039.jpg
    49 KB · Views: 35
  • photo2030040.jpg
    photo2030040.jpg
    158.7 KB · Views: 45
  • photo2030041.jpg
    photo2030041.jpg
    123.3 KB · Views: 52
  • photo2030042.jpg
    photo2030042.jpg
    216.9 KB · Views: 43
  • photo2030043.jpg
    photo2030043.jpg
    106.1 KB · Views: 46
  • photo2030045.jpg
    photo2030045.jpg
    128.2 KB · Views: 42
  • photo2030046.jpg
    photo2030046.jpg
    277.5 KB · Views: 47
  • photo2030048.jpg
    photo2030048.jpg
    184.8 KB · Views: 45
  • photo2030047.jpg
    photo2030047.jpg
    165.1 KB · Views: 40

Latest posts

Latest posts

Top