Step 4: Bottling Day! Day ~ 35-49:
Ahh. Bottling Day! I have a love-hate relationship w/bottling day, and by the time you’re done reading this, I’m sure you’ll understand why. If the results of bottling day weren’t so darn good, I’d give up making my own wine. And that’s no lie! It’s a long, hot and tedious process. You will need about 4 hours of uninterrupted time to bottle your wine. You will need the area where you do your cleaning and sanitizing (the household kitchen sink in my case) all to yourself for at least 2 hours. Being interrupted while cleaning and sanitizing 30 bottles and all your equipment because someone is hungry is a real pain.
I say, “~ 35-49 days”, because every wine takes a different time to clear depending on the style of wine, and on the ambient temps. You’ll know when it’s time to bottle when you shine your flash light through your wine from the back side of the carboy, and see very little haze in the light beam, or when you can shine the light from front to back and can read/see things clearly. This 2nd method only works w/white or blush wines though. If you’re having trouble determining if your wine is clear enough to bottle, siphon some off into a clean, clear wine glass and hold it up to the light.
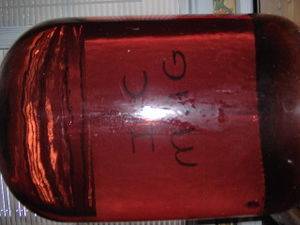
For the most part, you’re wine will be pretty clear in about 2-3 weeks. Weather your wine is clear or not, it’s best not to leave it sitting on the sediment for more than 30 days after you add the stabilizers in step 3. It can start to pick up bad flavors and odors from the dead yeast. So if you’re wine is not clear, you should at least rack it again into a clean, sanitized carboy.
A bottling wand is a handy piece of equipment, but not necessary. One end fits onto the end of your racking hose (if you have the proper size hose) that you suck on to create a siphon.
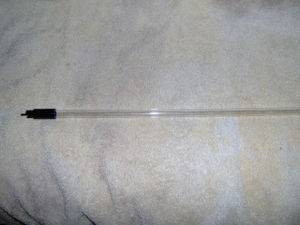
The other end has a little plunger on it.
When a siphon is established, and the plunger end is pushed down against the bottom of the wine bottle, wine flows out.
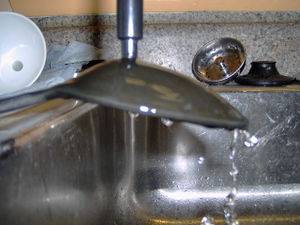
When it’s lifted off the bottom of the bottle, the pressure of the siphon pushes the plunger down, and the flow of wine stops. Fill the bottle to the top, lift the bottling wand out, and you have the perfect amount of wine in the bottle.
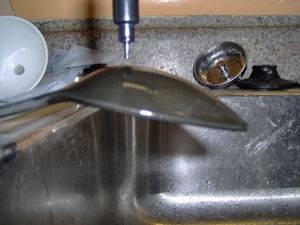
Let’s start, shall we? 30 (750ml) wine bottles.
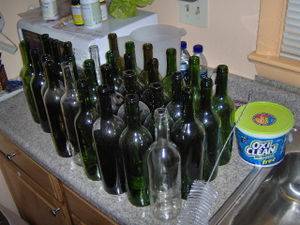
Normally, I bottle in as many 1.5 Lt bottles as I can get my hands on. Half as many bottles to wash. You can buy bottles, but I have my family save me their empties. I ask that they try to rinse them out when empty, then I soak them for a day or so in a bucket w/some bleach and scrape off the labels. Any glue that is difficult to get off @ this point, will come off w/a green scrub pad and elbow grease when you’re washing them on bottling day. If that doesn’t work, I use some “Goo-Be-Gone”.
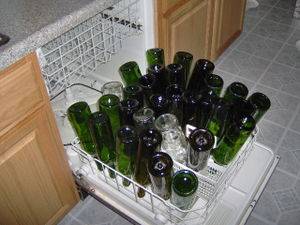
Dump about a ½ teaspoon of Oxi-Clean into each bottle (a bit more for the 1.5 Lt bottles). Put on a pair of rubber gloves. Get your bottle brush, and scrub and rinse all your bottles really well, inside and out, under scalding hot water. It’s nice to have a clean dishwasher nearby to let them drain.
Next, get your jug of pot-meta and a clean & sanitized funnel. Fill one wine bottle about a 1/3 full of pot-meta. Stick your finger in the mouth of the bottle and shake it up for 20 seconds or so. Put your funnel into the next bottle to be sanitized. Start to pour the pot-meta into the funnel. When the funnel is about half full of pot-meta, cover the hole in the funnel w/the mouth of the bottle you’re pouring from and just hold it there for 15-20 seconds or so to sanitize the mouth of this bottle.
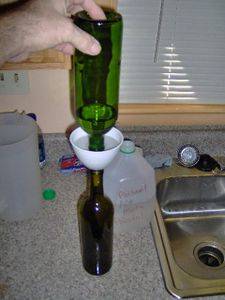
Now let all the pot-meta drain into the second bottle, and rinse the first bottle out w/cold water w/out touching the mouth of the bottle. From this point on, you’ll do your best not to let anything touch the mouth of your bottles that isn’t also sanitized. Set this bottle at an angle in the dish rack, mouth up, and after a few minutes, let the excess water dribble out, and set it aside to be filled w/wine. 29 more to go LOL! Actually, sanitizing goes much faster than washing.
Now, clean and sanitize your racking wand and hose, and bottle filler if you have one.

Go rinse out your mouth again, grab a rubber band, your flashlight, a 6-12” length of 2X4 or a thick book…, and bring everything to your carboy of wine. Oh, don’t forget a glass or cup so you can sample as you bottle LOL. Now the fun begins!
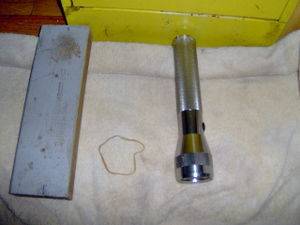
Well, we have one more VERY IMPORTANT thing to do first. Go take the phone off the hook! You CAN NOT be interrupted for the next 45 minutes or so. You can not stop the flow of wine once you get it started. If you’re using a bottle filler and/or you have a clamp on your racking hose, you can slow the flow of wine down considerably, but if you stop it completely for too long, you’ll loose your siphon. We’re bottling wine right off the sediment (which you normally wouldn’t do when making wine from scratch, but this is what the kit instructions tell us to do). If you loose your siphon, wine will flow back down your racking wand and kick up all kinds of nasty sediments into your wine. If this happens, and your wine gets too cloudy, you might as well just rack the wine into a clean/sanitized carboy and try again another day. The end of your racking wand must stay submerged at all times. This is what the rubber band is for. It allows you to use both hands during most of the bottling process.
Make a double loop w/your rubber band, and wrap it around the neck of your carboy.
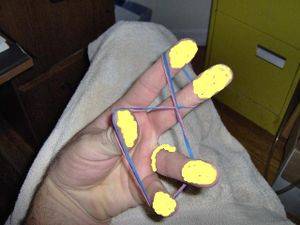
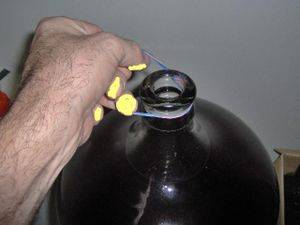
Insert your racking wand until the end is 3-4 inches above the sediment on the bottom of the carboy. Hold it steady while you slip one loop of the rubber band off the neck of the carboy, and it gets snagged around the racking wand.
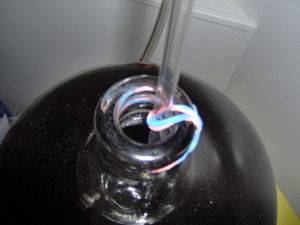
Gently let the end of the racking wand settle up against the inside of the carboy. The rubber band will keep it from falling in much further. Try not to wiggle it around to much from this point forward.
Make sure everything you need is w/in easy reach. Get a siphon going, and start filling bottles.
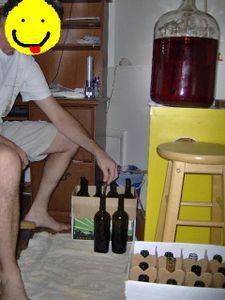
How full? Well, if you have a bottle filler, you fill it right to the top. Generally you fill to just above where the neck of the bottle starts. If a bottle has a long neck, you fill it a bit more. You want about 1 inch of air below your cork. A bit more or less aint going to hurt anything.
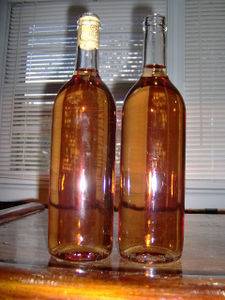
You have to work quickly. Keep an eye on the level of wine in the carboy while filling and moving bottles around. I put the bottles on a towel as I’m filling them cause there’s always a bit of spilling. I always make sure the last 2 bottles I fill are 1.5Lt. Once the carboy gets that low, the siphon will slow down some and the 1.5’s give you a bit more time to work with.
Keeping the end of the racking wand in the wine at all times, gently move it around to the side of the carboy facing you. Grip it and the neck of the carboy with your non-dominant hand as shown in the pick below w/your thumb fully extended.
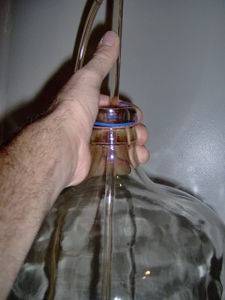
Gently tilt the carboy towards you. A steady hand helps as well as a short length of 2X4 to slip under the back end of the carboy to hold it there steady. Don’t let go! As the wine gets lower in the carboy, slowly lower the racking wand closer and closer to the sediments w/your thumb as shown.
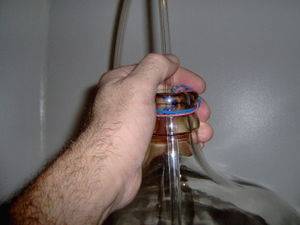
When you start sucking up sediment, stop. If you do not have a clamp on your racking hose or a bottling wand, what you can do is stick the end of your hose into the mouth of your next empty bottle, and hold it up so that the end of the hose is just below the level of wine left in the carboy. This will considerably slow down, but not stop the flow of wine. Before I got my bottling wand I just pinched the end of the hose off against the top of the bottle and let some wine dribble into the bottle every few seconds to keep a siphon going. As long as no air gets into your racking wand as you’re moving it around, you’ll be fine. Your last bottle more than likely isn’t going to be completely full, and is going to be a tiny bit cloudy. That’s ok. Put a tasting cork in it (or use the plastic wrap trick from step 3) and stick it in the fridge for a few days before gently decanting and enjoying it.
Corking: It goes w/out saying that you’ll need corks before you start to bottle. Don’t use used corks. Get new ones from the beer and wine equipment store. If you’re making one of these drink it as soon as you bottle it kit wines, and if you don’t want to invest in a corker, you can get away w/using tasting corks. Just swish them in a little sanitizer and push them in. If you make a wine that you plan to age any more than a year or so, you’ll need to have a corker to insert the corks into the bottles. There are many styles on the market. Ask around. Try a few out if possible. Store your corks in a clean zip lock baggie, swish them in a bit of pot-meta, and insert.

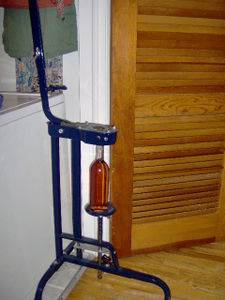
After carboys, my biggest investment in equipment was a quality floor corker, and it’s definitely worth every penny I spent on it. Position the bottle correctly,
drop in a cork,

pull the handle, and the cork slides in slicker than snot. LOL


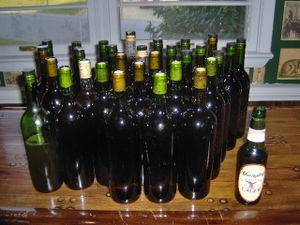
In addition to tasting corks, you can also use screw top caps. You’ll of course need screw top bottles to go w/them. I have no idea how long you can store wine w/screw top caps though.
Store your bottles up right for a week or so. Then they should be laid on their sides so the corks stay wet, and stored somewhere cool, and dark that gets very little vibrations from doors, stairs, washers, refrigerators… Except for this drink it as soon as it’s bottled style of wine, ALL wines should be left to age for a minimum of 6 months. White and blush wines will mature in 1-3 years depending on how dry they are. Red wines, I don’t even taste for 2-3 years, some longer. It’s a waste of good wine to do other wise. I’m sure you’re thinking, “That’s a long time”! I started w/2 carboys, and always try to keep them full. Every 3rd or 4th kit I make is a pricier one that I intend to let age. Over the course of time I’ve built up a nice little wine cellar. Nearly 200 bottles! This includes wines I’ve made from scratch as well. Remember, the equipment will quickly pay for itself in what you’ll be saving by not buying commercial beer/wine. I enjoy making wine from scratch, even though a lot of it doesn’t turn out all that good, but I can only think of one kit wine that I’ve been disappointed with in nearly 5 years of making wine this way.
Making wine from scratch is a bit more labor intensive, but even cheaper than making kit wines. If anyone is interested, here’s a link to a home winemaking web site that expounds on what you’ve read here. http://winemaking.jackkeller.net/
On this site you will find dozens of recipes for fruit, vegetable, herb and flower wines. One of my favorites, and one of the cheapest wines I’ve ever made w/store bought ingredients is Welches frozen grape juice wine. I’m not a huge fan of Concord grape wine, but niagra (white) grapes make a nice, mildly fruity wine that keeps well for 3-4 years. When it’s on sale, you can make a gallon of pretty good wine for well under 4 bucks LOL.
One of the biggest deterrents in home wine making is the time it takes for your wine to age. It’s hard to not want to taste what you’ve made every few months to see how it’s coming along. The only thing I’ve found that helps is to keep making wine and lots of it LOL! If this, “drink it as soon as you bottle it” style of wine is to your liking you’ll get a lot quicker return on your investment. But either way, if your carboy is always full, eventually you’ll have plenty of wine to enjoy w/enough left over to age for an appropriate amount of time.
Ahh. Bottling Day! I have a love-hate relationship w/bottling day, and by the time you’re done reading this, I’m sure you’ll understand why. If the results of bottling day weren’t so darn good, I’d give up making my own wine. And that’s no lie! It’s a long, hot and tedious process. You will need about 4 hours of uninterrupted time to bottle your wine. You will need the area where you do your cleaning and sanitizing (the household kitchen sink in my case) all to yourself for at least 2 hours. Being interrupted while cleaning and sanitizing 30 bottles and all your equipment because someone is hungry is a real pain.
I say, “~ 35-49 days”, because every wine takes a different time to clear depending on the style of wine, and on the ambient temps. You’ll know when it’s time to bottle when you shine your flash light through your wine from the back side of the carboy, and see very little haze in the light beam, or when you can shine the light from front to back and can read/see things clearly. This 2nd method only works w/white or blush wines though. If you’re having trouble determining if your wine is clear enough to bottle, siphon some off into a clean, clear wine glass and hold it up to the light.

For the most part, you’re wine will be pretty clear in about 2-3 weeks. Weather your wine is clear or not, it’s best not to leave it sitting on the sediment for more than 30 days after you add the stabilizers in step 3. It can start to pick up bad flavors and odors from the dead yeast. So if you’re wine is not clear, you should at least rack it again into a clean, sanitized carboy.
A bottling wand is a handy piece of equipment, but not necessary. One end fits onto the end of your racking hose (if you have the proper size hose) that you suck on to create a siphon.

The other end has a little plunger on it.

When a siphon is established, and the plunger end is pushed down against the bottom of the wine bottle, wine flows out.

When it’s lifted off the bottom of the bottle, the pressure of the siphon pushes the plunger down, and the flow of wine stops. Fill the bottle to the top, lift the bottling wand out, and you have the perfect amount of wine in the bottle.

Let’s start, shall we? 30 (750ml) wine bottles.

Normally, I bottle in as many 1.5 Lt bottles as I can get my hands on. Half as many bottles to wash. You can buy bottles, but I have my family save me their empties. I ask that they try to rinse them out when empty, then I soak them for a day or so in a bucket w/some bleach and scrape off the labels. Any glue that is difficult to get off @ this point, will come off w/a green scrub pad and elbow grease when you’re washing them on bottling day. If that doesn’t work, I use some “Goo-Be-Gone”.
Dump about a ½ teaspoon of Oxi-Clean into each bottle (a bit more for the 1.5 Lt bottles). Put on a pair of rubber gloves. Get your bottle brush, and scrub and rinse all your bottles really well, inside and out, under scalding hot water. It’s nice to have a clean dishwasher nearby to let them drain.

Next, get your jug of pot-meta and a clean & sanitized funnel. Fill one wine bottle about a 1/3 full of pot-meta. Stick your finger in the mouth of the bottle and shake it up for 20 seconds or so. Put your funnel into the next bottle to be sanitized. Start to pour the pot-meta into the funnel. When the funnel is about half full of pot-meta, cover the hole in the funnel w/the mouth of the bottle you’re pouring from and just hold it there for 15-20 seconds or so to sanitize the mouth of this bottle.

Now let all the pot-meta drain into the second bottle, and rinse the first bottle out w/cold water w/out touching the mouth of the bottle. From this point on, you’ll do your best not to let anything touch the mouth of your bottles that isn’t also sanitized. Set this bottle at an angle in the dish rack, mouth up, and after a few minutes, let the excess water dribble out, and set it aside to be filled w/wine. 29 more to go LOL! Actually, sanitizing goes much faster than washing.
Now, clean and sanitize your racking wand and hose, and bottle filler if you have one.

Go rinse out your mouth again, grab a rubber band, your flashlight, a 6-12” length of 2X4 or a thick book…, and bring everything to your carboy of wine. Oh, don’t forget a glass or cup so you can sample as you bottle LOL. Now the fun begins!

Well, we have one more VERY IMPORTANT thing to do first. Go take the phone off the hook! You CAN NOT be interrupted for the next 45 minutes or so. You can not stop the flow of wine once you get it started. If you’re using a bottle filler and/or you have a clamp on your racking hose, you can slow the flow of wine down considerably, but if you stop it completely for too long, you’ll loose your siphon. We’re bottling wine right off the sediment (which you normally wouldn’t do when making wine from scratch, but this is what the kit instructions tell us to do). If you loose your siphon, wine will flow back down your racking wand and kick up all kinds of nasty sediments into your wine. If this happens, and your wine gets too cloudy, you might as well just rack the wine into a clean/sanitized carboy and try again another day. The end of your racking wand must stay submerged at all times. This is what the rubber band is for. It allows you to use both hands during most of the bottling process.
Make a double loop w/your rubber band, and wrap it around the neck of your carboy.


Insert your racking wand until the end is 3-4 inches above the sediment on the bottom of the carboy. Hold it steady while you slip one loop of the rubber band off the neck of the carboy, and it gets snagged around the racking wand.

Gently let the end of the racking wand settle up against the inside of the carboy. The rubber band will keep it from falling in much further. Try not to wiggle it around to much from this point forward.
Make sure everything you need is w/in easy reach. Get a siphon going, and start filling bottles.

How full? Well, if you have a bottle filler, you fill it right to the top. Generally you fill to just above where the neck of the bottle starts. If a bottle has a long neck, you fill it a bit more. You want about 1 inch of air below your cork. A bit more or less aint going to hurt anything.

You have to work quickly. Keep an eye on the level of wine in the carboy while filling and moving bottles around. I put the bottles on a towel as I’m filling them cause there’s always a bit of spilling. I always make sure the last 2 bottles I fill are 1.5Lt. Once the carboy gets that low, the siphon will slow down some and the 1.5’s give you a bit more time to work with.
Keeping the end of the racking wand in the wine at all times, gently move it around to the side of the carboy facing you. Grip it and the neck of the carboy with your non-dominant hand as shown in the pick below w/your thumb fully extended.

Gently tilt the carboy towards you. A steady hand helps as well as a short length of 2X4 to slip under the back end of the carboy to hold it there steady. Don’t let go! As the wine gets lower in the carboy, slowly lower the racking wand closer and closer to the sediments w/your thumb as shown.

When you start sucking up sediment, stop. If you do not have a clamp on your racking hose or a bottling wand, what you can do is stick the end of your hose into the mouth of your next empty bottle, and hold it up so that the end of the hose is just below the level of wine left in the carboy. This will considerably slow down, but not stop the flow of wine. Before I got my bottling wand I just pinched the end of the hose off against the top of the bottle and let some wine dribble into the bottle every few seconds to keep a siphon going. As long as no air gets into your racking wand as you’re moving it around, you’ll be fine. Your last bottle more than likely isn’t going to be completely full, and is going to be a tiny bit cloudy. That’s ok. Put a tasting cork in it (or use the plastic wrap trick from step 3) and stick it in the fridge for a few days before gently decanting and enjoying it.
Corking: It goes w/out saying that you’ll need corks before you start to bottle. Don’t use used corks. Get new ones from the beer and wine equipment store. If you’re making one of these drink it as soon as you bottle it kit wines, and if you don’t want to invest in a corker, you can get away w/using tasting corks. Just swish them in a little sanitizer and push them in. If you make a wine that you plan to age any more than a year or so, you’ll need to have a corker to insert the corks into the bottles. There are many styles on the market. Ask around. Try a few out if possible. Store your corks in a clean zip lock baggie, swish them in a bit of pot-meta, and insert.

After carboys, my biggest investment in equipment was a quality floor corker, and it’s definitely worth every penny I spent on it. Position the bottle correctly,

drop in a cork,

pull the handle, and the cork slides in slicker than snot. LOL


In addition to tasting corks, you can also use screw top caps. You’ll of course need screw top bottles to go w/them. I have no idea how long you can store wine w/screw top caps though.
Store your bottles up right for a week or so. Then they should be laid on their sides so the corks stay wet, and stored somewhere cool, and dark that gets very little vibrations from doors, stairs, washers, refrigerators… Except for this drink it as soon as it’s bottled style of wine, ALL wines should be left to age for a minimum of 6 months. White and blush wines will mature in 1-3 years depending on how dry they are. Red wines, I don’t even taste for 2-3 years, some longer. It’s a waste of good wine to do other wise. I’m sure you’re thinking, “That’s a long time”! I started w/2 carboys, and always try to keep them full. Every 3rd or 4th kit I make is a pricier one that I intend to let age. Over the course of time I’ve built up a nice little wine cellar. Nearly 200 bottles! This includes wines I’ve made from scratch as well. Remember, the equipment will quickly pay for itself in what you’ll be saving by not buying commercial beer/wine. I enjoy making wine from scratch, even though a lot of it doesn’t turn out all that good, but I can only think of one kit wine that I’ve been disappointed with in nearly 5 years of making wine this way.
Making wine from scratch is a bit more labor intensive, but even cheaper than making kit wines. If anyone is interested, here’s a link to a home winemaking web site that expounds on what you’ve read here. http://winemaking.jackkeller.net/
On this site you will find dozens of recipes for fruit, vegetable, herb and flower wines. One of my favorites, and one of the cheapest wines I’ve ever made w/store bought ingredients is Welches frozen grape juice wine. I’m not a huge fan of Concord grape wine, but niagra (white) grapes make a nice, mildly fruity wine that keeps well for 3-4 years. When it’s on sale, you can make a gallon of pretty good wine for well under 4 bucks LOL.
One of the biggest deterrents in home wine making is the time it takes for your wine to age. It’s hard to not want to taste what you’ve made every few months to see how it’s coming along. The only thing I’ve found that helps is to keep making wine and lots of it LOL! If this, “drink it as soon as you bottle it” style of wine is to your liking you’ll get a lot quicker return on your investment. But either way, if your carboy is always full, eventually you’ll have plenty of wine to enjoy w/enough left over to age for an appropriate amount of time.

 !
! Another thing that I hope I imparted along the way is how inexpensive it is to make your own wine. These kit wines are a nice fool proff way to make some quality wines at a fraction of the cost of commercial wines. But there are much cheaper ways to make wine at home. Especially if you grow or pick your own ingreedients. The kits also alow you to make wine more frequently on a smaller scale for those of us that don't have the room or equipment to devote to large scale wine making. I dream of being able to make wine like Tolpan some day though.

 And glad to help. Be sure to put some wine aside to age. They only get better and better. Maybe someday, a few of us can get together to trade wine. Among other things LOL.
 Looking forward to it Bro.

