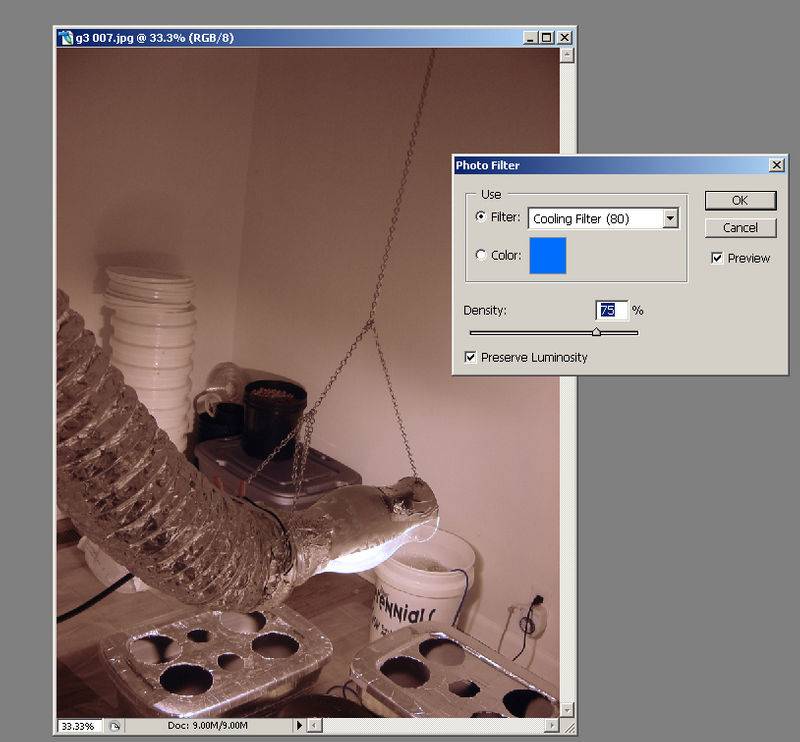
At one point in time or another, almost every indoor grower posting up pics have had to say 'They don't really look like that, it's just the HPS' or 'I'll get pics when the lights are off'. What else can you do? The HPS lights our girls love are a photographers worst nightmare, turning our beautiful babies into something that looks like it was grown in a nuclear reactor. Fear not, because removing that glow can be as easy as One, Two, Three!
Now, first of all, you'll need Adobe Photoshop. It's the industry standard, for good reason, and that's what I'll be using here. If you don't have it, get it, I consider it a must for anyone that is serious about digital imaging. If you don't have it and can't afford the $600 price tag, there are other options :wink: PM me if you don't know them
First, we'll open our picture in Photoshop (I'm using version CS2, but it's the same in older versions). File>Open> Browse to your picture>Highlight it>Open
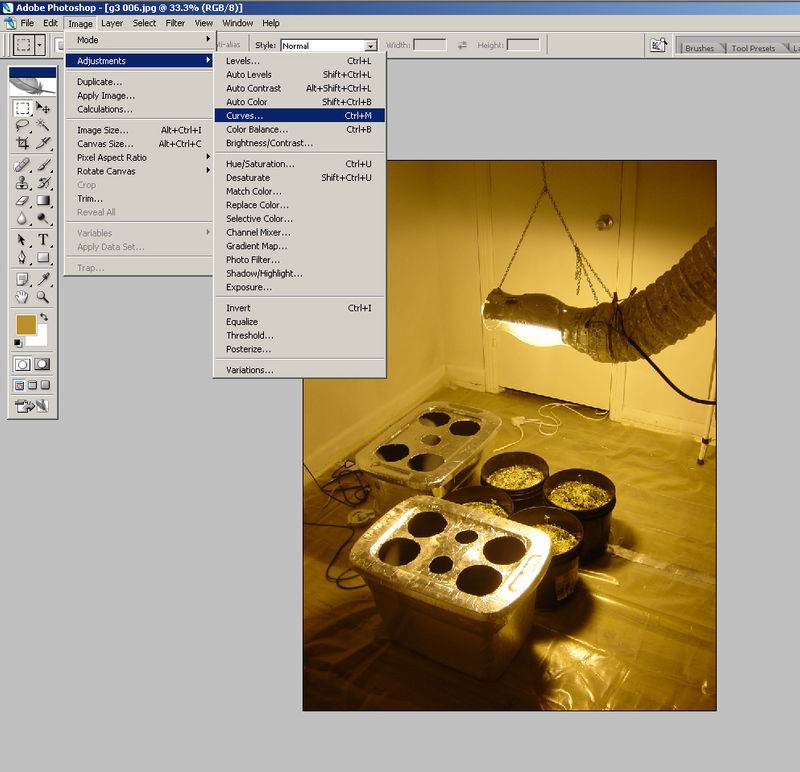
Now go up to the Image menu at the top of the page. Slide down to Adjustments, then to Curves.
The Curves window will open, and look all intimidating with it's graphs and fancy options. Ignore it, all you're interested in is the three little eyedroppers in the lower right hand corner. The one at the far right, when moused over, will tell you it's for setting the White point.
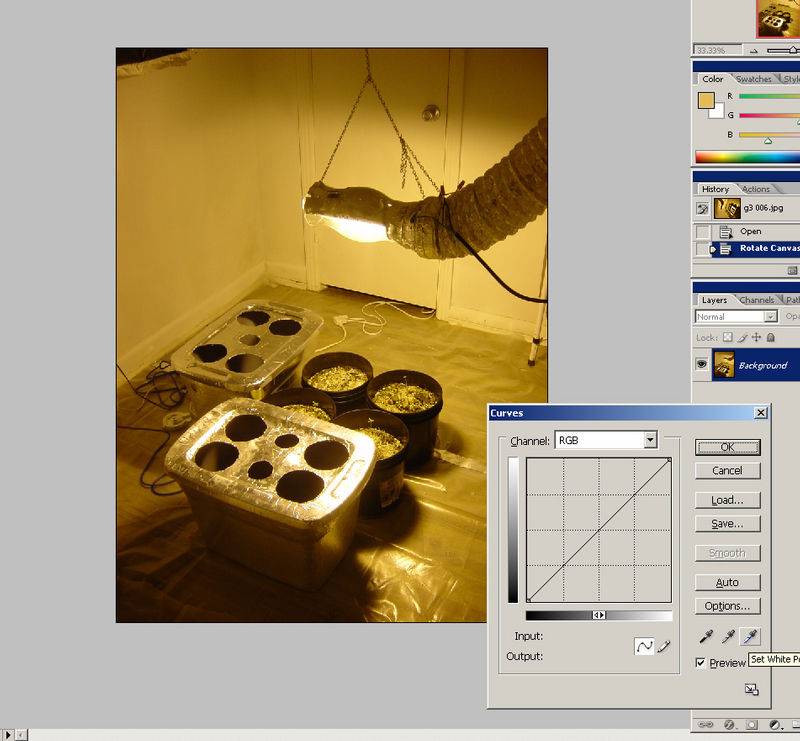
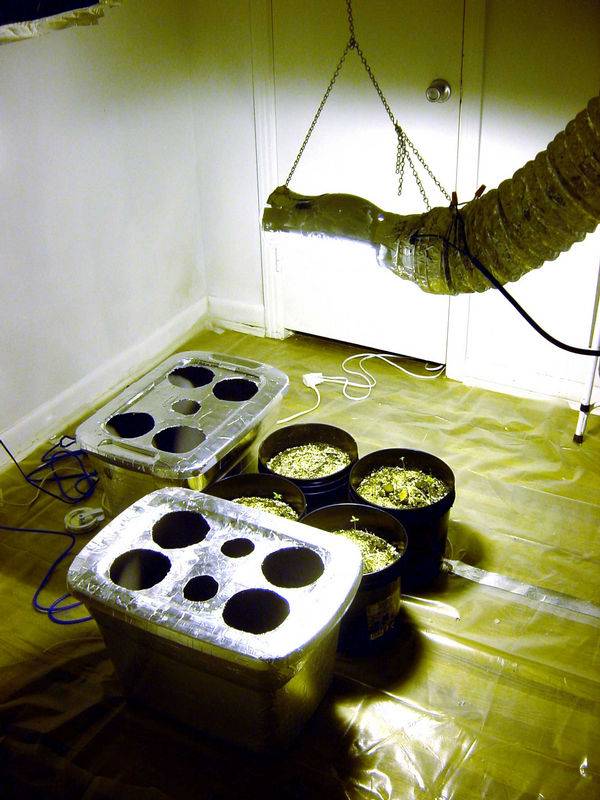
Click on that, and move your mouse over your picture. you'll notice it has changed to the eyedropper. Move the tip of the eyedropper over something white in your picture. In this case, I chose the extension cord, because it should look white, and it's not too close to the light, or too far away. Click your point, and watch the dreaded 'HPS Orange' disappear!
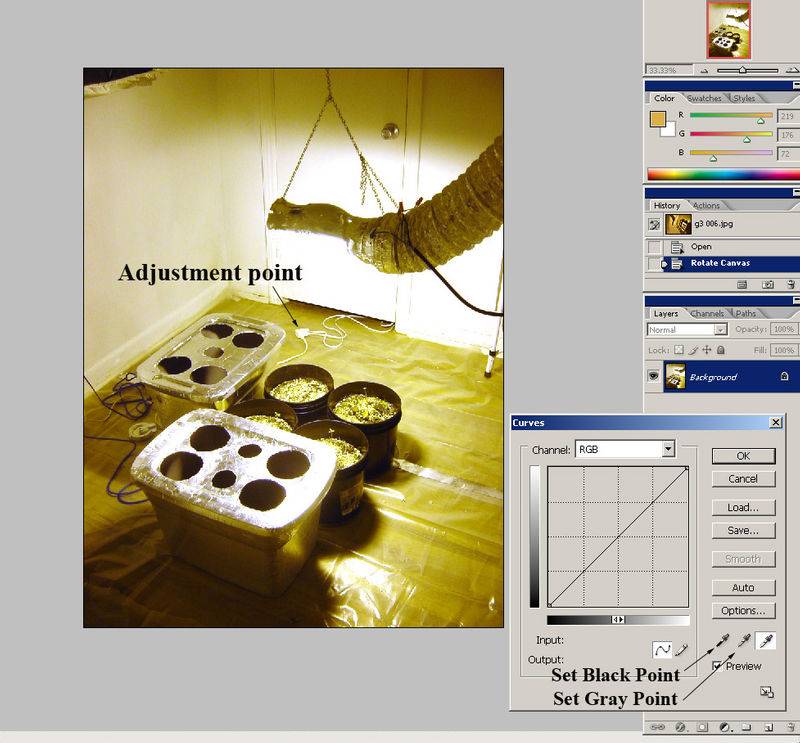
Now, you can stop. Just click 'Ok' and save your picture! however, if you want to get a truer picture, go ahead and set your Black Point and Gray Point as well. For reference, I used the Black buckets and Gray INTERIOR of the tubblers for this pic.
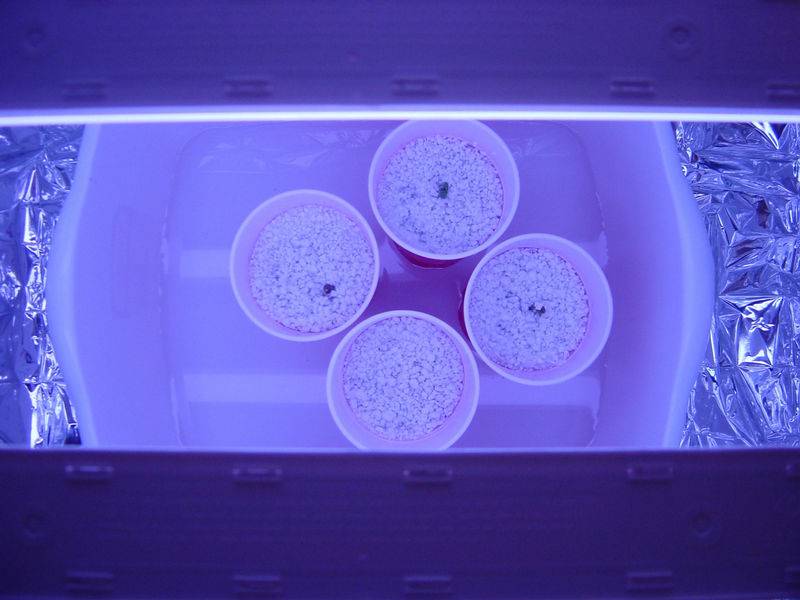
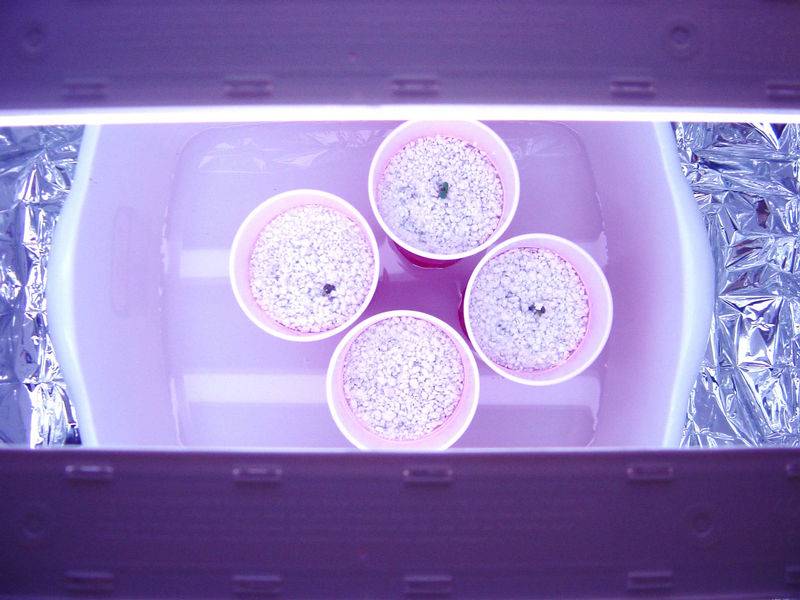
It can be used for any situation where your color is off, for whatever reason. Here's an example of removing the blue/purple tint cast by fluroescent grow bulbs.
Happy Growing, and enjoy being able to show off your girls without pulling them out of the room, or waiting for lights out! Any questions, just post 'em up.

Now, first of all, you'll need Adobe Photoshop. It's the industry standard, for good reason, and that's what I'll be using here. If you don't have it, get it, I consider it a must for anyone that is serious about digital imaging. If you don't have it and can't afford the $600 price tag, there are other options :wink: PM me if you don't know them

First, we'll open our picture in Photoshop (I'm using version CS2, but it's the same in older versions). File>Open> Browse to your picture>Highlight it>Open
Now go up to the Image menu at the top of the page. Slide down to Adjustments, then to Curves.

The Curves window will open, and look all intimidating with it's graphs and fancy options. Ignore it, all you're interested in is the three little eyedroppers in the lower right hand corner. The one at the far right, when moused over, will tell you it's for setting the White point.

Click on that, and move your mouse over your picture. you'll notice it has changed to the eyedropper. Move the tip of the eyedropper over something white in your picture. In this case, I chose the extension cord, because it should look white, and it's not too close to the light, or too far away. Click your point, and watch the dreaded 'HPS Orange' disappear!

Now, you can stop. Just click 'Ok' and save your picture! however, if you want to get a truer picture, go ahead and set your Black Point and Gray Point as well. For reference, I used the Black buckets and Gray INTERIOR of the tubblers for this pic.

It can be used for any situation where your color is off, for whatever reason. Here's an example of removing the blue/purple tint cast by fluroescent grow bulbs.


Happy Growing, and enjoy being able to show off your girls without pulling them out of the room, or waiting for lights out! Any questions, just post 'em up.


 )
) 


