Hi everyone. Several here have expressed an interest in seeing the steps taken in making wine from a kit. This will be a tutorial more than a pictorial though. The main reason being that most of the techniques learned here can be used to make wines from scratch from grapes, fruit, or grape &/or fruit juices, as well as wine made from a kit. If anyone has any questions along the way, please don’t hesitate to ask. It takes 4-7 weeks or so to make wine from a kit, so there will be plenty of time.
For starters, you may be asking, “what is a wine kit”? Well, you can make wine from almost anything eatable. Smash it up to release it’s natural juices and sugars, add some water, chemicals, more sugar (except when making wine from grapes) and yeast. Let it ferment. Siphon the wine off the sediments after a week, then every month or so till its clear. Then bottle it, age it, and call it wine. Though, I’ve never found anything called broccoli wine, and I LOVE broccoli LOL!
Most places that sell beer and wine making equipment also retail what are called “kit wines”. These are boxes, cans or pails of concentrated, pasteurized grape &/or fruit juice. Most come w/yeast and any other chemicals needed to make 5-6 gallons of wine. Some come w/additional flavor packs, or oak chips. All come w/easy to follow instructions, and in as little as a month, or as long as 3 years (depending on the style of wine you’re making) you have a wine that’s comparable to any commercial wine of the same style. (ie. Merlot, blush, zinfandel, peach, blackberry… and the list goes WAY on and on.)
I think it’s important to follow the instructions when making any kit wine for the first time so you know what you’re working with. For the most part, a lot of time and energy goes into designing them, and they come out pretty good as is. Several have even won international awards! If I’m trying a kit for the first time, and I really like it, I buy several more as soon as possible and then play around with it if I want. By that I mean, adding additional sugar or fruit to get a more potent wine, or to incorporate other flavors. I don’t do this very often though, and will yak more about it later if anyone is interested. If you find something you want to make again, you should get more ASAP because the kits change a bit from year to year just like wine from the same vines tastes a bit different every year.
Here is the kit wine I’ll be making for this pictorial.
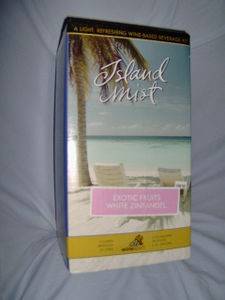
It’s called “Exotic Fruit Zinfandel”. It’s from the Island Mist line of wine kits marketed by a company called “WinExpert” $49.95 retail. Kits in the Island Mist label are all designed to be drank pretty much as soon as they’re bottled, and generally don’t need any additional aging. This is not to say that they won’t benefit from additional time in the bottle, but after 3-6 months, the quality of the wine doesn’t seem to improve much. I’ve never been able to keep a bottle of this “drink it as soon as you bottle it” style of kit wine around for more than a year, so I have no idea how long they’d last. Just from experience though, I’d say that if your cleanliness is up to par, they might last as long as 2 ½-3 years before they start to go bad.
From this kit I’ll get 6 gallons or 30 bottles (750ml) of mildly sweet, very fruity, low alcohol (7-8%ABV) wine. Not bad for 50 bucks eh?
Consider this bit of math: I buy my wife commercial wine on special occasions. She loves Beringers White Zinfandel. We can get it for $10/bottle (750ml) on sale. She likes the wine I’m making for this tutorial just as much, and will gladly drink it instead. I bought a total of 3 of these kits, saving us just over $750!
With those kinds of savings, it’s easy to give our wine away freely. We give wine out to friends and family all the time. And trade it for things; like fire wood, plumbing, or other small contract work. Good wine! Wine people come back and ask for more of!!!
Expensive wine kits might run in the $120-200 range for the same amount of wine, but these are very good quality wines; comparable to $30-40/bottle commercial wines. Most are “vintners reserve”, “special edition”, or from other places around the globe. France, Germany, Italy, Chili, Australia... The cost of the kits and your initial investment in equipment will quickly be paid for by what you’re saving by not buying commercial wines. As I go, I will try to include a full equipment list as well as give you helpful hints as to what items do not have to be bought at the wine/beer equipment store.
Another reason we prefer my homemade wines to commercial wines is the ever dreaded wine hangover. I’m sure you’ve all felt it. Those throbbing headaches come from the fact that commercial wines generally contain a high concentration of sulfites. The chemical used as a sanitizer by brewers and vintners. Because the home wine maker works on such a small scale, he can be a lot more careful w/his cleanliness than a large scale commercial operation, and can therefore keep the sulfite content of his wine very low. Since I’ve stopped drinking commercial wines, I have not once had a “wine hangover”! No matter how much wine I’ve drank. Adding sulfites to your wine is necessary when starting off w/raw fruit (w/the exception of some grapes), but these sulfites are added even before the yeast is added in order to kill off any unwanted germs and bacteria, and most of the sulfite added this early in the wine making process evaporates away (like bleach) long before the wine is bottled. For those that are allergic to sulfa products, it is possible to make wine, even fruit wines from scratch w/out adding sulfites at all, but that is beyond the realm of this tutorial. If you have any questions about this, PM me.
So, let’s get started!
Mixing sanitizer:
Every piece of equipment that touches your wine needs to be sanitized. Most brewers and vintners use a chemical called potassium meta-bi-sulfite.
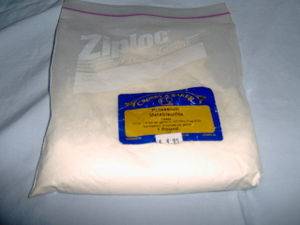
Also known as K+ Meta, Pot-Meta, or K Pot. It’s cheap and very effective. You get it at the wine/beer equipment store, and it comes as a powder. It’s like $5 for a pound or so, and lasts a long time. They also sell something called Camden tablets which are the same thing, just in tablet form. Crush up 15 tablets and add that to your water. The powder is just easier to work with.
Sulfite = SULFA! If you are allergic to sulfa, and are still interested in making wine at home, you will need to find other ways to sanitize your equipment.
Rinse out a plastic milk jug. Fill it about ¾ full of room temp tap water. Add 3 table spoons of Pot-Meta
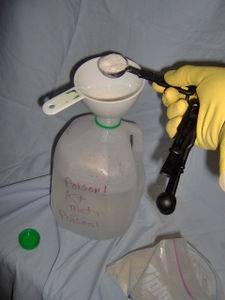


Put the lid back on and shake the crap out of it till nearly all if it’s dissolved. Then top off the jug and give it a quick shake to mix in the H2O you just added. Don’t worry if there’s a tiny bit in the bottom of the jug that didn’t dissolve. It will do so on it’s own.
WARNING: This stuff is poison! Please label and store your jug appropriately!!! Even the fumes will make you hack up a lung, and you’ll learn to breathe shallowly when working w/it. It’s reusable as long as it makes you cough when you take a small whiff of it, so you’ll need a funnel to pour it back into your storage jug. It’s also handy to have a spray bottle of it around with a fine mist setting. Any empty, well rinsed bottle of 409 or Windex… will do nicely. Once you cleanse an item, either pour some pot meta in it and shake it up good, or spray it down really well. Let is sit for few minutes, then rinse it under cold water.
“Cleansers” can be bought at the wine and beer equipment shop too. I’ve never used them. I do not use commercial, liquid dish soaps either though. They leave behind too much residue that can affect the taste of your wine. I just use “Oxi-Clean”. Wash everything in scalding hot water, rinse VERY well, let it cool down, sanitize, and rinse again w/cool water.
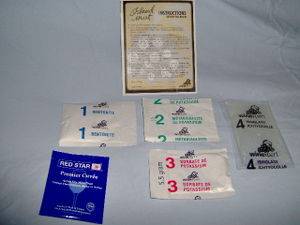
As you can see, my kit comes w/a large bag of concentrated juice, a secondary flavor pack,
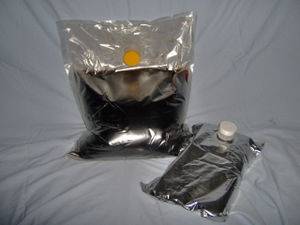
some chemicals (labeled 1,2,3,4 in the order they’re added to the wine), yeast and instructions.
Step 1: Primary Fermentation Day 1:
So go wash, sanitize and rinse the following items: your primary fermentation bucket, its lid, a long handled spoon.
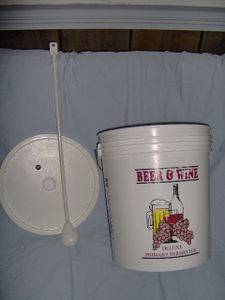
Your bucket should be made of food grade plastic, and be at least a gallon larger than the volume of wine you’re making. The lid need not be air tight, but should snap on tight enough to keep out bugs and dust. You can ask around at delis, bakeries, pizza joints…for a bucket large enough. A lot of times, if you tell them what you want it for, they’ll save one for you. What ever you use to stir w/should have a pretty long handle. Plastic is best. Use your imagination, but a long handled spoon is only like $7. Also wash and sanitize an air lock (bubbler) if needed, and a blender.
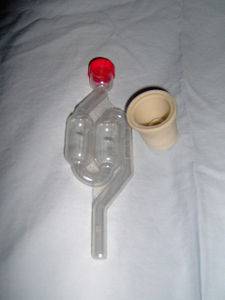
That’s right, a blender, or you can use a mixing bowl and a cake mixer or wire whisk if you don’t have a blender. Use the spray bottle of Pot-Meta to sanitize your blender/bowl, fermentation bucket and long handled spoon. You can also wash and sanitize your hydrometer if you have one. (See “side note” below) I don’t use mine when making kit wines. The instructions give you a good idea of what the alcohol content of your wine will be, and it’s easy enough to tell when fermentation is complete. Hydrometers are fragile, and I’m a klutz, so I use the “calendar method” of fermentation which I’ll get back to in a bit.
Once everything is sanitized and rinsed, put about 1.5 quarts of scalding hot tap water into your blender and crank it up to high. SLOWLY sprinkle in packet #1 labeled Bentonite.
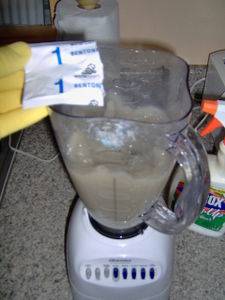
You’ll end up w/ a gross looking gray slurry. Blend until there are no lumps, and then pour this into your primary fermentation bucket.
Next, add the concentrated juice. (It’s best not to do this over a carpeted floor because you will have splattering.)
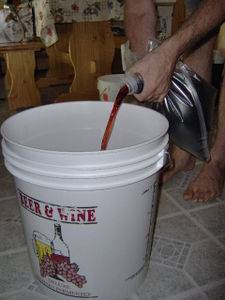
Rinse out the bag it came in w/room temp tap water and dump that in the bucket too, followed by enough room temp water to make 5-6 gallons depending on the size of your kit.
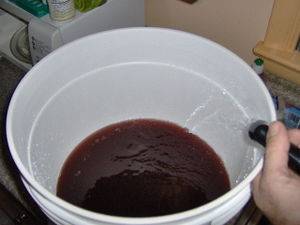
If you are not on a municipal water supply and don’t trust the quality of your well water, you can either use store bought spring water, or boil your water for 20 minutes or so. Do not use distilled water. Yeast needs trace elements and minerals to reproduce and make alcohol. Spend a minute or so stirring it really well, pulling up from the bottom of the bucket w/your spoon.
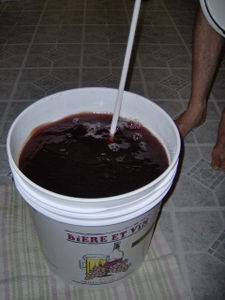
Put the lid on, and let it sit to come to room temp. You can get fancy and check the temps, but this isn’t necessary. As long as your room temps are between 65-80F, you’ll be fine. This is a good time to take an SG reading if you’re so inclined. (again, see below)
I usually give the wine 6-8 hours to settle to room temp before I add the yeast. Just tare open the packet and sprinkle it on top of the juice/H2O mixture (called “must”).
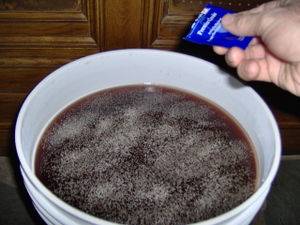
No need to stir it in. It’s actually better if you don’t.
Place your primary fermentation bucket in a warm quiet corner and forget about it for the next 5 days or so. After a day or so, the area will smell mildly of yeast, so take that into consideration. I don’t mean that you need to “hide” your wine. As long as you’re over the age of 21 it’s perfectly legal to brew wine/beer in your home. Depending on what state you live in, you can make up to 200 or more gallons of wine/adult in your household each year! It’s just that some people don’t appreciate the aroma of fermenting fruit/hops. However!!! It is illegal to sell your wine w/out a license.
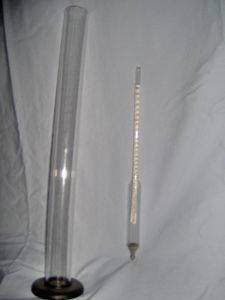
Side Note: A hydrometer, for those that don’t know is an instrument used to figure out what the alcohol content of your wine will be. It measures the SG (Specific Gravity) of your must, meaning, it measures the weight of your must compared to the weight of distilled water @ a temp of 60F. Here’s a pic of one w/a clear plastic cylinder that it comes with.
There are graduated lines up the skinny end.
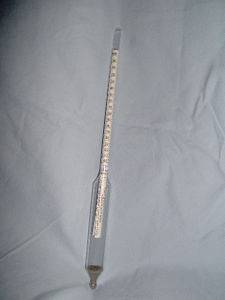
Basically, you sanitize everything, put a sample of your must in the cylinder (using a clean/sanitized turkey baster or similar utensil) before you add your yeast. Drop in the hydrometer, and take a reading where it floats. When fermentation is complete, you take another reading and do some very basic math to figure out the alcohol content of your wine.
See you in a week!
For starters, you may be asking, “what is a wine kit”? Well, you can make wine from almost anything eatable. Smash it up to release it’s natural juices and sugars, add some water, chemicals, more sugar (except when making wine from grapes) and yeast. Let it ferment. Siphon the wine off the sediments after a week, then every month or so till its clear. Then bottle it, age it, and call it wine. Though, I’ve never found anything called broccoli wine, and I LOVE broccoli LOL!
Most places that sell beer and wine making equipment also retail what are called “kit wines”. These are boxes, cans or pails of concentrated, pasteurized grape &/or fruit juice. Most come w/yeast and any other chemicals needed to make 5-6 gallons of wine. Some come w/additional flavor packs, or oak chips. All come w/easy to follow instructions, and in as little as a month, or as long as 3 years (depending on the style of wine you’re making) you have a wine that’s comparable to any commercial wine of the same style. (ie. Merlot, blush, zinfandel, peach, blackberry… and the list goes WAY on and on.)
I think it’s important to follow the instructions when making any kit wine for the first time so you know what you’re working with. For the most part, a lot of time and energy goes into designing them, and they come out pretty good as is. Several have even won international awards! If I’m trying a kit for the first time, and I really like it, I buy several more as soon as possible and then play around with it if I want. By that I mean, adding additional sugar or fruit to get a more potent wine, or to incorporate other flavors. I don’t do this very often though, and will yak more about it later if anyone is interested. If you find something you want to make again, you should get more ASAP because the kits change a bit from year to year just like wine from the same vines tastes a bit different every year.
Here is the kit wine I’ll be making for this pictorial.

It’s called “Exotic Fruit Zinfandel”. It’s from the Island Mist line of wine kits marketed by a company called “WinExpert” $49.95 retail. Kits in the Island Mist label are all designed to be drank pretty much as soon as they’re bottled, and generally don’t need any additional aging. This is not to say that they won’t benefit from additional time in the bottle, but after 3-6 months, the quality of the wine doesn’t seem to improve much. I’ve never been able to keep a bottle of this “drink it as soon as you bottle it” style of kit wine around for more than a year, so I have no idea how long they’d last. Just from experience though, I’d say that if your cleanliness is up to par, they might last as long as 2 ½-3 years before they start to go bad.
From this kit I’ll get 6 gallons or 30 bottles (750ml) of mildly sweet, very fruity, low alcohol (7-8%ABV) wine. Not bad for 50 bucks eh?
Consider this bit of math: I buy my wife commercial wine on special occasions. She loves Beringers White Zinfandel. We can get it for $10/bottle (750ml) on sale. She likes the wine I’m making for this tutorial just as much, and will gladly drink it instead. I bought a total of 3 of these kits, saving us just over $750!
With those kinds of savings, it’s easy to give our wine away freely. We give wine out to friends and family all the time. And trade it for things; like fire wood, plumbing, or other small contract work. Good wine! Wine people come back and ask for more of!!!
Expensive wine kits might run in the $120-200 range for the same amount of wine, but these are very good quality wines; comparable to $30-40/bottle commercial wines. Most are “vintners reserve”, “special edition”, or from other places around the globe. France, Germany, Italy, Chili, Australia... The cost of the kits and your initial investment in equipment will quickly be paid for by what you’re saving by not buying commercial wines. As I go, I will try to include a full equipment list as well as give you helpful hints as to what items do not have to be bought at the wine/beer equipment store.
Another reason we prefer my homemade wines to commercial wines is the ever dreaded wine hangover.
 I’m sure you’ve all felt it. Those throbbing headaches come from the fact that commercial wines generally contain a high concentration of sulfites. The chemical used as a sanitizer by brewers and vintners. Because the home wine maker works on such a small scale, he can be a lot more careful w/his cleanliness than a large scale commercial operation, and can therefore keep the sulfite content of his wine very low. Since I’ve stopped drinking commercial wines, I have not once had a “wine hangover”! No matter how much wine I’ve drank. Adding sulfites to your wine is necessary when starting off w/raw fruit (w/the exception of some grapes), but these sulfites are added even before the yeast is added in order to kill off any unwanted germs and bacteria, and most of the sulfite added this early in the wine making process evaporates away (like bleach) long before the wine is bottled. For those that are allergic to sulfa products, it is possible to make wine, even fruit wines from scratch w/out adding sulfites at all, but that is beyond the realm of this tutorial. If you have any questions about this, PM me.
 So, let’s get started!
Mixing sanitizer:
Every piece of equipment that touches your wine needs to be sanitized. Most brewers and vintners use a chemical called potassium meta-bi-sulfite.

Also known as K+ Meta, Pot-Meta, or K Pot. It’s cheap and very effective. You get it at the wine/beer equipment store, and it comes as a powder. It’s like $5 for a pound or so, and lasts a long time. They also sell something called Camden tablets which are the same thing, just in tablet form. Crush up 15 tablets and add that to your water. The powder is just easier to work with.
Sulfite = SULFA! If you are allergic to sulfa, and are still interested in making wine at home, you will need to find other ways to sanitize your equipment.
Rinse out a plastic milk jug. Fill it about ¾ full of room temp tap water. Add 3 table spoons of Pot-Meta


Put the lid back on and shake the crap out of it till nearly all if it’s dissolved. Then top off the jug and give it a quick shake to mix in the H2O you just added. Don’t worry if there’s a tiny bit in the bottom of the jug that didn’t dissolve. It will do so on it’s own.
WARNING: This stuff is poison! Please label and store your jug appropriately!!! Even the fumes will make you hack up a lung, and you’ll learn to breathe shallowly when working w/it. It’s reusable as long as it makes you cough when you take a small whiff of it, so you’ll need a funnel to pour it back into your storage jug. It’s also handy to have a spray bottle of it around with a fine mist setting. Any empty, well rinsed bottle of 409 or Windex… will do nicely. Once you cleanse an item, either pour some pot meta in it and shake it up good, or spray it down really well. Let is sit for few minutes, then rinse it under cold water.
“Cleansers” can be bought at the wine and beer equipment shop too. I’ve never used them. I do not use commercial, liquid dish soaps either though. They leave behind too much residue that can affect the taste of your wine. I just use “Oxi-Clean”. Wash everything in scalding hot water, rinse VERY well, let it cool down, sanitize, and rinse again w/cool water.
As you can see, my kit comes w/a large bag of concentrated juice, a secondary flavor pack,

some chemicals (labeled 1,2,3,4 in the order they’re added to the wine), yeast and instructions.

Step 1: Primary Fermentation Day 1:
So go wash, sanitize and rinse the following items: your primary fermentation bucket, its lid, a long handled spoon.

Your bucket should be made of food grade plastic, and be at least a gallon larger than the volume of wine you’re making. The lid need not be air tight, but should snap on tight enough to keep out bugs and dust. You can ask around at delis, bakeries, pizza joints…for a bucket large enough. A lot of times, if you tell them what you want it for, they’ll save one for you. What ever you use to stir w/should have a pretty long handle. Plastic is best. Use your imagination, but a long handled spoon is only like $7. Also wash and sanitize an air lock (bubbler) if needed, and a blender.

That’s right, a blender, or you can use a mixing bowl and a cake mixer or wire whisk if you don’t have a blender. Use the spray bottle of Pot-Meta to sanitize your blender/bowl, fermentation bucket and long handled spoon. You can also wash and sanitize your hydrometer if you have one. (See “side note” below) I don’t use mine when making kit wines. The instructions give you a good idea of what the alcohol content of your wine will be, and it’s easy enough to tell when fermentation is complete. Hydrometers are fragile, and I’m a klutz, so I use the “calendar method” of fermentation which I’ll get back to in a bit.
Once everything is sanitized and rinsed, put about 1.5 quarts of scalding hot tap water into your blender and crank it up to high. SLOWLY sprinkle in packet #1 labeled Bentonite.

You’ll end up w/ a gross looking gray slurry. Blend until there are no lumps, and then pour this into your primary fermentation bucket.
Next, add the concentrated juice. (It’s best not to do this over a carpeted floor because you will have splattering.)

Rinse out the bag it came in w/room temp tap water and dump that in the bucket too, followed by enough room temp water to make 5-6 gallons depending on the size of your kit.

If you are not on a municipal water supply and don’t trust the quality of your well water, you can either use store bought spring water, or boil your water for 20 minutes or so. Do not use distilled water. Yeast needs trace elements and minerals to reproduce and make alcohol. Spend a minute or so stirring it really well, pulling up from the bottom of the bucket w/your spoon.

Put the lid on, and let it sit to come to room temp. You can get fancy and check the temps, but this isn’t necessary. As long as your room temps are between 65-80F, you’ll be fine. This is a good time to take an SG reading if you’re so inclined. (again, see below)
I usually give the wine 6-8 hours to settle to room temp before I add the yeast. Just tare open the packet and sprinkle it on top of the juice/H2O mixture (called “must”).

No need to stir it in. It’s actually better if you don’t.
Place your primary fermentation bucket in a warm quiet corner and forget about it for the next 5 days or so. After a day or so, the area will smell mildly of yeast, so take that into consideration. I don’t mean that you need to “hide” your wine. As long as you’re over the age of 21 it’s perfectly legal to brew wine/beer in your home. Depending on what state you live in, you can make up to 200 or more gallons of wine/adult in your household each year! It’s just that some people don’t appreciate the aroma of fermenting fruit/hops. However!!! It is illegal to sell your wine w/out a license.
Side Note: A hydrometer, for those that don’t know is an instrument used to figure out what the alcohol content of your wine will be. It measures the SG (Specific Gravity) of your must, meaning, it measures the weight of your must compared to the weight of distilled water @ a temp of 60F. Here’s a pic of one w/a clear plastic cylinder that it comes with.

There are graduated lines up the skinny end.

Basically, you sanitize everything, put a sample of your must in the cylinder (using a clean/sanitized turkey baster or similar utensil) before you add your yeast. Drop in the hydrometer, and take a reading where it floats. When fermentation is complete, you take another reading and do some very basic math to figure out the alcohol content of your wine.
See you in a week!
Last edited:


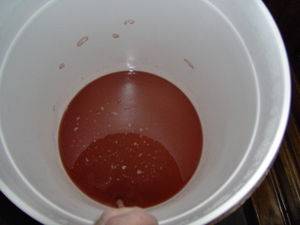
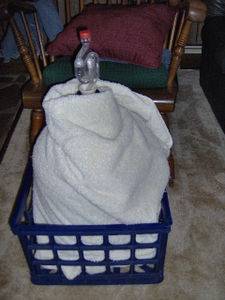

 thanks again for providing the info
 Fuckers, but you're still only talkin' $2/bottle.

 SUCKER!!! LOL