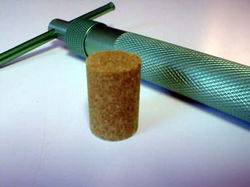
Those that know me, realize that I seldom start threads. I’m not one for throwing stuff out there just for a reaction. If you have something of value to contribute to a thread you should post it, but if you don’t, just browse, read, and learn. As such, this is only the third thread that I’ve started on IC. The other two, my personal-grow thread (see link in signature), and the 150wHPS Club, have both become active “Stickys”. It’s my hope that this new thread will offer valuable information as well, and potentially save readers a big chunk of change and a lot of aggravation.
As a medical user, I’ve found that processing my herb into pieces of hash has many advantages. It will store for very long periods of time (years), consistent dosing is easier, there is no degradation of the quality as a result of long-term storage, it burns very evenly, is very easy to transport, and various other factors as well.
The issue is, the equipment available for pressing herb or its resin into hash can be expensive, large and cumbersome, work poorly, or is so small that it is difficult to operate for someone with reduced hand-strength. There are also numerous DIY units that can be made from plumbing items, but the quality just isn’t there and not everyone is up to the challenge. Up to now, the best compromise has been a press known as the Piecemaker®.
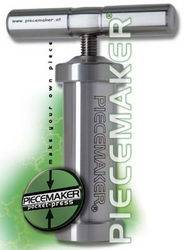 THEIRS-$300 vs. MINE-$20
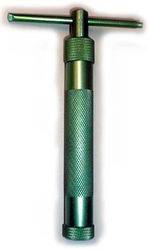
Theirs is a true quality item, however, you must be willing to hand over almost $300 U.S. and share your personal info on-line to order one.
Alternatively, here is a simple solution that easily makes perfect hash, is readily available, easy to operate, requires no assembly, looks very professional, and can be had on sale for under 20 bucks U.S. The item I am suggesting is a Makin’s® Professional Ultimate Clay Extruder. That’s right, available at most larger craft stores, and designed to work with fimo-clay, this item makes the perfect personal hash press. In fact, it looks almost identical to the $300 Piecemaker® just a bit smaller and less than 1/10th the price!
So, instead of me writing more about the unit itself, why don’t I just show you how it can make perfect Black Tar Hash, or any other type that you may fancy………
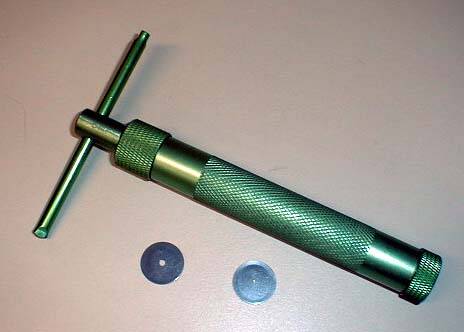
My unit came packaged like this with 20 different extruding disks.
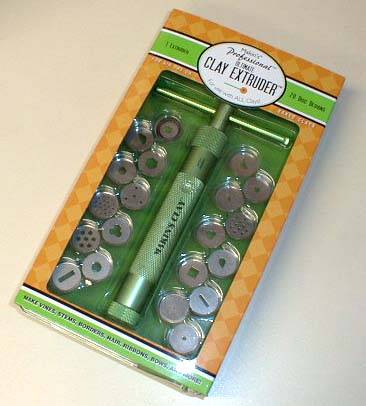
Unless you are planning on making beads and decorations, dump everything except the Press and the two disks with the smallest round holes.
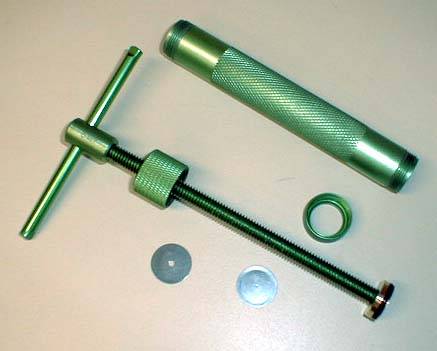
As you can see from this disassembled shot, this is a quality item that will be easy to clean and even has an “O-Ring” around the brass ram.
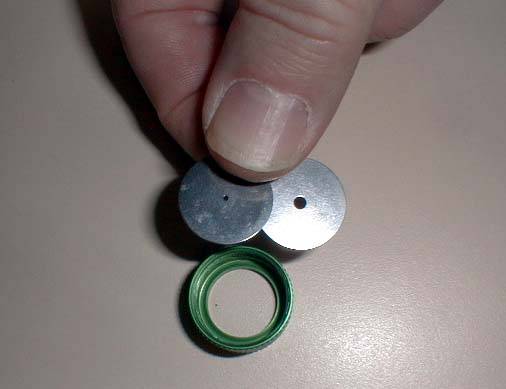
The actual process goes like this. Place both disks in the end-cap. The one with the smaller hole should be on top so to be closest to the hash being made.
If you are going to use un-sifted plant matter, make sure it is fully covered with glands, and ground as fine as possible.
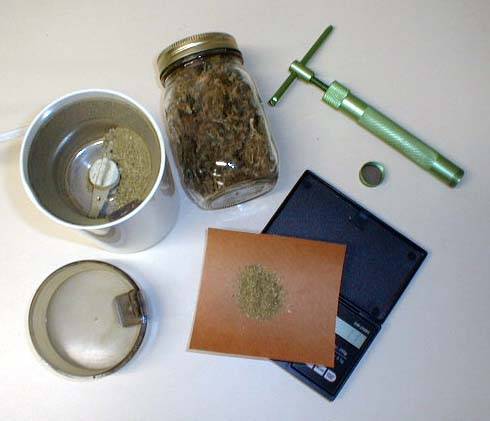
For this demo, I’ll use my favorite measure, which is 1.1 grams of the finest material I have.
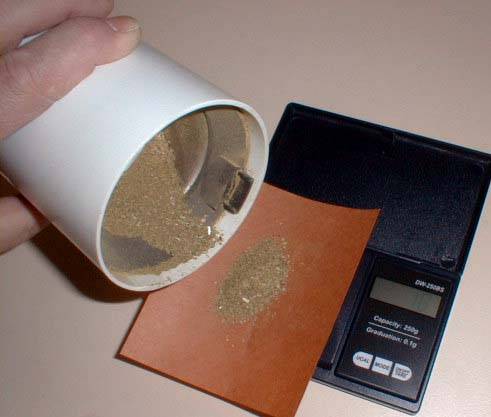
Now unscrew the plunger and fill the tube with the desired amount of product you want to use.
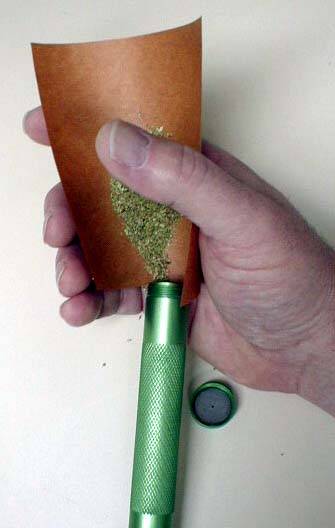
Also, another step I take which is totally not necessary is to insert 2 US dimes. One in the cap and one against the plunger.
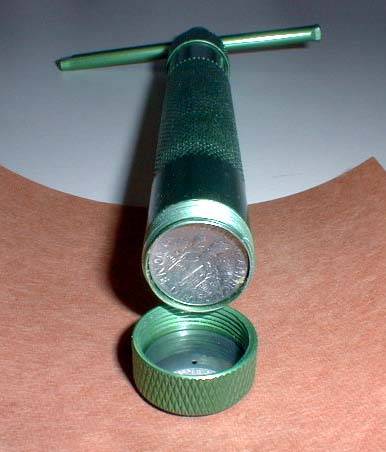
This will make a perfect impression on the surface of my finished hash, much like a trademark.
Now screw on the end-cap and turn the plunger down until its nice and snug. DON”T OVER-TIGHTEN IT!
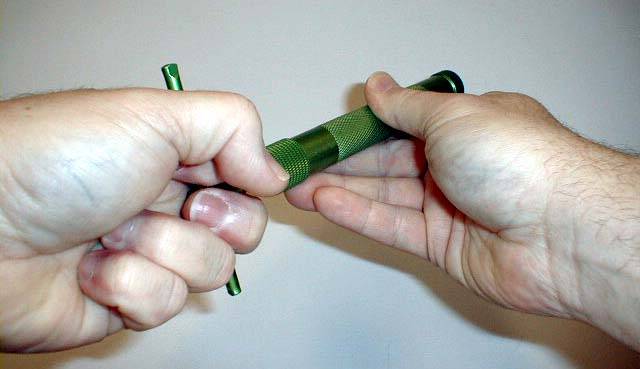
Now we'll continue to tightenit in steps. It will work much better and remember that this is an aluminium unit we don’t want to destroy it. Once it nice and snug, wait 30 seconds and give it another 1/8th turn. Now repeat the "30 second wait and 1/8th turn" process about six times.
This final step will put a shinny sealed surface on your hash that will protect it from falling apart or loss of potency for years to come. Using a hair-dryer, small space-heater, or other safe heat source, warm up the end of your press.
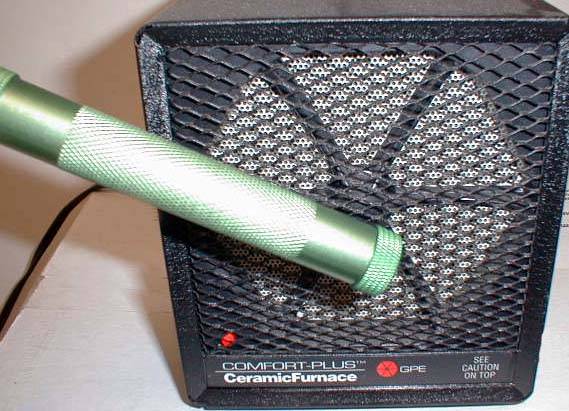
Slowly keep rotating the unit as a whole. This will assure that the heat is evenly distributed. It should get very, very warm, but not so hot that you can’t touch it. While keeping it warmed, repeat the "1/8th turn and 30 second wait" process about five more times.
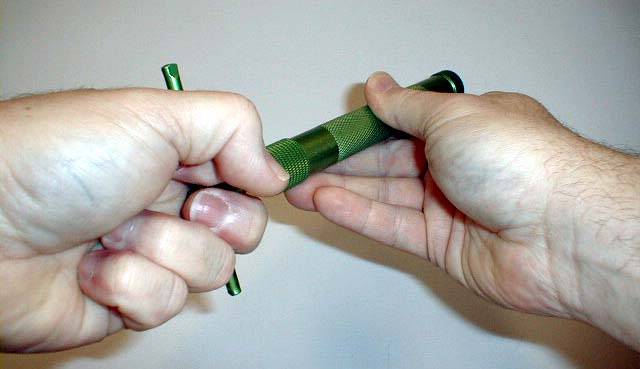
The hotter you get it, the darker and denser your end product will be.
To remove your hash, allow the unit to cool to room temperature. Then back off the ram a turn or two. Unscrew the end-cap, and turn the ram all the way down pushing the hash out.
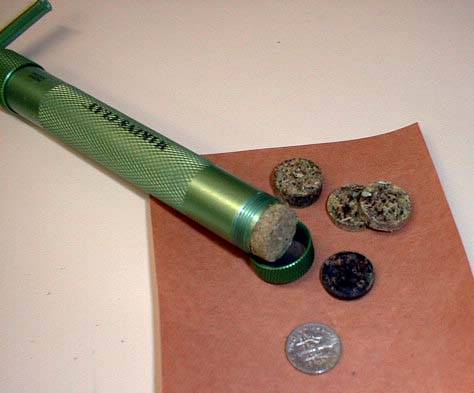
After each days use, fully disassemble & clean the unit with ISO alcohol and allow to air-dry.
Here’s a sample piece that I made with the impression of the dime.
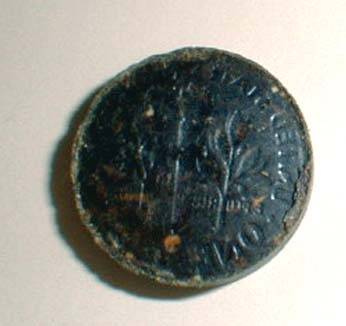
Keep this in mind, the better the quality of your starting material, and the finer its ground, the less heat and pressure it will require to hold together. If you choose to use pure sifted glands, virtually no heat will be required. And, if your material is not as good as you wish it was, adding one drop of ISO or Olive Oil per gram of material inside the press will help it hold together better.
That’s about it. Good luck & get pressing. If you have any questions or comments I’d love to hear them so post away or send me a PM.
Grow Smart & Grow Safe
Pipedream
As a medical user, I’ve found that processing my herb into pieces of hash has many advantages. It will store for very long periods of time (years), consistent dosing is easier, there is no degradation of the quality as a result of long-term storage, it burns very evenly, is very easy to transport, and various other factors as well.
The issue is, the equipment available for pressing herb or its resin into hash can be expensive, large and cumbersome, work poorly, or is so small that it is difficult to operate for someone with reduced hand-strength. There are also numerous DIY units that can be made from plumbing items, but the quality just isn’t there and not everyone is up to the challenge. Up to now, the best compromise has been a press known as the Piecemaker®.
 THEIRS-$300 vs. MINE-$20

Theirs is a true quality item, however, you must be willing to hand over almost $300 U.S. and share your personal info on-line to order one.
Alternatively, here is a simple solution that easily makes perfect hash, is readily available, easy to operate, requires no assembly, looks very professional, and can be had on sale for under 20 bucks U.S. The item I am suggesting is a Makin’s® Professional Ultimate Clay Extruder. That’s right, available at most larger craft stores, and designed to work with fimo-clay, this item makes the perfect personal hash press. In fact, it looks almost identical to the $300 Piecemaker® just a bit smaller and less than 1/10th the price!
So, instead of me writing more about the unit itself, why don’t I just show you how it can make perfect Black Tar Hash, or any other type that you may fancy………
My unit came packaged like this with 20 different extruding disks.

Unless you are planning on making beads and decorations, dump everything except the Press and the two disks with the smallest round holes.

As you can see from this disassembled shot, this is a quality item that will be easy to clean and even has an “O-Ring” around the brass ram.

The actual process goes like this. Place both disks in the end-cap. The one with the smaller hole should be on top so to be closest to the hash being made.

If you are going to use un-sifted plant matter, make sure it is fully covered with glands, and ground as fine as possible.

For this demo, I’ll use my favorite measure, which is 1.1 grams of the finest material I have.

Now unscrew the plunger and fill the tube with the desired amount of product you want to use.

Also, another step I take which is totally not necessary is to insert 2 US dimes. One in the cap and one against the plunger.

This will make a perfect impression on the surface of my finished hash, much like a trademark.
Now screw on the end-cap and turn the plunger down until its nice and snug. DON”T OVER-TIGHTEN IT!

Now we'll continue to tightenit in steps. It will work much better and remember that this is an aluminium unit we don’t want to destroy it. Once it nice and snug, wait 30 seconds and give it another 1/8th turn. Now repeat the "30 second wait and 1/8th turn" process about six times.
This final step will put a shinny sealed surface on your hash that will protect it from falling apart or loss of potency for years to come. Using a hair-dryer, small space-heater, or other safe heat source, warm up the end of your press.

Slowly keep rotating the unit as a whole. This will assure that the heat is evenly distributed. It should get very, very warm, but not so hot that you can’t touch it. While keeping it warmed, repeat the "1/8th turn and 30 second wait" process about five more times.

The hotter you get it, the darker and denser your end product will be.
To remove your hash, allow the unit to cool to room temperature. Then back off the ram a turn or two. Unscrew the end-cap, and turn the ram all the way down pushing the hash out.

After each days use, fully disassemble & clean the unit with ISO alcohol and allow to air-dry.
Here’s a sample piece that I made with the impression of the dime.

Keep this in mind, the better the quality of your starting material, and the finer its ground, the less heat and pressure it will require to hold together. If you choose to use pure sifted glands, virtually no heat will be required. And, if your material is not as good as you wish it was, adding one drop of ISO or Olive Oil per gram of material inside the press will help it hold together better.
That’s about it. Good luck & get pressing. If you have any questions or comments I’d love to hear them so post away or send me a PM.
Grow Smart & Grow Safe
Pipedream
Last edited:


