Quazi
Member
Hello everyone. Time for another DIY guide to help you along in your travels. Things are a bit more complicated on this one but the payoff is sweet.
This time, I bring you a cool tube and reflector that you can make at home with just a few simple pieces.
I looked at a lot of examples and couldn't find a simple solution to having a cool tube and a reflector. So, I decided to just woke some smeed and walk around my local Dome Hepot. After an hour of walking around and fitting things together, I'm pretty happy with the result and so are my plants so I decided to share it with everyone.


 Quazi's DIY Cool Tube & Reflector


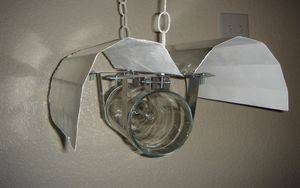
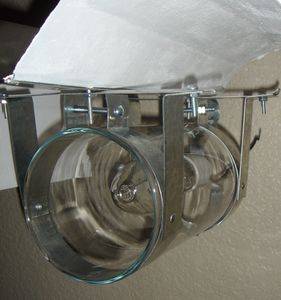
Here's what you'll need to get started:
Pliers
Flathead Screwdriver
Tin snips (or something similar)
Hammer (or something similar :wink: )
1 x Hurricane Glass Tube from Craft Store
-5 inch cylinder
2 x 4-inch duct hangers
2 x longer screws to replace the ones that come with the duct hangers (same width, just longer 'cause you're gonna widen 'em out a bit)
1 x Sheet Galvonized Metal
-Find it near the duct work
1 x Tube of Titanium White Paint from Craft Store
4 x 22 gauge (I think that's the correct gauge) metal strips
-Find them near the lumber connectors
-Get the ones that are thin with just holes going down the middle
1 x package of screws that fit through the holes on the metal strips with nuts
2 x length of chain links
2 x eyelet screws for the chains
2 x hooks for the chains
You'll want to get your reflector measured out and finished first. Remember: measure twice, cut once.
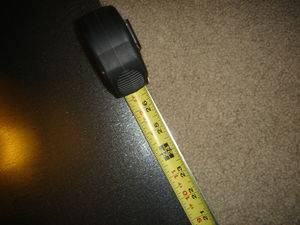
You'll want to be sure to add a couple of inches as you'll be bending the reflector in a few spots. In order to attach the reflector to the cool tube, you'll need to plan for having a 1-inch middle that will have bends immediately going upward. Look at the pictures and you'll see what I'm talking about.
I recommend making a drawing of how you want the folds and then marking it on the metal as I have done here:

Please wear gloves when you are cutting this stuff. You can create some really sharp edges and/or shards of metal. Once you cut out the metal reflector from the sheet, you can bend it using the edge of a table, books, vices and wood, however you want. I would not recommend using your hands as clean bends are best for throwing the light.
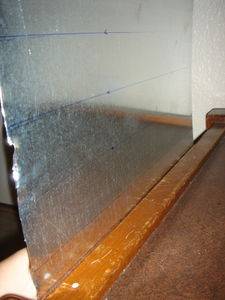
Now, you're going to take one of your strips of metal and place it in the 1 inch area you have put in the middle. Make the short edge flush with the edge of your reflector and make a dot in the 2nd, 3rd and 7th hole.
Now that you know where your holes are going to be, you can punch some holes in your reflector. I used a screw, a roll of duct tape and a hammer:


Now you can go to painting your reflector. Set up a fan in front of it so it dries quickly. You'll probably get 3 coats, maybe 4 out of a single tube. So go ahead, start painting, what are you waiting for? Make sure you do more than one coat. Also, make sure you make your major bends before you paint. Otherwise, it's possible that the paint may crack when you're creasing it.
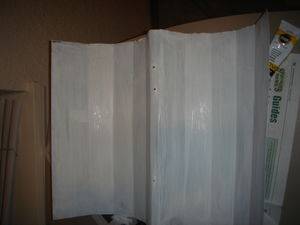
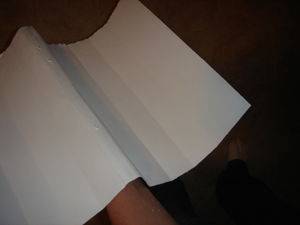
While that's drying, you can start the construction on your cool tube. Take your 4 inch duct hangers and wrap them carefully around the Hurricane tube.
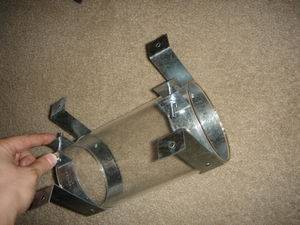
Insert the longer screws you got and tighten it down gently and not too tight. Otherwise, you'll get all finished and then while it's sitting out in your living room waiting to be installed (or after it is installed) you'll here a pop in the middle of the night and you'll wake up the next morning and see this:
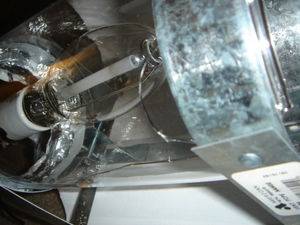
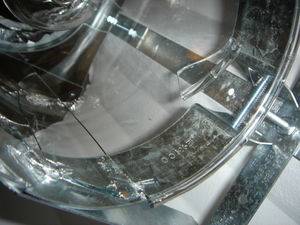
So just don't tighten them down too much.
Set that aside for later.
On to part II...
This time, I bring you a cool tube and reflector that you can make at home with just a few simple pieces.
I looked at a lot of examples and couldn't find a simple solution to having a cool tube and a reflector. So, I decided to just woke some smeed and walk around my local Dome Hepot. After an hour of walking around and fitting things together, I'm pretty happy with the result and so are my plants so I decided to share it with everyone.


 Quazi's DIY Cool Tube & Reflector


Here's what you'll need to get started:
Pliers
Flathead Screwdriver
Tin snips (or something similar)
Hammer (or something similar :wink: )
1 x Hurricane Glass Tube from Craft Store
-5 inch cylinder
2 x 4-inch duct hangers
2 x longer screws to replace the ones that come with the duct hangers (same width, just longer 'cause you're gonna widen 'em out a bit)
1 x Sheet Galvonized Metal
-Find it near the duct work
1 x Tube of Titanium White Paint from Craft Store
4 x 22 gauge (I think that's the correct gauge) metal strips
-Find them near the lumber connectors
-Get the ones that are thin with just holes going down the middle
1 x package of screws that fit through the holes on the metal strips with nuts
2 x length of chain links
2 x eyelet screws for the chains
2 x hooks for the chains
You'll want to get your reflector measured out and finished first. Remember: measure twice, cut once.
You'll want to be sure to add a couple of inches as you'll be bending the reflector in a few spots. In order to attach the reflector to the cool tube, you'll need to plan for having a 1-inch middle that will have bends immediately going upward. Look at the pictures and you'll see what I'm talking about.
I recommend making a drawing of how you want the folds and then marking it on the metal as I have done here:
Please wear gloves when you are cutting this stuff. You can create some really sharp edges and/or shards of metal. Once you cut out the metal reflector from the sheet, you can bend it using the edge of a table, books, vices and wood, however you want. I would not recommend using your hands as clean bends are best for throwing the light.
Now, you're going to take one of your strips of metal and place it in the 1 inch area you have put in the middle. Make the short edge flush with the edge of your reflector and make a dot in the 2nd, 3rd and 7th hole.
Now that you know where your holes are going to be, you can punch some holes in your reflector. I used a screw, a roll of duct tape and a hammer:
Now you can go to painting your reflector. Set up a fan in front of it so it dries quickly. You'll probably get 3 coats, maybe 4 out of a single tube. So go ahead, start painting, what are you waiting for? Make sure you do more than one coat. Also, make sure you make your major bends before you paint. Otherwise, it's possible that the paint may crack when you're creasing it.
While that's drying, you can start the construction on your cool tube. Take your 4 inch duct hangers and wrap them carefully around the Hurricane tube.
Insert the longer screws you got and tighten it down gently and not too tight. Otherwise, you'll get all finished and then while it's sitting out in your living room waiting to be installed (or after it is installed) you'll here a pop in the middle of the night and you'll wake up the next morning and see this:
So just don't tighten them down too much.
Set that aside for later.
On to part II...
Last edited:

