What's new
  • As of today ICMag has his own Discord server. In this Discord server you can chat, talk with eachother, listen to music, share stories and pictures...and much more. Join now and let's grow together! Join ICMag Discord here! More details in this thread here: here.

ng37dBA's cab to room build & grow

negative37dBA

Well-known member
Veteran
Hello all. This is my first post here and to start I would like to give a huge thanks to IC Mag and its members for such a wealth of information. I can honestly say that between this site and 1 nice book on the subject I learned everything I know about this so far. Still alot to go.

So I am limited in the # of pictures I can put up so my thread will not contain as many pictures as I would like. Hopefully I will be able to put up more as I go along. We will take it in stages.

Let me say that when I started all this I did not want pictures around of what I was doing. Now that time has passed and some laws have changed I wish I had taken lots during construction and tucked them away for later. Oh well, I have the finished shots so we will use what I have. I will start with the cabinet I made for getting the little ones started up. Will have to give credit to the DIY sticky for giving me many ideas for this cab.

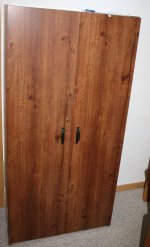
I began with a standard kitchen type floor cabinet. I was able to find a new one with no top for a nice buy. Outside dimentions are
35.5"H x 31.5"W x 22.5"D.
URL]

I used the toe kick area for inlets and electrics with a little hidden door.
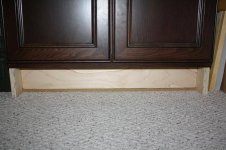
cabinet1.jpg
Basically made the bottom into 2 compartments. #2 for the light proof inlets and #1 in the front for electrics and controls. For the inlets I just used some pieces of wood to make the air go around a couple corners and then into the cab. I purposely left a space near the front for the controls. The inlets are also filtered.
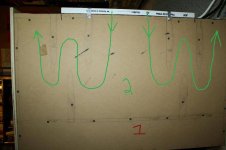
cabinet12.jpg
I mounted the 2 power strips and built a fan control. Then I built a little door on a pivot and small magnet catch to keep it shut and stealthy.
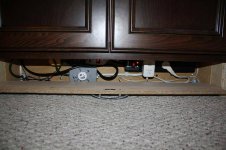
cabinet3.jpg
I picked up a sheet of pressed board with a smooth layer on both sides. I am not sure what it is called but real nice. Ripped that down to form a slightly oversized top. Painted 2 coats inside flat white. 2 coats outside flat dark blue. Attatched 4 eye bolt hangers to top for lighting.

My cabinet has a small trim space at the sides and I am going to free stand it in a room so I added 2 plywood sides to make them flush with the front of the cabinet. Have not stained the sides yet to match.

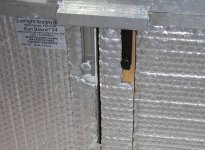
For entry into the cab I used 4 sliding type locks, 2 per door. My top is hinged at the rear so I can lift it up and reach in to undo the locks on 1 side. I have a plan to upgrade this in the future with a electromagnetic lock and remote controlled power supply. Have both just sitting waiting to be installed. Will make it much easier/nicer.
cabinet6.jpg
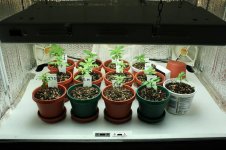
The inside was painted with 2 coats of flat white then applied reflectix all around. Hung a Sun Blaze 2' 4 bulb T-5 HO fixture from the roof. 96 total watts of 6500k. Put 2 Thermaltake computer fans near the inlets to help with airflow. Hooked up to a adjustable voltage controller so I can set the desired speed. They run very quiet, 16db at 62cfm.

The 4" oulet duct was ran through the floor to a airbox. That airbox contains a Can-Fan 9000 carbon filter hooked to a 4", 123 cfm Can-Fan R/S series fan. The fan is housed in a custom built box to reduce any noise output. You know, just a bigger box built around the fan filled with insulation. I used insulated ducting all the way. Its vent to a crawl area that is very large and well vented. Zero noise from outside the dwelling. Power comes from the room itself with a 2 gang plug located just behind the cab. Power wise the cab draws 2.49 amps with everthing up and running.

So after running the cab for a bit, I am planning some easy changes/upgrade for the cab. 1st is the addition of a 2nd Sun Blaze 96 watt T-5 fixture. 2nd. Move the 2 P/C fans to hang on each fixture to move hot air off it quick. Also the addition of 5, 2.5" intake holes at the rear for inproved airflow.
So thats my cab for clones, moms and some vegging. I can only have a certain # of plants at any 1 time so this size is great for me.
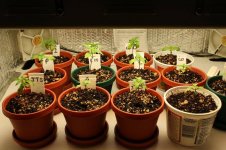
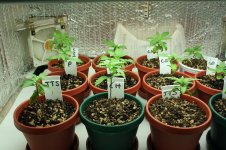
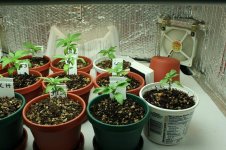
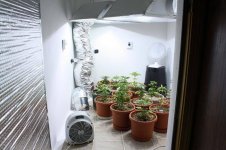
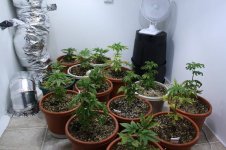
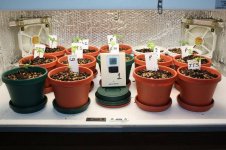
Here is a shot of whats growin inside right now.
cabinet10.jpg
Its is a mix of bag seed & crosses that were put into dirt on 2-29-12.
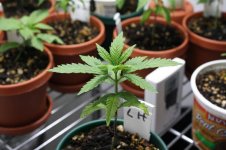
Lemon Haze
lemon haze seedling.jpg
Chemdawg
chemdog seedling.jpg
The Pure
pure seedling1.jpg
Those 3 pictures were taken while they were in the veg/flower room. I was doing a bulb change/upgrade to the cab. Put in 4 brand new Spectralux 6500k T-5 bulbs.
I have 2 strains that are crosses. I am no breeder by any stretch but I had a chance to make some seeds and thats what I did.
CS1 is a cross of a outdoor California purple strain and a SS Haze male.
The JTS1 is the same SS Haze male with a great quality unknown bagseed I found and grew out.
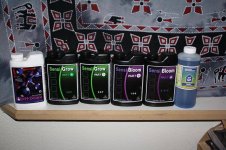
I am using a new soiless mix and nutrients that I am not familiar with. Going with AN Sensi grow and bloom 2 part.
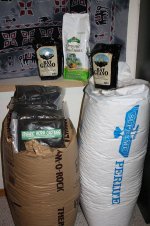
My soiless mix is:
1/3 sphagnum
1/3 perlite
1/3 vermiculite
added lime
added kelp meal
It will be a bit of a learning curve especially with 5 different strains. All of which I have not grown before.These will all be moved to a veg/flower room that is completed. Pictures of that will come!
Fell free to critique or ask any questions you may have. I will try to do updates weekly. Thanks.
 
Last edited:

negative37dBA

Well-known member
Veteran
negative37dBA's cab to room build & grow

negative37dBA's cab to room build & grow

Here are a few more shots of the cabs construction.
this is the top
cab top1.jpg
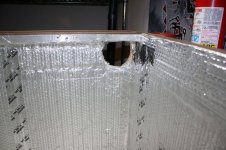
The 4" exhaust. I know that hole loks a bit rough. Learned to install the reflextix after all was finished.
cabinet7.jpg
Here are the seedlings at 3/18
seedlings 3 18.jpg
Here they are at 3/21
cab seedlings1.jpg
cab seedlings2.jpg
cab seedlngs3.jpg
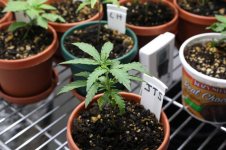
Here is one of the crosses, a JTS1 at 3/26
jts1.jpg
Here is my soil mix and the nutrients.
soiltime1.jpg
nute lineup.jpg
I might have waited just a bit to long before the first feed. Leaves were showing signs of defeciencies
I will be lookng to transplant to 1 gallon containers on 3/28. Will get some pictures up of that. Thanks.
 

negative37dBA

Well-known member
Veteran
negative37dBA's cab to room build & grow

negative37dBA's cab to room build & grow

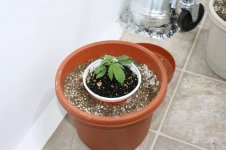
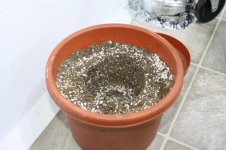
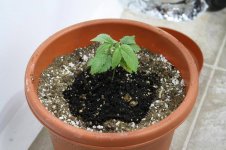
Time to transplant has arrived. I use this method for making the hole in the new pot. I use the same kind of container the plant is in to push down on soiless mix. Then tamp down the surrounding mix then remove the container. You are left with a perfectly sized hole for your new plant.
the method1.jpg
the method2.jpg
planted1.jpg
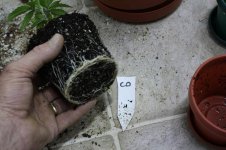
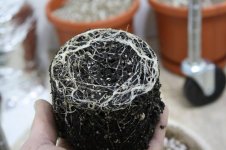
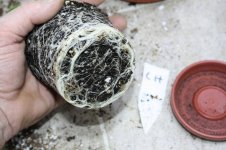
Here are some root shots at 3/28.
Chemdawg
chemdogroots1.jpg
The Pure
pureroots1.jpg
Lemon Haze. Might have waited a bit long for this one.
lemonhazeroots1.jpg
So now that they are in 1 gallons they will not fit into the cab. On the the veg/flower room. I will make a seperate post for all the veg/flower room specs & information
room1.jpg
 

negative37dBA

Well-known member
Veteran
negative37dBA's veg & flower room

negative37dBA's veg & flower room

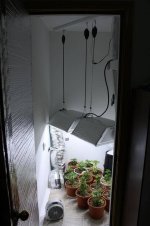
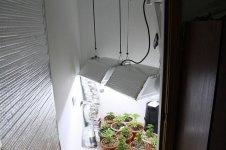
The veg/flower room started out life as a small walk-in closet. I ripped it down to the studs. I like to start from scatch. This is where I really wish those pictures were saved. I love seeing rooms go up from the start.

My room size is 4'W x 5.5'D x 7'H. I was concerned about noise so I installed 2 layers of 5/8 sheet rock with Green Glue in between them. It is a sound reducing product. Really helped with noise transfer to the adjoining room. I also upgraded the insulation on the 2 exterior 2x6 walls. The 2 interior walls were not insulated so I filled those up to. I have to deal with some temperature extremes were I am located at. 115 degrees in summer to 0 degrees in winter.
room2.jpg
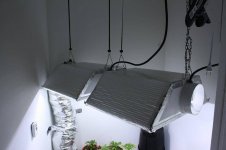
The intake air is brought into the room via a 6" Fantech, 303 cfm fan. It is brought in from a different room in the house. The exhaust air is expelled from the room via a 6" Fantech, 303 cfm fan as well. It pulls air from the room through a Can 50 carbon filter and 2, 6" Sunmaster air cooled hoods. Both fans are housed in custom boxes like the one for the cab for noise reduction. I use insulated ducting all the way. The exhaust exits to the same crawl that the cab vents to. Very large and well vented.

Lighting is 2, 400 watt Galaxy digital ballasts. I wanted to go with more than 1 point of light so I chose the dual 400 settup. I figured I would be able to control the temps better than with a bigger set. I insulated the hoods with reflectix. We will see if that makes any difference. I use 2, Sunmaster cool deluxe metal halides for vegging and 2, Solarmax HPS for flower.
room5.jpg
I have what I consider to be a small space. To maximaize floor space and keep heat out of the room I choose to locate all the controls, ballasts and power ooutside the room.
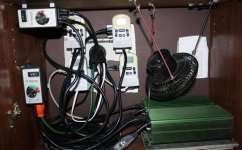
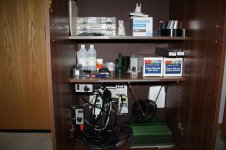
They are housed in this sort of "Mission Control " cabinet if you will. I can control everything from here and do not have to go into the room to do so.
Electricity for the room is brought in from the main panel to the adjoining room. I used 1' pvc electrical conduit and ran 12 gauge wire to my outlets. I have 2 seperate 15 amp, 120 circiuts. I wired up 8 outlets, 4 for each circiut. I will use 1 for lighting and the other for accessories. I also got a bonus circiut that is located behind the "Mission Control" cab from the room.
mission control1.jpg
room electrics1.jpg
room supplies1.jpg
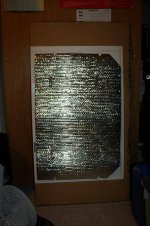
I have a small thermostatically controlled heater in there to keep up the temps when lights are out. Also a couple of circulating fans to keep air moving. 3 remote temperature/humidity sensors to keep track of things. Have a little base station on my desk. Covered the door in reflectix to help with sound and heat.
room3.jpg
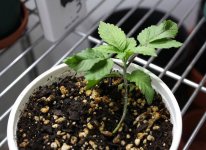
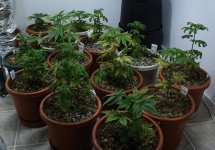
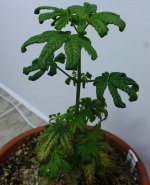
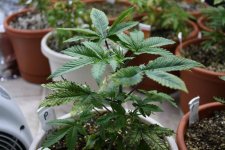
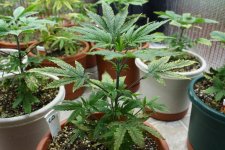
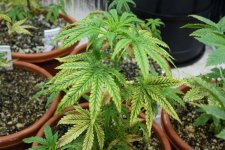
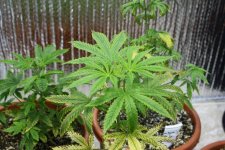
Plants are not doing well. My inexperience with the soiless mix and new nutrients is proving to be a challenge. Dealing with five different strains is a little complex too.
These are the plants at 4/9
plants at 4 9 12.jpg
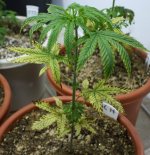
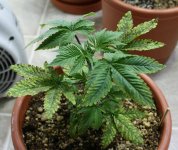
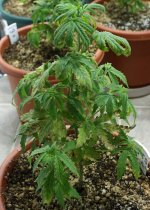
I started out feeding them late for the first time. I kept the feedings at around 50% of the recommended amounts. They seemed to do well then bam showing big signs of defeciencies. So I upped the nutrient dose to 90% strength and 4 of the crosses really hated that. It seemed to stimulate the others but burnt tips on those as well. I will let the pictures talk. My inexperiece is showing big time. The temps have been good. Low of 69 with L/O to a high of 77. My humidity is always low, under 20%. Humidity has always been that way and have had good success. I live in the desert. I am on a 20/4 light schedule.
pure seedling troubles1.jpg
chemdawg seedling trouble1.jpg
chemdawg seedling trouble2.jpg
I use R/O water. Hanna Combo PH/PPM pen. My ph has been at 6.0 up to 6.7 when I water. My PPM,s were pretty low, right around 200 then last feeding up to 335.
I am thinking some micro nutrients may be lacking. I flushed the 4 worst ones with plain R/O water to try and rid them of the excess. I will wait and see what happens. If anyone has some suggestions feel free to chime in.
 
Last edited:

negative37dBA

Well-known member
Veteran
negative37dBA's cab to room build & grow

negative37dBA's cab to room build & grow

After moving the plants to the veg/flower room I decided to take the opportunity to make some changes to my cab.
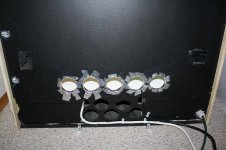
I increased ventilation by hole sawing out 5 additional 2.5" round holes in the back. There are brackets to hold an air filter there.
cab mod3.jpg
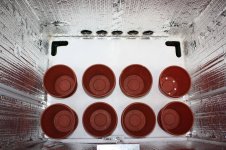
I plan to run this for vegging and you can see my setup here. There will be a total of 12 plants.
cab mod1.jpg
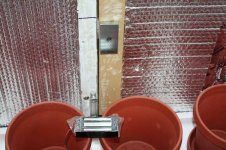
Working on the electromagnetic lock install. Waiting on the remote controlled power supply to arrive.
cab mod2.jpg
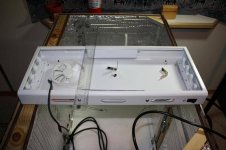
I also plan on adding a 2nd T-5, 4 bulb fixture so I devised a plan to help move the hot air off the lamps quick. It also provides some nice air movement inside the cab.
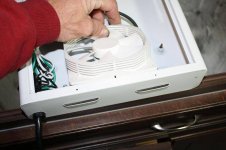
I dissasembled my light somewhat.
t-5 mods1.jpg
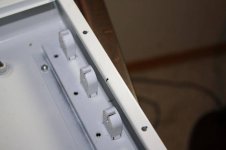
Marked the drill holes out.
t-5 mods2.jpg
Drilled a couple of holes for my fan mounts
t-5 mods3.jpg
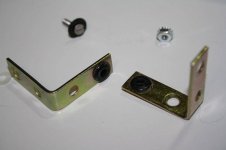
Used simple angle brackets to hold the fan.
I used rubber grommets inserted into the holes to isolate any fan noise/vibration from the fixture.
t-5 mods4.jpg
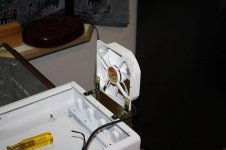
Here the fan is ready to move its air.
t-5 mods6.jpg
Just have to get the other light fixture and do the same fan mod and this cab is about ready to roll again.
Well that was fun, now on to the more serious not so fun stuff right now. My plants look like he**!
After a good flushing for the worst 4 and a 90% strengh dose of nutrient for the others I can report some improvement. There is some nice new growth at the tips and down low. I think the late first feeding coupled with the fact that I kept nutrient levels low(50-60% of recommended) they needed more than I was giving them.
Now for the 4 that look completely trashed, not so sure. They must need a much lower nutrient level than the others. Those happen to be my crosses. Interesting.
Again, I am using Advanced Nutriets Sensi grow & bloom parts a&b. Nothing else in a soiless mix.
These are both new to me and I am having a bit of trouble.
Here they all are on 4/11.
4-11 group1.jpg
 
Last edited:

negative37dBA

Well-known member
Veteran
negative37dBA's cab to room build & grow

negative37dBA's cab to room build & grow

you are welcome to the IC MAG Family..
interesting project bro, ill be watching!!
Thanks so much for the welcome Killerweed31. Watching your 1degree run 2012 grow with the WW. Looking amazingly healthy.

Well not so much with mine.
Here are a few shots at 4/11
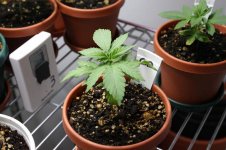
Lemon Haze
4-11 lemon haze.jpg
Pure1
4-11 pure1.jpg
Pure2
4-11 pure2.jpg
JTS1
4-11 jts1.jpg
CS1
4-11 cs1.jpg
Ouch on those last 2.
 

negative37dBA

Well-known member
Veteran
negative37dBA's cab to room build & grow

negative37dBA's cab to room build & grow

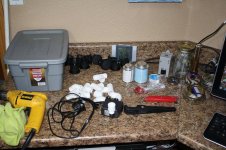
So I took some time and built a little 12 site aero cloner the other night. Big thanks to Rumpleforeskin for all the advise in the DIY Propagation sticky thread. I made a couple of small changes to suit my needs. I think it came out well. We will see how it works soon.
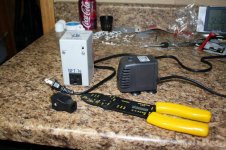
Got some things together for the build
cloner13.jpg
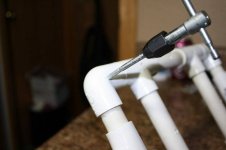
Used a tap instead of a screw. Perfect fit for the sprayers. Tight.
cloner14.jpg
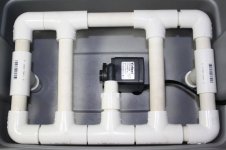
Went smaller on the pump, this is only a 3 gallon cloner.
cloner12.jpg
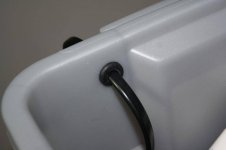
Went throught the side with a grommet for the power cord.
cloner15.jpg
Had to cut plug and rewire for putting it throught the side. Going to run this on a CAP cycling timer.
cloner16.jpg
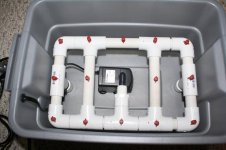
The inside done.
cloner22.jpg
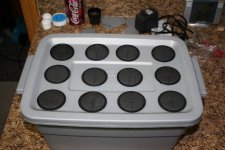
Cut the top for the net pots.
cloner11.jpg
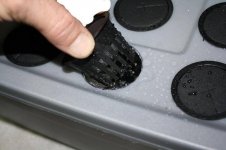
Dropped them in and turned it on. Good to go!
cloner17.jpg
Sampling some great meds.
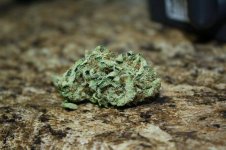
White Rhino. A cross of a White Widow & unknown american indica
white rhino.jpg
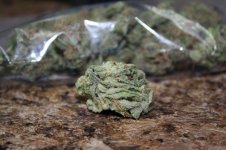
Black Jack. A cross of Black Domina & Jock Horror
black jack.jpg
Both were quite nice On to a update on my plants.
 
Last edited:
oneshot

Active member
Awesome thread. I can tell you're a perfectionist and love the details. That cloner is super clean and so are your rooms.
 

negative37dBA

Well-known member
Veteran
negative37dBA's cab to room build & grow

negative37dBA's cab to room build & grow

Awesome thread. I can tell you're a perfectionist and love the details. That cloner is super clean and so are your rooms.

Thanks so much for that oneshot. Try to put some effort into what I do. I really like things a certain way. Makes me happy that others are out there watching. Really frustrating for me to have my plants look this way. With all the issues they are having I am learning alot about them.
I have a nice set of pictures to upload for an update as of 4/13. Working on that right now.
Plants are doing slightly better.
Also have 2 confirmed females as of this evening. That is nice. Both of the females are the crosses. The crosses are special to me, even though I am making them look like heck right now.
The crosse are SS Haze male x unknown California outdoor purple, and SS Haze male x unknow high quality Indica.
 
Last edited:
negative37dBA

Well-known member
Veteran
OK, got some picture things figured out.
So here are some of the plants at 4/13.
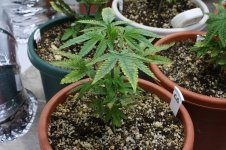
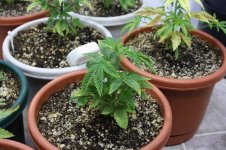
Pure
4-13 pure1.jpg
4-13 pure2.jpg
4-13 pure5.jpg
JTS1
4-13 jts1.jpg
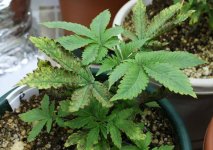
Lemon Haze
4-13 lemon haze1.jpg
Doing slightly better. On the second nearly full strength feeding.
I am trying out some reflectix on the veg/flower room walls to see if I like it. Just taped it up temporary to check it out. I am not sure about the reflectivity of it. Room seems to be not as bright now that it is in there. Could just be my imagination.
reflectix testout.jpg
Here are some just prior to harvest pictures from a bit ago. I was still learning white balance. So many hobbies to master. These were both grown from seeds found in bags of the respective strain.
Grape Ape.
grape ape.jpg
Purple Urkle
purple eurkle1.jpg
And then after a 32 day cure. Sooo different,
Grape Ape, that concord grape hits you so nice when you crack a jar.
grape ape1.jpg
Purple Urkle also 32 day cure. Great smooth smoke.
purple e2.jpg
 
Last edited:
oneshot

Active member
I would remove the reflectix actually. It's probably going to hinder your reflection/light surface.
 

negative37dBA

Well-known member
Veteran
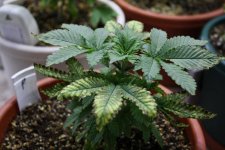
Back with some pictures and updates. We are at 4-16 or week #4 of veg from seed. Giving the plant full strength feedings has helped a bit. Has taken me awhile to learn this meduim and nutrients. They are coming back.
Heres a Pure
picture.php

Another Pure with a friend.
picture.php

Lemon Haze
picture.php

3rd Pure
picture.php
 

negative37dBA

Well-known member
Veteran
Did a install of a R/O water filter. I have been using R/O water for a long time but have been hauling it from another location. Can you say pain in the a**. I have used this model before and it works well for my purpose. It is available everywhere so you do not have to go to a hydro shop to get it.
Part#1 of 2 parts.
picture.php

Step 1 turn off water. I turn off both because I
i am sure to hit the faucet sometime during this install. The filter hooks to the cold side.
picture.php

Remove some plumbing to make room to work. With this model you need to plumb in a drain for the waste.
Just a simple tailpiece change out.
picture.php

picture.php

Make sure everything fits and hook it up.
picture.php
 
Last edited:
negative37dBA

Well-known member
Veteran
Part #2
Notice how dirty undersink is and clean like no tommorrow...sparkly now. I also used my own supply stop. They include one in the kit but it would not work for my application. I picked up a 1/4 turn 3 way for this project.
Punch the sink. Not like in frustration.
picture.php

Sanitize system.
picture.php

After you sanitize you must run it for 24 hours straight, then your good to go.
Time to water.
picture.php

My well water is very high in dissolved solids, 409 PPM and a high PH of 7.5. This will change it.
Before.
picture.php

After.
picture.php

Makes a huge difference in the quality of water your plants get. If you are not using R/O water now it is a good idea to start. Your plants will thank you in a BIG way. Cost about $125.00 and free install. Helps if you have skills in the trades but this install was a piece of cake.
 

negative37dBA

Well-known member
Veteran
4-18.
Here is a shot of my 5 Pure's. Couple days away from 12/12.
Still showing the defficiencies from before of course. Those are going to be there the whole way, if they dont fall off first.
picture.php

A little project I am putting some parts together for. I do believe you can figure this one out for yourselves.
picture.php

Found 2 males in the garden. Quickly got the removal. They were both crosses.
picture.php

picture.php

I have been seeing alot of the older strains around lately. So nice for them to make a bit of a comeback.
Some Jack Herer.
picture.php
 

negative37dBA

Well-known member
Veteran
4-20 update!!
What a better day to start flowering than today. So off for a 12 hour nap at 7:30 this AM.
Took some shots just before L/O. Noticed that remote temperature guage LED just as I shut the door. Goes back in...tape in hand!
picture.php

picture.php

picture.php

Time for the Can 50 to do its work. Starting to put off some nice odors.
picture.php

Had a sample of Wonder Diesel(Williams Wonder x Sour Diesel)
Soooo nice. Love that classic fuely diesel smell.
Have a great 420.
picture.php
 

negative37dBA

Well-known member
Veteran
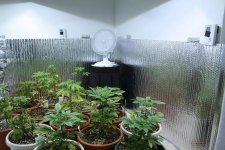
4-24. Day 4 of flower. Keeping them under MH light for the first 2 weeks. Then I swap 1 light for HPS, then another a week later. 5 more weeks of HPS and they should be about done.
Whole room
picture.php

Chemdog
picture.php

Pure 1.
picture.php

Pure 2.
picture.php

CS1 female cross.
picture.php

Comming along. We will see what this brings with all the problems early on. What it has brought is an understanding of how Advanced Nutrients works in a soiless mix. All new to me. I have learned alot.
 

negative37dBA

Well-known member
Veteran
Here we/I am. This diary is a excellent tool for going back and seeing problems/trends. Helps you match it with your hand taken notes. Very useful.
Have really been busy this last week with projects but have found some time to finish my cab upgrades. Take some clones and tidy up some remote ducting runs. Here are some shots of the room.
4-29, day 9 of flower.
Pure 1
picture.php

Pure 2
picture.php

Pure 3
picture.php

ChemD 1 My favorite looking one.
picture.php

ChemD 2
picture.php

I think I am htting the nutrients right now, the last few sets of leaves are looking pretty good. I have of course switched to the bloom A & B parts.
PH: 6.40
EC: 1.241
PPM: 621
H2O Temp: 66.2
 

negative37dBA

Well-known member
Veteran
Took some clones the other evening and put them in the aero cloner I built. First try at this technique.
cloner11_Copy.jpg

It has been 3 days now and I am starting to see some root nubs.
Temperatures are nice and PH is OK.
4_29_cloner_temp_Copy.jpg

Installed a electromagnetic lock on my cab while it was out of service. It is remote controlled. Push a button, it is open. Push a button, it is closed. Very slick.
4_29_maglock_2_Copy.jpg

4_29_maglock1_Copy.jpg

4_29_maglock_4_Copy.jpg

It was a retrofit. If I had designed it from the start that way it would have come out much cleaner.
 

Latest posts

Latest posts

Top