I've been asked a few times now for a material list for these lil 19 site aero/bubble cloners. So here we go.
If I forget anything please ask and I'll edit to include missing info.
Everything is available at Walmart or your local Do-It-Center.
Sterilite storage box: $2.79
#1751 - 6 Quart ClearView Latch™ Box Colors Available: See-through lid & base w/Sweet Plum latches
Capacity: 6 Qt / 5.7 L
Dimensions: 14 1/8" L x 7 7/8" W x 4 7/8" H
1 can of black spray paint. $1.99
Tube of Super Glue: $1.00
Aqua Culture 20-60 gallon air pump: $18.69
This will easily handle 2 cloners.
Aqua Culture 10" air stone: $4.49
1/8" plastic tubing $1.50
2 Foam trays
Like you would get doughnuts on from the Deli.
Flat wooden board

Tools:
Drill & 3/4" spade bit
1/4" drill bit
Razor-blade
Icepick
7/8" hole-saw (I used an old one and ground the teeth off and sharpened the edge)
3/4" copper tubing coupler (sharpen one end)
Now I know this sounds like a weird list but watch how this works.
Step #1----> Lay the lid upside down on the board and lay out your holes evenly with the 3/4" spade bit. The board will let you drill through until the bit just cuts through the plastic. I used 19 because it just worked out right for this container.

Step #2 ----> Drill a 1/4" hole on 1 end about 1" from the top of the top lip of the container.
Step #3 ----> Put the lid on and paint the entire outside of the container and lid black. I usually give it a few coats.
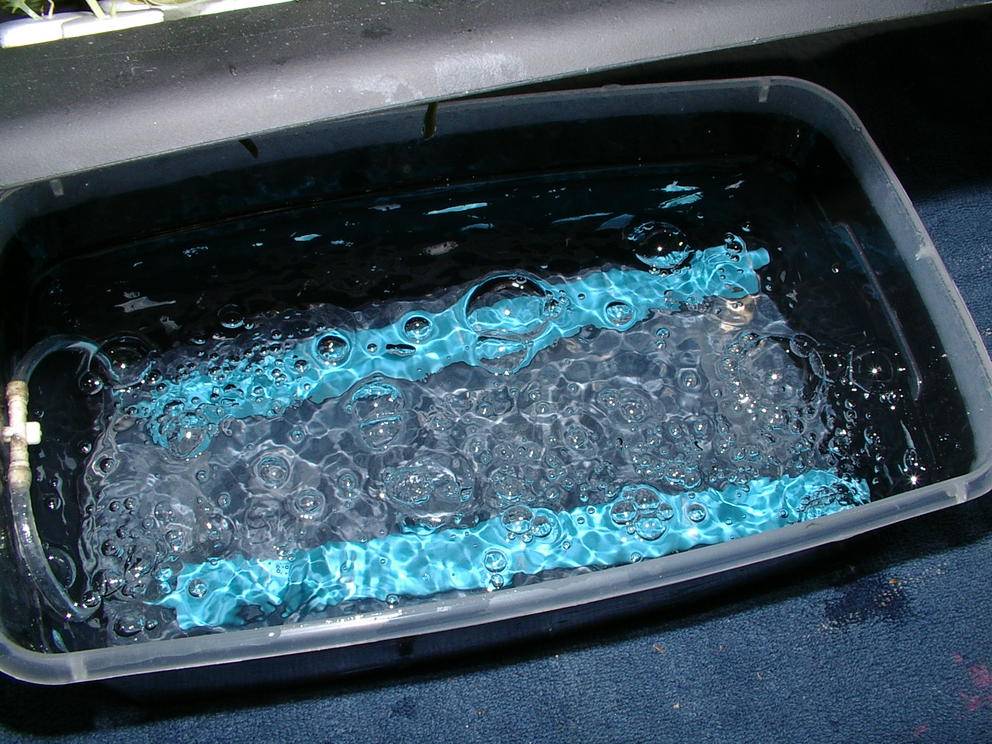
Step #4 ----> Stick the end of the tubing through the 1/4" hole about 4" and attach the air-stone and attach the other end to the air pump.
Step #5 ----> Turn the board over and lay the foam tray on it. Using the 7/8" cutter push down and twist it so it cuts a nice circle out. Cut as many as you can. Repeat this using the 3/4" coupler.

Step #6 ----> Center the small circles on the big circles and apply a drop of super glue.
Step #7 ----> Using the ice-pick poke a small hole in the center of each one.

Step #8 ----> Using the razor blade, slice across the center of each disc, completely through the small one and half way through the bigger one. This makes removing rooted clones a breeze and they are reusable with a couple tiny drops of super glue. Just rince em off in a mild bleach solution.

Step #9 ----> Pop the discs into the holes in the container. They usually fit kinda snug but don't sweat it if they are a tad bit loose cause it won't matter.
Step #10 ----> Fill the container with 3 quarts of bottled water. I prefer filtered spring water because it hasn't been distilled and has some trace minerals. Add 1 Tbls of H2O2. (I'm using 2 air-stones in this one but one works perfectly well.)

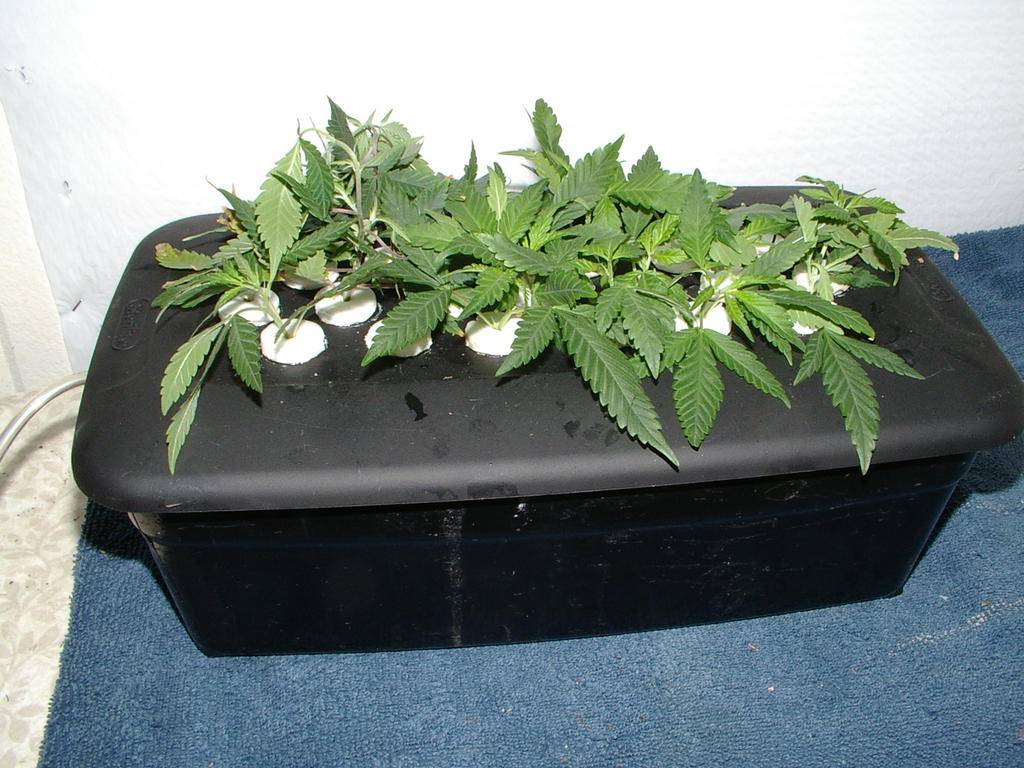
Step #11 ----> Cut your clones and stick em into the center of each discs until about an inch is inside.


Change your water every 5 to 7 days.
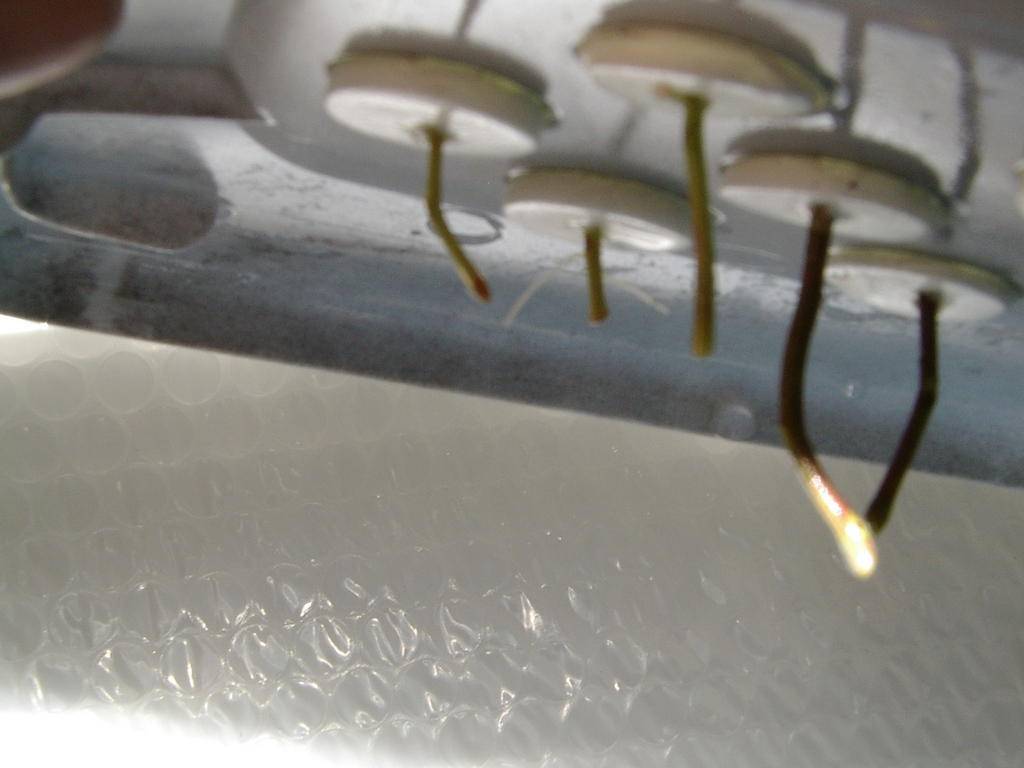
I usually have roots showing in a couple days and ready to pot inside of 7 days. Never has it taken more than 10.
I loaded this last night as I was putting this thread together. Notice the lil clone already has roots this morning. Don't always count on it but some cuttings really go in these bubblers.

I run several of these side by side. As soon as a cutting has visible roots I move it to another unit with a drop or 2 of Super-thrive until they have sufficient roots to pot.
Please let me know if I failed to explain anything.
If I forget anything please ask and I'll edit to include missing info.
Everything is available at Walmart or your local Do-It-Center.
Sterilite storage box: $2.79
#1751 - 6 Quart ClearView Latch™ Box Colors Available: See-through lid & base w/Sweet Plum latches
Capacity: 6 Qt / 5.7 L
Dimensions: 14 1/8" L x 7 7/8" W x 4 7/8" H
1 can of black spray paint. $1.99
Tube of Super Glue: $1.00
Aqua Culture 20-60 gallon air pump: $18.69
This will easily handle 2 cloners.
Aqua Culture 10" air stone: $4.49
1/8" plastic tubing $1.50
2 Foam trays
Like you would get doughnuts on from the Deli.
Flat wooden board
Tools:
Drill & 3/4" spade bit
1/4" drill bit
Razor-blade
Icepick
7/8" hole-saw (I used an old one and ground the teeth off and sharpened the edge)
3/4" copper tubing coupler (sharpen one end)
Now I know this sounds like a weird list but watch how this works.
Step #1----> Lay the lid upside down on the board and lay out your holes evenly with the 3/4" spade bit. The board will let you drill through until the bit just cuts through the plastic. I used 19 because it just worked out right for this container.
Step #2 ----> Drill a 1/4" hole on 1 end about 1" from the top of the top lip of the container.
Step #3 ----> Put the lid on and paint the entire outside of the container and lid black. I usually give it a few coats.
Step #4 ----> Stick the end of the tubing through the 1/4" hole about 4" and attach the air-stone and attach the other end to the air pump.
Step #5 ----> Turn the board over and lay the foam tray on it. Using the 7/8" cutter push down and twist it so it cuts a nice circle out. Cut as many as you can. Repeat this using the 3/4" coupler.
Step #6 ----> Center the small circles on the big circles and apply a drop of super glue.
Step #7 ----> Using the ice-pick poke a small hole in the center of each one.
Step #8 ----> Using the razor blade, slice across the center of each disc, completely through the small one and half way through the bigger one. This makes removing rooted clones a breeze and they are reusable with a couple tiny drops of super glue. Just rince em off in a mild bleach solution.
Step #9 ----> Pop the discs into the holes in the container. They usually fit kinda snug but don't sweat it if they are a tad bit loose cause it won't matter.
Step #10 ----> Fill the container with 3 quarts of bottled water. I prefer filtered spring water because it hasn't been distilled and has some trace minerals. Add 1 Tbls of H2O2. (I'm using 2 air-stones in this one but one works perfectly well.)
Step #11 ----> Cut your clones and stick em into the center of each discs until about an inch is inside.
Change your water every 5 to 7 days.
I usually have roots showing in a couple days and ready to pot inside of 7 days. Never has it taken more than 10.
I loaded this last night as I was putting this thread together. Notice the lil clone already has roots this morning. Don't always count on it but some cuttings really go in these bubblers.
I run several of these side by side. As soon as a cutting has visible roots I move it to another unit with a drop or 2 of Super-thrive until they have sufficient roots to pot.
Please let me know if I failed to explain anything.


