-
ICMag with help from Landrace Warden and The Vault is running a NEW contest in November! You can check it here. Prizes are seeds & forum premium access. Come join in!
You are using an out of date browser. It may not display this or other websites correctly.
You should upgrade or use an alternative browser.
You should upgrade or use an alternative browser.
Building a 4x6 hidden room
- Thread starter budderfly
- Start date
budderfly
Active member
Keep your head up pal. Life is a pain the ass. Surround yourself with positivity and look up to your Higher Power to help you through tough times. Everything happens for a reason, its just important to learn from the hard times instead of hide them away emotionally.
From the looks of your thread life will be grand with a little more time and work, 100% win.
If it weren't for these hard times this build would not have happened, and it is from a great desire to overcome that I muster the time, energy, funds, ingenuity, and persistence to make this happen. Thanks to everyone tuning into the show. Since we all know rule #1 is DON'T TELL ANYONE EVER, it's nice to be able to show-off my hard work here with anonymity.
Couple little pics as long as I'm posting.
I picked up like 7 tubes of this acoustical sealant caulking, also made by Green Glue (though others sell it as well).
Around the entire perimeter I laid a thick bead along the base plates to seal those up, and also a bead up one of the corners that had some gap.
I also plan to use the sealant in the cracks of the inner drywall layer, and also around ventilation ports, to try and make the room nearly completely sealed.
Today I hauled in a bunch of drywall. Wonder what the neighbors are thinking, I'm sure some have been watching me unload 4x8's.
This purple drywall is for the inner layer. It is high impact resistant, mold resistant, Type X (fire rated) 5/8". It is heavy as f*ck. Considerably heavier than a standard 5/8" Type X sheet.
I'm using standard Type X 5/8" as the inner layer because it won't need impact or mold resistance and it's less than half the cost of the purple stuff. Also, the two different density materials might provide better sound proofing characteristics as each density has different resonant frequencies and absorption characteristics.
At this point I am more concerned about screws holding all the weight than I am about sound leaking out. There are only a couple of more techniques that could be used - floating floor, full cover of mass loaded vinyl or lead, and maybe resilient channels (but I wasn't sure they'd handle the weight), or more double walls. All of those seemed prohibitively expensive.
But with all that mass (it's alot), and green glue and the whole room wrapped in roxul - it may be so quiet inside as to induce hallucinations!
This week I'm just going to try and get a couple steps done each night after work. Might not have much time to process pics and post. I can feel the end near; we're very excited here!
G
Guest 315072
we all wish u the best man.. hope u and the wife can overcome the hard times..
its been a tough year for a lot of us. me and my wifey lost our jobs.. and have been put in a situation like yourself..
but stayed positive.. and everything is working out .. got a new job.. that has some perks.. lol and got the rooms full for the new SOG .. and started my breeding projects! been very productive since i lost the job.. but now going back to 9-5 is going to be a little difficult lol .. but hey.. keep your head up .. things only get better!
and loved seein how u pulled this off so far.. very impressive.. for a hidden room.. u showed alot of creativity !!
Peace L2G
Right on man looks like the ends is near keep it up we are all excited to see it all done
El Bandito
Member
Sending good vibes your way. Amazing and inspirational build.
budderfly
Active member
I've been back at the office full time Mon-Fri. Haven't gotten as far on the the room as I'd hoped, but that's ok. If I meet my deadline on my first project I'll be getting an 50% raise; can't argue with that.
Anyway, I've been cutting lots of OSB sheets, so I thought I'd show you guys the track system and from Eurekazone that I use.
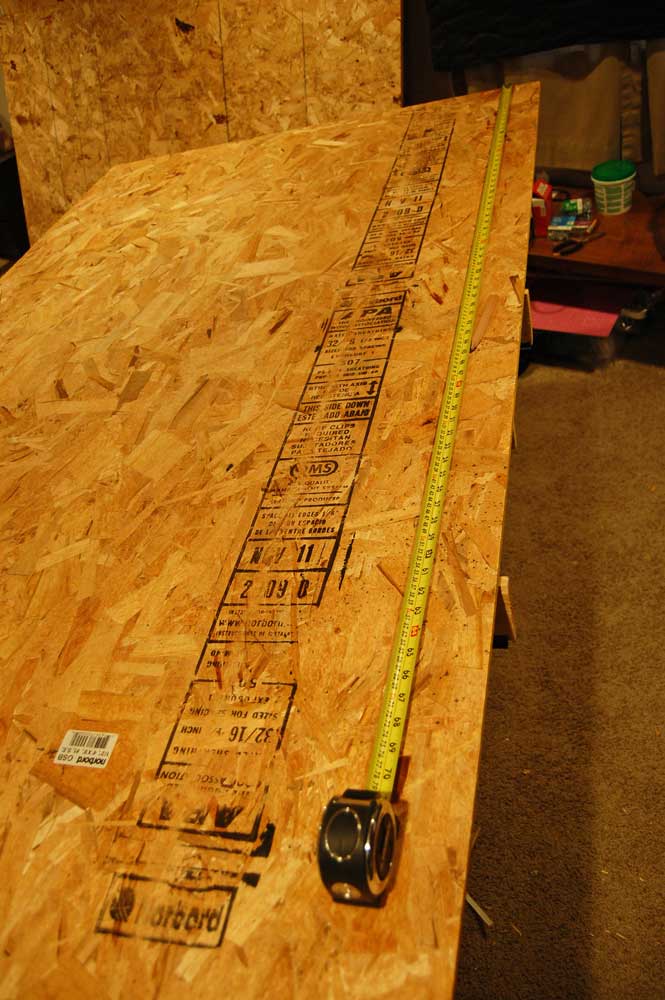
What's so great about this track system is that if you can draw a line, or even mark two points, then you can make a perfect cut on that line. So that's the first thing I do, mark my cut. Some of the walls already in place were not square, this let's me cut on any angle and I can make panels fit unsquare corners with consistent spacing all around.
So I mark my cut.
Then here's the bottom of the track.
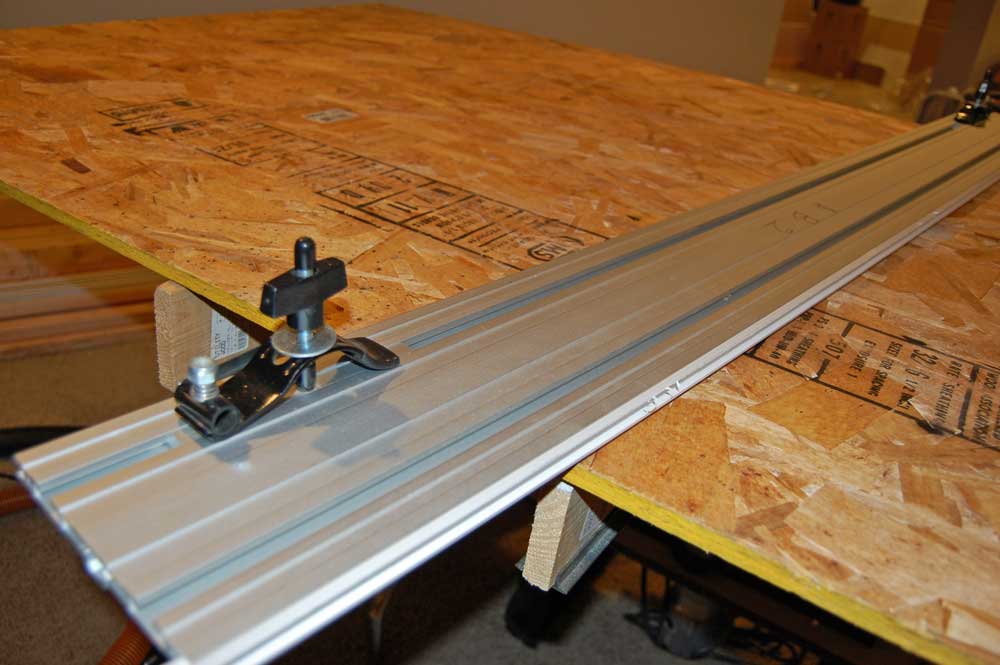
Everything in this system is so well designed. There's a spring on one end of the clamp so that it's under tension and resists moving and coming out the end, but still slides smoothly. The owner of Eurekazone is some Greek-American carpenter who has a lot of opinions on how to do safe, productive wood working and he designs and builds all his tools. I have the 118" track saw combo with clamp extensions you can cut pieces under an inch thick. I have a miter/square that can connect to the track, as well as repeater stops for cutting many pieces to the exact same length, and finally I have the full kit to attach a router which enables so much awesomeness. Anyone in the market for woodworking tools should check this stuff out.
On the saw I attach a base that rides the rail. The saw's a Makita 5008MGA. Nice saw, dust collection could be better, though.
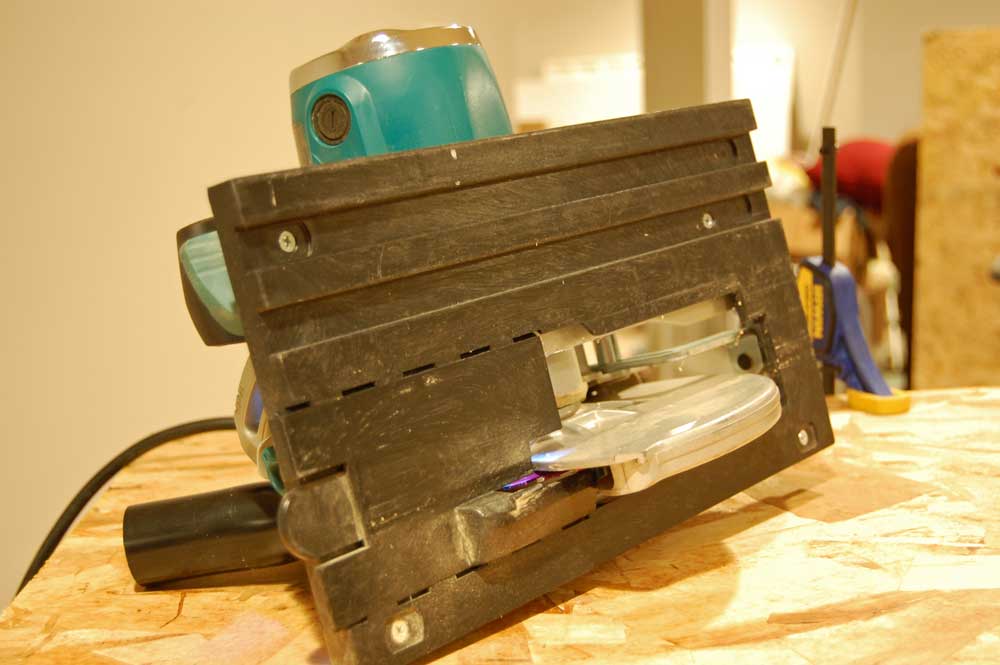
Once your cut is as good as your placement. It's hard to explain how safe cutting this way is. I built furniture in a prison workshop on traditional equipment (table saws, etc), and a circular saw on a good track is so much safer than a table saw and that gives you confidence to operate your equipment. It also let's me have a whole workshop in a lot less space than traditional floor equipment takes - not to mention it doesn't all weigh hundreds of pounds like big shop equip.
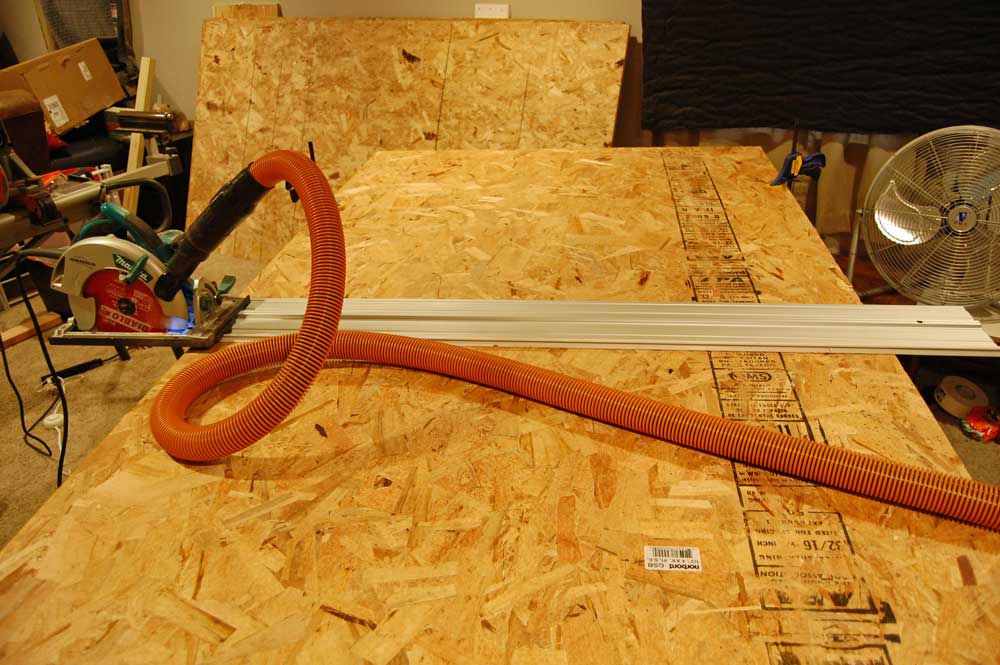
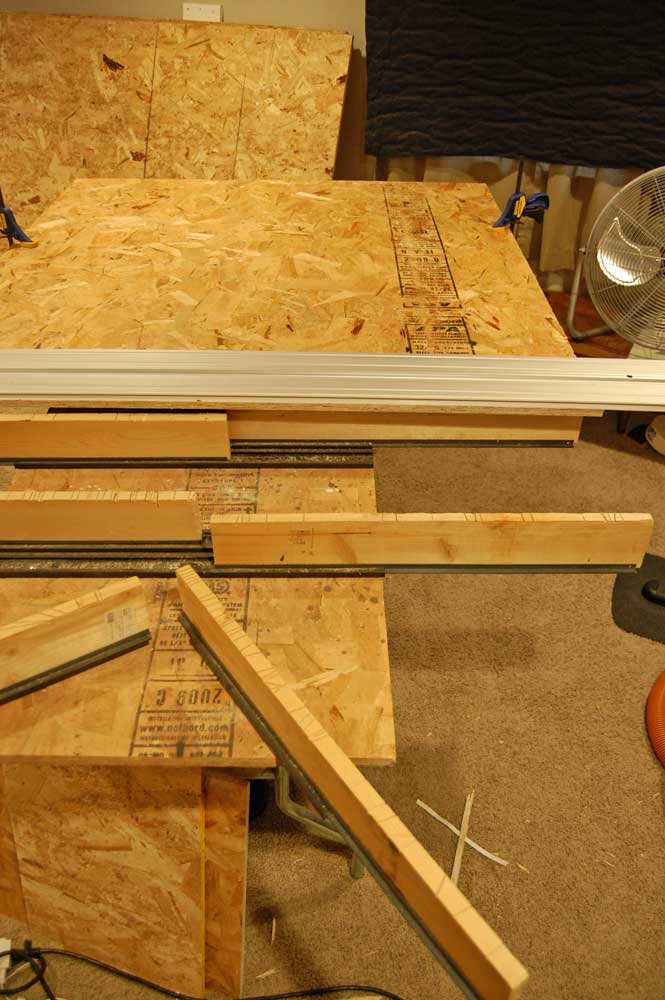
Finished cuts are right on the money. The table is also a Eurekazone product. They send you the tracks and mounting hardware. You provide a 2'x4' 3/4" board (it's OSB) and all the 1x slats. The two on each end swivel and it holds a full 4x8 perfectly. The banquet table legs under the board fold up for storage, too.
Anyway, I've been cutting lots of OSB sheets, so I thought I'd show you guys the track system and from Eurekazone that I use.
What's so great about this track system is that if you can draw a line, or even mark two points, then you can make a perfect cut on that line. So that's the first thing I do, mark my cut. Some of the walls already in place were not square, this let's me cut on any angle and I can make panels fit unsquare corners with consistent spacing all around.
So I mark my cut.
Then here's the bottom of the track.
Everything in this system is so well designed. There's a spring on one end of the clamp so that it's under tension and resists moving and coming out the end, but still slides smoothly. The owner of Eurekazone is some Greek-American carpenter who has a lot of opinions on how to do safe, productive wood working and he designs and builds all his tools. I have the 118" track saw combo with clamp extensions you can cut pieces under an inch thick. I have a miter/square that can connect to the track, as well as repeater stops for cutting many pieces to the exact same length, and finally I have the full kit to attach a router which enables so much awesomeness. Anyone in the market for woodworking tools should check this stuff out.
On the saw I attach a base that rides the rail. The saw's a Makita 5008MGA. Nice saw, dust collection could be better, though.
Once your cut is as good as your placement. It's hard to explain how safe cutting this way is. I built furniture in a prison workshop on traditional equipment (table saws, etc), and a circular saw on a good track is so much safer than a table saw and that gives you confidence to operate your equipment. It also let's me have a whole workshop in a lot less space than traditional floor equipment takes - not to mention it doesn't all weigh hundreds of pounds like big shop equip.
Finished cuts are right on the money. The table is also a Eurekazone product. They send you the tracks and mounting hardware. You provide a 2'x4' 3/4" board (it's OSB) and all the 1x slats. The two on each end swivel and it holds a full 4x8 perfectly. The banquet table legs under the board fold up for storage, too.
budderfly
Active member
When you want to cut down the 8' side of a board you connect the two rails.
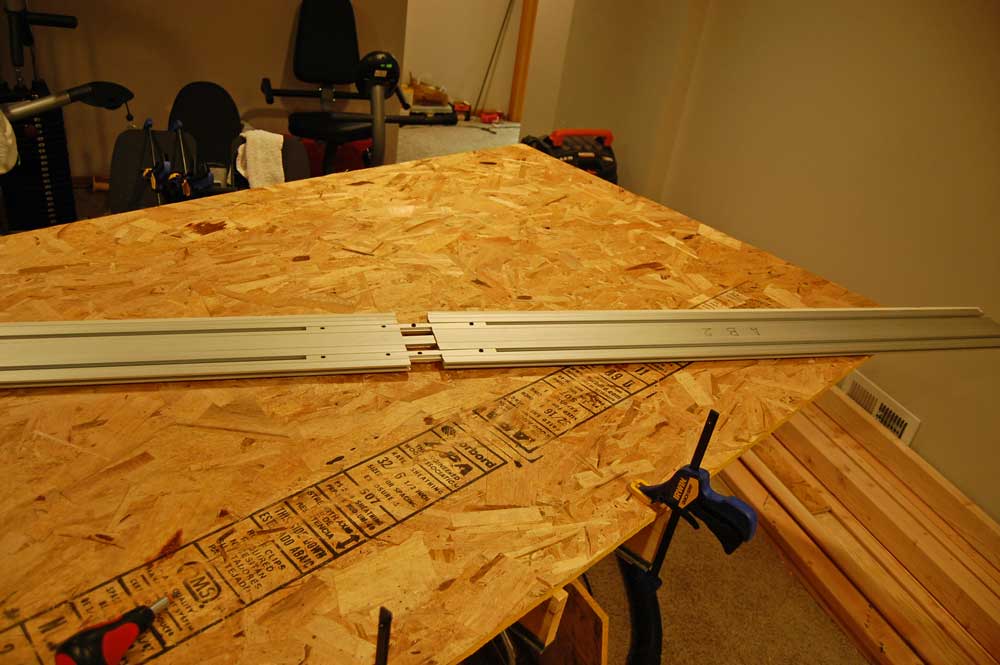
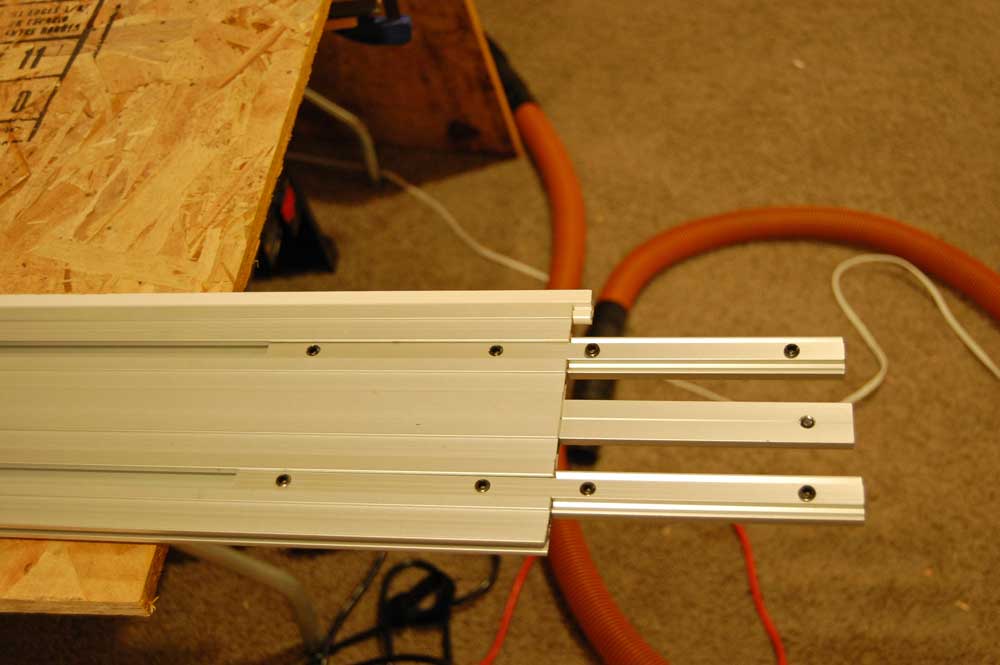
The rails align themselves perfectly every time due to the shape of the channels the connectors are in.
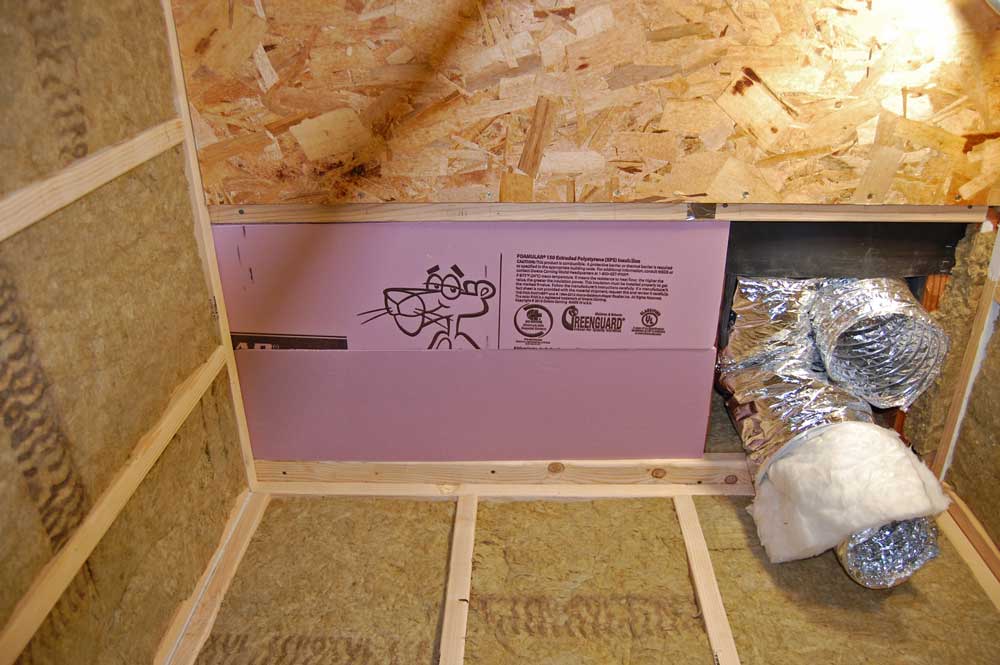
Anyways, towards the front of the room I put in a layer of pink XPS foam over the roxul to help prevent any heat signature from showing through the front wall.
The last piece I had to cut for the ceiling was this part with the duct cutouts. It has only one 90 degree corner and four different length sides - 22", 21 13/16", 19 3/4", and 20 1/16" - lol. But I just marked it off going out from the 90 and zipped each egde of with the rail - and it fit perfectly first shot!
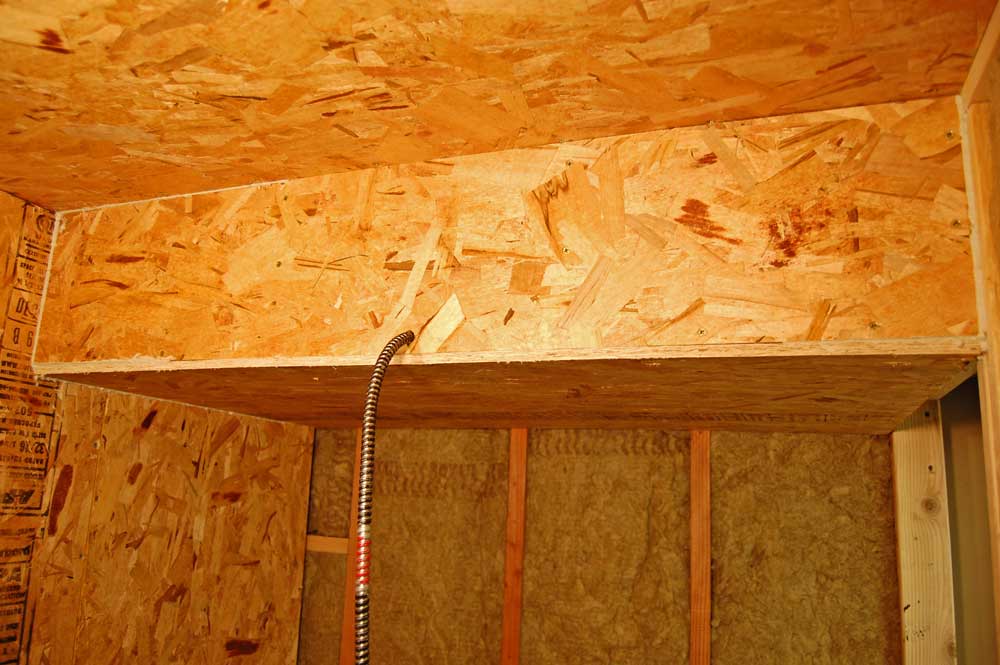
Here's a shot of the soffit covered. I stuffed every crevice with Roxul in there too. Drilled a 9/16" hole for the AC cable, it's a pretty good seal and I've been liberal with that acoustic caulking.
There's more done, but I don't have more pictures yet. Sorry to drag it out so long on everyone but I wanted to do the thread in real time.
The rails align themselves perfectly every time due to the shape of the channels the connectors are in.
Anyways, towards the front of the room I put in a layer of pink XPS foam over the roxul to help prevent any heat signature from showing through the front wall.
The last piece I had to cut for the ceiling was this part with the duct cutouts. It has only one 90 degree corner and four different length sides - 22", 21 13/16", 19 3/4", and 20 1/16" - lol. But I just marked it off going out from the 90 and zipped each egde of with the rail - and it fit perfectly first shot!
Here's a shot of the soffit covered. I stuffed every crevice with Roxul in there too. Drilled a 9/16" hole for the AC cable, it's a pretty good seal and I've been liberal with that acoustic caulking.
There's more done, but I don't have more pictures yet. Sorry to drag it out so long on everyone but I wanted to do the thread in real time.
budderfly
Active member
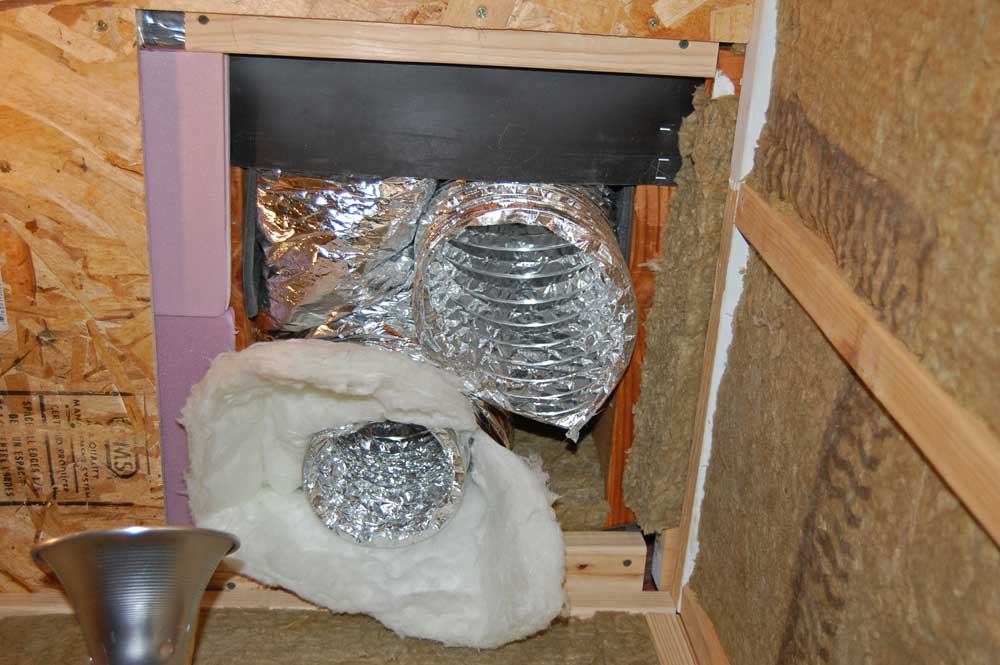
Can't see for sure, but you know you don't want any fiberglass in there, dontcha? Fiber glass in grow room = bad!
Yes, the only fiberglass is the insulated duct wrap. The big chunk hanging off the intake duct that you can see in the pics will be trimmed back as I connect that duct to an elbow that goes through the ceiling board which will cover it all anyway. Should be fine.
N
noyd666
hi ,great job. another top story from best library in world

budderfly
Active member
Ok quick mid-week update. Still plodding along. Didn't get all the pictures I wanted of this step in retrospect, but I'll show you what I've got for finishing off the ventilation in and out of the room. The end result is primo.
So earlier you saw the flex ducts hanging out of a roughly 20" square in the ceiling. I cut a board to fit and traced a 6" & 8" elbow on cutting them out with a jigsaw. Into the elbow I put a duct connector - basically just two crimped ends. The 8" connector was short, but the 6" was long and I couldn't find a short one. It ended up being a bit of an issue as the duct gets a bit cut off in the turn once the board is all the way up in the ceiling. It should be ok but I'm disappointed, that's the perfectionism talking.
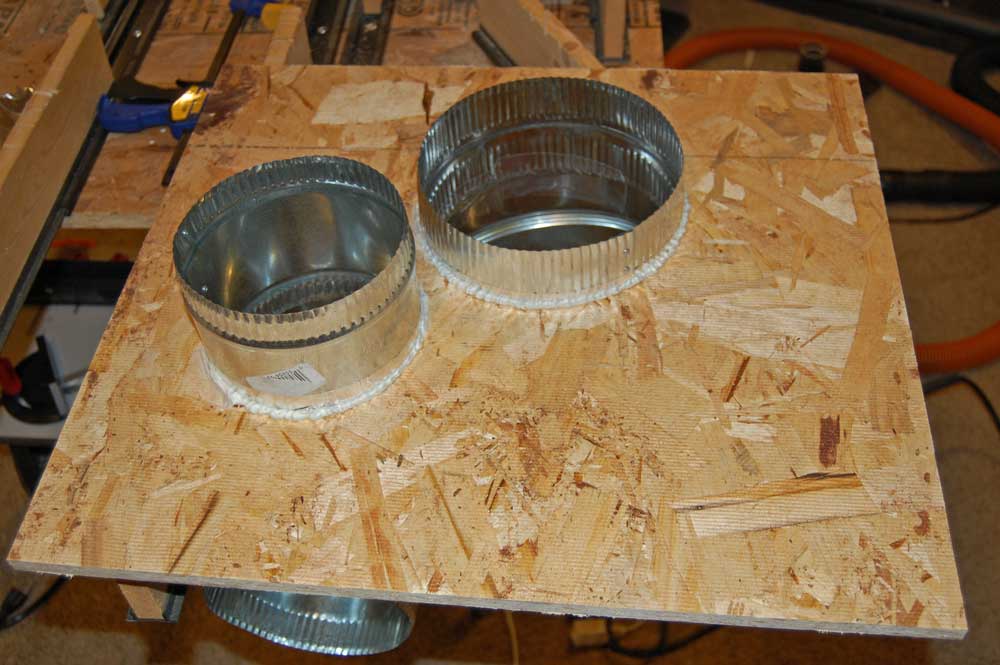
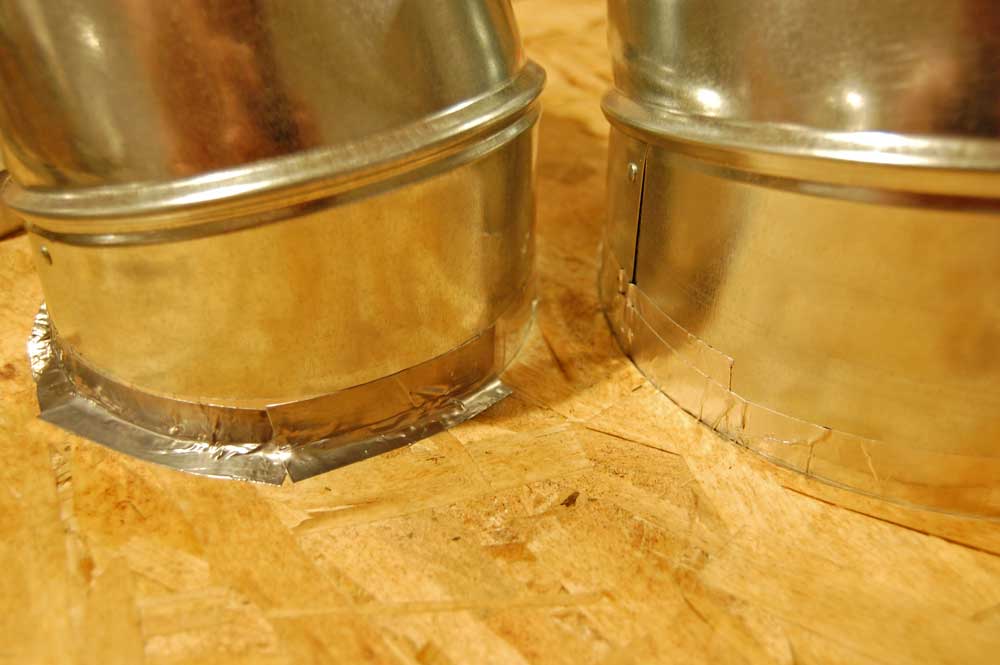
You can also see I sealed around it with acoustic caulking on the backside that goes into the ceiling. Here's the elbows on the room-side of the board. That roll of tape weighs a good few pounds. It's made out of lead!
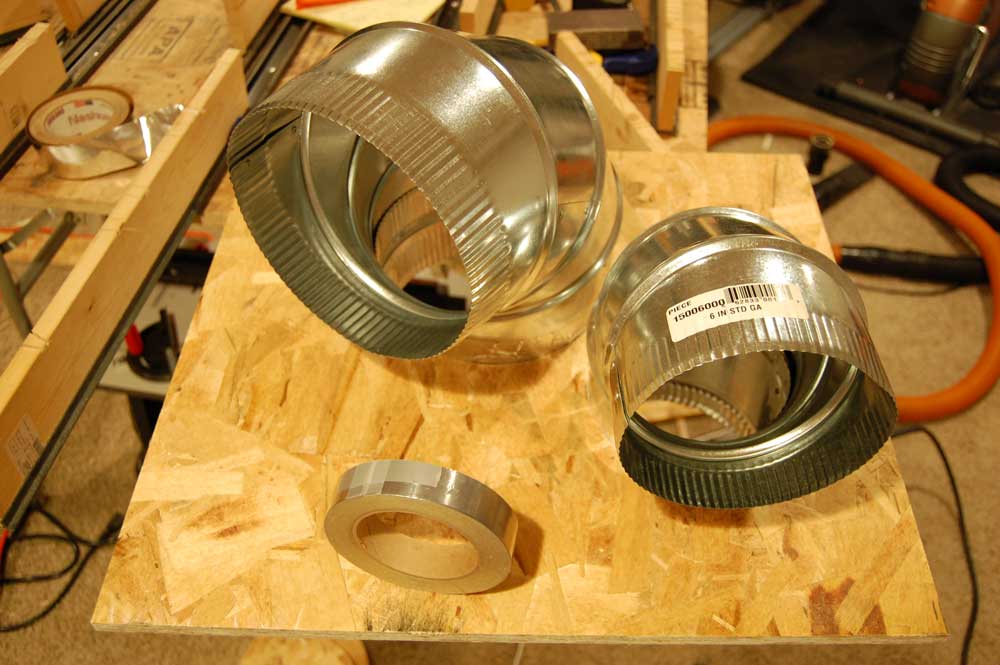
I used the lead tape on the room side of the board to seal that side. These two giant holes may be the largest potential sound leak so I'm layering tactics. The space between the joists and around the flex duct got stuffed totally full of roxul to help dampen the ducts. In addition to the insulated wrap and the mass loaded vinyl!
I'm afraid I forgot to get a picture of the board connected but not screwed in yet. It was a serious pain in the ass and I forgot to stop and take it. I had to cut the flex ducts short so they didn't jam up when the board was all the way up. It was way stuffed in there. Then I had to hold the board like 6" from the ceiling and manuever the ducts over those connectors. In retrospect, I probably should not have taped the connecters to the elbows but instead but the connector on the duct first and then just slip that into the elbow through the board when putting it up. Oh well, it works.
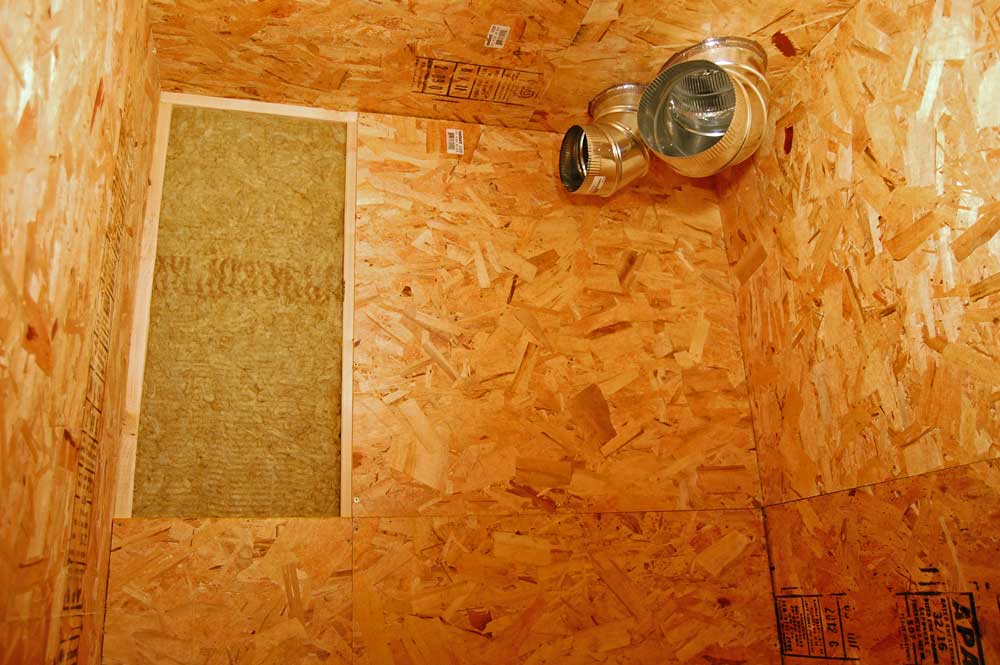
That pic was right before the last board went up. It's up now, and I've cleaned up all the mess. Now I have to seal all the gaps with more acoustic caulk.
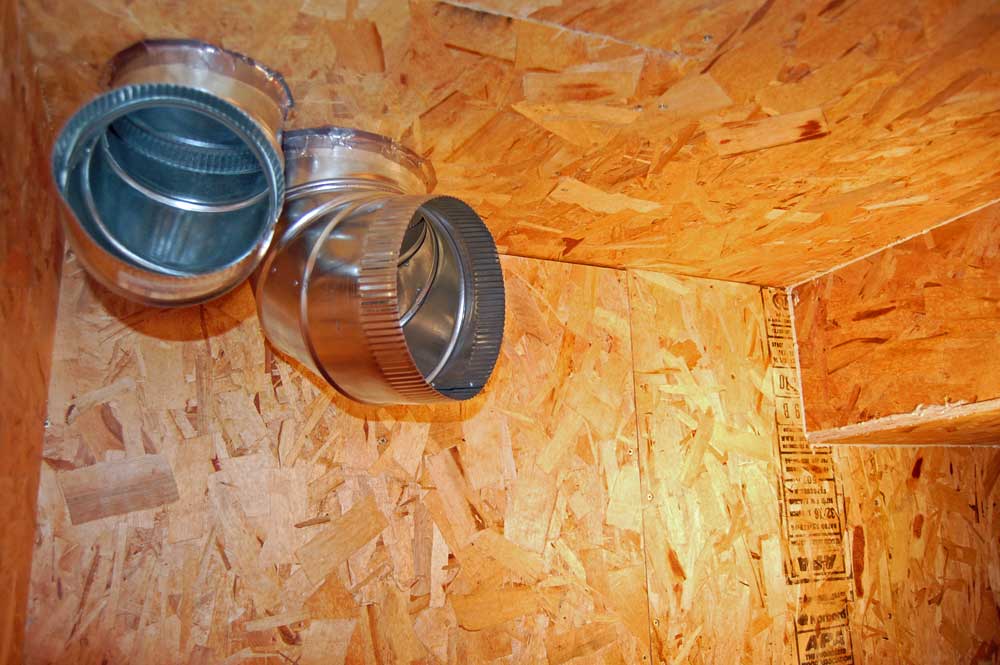
The elbows also still twists, so I can swivel either elbow left to right all the way to adjust for a straighter duct run depending on where the filter, fan, and muffler fit. You could also point the elbow straight down, which may be an option for the intake run.
I also have the intake filter which looks really nice (from Phresh) and the duct mufflers are both in and they look awesome too - sounds very dead inside them! I also have a couple of backdraft dampers so that if the fans are ever off in the room the central heat/ac won't suck out smelly air. Almost $50 for the pair, but necessary if you're connecting to the house's shared ducting.
Anyways, day job keeping me busy, I should've been in bed two hours ago.
So earlier you saw the flex ducts hanging out of a roughly 20" square in the ceiling. I cut a board to fit and traced a 6" & 8" elbow on cutting them out with a jigsaw. Into the elbow I put a duct connector - basically just two crimped ends. The 8" connector was short, but the 6" was long and I couldn't find a short one. It ended up being a bit of an issue as the duct gets a bit cut off in the turn once the board is all the way up in the ceiling. It should be ok but I'm disappointed, that's the perfectionism talking.
You can also see I sealed around it with acoustic caulking on the backside that goes into the ceiling. Here's the elbows on the room-side of the board. That roll of tape weighs a good few pounds. It's made out of lead!
I used the lead tape on the room side of the board to seal that side. These two giant holes may be the largest potential sound leak so I'm layering tactics. The space between the joists and around the flex duct got stuffed totally full of roxul to help dampen the ducts. In addition to the insulated wrap and the mass loaded vinyl!
I'm afraid I forgot to get a picture of the board connected but not screwed in yet. It was a serious pain in the ass and I forgot to stop and take it. I had to cut the flex ducts short so they didn't jam up when the board was all the way up. It was way stuffed in there. Then I had to hold the board like 6" from the ceiling and manuever the ducts over those connectors. In retrospect, I probably should not have taped the connecters to the elbows but instead but the connector on the duct first and then just slip that into the elbow through the board when putting it up. Oh well, it works.
That pic was right before the last board went up. It's up now, and I've cleaned up all the mess. Now I have to seal all the gaps with more acoustic caulk.
The elbows also still twists, so I can swivel either elbow left to right all the way to adjust for a straighter duct run depending on where the filter, fan, and muffler fit. You could also point the elbow straight down, which may be an option for the intake run.
I also have the intake filter which looks really nice (from Phresh) and the duct mufflers are both in and they look awesome too - sounds very dead inside them! I also have a couple of backdraft dampers so that if the fans are ever off in the room the central heat/ac won't suck out smelly air. Almost $50 for the pair, but necessary if you're connecting to the house's shared ducting.
Anyways, day job keeping me busy, I should've been in bed two hours ago.
You will have space for some green in there soon!Maybe a christmas gift .


 Still following along.

