DiscoDuck
Member
Just got a new box for my grows. My old box was a heat magnet and I decided to throw it in the creek.
Here's what I started with...

http://www.storage-cabinets-online.com/base-storage-cabinet-2d.htm
Before I started putting things together, I drilled passive intakes into the bottom panel.

I didn't realize the cabinet I bought doesn't have a back panel. I had to make one out of masonite. Here's the back panel showing the fan exhaust hole with some screen to help keep critters out.

Here's a front view minus the doors, showing the utility shelf. I made the vertical divider out of the adjustable shelf that came with the cabinet.

I used a hole cutter (damn thing is dangerous as Hell!) for the cool tube. I drilled the hole half way through one side and one half on the other to keep the MDF from chipping.

Air flow will enter the cabinet at the bottom. The front will have a kick panel to hide light. I'll put the box over an air conditioning register in the hot months for a little climate control.

I bought a "bake a round" pyrex bread tube from ebay. With a pair of tin snips I cut a strip of steel roofing about 5/16" wide and 2 feet long. Then I drilled screw holes for the socket.


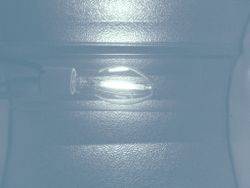
Next I slid the bulb, socket and spring clip (sheet metal strip) into the tube. After centering the bulb in the tube I bent the ends of the spring clip over the end of the tube.

A radiator clamp would work perfect to hold the spring clip snug against the tube. I got around using the clamp by drilling a 3.75" hole in the divider panel of the cabinet. The hole works just like a clamp, holding the tube and spring clip tight.

Here's what the utility room looks like so far:


I still have a few loose ends to tie up like painting the dark panels white and weather stripping the cracks. Here's a few more shots with the box in operation. Thanks for looking and have a good one!


Here's what I started with...

http://www.storage-cabinets-online.com/base-storage-cabinet-2d.htm
Before I started putting things together, I drilled passive intakes into the bottom panel.

I didn't realize the cabinet I bought doesn't have a back panel. I had to make one out of masonite. Here's the back panel showing the fan exhaust hole with some screen to help keep critters out.

Here's a front view minus the doors, showing the utility shelf. I made the vertical divider out of the adjustable shelf that came with the cabinet.

I used a hole cutter (damn thing is dangerous as Hell!) for the cool tube. I drilled the hole half way through one side and one half on the other to keep the MDF from chipping.

Air flow will enter the cabinet at the bottom. The front will have a kick panel to hide light. I'll put the box over an air conditioning register in the hot months for a little climate control.

I bought a "bake a round" pyrex bread tube from ebay. With a pair of tin snips I cut a strip of steel roofing about 5/16" wide and 2 feet long. Then I drilled screw holes for the socket.


Next I slid the bulb, socket and spring clip (sheet metal strip) into the tube. After centering the bulb in the tube I bent the ends of the spring clip over the end of the tube.

A radiator clamp would work perfect to hold the spring clip snug against the tube. I got around using the clamp by drilling a 3.75" hole in the divider panel of the cabinet. The hole works just like a clamp, holding the tube and spring clip tight.

Here's what the utility room looks like so far:


I still have a few loose ends to tie up like painting the dark panels white and weather stripping the cracks. Here's a few more shots with the box in operation. Thanks for looking and have a good one!


Last edited:

 Goodjob on the cab!


