medicaluser420
Active member
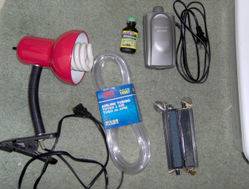
I wanna show you guys how to make a cheap cloner.Bear in mind that it is already made so I just took pictures of different things to show what you need to do. Here are some pics of what I used.
2 Airstones
Dual outlet Air Pump(A cheaper pump will also work but it might take longer)
Air line (tubing)
Light Fixture
22wattCFL
Small Tub
Superthrive(optional)
The only real power tool you need is a drill and a razor blade to cut off the plastic shavings that drill leaves behind.


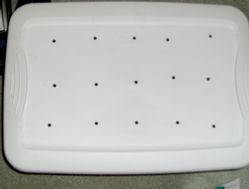
Next drill the holes on the top of your tub lid put as many holes as you want clones. Also drill holes on the side of the tub up high that is where the airline will run through.
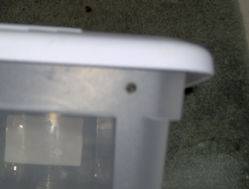
Clean out the shavings in the tub and cut them off the lid with the razor blade.(be careful) Once it is clean throw in the airstones connect the tubing to the stones and to the airpump. I use rocks and nylon string to hold them down.
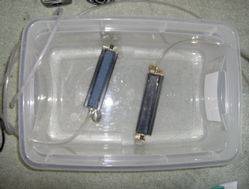

Fill it with water add a drop of superthrive and plug it in. Make sure everything is working as you want it before you think of taking the clones.
Once you are done with that it is time to get the cuts from your mom. I cut them at a 45 degree angle off the mom then I take the branch I just cut and re-cut it at same angle underwater to prevent airbubbles from forming in the stem.After that I toss them right into the cloner that already running. I like leaving the tips of the stems submerged in the water.Sometimes some will bend the stem out of the water don't worry it's still getting water from the moisture that collects on lid and fall back down on them.

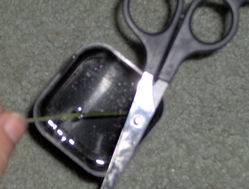


7-12 days later little roots will start to form on the outside of the bare stem I pull them out right away and transplant them into soil before the roots get to big. That is the disadvantage with this one. The roots can't be overgrown cause then they will not fit through the holes.The roots on mine are usually just 1/8 inch long before I take them out. I leave them one more week under 2 22watt cfls so the roots can develop a little more in soil before throwing the 250MH on them.
2 Airstones
Dual outlet Air Pump(A cheaper pump will also work but it might take longer)
Air line (tubing)
Light Fixture
22wattCFL
Small Tub
Superthrive(optional)
The only real power tool you need is a drill and a razor blade to cut off the plastic shavings that drill leaves behind.
Next drill the holes on the top of your tub lid put as many holes as you want clones. Also drill holes on the side of the tub up high that is where the airline will run through.
Clean out the shavings in the tub and cut them off the lid with the razor blade.(be careful) Once it is clean throw in the airstones connect the tubing to the stones and to the airpump. I use rocks and nylon string to hold them down.
Fill it with water add a drop of superthrive and plug it in. Make sure everything is working as you want it before you think of taking the clones.
Once you are done with that it is time to get the cuts from your mom. I cut them at a 45 degree angle off the mom then I take the branch I just cut and re-cut it at same angle underwater to prevent airbubbles from forming in the stem.After that I toss them right into the cloner that already running. I like leaving the tips of the stems submerged in the water.Sometimes some will bend the stem out of the water don't worry it's still getting water from the moisture that collects on lid and fall back down on them.
7-12 days later little roots will start to form on the outside of the bare stem I pull them out right away and transplant them into soil before the roots get to big. That is the disadvantage with this one. The roots can't be overgrown cause then they will not fit through the holes.The roots on mine are usually just 1/8 inch long before I take them out. I leave them one more week under 2 22watt cfls so the roots can develop a little more in soil before throwing the 250MH on them.
Last edited:


