What's new
  • ICMag with help from Landrace Warden and The Vault is running a NEW contest in November! You can check it here. Prizes are seeds & forum premium access. Come join in!

DIY LED red/white

SupraSPL

Member
The last lamp did a great job but more efficient emitters are available now so I tore it down and started from scratch. I saved and reused most of the copper tape, the 635nm reds and of course the heatsinks and drivers. The old white and blue emitters ended up being used for the vegging lamp so nothing goes to waste.

The new lamps will be using cool white Golden Dragon LX bin, 635nm Golden Dragon reds and newly available 660nm deep reds. The white string will be run at .7A and the red string will be run at .45A.

For now there are 4 modules with a total dissipation of 157 watts and a total input power of 177 watts (drivers 88.7% efficient at converting 120v AC to constant current DC). The 5th and 6th module are not ready yet.

dsc04975a.jpg


The room is kept at 80f-85f during lights on and about 60f during lights out. Canopy is kept short by a combination of topping and tying. Fan leaves are gradually removed to expose bud sites to direct light.

The soil is reused organic mix peat/diatomaceous earth/perlite/dolomite lime/Epsoma plant tone. Fertilizing every watering with Blue Mountain Organics liquid ferts (guano/molasses based). The water is R/O remineralized by dissolving dolomite lime from 2ppm to about 110ppm.

At the beginning of the grow the lamps were turned down so I have to keep track of the dissipation and dates I cranked them up in order to calculate the average grams/watt for each girl. Last time a Puna reached 1.5 grams per watt but there were calmag problems and under fert problems so hopefully there is room for improvement. Also the new lamp is using a better spectrum and more efficient whites so I am daring to hope for 2 grams per watt at some point from the indica doms. The most I have ever seen from a 1.5 liter pot was 16 grams. There are 12 girls so each is getting 13w dissipation. So a single plant would have to yield 26g in 8 weeks to reach that goal.

Another bottle neck to the 2 grams/watt goal might be the tiny containers. In order to sample many different girls at once with a short canopy small containers are used (1.5 liters). Since the penetration of the lamps is limited a canopy range 6-18" is being used so maybe the small containers will still be able to get the job done. During the 3rd week stretch some girls need to be watered every day.

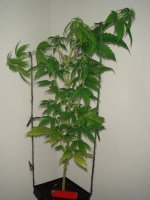
More pics coming. This is Mr Nice Spice 34 days veg from bean and 20 days of 11.5/12.5:
 

Attachments

  • DSC05173a 38.JPG
    DSC05173a 38.JPG
    53.6 KB · Views: 36

SupraSPL

Member
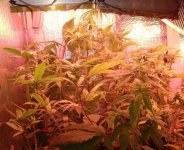
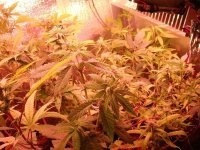
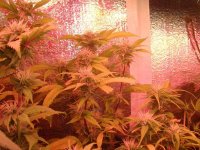
15 stuffed in there might be room for 18 if the modules can be repositioned sideways. That would get much closer to the 250 watts per sq meter KNNA recommends and it would mean I only need to get 17g off each 1.5L pot to reach 2 gr/watt. That sounds much more realistic I have seen 16g come from this size pot before and there was room for improvement.
 

Attachments

  • DSC05177a.jpg
    DSC05177a.jpg
    108.4 KB · Views: 38
  • DSC05175a.jpg
    DSC05175a.jpg
    104.8 KB · Views: 42
  • DSC05178a.jpg
    DSC05178a.jpg
    101 KB · Views: 35

SupraSPL

Member
Thanks AV. Yea I used to procrastinate on ICmag a lot too.

The construction is very simple (once you have done it). I still use a Kapton layer then 6mm wide copper traces and mount the LEDs with Arctic Silver Ceramique. Then the leads are soldered to the traces with lead based solder. I try to make sure the base of the LED is very flat when soldering and if there are any gaps I will go back and reheat the solder and get it nice and flat. There are many ways to do it but there are the 2 I have used most:


The trickier part was calculating how much heatsink to order, how to have it cut and how many drivers to order. Each driver is different so that can makes things even trickier if you don't leave yourself much breathing room.

As far as wiring I tried to set it up with slide connectors so each trace and heatsink is interchangeable (female sliders are always positive and male always negative for example). That comes in handy during testing and you can add or remove modules if needed.

I use a cheap 10A multimeter with slide connectors that can bug into any junction easily so the current can be adjusted quickly.

May sound like a PITA to some but I would never go back now. Osram recently released some really nice deep red 660s that are even more efficient than the top binned Dominant ones we have and they are easier to mount.
 

blimblom

Member
hey supraSPL, what kind of LEDs (R/B/W ratio) have you used in your veg room? and how many Watts are they?

Vegging under leds need less Watts than flowering the same plants?

Im waiting KNNA to send me some LEDS too for my flowering room, and I starting to consider if I can use a setup for vegging too :)
 

SupraSPL

Member
Hi Blimbom. I had my vegging modules cut into small pieces so to keep things simple the smallest modules had (1) 635nm red (1) 660nm red (1) cool white and (1) 450nm blue. I run them all on the same string at a maximum of 450mA and the internodes distances look great.

I also tried using (1) 635nm red) (1) 660nm red and (2) cool whites. That worked great when vegging dense indicas but it stretched the sativas too much.

KNNA would probably have much more specific ratio considering that he has new and more efficient LEDs. So if you are building a larger module you can use a more specific ratio, especially if you plan to separate the red and white/blue strings on different drivers.

You have the right idea LED really excels at vegging. I could never go back.
 
S

sm0k4

I was planning on using about 30 Watts for vegging. That's 32 LEDs. Too much for Veg? I don't need huge growth since it will be a perpetual cloning garden. I just need enough wattage to grow roots, then slowly veg while the ladies in flower finish. 30 might be overkill since LED seems to be way better at veg stage of growth.

 
S

sm0k4

I thought I would share my soldering experience for those worried about ruining the LEDs. This wasn't hard to do at all, but I'm a soldering veteran :) The heat sink does cool down the joint so turning the iron up to 350-400 Fahrenheit or so helps.

First, some starting tips to soldering.

1. Keep a tinned tip AT ALL TIMES. Even when letting the iron sit for 10-20 minutes you want to be sure to have tinned the tip to prevent the brown/black oxidizing process on the special coating they put on the tips. Let the solder oxidize, its cheaper. Oxidization ruins the tips quickly and also does not help at all in heat transfer.

2. If you are having poor heat transfer, wipe the tip on the sponge and re-tin to give it that beautiful silver shine.

3. I touch the solder to the iron to see where the solder globs to. This is your best spot for heat transfer. Do not try to solder with an oxidized part of the tip, you will not have fun.

4. Keeping the iron tip at an angle and having the side surface of the tip on the LED pin is best method in this application. Relying on just the tip to heat up that joint takes a while, using more of the iron tip works better.

Start with the iron on the copper tape and heat that up first. After you see solder starting to bond to the copper foil, slide the iron to the leg of the LED and rest on the edge of it so the iron is contacting the LED pin and the copper trace. After a couple seconds of heat on the LED pin, touch the solder to the pin, not the soldering iron. The solder should flow from the LED pin to the copper pad if heated up properly. After you have enough solder on the joint, take your needle nose pliers or tweezers to press on the two corners of the LED you just soldered. This will minimize the solder gap between the pin and copper trace. Give the iron a few seconds to reheat itself before moving on. Going too fast will just keep dropping the iron temp because of the heat sink.

Do one leg on each LED, then come back to do the other side. You want to see the second leg raised up off of the copper strip just a bit to ensure proper contacting with the thermal pad and metal slug. When you solder the second leg down, the thermal pad acts as a compression spring. Too much pressure will negate the thermal transfer process, so keep it light. We just want contact, not 50 psi of force.

Doing all this will leave a joint like my picture. Using small pressure on the corner of the LED is important so you have a consistent gap spacing between the LED and thermal pad. This leaves a clean joint and you don't have to worry about it cracking or breaking loose like you would with "cold" solder joint conditions. Cold solder joints can be a major pain to find and they will creep up whenever they want. Usually after things heat up from my experience. I've had to find some nasty cold joints in repair work. It is best to have smooth solder flow every time to ensure proper bonding to eliminate finding the problem joint if a string on your light should quit working mysteriously.


blimblom

Member
Thanks SupraSPL. So you use 8watts of LEDs for vegging??? thats amazing... you can put them on a PC heatsink and thats all..

My flowering cabinet will be around 75 watts and my vegging cabinet will have equal dimensions (60x35cm) but I will use half the space for vegging (the other half will be for cloning so nobody cares about light there ). I ll ask KNNA but I will probably use one driver too , to drive them all so it will be around 500mA,
Even a 17watt setup can be an overkill according to your experience (thats 5times less the flowering department

PS what do you mean when you say the sativas where stretching too much?? Streching is a good thing for veggie even if you go for SCROG isnt it?? (also the more blue you have the more dense internodes, isnt that right??)
 

blimblom

Member
smok04 thanks for the tips, I hope that having a father who was an electronics technician when young, I wont have a soldering problem lol. Damn I surely have somewhere, some electronic genes :)

I dont know your vegging cabinet but probably 32 LEDs are an overkill. My flowering cabinet will be a 75watt setup for 60x35 cabinet. What do you use for flowering ??
 

Stress_test

I'm always here when I'm not someplace else
Veteran
Soldering is much easier if you "tin" both surfaces before you try to solder them together.

Just apply a light coat of solder to each piece in advance, then begin assembly, soldering as you go.
You will be surprised at how much faster and nicer it goes together.

Also you will have a much better finished product if you stop using the copper tape and just etch your own PCB boards.
http://www.goldmine-elec-products.com/products.asp?dept=1034
 
S

sm0k4

blimblom said:
smok04 thanks for the tips, I hope that having a father who was an electronics technician when young, I wont have a soldering problem lol. Damn I surely have somewhere, some electronic genes
smile.gif


I dont know your vegging cabinet but probably 32 LEDs are an overkill. My flowering cabinet will be a 75watt setup for 60x35 cabinet. What do you use for flowering ??

Yeah, 30 watts is probably too much. I'll build one more of these small bars in case I need some more in veg.

My flower chamber is designed for 3' x 2' x 5'. I plan to have 13 light bars at 20 inches long each. They will cover the area of the whole cabinet minus 2 inches on each side. 157 LEDs equally spaced 1.5 inches apart just like the pic I posted above. Red and B/W will be on their own driver boards and can be tuned to any ratio I want. Yes 157 LEDs is overkill. With modest currents of 400 mA on red and 600 mA on B/W it will be around 270 Watts. If I turn it up in flower to 500 mA on red and 700 mA on B/W it will be around 330 Watts.

With a .5 m^2 area, 200 watts is plenty, but in bloom I want to be able to boost it.

Soldering is much easier if you "tin" both surfaces before you try to solder them together.

Just apply a light coat of solder to each piece in advance, then begin assembly, soldering as you go.
You will be surprised at how much faster and nicer it goes together.

Also you will have a much better finished product if you stop using the copper tape and just etch your own PCB boards.
http://www.goldmine-elec-products.com/products.asp?dept=1034

Etching PCBs homebrew isn't what I want to do. Then you have to mount the PC board to the sink and it costs more money and time. The light is expensive enough. I am getting new thermal pads though so I can mount directly to the Aluminum rather than the kapton tape.

I did design and have boards being sent for my drivers. I designed my own home-brew driver board using a CAT4101 with PWM dimming control. 3 drivers on each board. When using the appropriate Voltage to the string, there is little heat on the IC making it a nice easy design that stays cool. I have no heat sink on the IC in my prototype setup and it is barely warm to the touch. Been running it for 7 hours so far today. Heat sink is still luke warm also. I do have a house fan on in my room so there is a natural air flow like in a cabinet simulation.
 

SupraSPL

Member
@Blimbom For vegging we use 26 watts. If I crank the driver up to max the LEDs will dissipate about 38 watts. 38 would be much more vegging power than we need for a 160 watt LED flowering room mainly because we keep the canopy short so vegging requirement is reduced.

I tried to scrap the blues because I was concerned about color mixing as evenly as possible so I tried just red/whites because there is a lot of blue peak in the white LEDs. It worked fine for dense indicas but not as well for sativas, and I prefer sativa doms.

When I say the red/white combo stretched out the sativas too much I mean the internodes are spaced too far apart which makes the stems floppy and the canopy is too tall and uneven. By adding the blue back in the nodes stay closer together and the stems are more self supporting. They still grow very fast and still get very tall but it is more under control with the extra blue and yields are ultimately higher + more efficient trimming.

The color mixing seems to be a non issue overall so I am going back to red/white/blue in the vegging and flowering areas. It will be easy to swap out some whites and swap in blues.

2'x2' vegging area. 26 dissipation watts spread across 6 modules for vegging:

335996d1291977990-agent-orange-caramel-ice-led-organic-dsc05278a-vegging.jpg


I have found that very little light is necessary for cloning. We are trying to avoid actual vegetative growth but also trying to avoid inducing flowering, so some light is necessary. This space can fit 25 clones but I would not be surprised if the light could successfully clone 50-100 clones and it is only 2 dissipation watts:
335997d1291978549-agent-orange-caramel-ice-led-organic-dsc05303a.jpg
 
S

sm0k4

Perfect, thanks for your wattage in clone and veg Supra. Looks like I can adapt my design easily enough with only a single switch.

I will just add a dpdt switch to my prototype to either use 5V or 24V for clone / veg then. The 5V should be enough to power 1 white and 1 blue for cloning. flip the switch and it will then use 24V on the bigger string for veg after they root. Maybe use two of the small prototype modules I built for veg for around 20 Watts.
 

blimblom

Member
@SupraSPL , ok now I see (nice photo by the way). I too will use small modules (old PC heatsinks so they have enough passive cooling capacity) for my veggie cabinet.
So you definitely suggest blue for vegg room along with white and some red run along the same driver (so you basically overdrive the red ones, or underdrive the b/w ones.

I love sativa dom strains too, and there so suited for LSTing (I dont top, I feel sorry for amputating my plant lol lol)

So you know use blue in both the vegging and flowering room??

@sm0k4 If I d use one white LED for cloning, I would consider using 2-3 Li-ION batteries along with a stepdown converter to drive it. I have some unused ones from old laptops that I can use.
 
S

sm0k4

(so you basically overdrive the red ones, or underdrive the b/w ones.

@sm0k4 If I d use one white LED for cloning, I would consider using 2-3 Li-ION batteries along with a stepdown converter to drive it. I have some unused ones from old laptops that I can use.

For the red + blue on same string, 500mA seems to be the max current I can use. With beefed up heat sinks you may be able to push 600, but driving all at 500 is still pretty bright. Thats what my current test light is set at right now.

That is a good idea on the battery, wonder how long a battery would last, hehe. The only downside is when it goes out. I have lots of Wall-warts from old electronic devices I saved. I use them all the time for my little projects.
 

blimblom

Member
3li-ion cells around 2000mAh each on a white LED at 350mA on a 16hour basis, I think it will last 2 days, and you can stuff it discreetly under your bed (your cloning box).

for the LEDs Im targeting B/W will run on the same string, while the RED ones a separate driver somewhat lower.
 

SupraSPL

Member
Yes I ordered a bunch of blues to swap into the rest of the vegging and flowering modules. The red/white thing was worth a try and it did work well in some cases but I think going back to the original mix red white and blue will end up being the most efficient and the jack of all trades.

I do drive all the LEDs on the same string for vegging. At 450-500mA I consider the blue/whites to be underdriven which is fine. It is a slight increase in LED cost but a decrease in driver costs and it simplifies construction. It is also a slight increase in efficiency. If I were to build a large vegging LED I would probably would take the time to run them on separate strings. A friend of mine uses a pair of 400 watt HPS for vegging the dense indica types. He only vegges them about 18 inches tall so an overhead LED could be an easy way to replace it. With KNNAs newest LED bins as a rough guess I would aim for a 5 driver system dissipating about 200 watts to replace the 800 HPS watts. I would not be surprised if the LED outperformed the HPS also. If we used a 240v AC source we could probably get away with only 3 drivers.

I collect wall worts also they are great for small projects but the downside is that most I have tested are only 50-60% efficient at converting AC to DC so there is a lot of unnecessary waste. That includes the battery chargers that would be used for the Li-Ion batteries unless you charged them on a DC system. I don't mind the small amounts of waste because it gets the job done but if I plan to scale anything up 50-60% efficiency is abysmal. To make matters worse they tend to have a poor power factor also lol.

So it would be nice if you could rope your cloning LEDs into the vegging LED string and enjoy the 90% efficiency, but the downside is that many growers veg for 20/4 and clone 24/0. A commercial greenhouse grower with 45 years growing experience (non cannabis) I spoke with swears by 24 hour light for cloning but advises against it for basic vegging.
 
Top