Soular HITS
New member
It's a new year and I am finally able to engage in a mutually educational discourse with the icmag community. For many years I have trolled these boards, soaking up as much information as I could all the while dreaming of a day when I would have my own grow setup. Finally the day has come and I'd like to share some of what I have learned as a humble offering knowing that the learning never ends...
First, I should call this thread "The Thundurkel Method, by Soular HITS" as much of what I have implemented in my setup came from his work with a Dr. Bud style micro cabinet and his adventures in coco and various nutrient combinations. I owe Thundrukel many thanks for his inspiration as well as Dr. Bud and many others here at icmag.
Lets get some details out of the way...
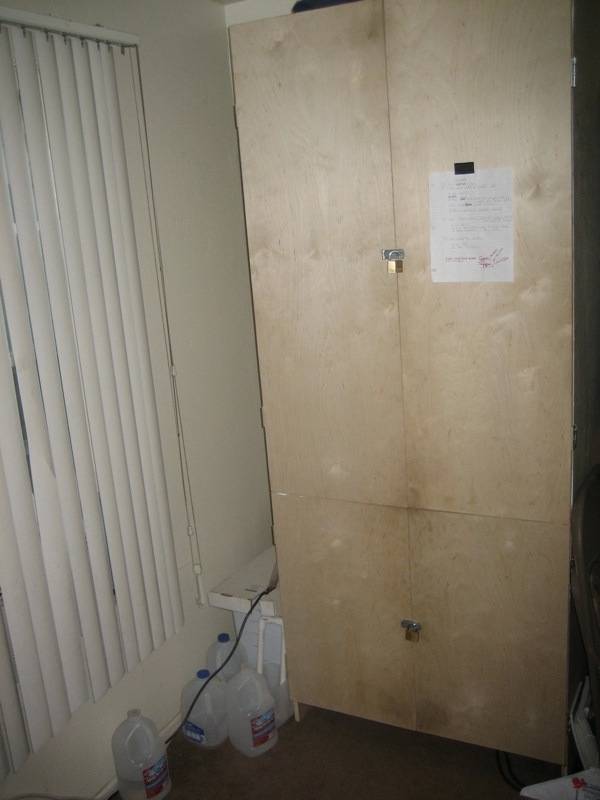
-Dimensions: 3'W x 2'D x 7'4"H
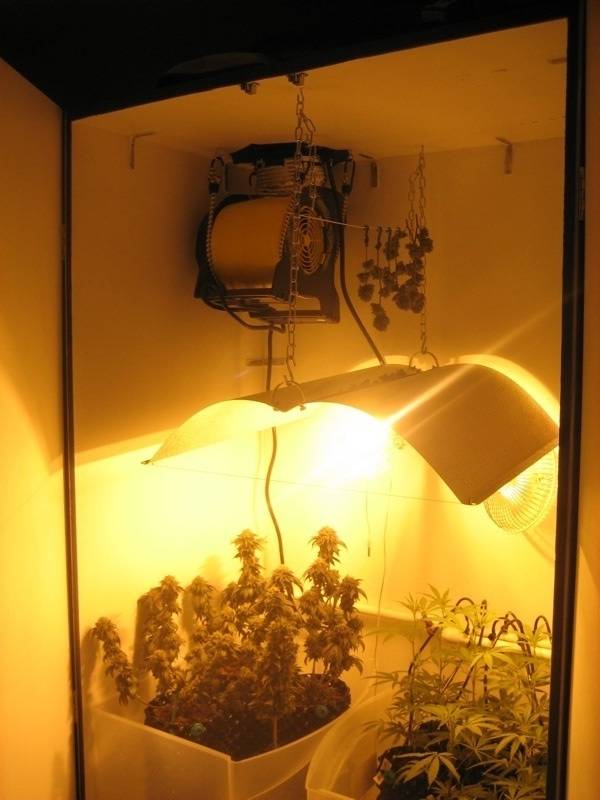
-400 watt magnetic HPS powering the bloom chamber
-Adjust-a-wing reflector with super spreader on the 400w
-Stanley blower cooling the entire box (~280-300 cfms)
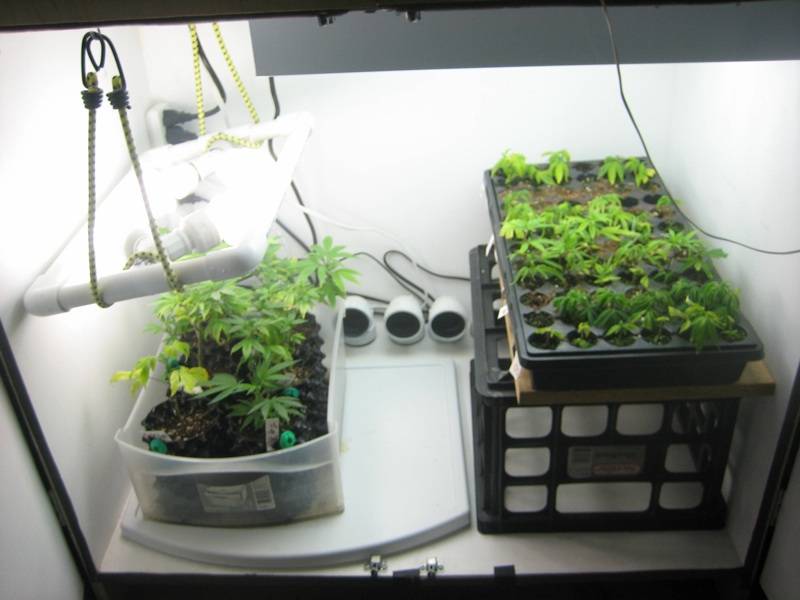
-98 watt T-5 and ~120 watt DIY CFL fixture for mothers/clones for combined ~220 watts veg
-Activated carbon filter on top of cabinet 8"o.d. x 12"L
-1 and 3 liter AIR POTS with 70/30 coco/perlite mix
-FloraNova Grow and Bloom nutes modified Lucas
Outside Shot:
Mothers/Clones:
Bloom:
The box is 100% light and smell contained and receives fresh air from a 4" gap between the bottom of the mother chamber and the floor. 10 2" PVC elbows provide light proof intakes as well as filtering out dust and and pests that might otherwise be sucked into my garden.
The solution that I came up with to accomplish my ventilation needs was 2" PVC elbows and 1-2" segments of 2" PVC pipe. This allowed me to buy only a 2" hole saw to drill all ventilation holes and attach a pre filter by stretching it over the 2" pipe and securing it with electrical tape. For the light traps between mother and bloom chamber I used a similar method and attached 2 elbows with a small length of 2" PVC. The pictures should clear things up...
Intake/pre-filters:
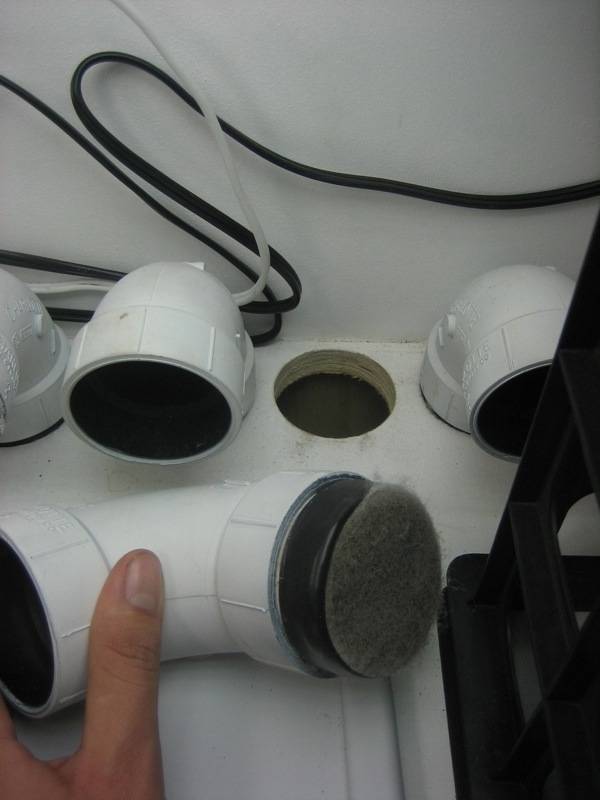
Having a pre filter is a must! These things get sooo dusty in just a matter of a month. It is very easy to simply pop out all the elbows and rinse them out to maintain adequate airflow.
Light traps as viewed down from bloom chamber:
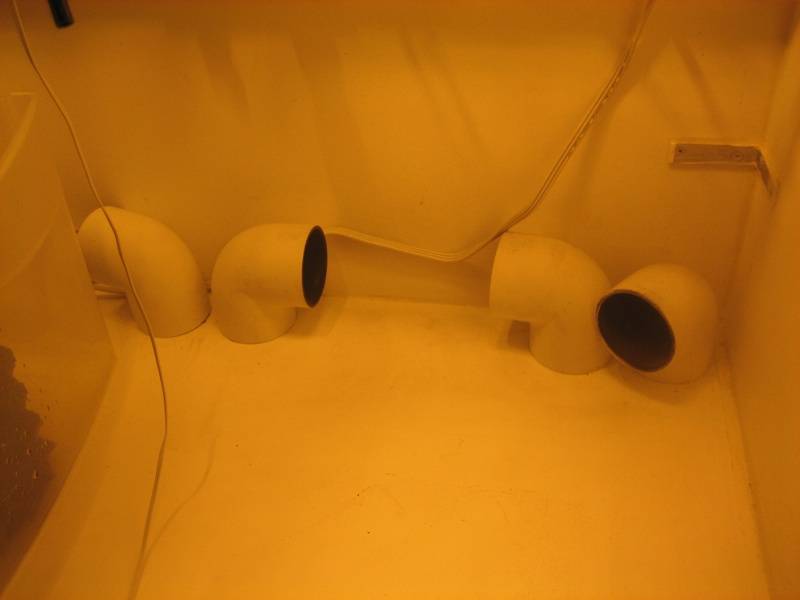
I only used 6 2" openings between the mother chamber and the bloom chamber. In the last few months I have not have the need to increase my cooling capabilities as my temperatures like to hang out in the mid 70s with everything running...I also have my 400 on at night so that helps keep things cooler...
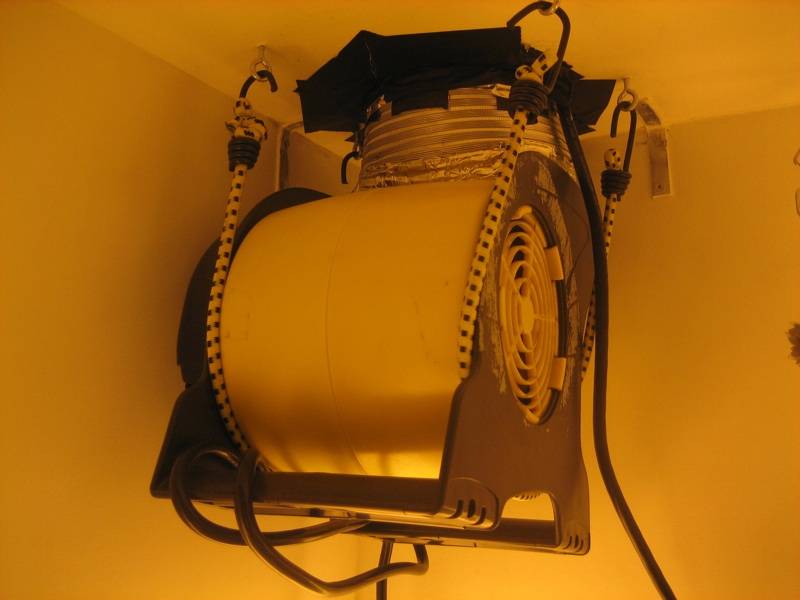
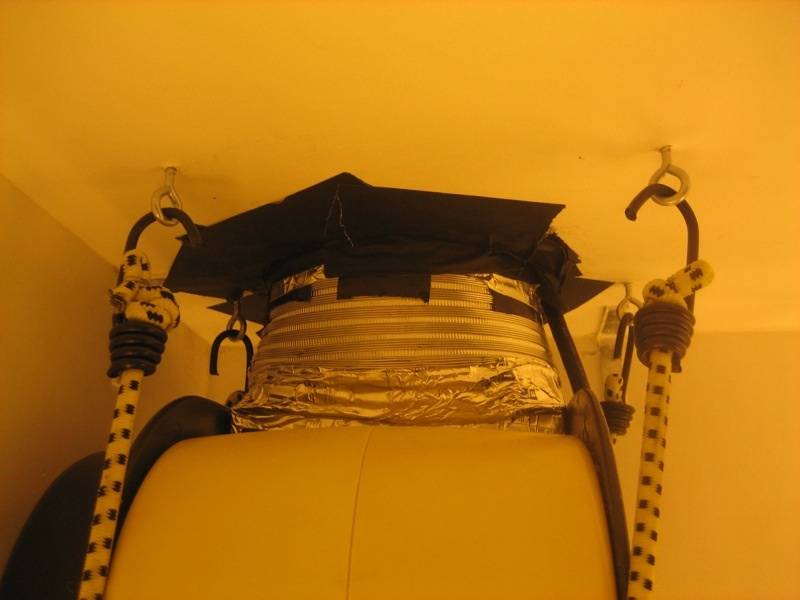
The box is cooled by a stanley blower that was modded using some flexible 6" ducting. A 6" ducting elbow sits on top of the cabinet and everything is secured using duct tape. The blower itself hangs from bungee chords to reduce vibration.
Blower:
Blower Close up:
Here is a close up of the Adjust-a-wing reflector and super spreader. Having done my research I heard that this combination of reflector and modified heatsink/light diffuser would provide the absolute best results and I must admit I have been very pleased. As you can see I don't run any sort of cool tube and only have a small fan blowing directly on the lightbulb/super spreader. My temperatures just a few inches below the bulb stay below the 80 degree mark and my plants have never suffered from light burn of any sort.
Adjust-a-wing Reflector:
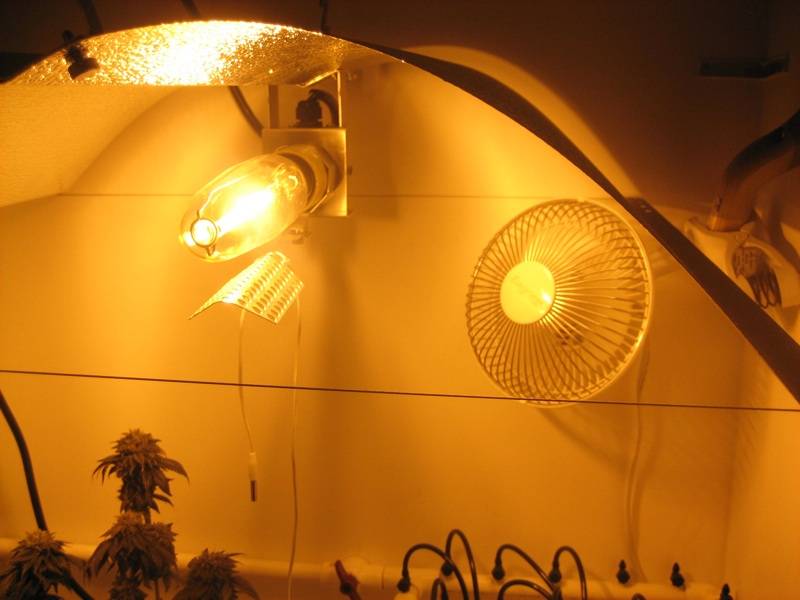
To hold the fan in place I simply screwed a tool handle from the hardware store directly into the wall of my cabinet. Works great!
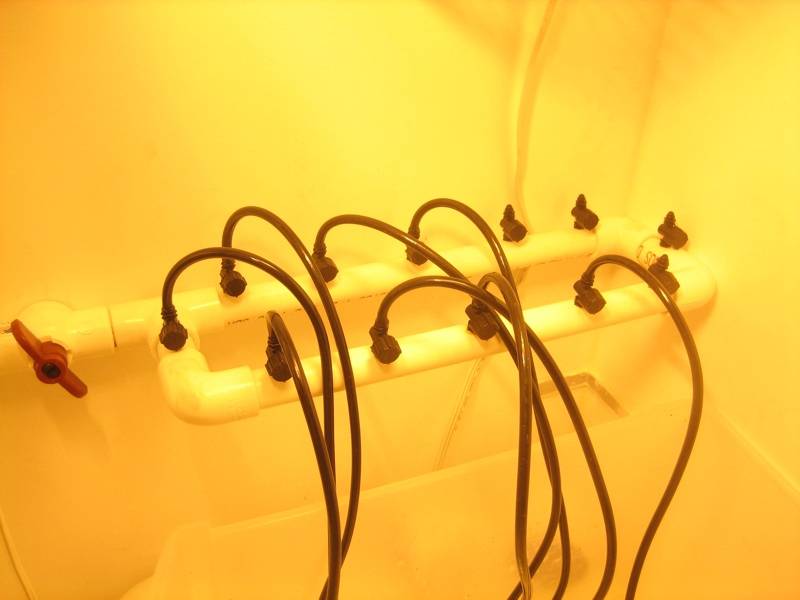
Although my cabinet is currently not at full capacity I plan to run a perpetual 24 plant SOG. I have already tired of the daily watering requirements so I made a PVC watering manifold that will accommodate 12 plants at one time. I have the ability to turn some plants off or adjust the flow to individual plants as I see fit. So far it's worked great and has meant watering was just as easy as plugging in a pump for a minute or 2...I can't wait to automate that system with some timers and have a garden that keeps herself!
PVC Watering Manifold with 12 adjustable valves:
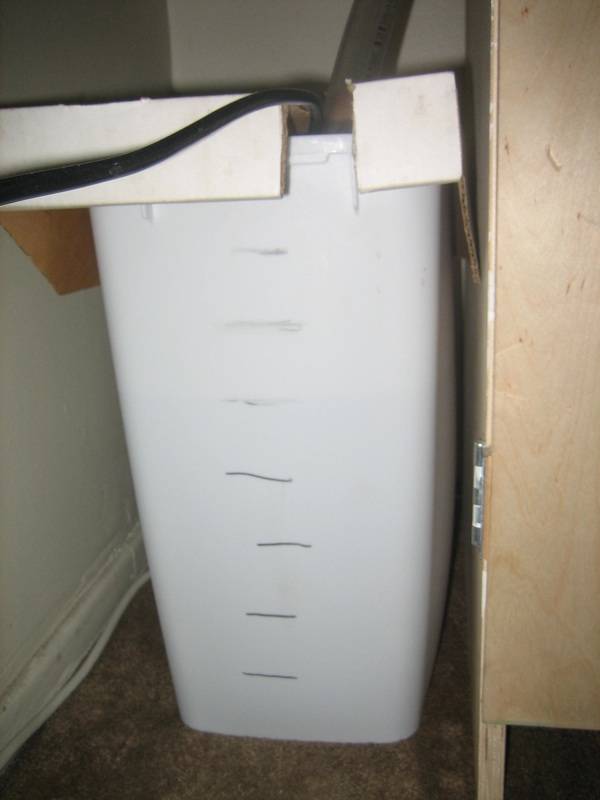
7 gallon reservoir outside cabinet:
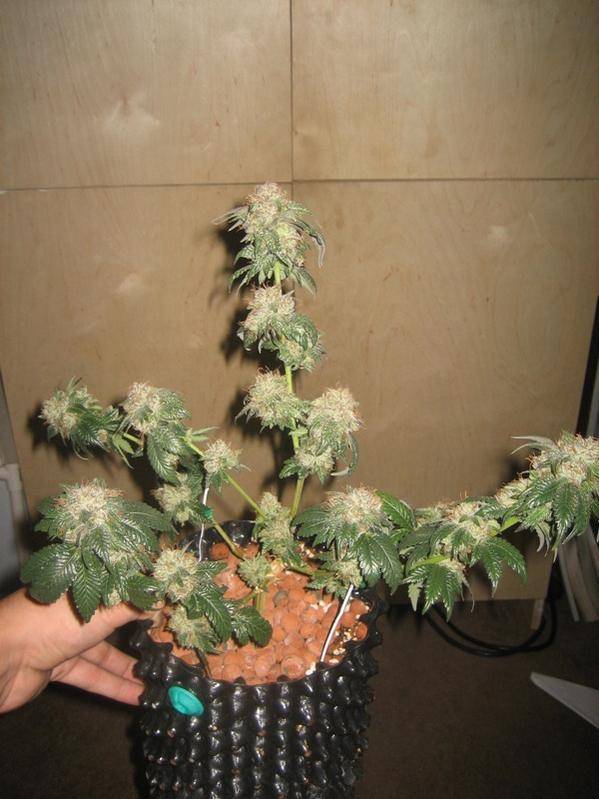
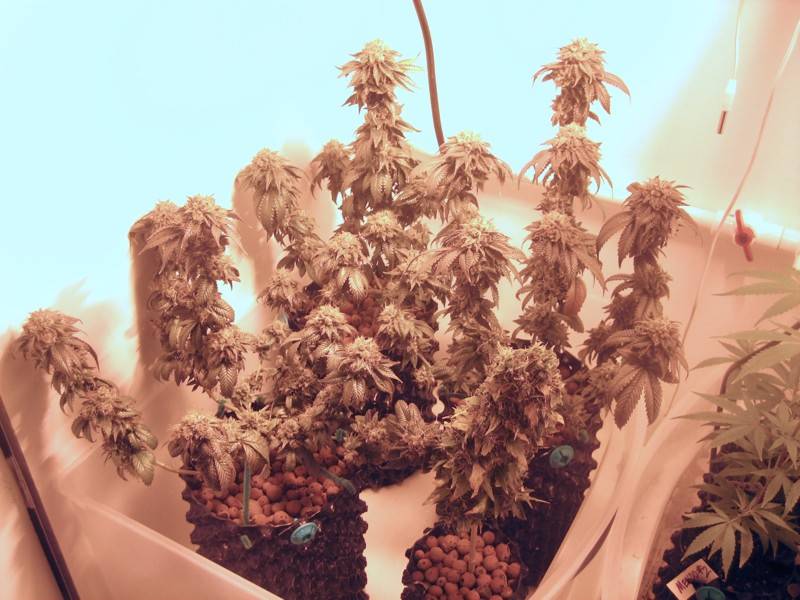
So that's enough about the box...lets get to the good stuff! 8 weeks ago I transplanted 4 Bubba Kush plants from 1 liter AIR POTS to the next larger, 3 liter size. They had been LST'ed to promote bushier growth and I gave them one week of 24 hour veg under the 400 watt. Sunday night was the 8 week mark and I chopped one of the 4 plants. I am going to take the next three over the next week and compare when I like it most. Also the one that was taken Sunday has had a 7 day flush so I'm sure I will enjoy the ones that have had a bit longer to flush out.
Bubba Kush #1 before chop:
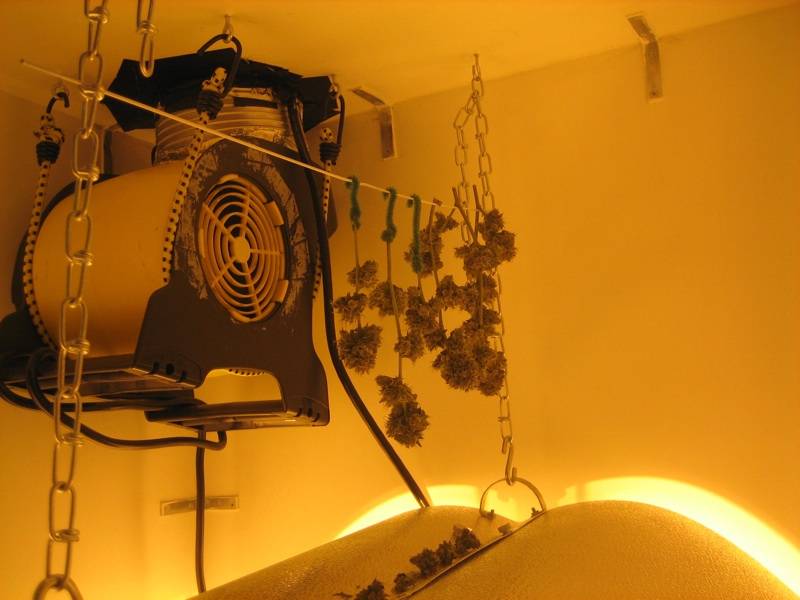
Bubba Kush hanging to dry:
My feeding schedule is as follows:
4 mL FloraNova Grow when in Veg through week 2 or 3 of bloom depending on stretch
Mothers also get this blend every other watering or so...
7mL FloraNova Bloom until late flower when I dropped to 5mL and added a bloom enhancer (I've been using a free sample of Hydroplex but I'll probably be using Kool Bloom when the sample runs out...)
Here are the remaining 3 Bubba Kush ladies:
On the other side of the cabinet we have 6 Mendocino Purple ladies that were put to flower just over a week ago.
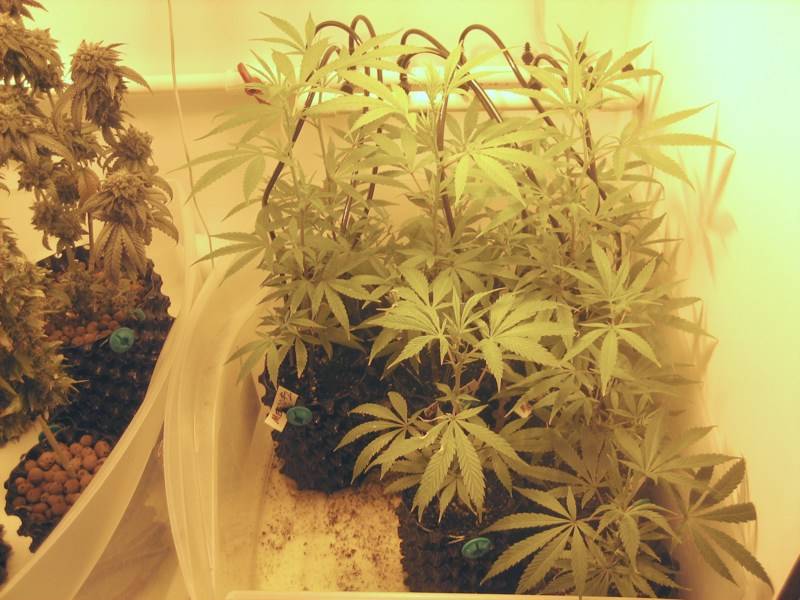
These are some leggy gals and like to stretch but from what I've learned this style of growing is all about knowing your strains and having them dialed in to exactly when to initiate flower to leave you with maximum bud output. I also have 2 sour diesel ladies and one beautiful NYC diesel and plan to continue to add more ladies as space permits and begin the complex orchestration of running a multi-strain, perpetual 24 plant garden.
This is only the beginning and I look forward to a long future of shared knowledge with this great community!
First, I should call this thread "The Thundurkel Method, by Soular HITS" as much of what I have implemented in my setup came from his work with a Dr. Bud style micro cabinet and his adventures in coco and various nutrient combinations. I owe Thundrukel many thanks for his inspiration as well as Dr. Bud and many others here at icmag.
Lets get some details out of the way...
-Dimensions: 3'W x 2'D x 7'4"H
-400 watt magnetic HPS powering the bloom chamber
-Adjust-a-wing reflector with super spreader on the 400w
-Stanley blower cooling the entire box (~280-300 cfms)
-98 watt T-5 and ~120 watt DIY CFL fixture for mothers/clones for combined ~220 watts veg
-Activated carbon filter on top of cabinet 8"o.d. x 12"L
-1 and 3 liter AIR POTS with 70/30 coco/perlite mix
-FloraNova Grow and Bloom nutes modified Lucas
Outside Shot:
Mothers/Clones:
Bloom:
The box is 100% light and smell contained and receives fresh air from a 4" gap between the bottom of the mother chamber and the floor. 10 2" PVC elbows provide light proof intakes as well as filtering out dust and and pests that might otherwise be sucked into my garden.
The solution that I came up with to accomplish my ventilation needs was 2" PVC elbows and 1-2" segments of 2" PVC pipe. This allowed me to buy only a 2" hole saw to drill all ventilation holes and attach a pre filter by stretching it over the 2" pipe and securing it with electrical tape. For the light traps between mother and bloom chamber I used a similar method and attached 2 elbows with a small length of 2" PVC. The pictures should clear things up...
Intake/pre-filters:
Having a pre filter is a must! These things get sooo dusty in just a matter of a month. It is very easy to simply pop out all the elbows and rinse them out to maintain adequate airflow.
Light traps as viewed down from bloom chamber:
I only used 6 2" openings between the mother chamber and the bloom chamber. In the last few months I have not have the need to increase my cooling capabilities as my temperatures like to hang out in the mid 70s with everything running...I also have my 400 on at night so that helps keep things cooler...
The box is cooled by a stanley blower that was modded using some flexible 6" ducting. A 6" ducting elbow sits on top of the cabinet and everything is secured using duct tape. The blower itself hangs from bungee chords to reduce vibration.
Blower:
Blower Close up:
Here is a close up of the Adjust-a-wing reflector and super spreader. Having done my research I heard that this combination of reflector and modified heatsink/light diffuser would provide the absolute best results and I must admit I have been very pleased. As you can see I don't run any sort of cool tube and only have a small fan blowing directly on the lightbulb/super spreader. My temperatures just a few inches below the bulb stay below the 80 degree mark and my plants have never suffered from light burn of any sort.
Adjust-a-wing Reflector:
To hold the fan in place I simply screwed a tool handle from the hardware store directly into the wall of my cabinet. Works great!
Although my cabinet is currently not at full capacity I plan to run a perpetual 24 plant SOG. I have already tired of the daily watering requirements so I made a PVC watering manifold that will accommodate 12 plants at one time. I have the ability to turn some plants off or adjust the flow to individual plants as I see fit. So far it's worked great and has meant watering was just as easy as plugging in a pump for a minute or 2...I can't wait to automate that system with some timers and have a garden that keeps herself!
PVC Watering Manifold with 12 adjustable valves:
7 gallon reservoir outside cabinet:
So that's enough about the box...lets get to the good stuff! 8 weeks ago I transplanted 4 Bubba Kush plants from 1 liter AIR POTS to the next larger, 3 liter size. They had been LST'ed to promote bushier growth and I gave them one week of 24 hour veg under the 400 watt. Sunday night was the 8 week mark and I chopped one of the 4 plants. I am going to take the next three over the next week and compare when I like it most. Also the one that was taken Sunday has had a 7 day flush so I'm sure I will enjoy the ones that have had a bit longer to flush out.
Bubba Kush #1 before chop:
Bubba Kush hanging to dry:
My feeding schedule is as follows:
4 mL FloraNova Grow when in Veg through week 2 or 3 of bloom depending on stretch
Mothers also get this blend every other watering or so...
7mL FloraNova Bloom until late flower when I dropped to 5mL and added a bloom enhancer (I've been using a free sample of Hydroplex but I'll probably be using Kool Bloom when the sample runs out...)
Here are the remaining 3 Bubba Kush ladies:
On the other side of the cabinet we have 6 Mendocino Purple ladies that were put to flower just over a week ago.
These are some leggy gals and like to stretch but from what I've learned this style of growing is all about knowing your strains and having them dialed in to exactly when to initiate flower to leave you with maximum bud output. I also have 2 sour diesel ladies and one beautiful NYC diesel and plan to continue to add more ladies as space permits and begin the complex orchestration of running a multi-strain, perpetual 24 plant garden.
This is only the beginning and I look forward to a long future of shared knowledge with this great community!


