Many have been interested in my old DIY reflector that I used with 150hps.
I still use the reflector in my stud box.
I'll go over this thing quickly, as there isn't much to it.
You will need:
Piece of aluminized insulation board.
(I use Dow SuperTuff R x 1/2" this comes in an 8x10 sheet for about $12)
Roll of aluminum tape.
Knife (carpet knife is best)
Straight edge (yardstick)
Piece of uni-strut or some sort of mounting bracket
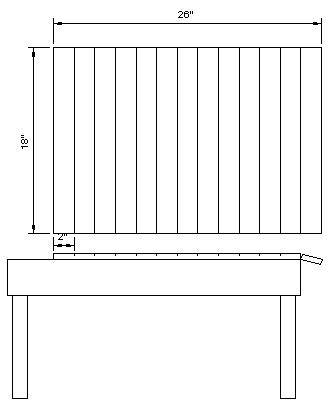
I made my reflector 18" deep
I cut a piece of SuperTuffR 18" x 26"
Then I make a small cut on one side of the board every two inches...do NOT cut all the way through the board..all you want to do is cut through the aluminum sheet on that side only. And you want to cut THE BLUE SIDE!
Leave the aluminum side for reflection.
Best to make 2" marks on both ends of the board and then lay your yardstick down lining them up, then lightly cut the top layer.
Once you have the one side cut every two inches, lay each section on a table edge and break that piece. It will not come off, and will break cleanly with a swift downward motion. Practice on some scrap first if you are uncomfortable with this. First time you will see it breaks like magic.
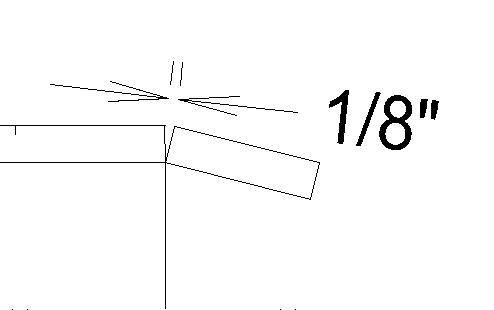
Once you have all the sections broken, open each section up until the gap is 1/8", then tape it with a small piece of alum. tape so it stays.
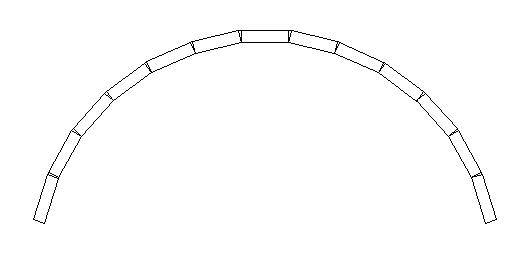
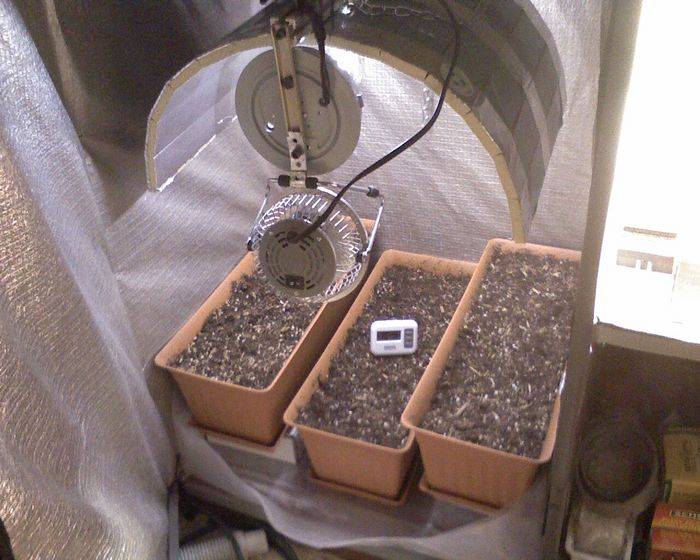
When you get done, you will have this:
Mount on a channel or piece of uni-strut to hold your light base, and hanger, and you are done.
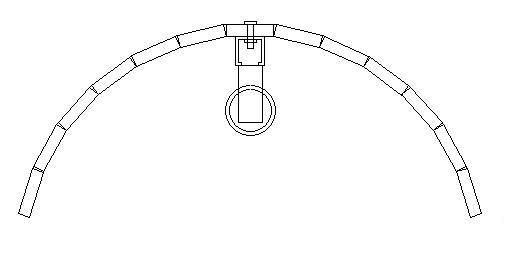
This configuration can be used with two 150hps bulbs facing each other. I used the now discontinued econolights vapor tights.
I still use the reflector in my stud box.
I'll go over this thing quickly, as there isn't much to it.
You will need:
Piece of aluminized insulation board.
(I use Dow SuperTuff R x 1/2" this comes in an 8x10 sheet for about $12)
Roll of aluminum tape.
Knife (carpet knife is best)
Straight edge (yardstick)
Piece of uni-strut or some sort of mounting bracket
I made my reflector 18" deep
I cut a piece of SuperTuffR 18" x 26"
Then I make a small cut on one side of the board every two inches...do NOT cut all the way through the board..all you want to do is cut through the aluminum sheet on that side only. And you want to cut THE BLUE SIDE!
Leave the aluminum side for reflection.
Best to make 2" marks on both ends of the board and then lay your yardstick down lining them up, then lightly cut the top layer.
Once you have the one side cut every two inches, lay each section on a table edge and break that piece. It will not come off, and will break cleanly with a swift downward motion. Practice on some scrap first if you are uncomfortable with this. First time you will see it breaks like magic.
Once you have all the sections broken, open each section up until the gap is 1/8", then tape it with a small piece of alum. tape so it stays.
When you get done, you will have this:
Mount on a channel or piece of uni-strut to hold your light base, and hanger, and you are done.
This configuration can be used with two 150hps bulbs facing each other. I used the now discontinued econolights vapor tights.

 Thanks for the tip cheetos!


